Table of Contents
Advertisement
Quick Links
Advertisement
Table of Contents

Related Manuals for Qstarz BT-Q1000


Summary of Contents for Qstarz BT-Q1000
- Page 1 BT-Q1000 Super 51-CH Performance GPS Travel Recorder...
-
Page 2: Table Of Contents
10-2. C REATE LUETOOTH 10-3. S TART YOUR NAVIGATION SOFTWARE 10-4. S AFETY OTICES BT-Q1000 Super 51-CH Performance GPS Travel Recorder Table of Contents ... 5 ... 6 ... 8 OWER SAVING MODE ... 9 BT-Q1000..10 ... 14 ARTH PC... -
Page 3: Overview
All tracking records can be downloaded, saved, and also can display directly on Google Earth. BT-Q1000 supports 32hrs operating time for your log. You don’t have to worry your GPS need to be recharged shortly, and supports Smart Power control for power saving. -
Page 4: Features
Support Multi-Selection setting to record data (Time interval, Speed, Distance) Active NMEA protocol VTG / GLL / ZDA manually via Qstarz setup tool. Backup your travel record as CSV / NMEA / Google Earth file format. Lower power consumption up to 32hrs for travel recording... -
Page 5: Product Specification
Built-in rechargeable Li-ion battery, Up to 32 hrs after fully charged Standard Bluetooth Profile Size / Weight Operating Temperature Storage Temperature Charging BT-Q1000 Super 51-CH Performance GPS Travel Recorder General MTK GPS Module L1, 1575.42MHz 1.023MHz chip rate 51 CH Performance Built-in patch antenna with LNA... -
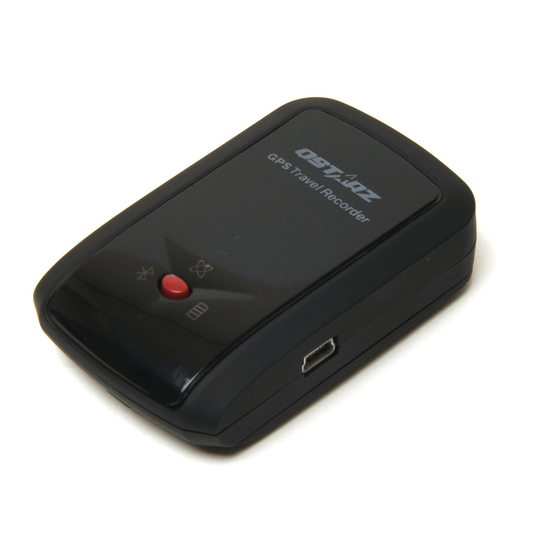
Page 6: Hardware Introduction
Take the power cable and connect it to the power jack (mini USB type) for charging only Power off BT-Q1000 When switch to NAV mode, BT-Q1000 can be used to navigate with handheld devices (PDA / Smartphone / Laptop…). And the data log function is enabled for recording your travel path. -
Page 7: Battery Installation
1. Press the PUSH button on the bottom side of the unit 2. Pull out the battery cover. Insert battery in the unit 3. Put battery cover on to the cabinet 4. Then push down and force it forward to fit firmly BT-Q1000 Super 51-CH Performance GPS Travel Recorder... - Page 8 BT-Q1000 Super 51-CH Performance GPS Travel Recorder - Take Battery out: 1. Press the PUSH button on the bottom side of the unit 2. Pull out the battery cover 3. Then take out the battery from the unit.
-
Page 9: Led Indicators
- Charging your battery For the first time using the BT-Q1000, please charge battery until it is fully charged. Take the power cable and connect it to the power jack (mini USB type) and recharge through USB cable, travel charger, or car cigarette adaptor. -
Page 10: Function Of Auto On-Off (Power Saving Mode)
NOTE : Please power OFF/ON to start log after completing parameter setting. 6-1. Install USB Driver NOTE 1: The USB driver of BT-Q1000 only supports Microsoft Windows system (Win XP / Win Vista). 1. Please insert the Driver CD to your computer, and find the folder “USBDriver\Windows_2K_XP_S2K3_Vista”. -
Page 11: Install The Software Utility For Bt-Q1000
BT-Q1000 Super 51-CH Performance GPS Travel Recorder 2. System would pop up the driver installation dialog. Please click <Install> to install the driver. 3. After completing the installation, please click <Yes> to restart your computer for taking effect of new setting. Driver installation dialog will show up. Please click <Install>... - Page 12 BT-Q1000 Super 51-CH Performance GPS Travel Recorder 2. System would pop up the utility installation dialog. Please click <Next> for the next step. 3. Please select “I accept the terms in the license agreement”, and then click <Next> to the next step.
- Page 13 BT-Q1000 Super 51-CH Performance GPS Travel Recorder 4. Please entry user name and organization and then click <Next> to the next step. (You can also click <Next> directly without any entry) 5. Please select “Typical” and then click <Next> to the next step.
- Page 14 BT-Q1000 Super 51-CH Performance GPS Travel Recorder 6. Check again if all the settings are correct. Then please click <Install> to start the utility installation. 7. When the utility installation is completed, please click <Finish> to exit the installation dialog.
-
Page 15: Install Google Earth
BT-Q1000 Super 51-CH Performance GPS Travel Recorder 6-3. Install Google Earth BT-Q1000 supports to show your travel path directly on Google Earth. Please go to http://earth.google.com for getting the free download of Google Earth, and then install it to your computer. For the operation procedure of Google Earth, please refer to http://earth.google.com/support/... -
Page 16: Start The Software Utility
Before starting the software utility, please make sure that the USB driver and the software utility has been installed properly. And also, make sure that BT-Q1000 already connect to your PC by mini USB cable, and switch BT-Q1000 to LOG position. - Page 17 PC. 3. < CONFIGURATION > \ <User Mode> BT-Q1000 utility provides three user modes (Basic / Advanced / Professional) for your personal setting. You can complete the settings by each user mode per your requirement. Setup the user mode for your personal setting before logging your travel path.
- Page 18 3.2.1 Basic Mode provides simple setting for you. Select the transportation gear (Vehicle / Bicycle / Jog) you will use, and then click <SET> to set specific values to BT-Q1000. The detail is as below. Basic Mode Log for Vehicle...
- Page 19 (Time + Speed) How BT-Q1000 log waypoints with the settings (3secs, 60 km/h) When the speed is below 60km/h, BT-Q1000 would log one waypoint per 3 seconds. When the speed is above 60km/h, it would log one waypoint per second.
- Page 20 When the speed is above 10km/h, it would log one waypoint per second. 3.2.3 Professional Mode provides three sections for your detailed settings manually, including Output Period, AutoLog Option, and Log Format. After complete all settings, click <SET> to set the values to BT-Q1000. The detail is as below. (1) Output Period - Description 1.
- Page 21 1. Provide three conditions (Time, Distance, Speed) for setting your log interval. 2. Support multi-settings (Time+Distance+Speed) for your log interval. 3. Time interval is between 1~999 second(s). 4. Distance interval is between 10~9999 meters. 5. Speed interval is between 10~999 km/h. BT-Q1000 Super 51-CH Performance GPS Travel Recorder...
- Page 22 - How BT-Q1000 log waypoints with different settings AutoLog Setting Log every X seconds Log every Y meters Log over Z km/h 1. Log every X seconds 2. Log every Y meters 1. Log every X seconds 2. Log over Z km/h 1.
- Page 23 Navigation Latitude Longitude Height Speed BT-Q1000 Super 51-CH Performance GPS Travel Recorder meters. When the speed is above Z km/h, it would log one waypoint per second. When the speed is below Z km/h, it would log one waypoint per Y meters or per X seconds, depends on which condition meets the setting (distance / time) first.
- Page 24 BT-Q1000 Super 51-CH Performance GPS Travel Recorder Heading Differential DSTA Data DAGE PDOP HDOP VDOP Method Satellite NSAT Information Elevation Azimuth Other Distance The compass direction in which the longitudinal axis of a ship or aircraft points DGPS station ID number...
- Page 25 Setting>. Click <CONFIGURATION> tab / <Other Setting> button. The default setting is <Stop>. When the flash memory is full, BT-Q1000 will stop logging data. If you want to record new data, you must erase all data in the flash memory.
- Page 26 5. <SATELLITE INFORMATION> Show the current satellite viewer of your BT-Q1000 at < SATELLITE INFORMATION > tab. Click <CONFIGURATION> tab / <Other Setting> button. Please see the detail description of satellite information as below. Item Date Time Mode TTFF Latitude...
- Page 27 (Vertical Dilution Of Precision); vertical accuracy; height Click <Hot> / <Warm> / <Cold> button to perform hot/warm/cold start immediately. Item <Hot> button <Warm> button <Cold> button BT-Q1000 Super 51-CH Performance GPS Travel Recorder Description Perform hot start Perform warm start Perform cold start...
- Page 28 Access the log data which is downloaded from BT-Q1000. NOTE 1: Before accessing your log data of BT-Q1000, please establish the communication between BT-Q1000 and PC with mini USB cable. (Refer to 7-3, item 2) NOTE 2: Please install Google Earth before trying to download and draw map on Google Earth.
- Page 29 Click <Download> button to download the log data from BT-Q1000. System will pop up the message box to show the progress status. It will take a few minutes depending on the data volume. After completing the log data downloading, those data will be shown on data grid.
- Page 30 BT-Q1000 Super 51-CH Performance GPS Travel Recorder Your travel path will be shown on Google Earth as the following image. You can check the detail information for each log point.
- Page 31 <Stop Log> button. Save the logged data in the memory of BT-Q1000 into your PC. It supports CSV file, NMEA file, and Google Earth file format. Open CSV file that saved as before Reset your BT-Q1000 and reload to factory setting.
- Page 32 BT-Q1000 Super 51-CH Performance GPS Travel Recorder 7. <About> Here we show the information of software utility.
-
Page 33: Useful Reference Applications On The Internet
Useful reference Applications on the internet 8-1. locr GPS Photo BT-Q1000 is the member of locr GPS Photo certified product. This utility can integrate travel log and digital photos by date/time to show your photos on the map directly. After the integration, the current GPS coordinates also can be imported to your digital photos for the further application. -
Page 34: Gpsbabel
8-2. GPSBabel This utility can transfer your NMEA file to GPX file or other format. Please go to http://www.gpsbabel.org BT-Q1000 Super 51-CH Performance GPS Travel Recorder for free download. 1. Select “NMEA 0813 sentences” 2. Open your NMEA file 3. Select “GPX XML”... -
Page 35: Sportsmate
BT-Q1000 Super 51-CH Performance GPS Travel Recorder 8-3. SPORTSMATE This web site can share your travel log with your friends. Before sharing your trip, please apply a new account first. Please go to http://www.ttsm.com for the further information. -
Page 36: Jetphoto Studio
BT-Q1000 Super 51-CH Performance GPS Travel Recorder 8-4. JetPhoto Studio This utility can integrate travel log and digital photos by date/time to show your photos on the map directly. After the integration, the current GPS coordinates also can be imported to your digital photos for the further application. Please go to http://www.jetphotosoft.com... -
Page 37: Trouble Shooting
(PDA / Smartphone / Laptop…). And the data log function is also enabled for logging your travel path. LOG : BT-Q1000 only can be used to record your travel path, but navigation function is disabled. DC Input range of BT-Q1000 is 4.5~5.5V. You can use a travel charger which support DC output range from 4.5~5.5V. -
Page 38: Appendix
10-1. Activate the Bluetooth function in your PDA/Smart phone or PC Before activating the Bluetooth function in your PDA/PC, please switch BT-Q1000 to <NAV> position for paring and check if your device is equipped with Bluetooth function. If not, you may need to acquire an optional CF/SD Bluetooth card or Bluetooth dongle. -
Page 39: Create Bluetooth Setting (Windows Mobile 5 For Pocket Pc)
BT-Q1000 Super 51-CH Performance GPS Travel Recorder 10-2. Create Bluetooth Setting (Windows Mobile 5 for Pocket PC) 1. Switch your Bluetooth Receiver on. 2. Tap the Bluetooth icon at the bottom. 3. Check “Turn on Bluetooth”. - Page 40 BT-Q1000 Super 51-CH Performance GPS Travel Recorder 4. Tap the “Devices” tab, and then tap “New Partnership”. 5. System will search for all Bluetooth devices. 6. Select “iBT-GPS” device, and tap “Next”.
- Page 41 BT-Q1000 Super 51-CH Performance GPS Travel Recorder 7. Enter Passkey “0000” if required, and then tap “Next”. 8. Check “Serial Port”, and then tap “Finish”.
- Page 42 BT-Q1000 Super 51-CH Performance GPS Travel Recorder 9. The “iBT-GPS” device will be established in the list. 10. Tap the “COM Ports” tab, and select “New Outgoing Port”.
- Page 43 BT-Q1000 Super 51-CH Performance GPS Travel Recorder 11. Select the “iBT-GPS”, and then tap “Next”. 12. Uncheck “Secure Connection”, and select a COM port (for example, COM 8) from the “Port:”. Then tap “Finish”.
-
Page 44: Start Your Navigation Software
BT-Q1000 Super 51-CH Performance GPS Travel Recorder 13. The “iBT-GPS” with its COM port will be shown on the list. 10-3. Start your navigation software Activate your navigation software and make sure to select the correct “COM Port”. NOTE 1: In the map software such as TomTom, you might need to change preference and set “Other Bluetooth GPS Device”... -
Page 45: Safety Notices
This device must accept any interference received, including interference that may cause undesired operation. Spec. is subject to change without prior notice. All rights reserved. All registered trademark is belong to their respected companies. BT-Q1000 Super 51-CH Performance GPS Travel Recorder...
Need help?
Do you have a question about the BT-Q1000 and is the answer not in the manual?
Questions and answers