Stealth Designer SC-18FM-UM Owner's Manual
Hide thumbs
Also See for Designer SC-18FM-UM:
- Quick start manual (2 pages) ,
- Installation manual (30 pages)

Subscribe to Our Youtube Channel
Related Manuals for Stealth Designer SC-18FM-UM


Summary of Contents for Stealth Designer SC-18FM-UM
-
Page 1: Introduction
FLOOR/CEILING OWNER’S MANUAL Models: Indoor Unit Outdoor Unit SC-18FM-UM SC-18Z-UM SC-24FM-UM SC-24Z-UM SC-30FM-UM SC-30Z-UM SC-36FM-UM SC-36Z-UM SC-42FM-UM SC-42Z-UM SC-48FM-UM SC-48Z-UM... -
Page 2: Table Of Contents
Thank you for choosing a Floor /Ceiling Air Conditioning & Heating System. Please read this owner’s manual carefully before operation and retain it for future reference. Table of Contents Introduction ..........2 Safety Precautions . -
Page 3: Safety Precautions
• Disconnect electrical power to the indoor and outdoor units before performing any maintenance or cleaning. • Do not attempt to repair the stealth system yourself. Incorrect repairs may cause electric shock or fire. Contact a qualified service technician for all service requirements. -
Page 4: System Schematic
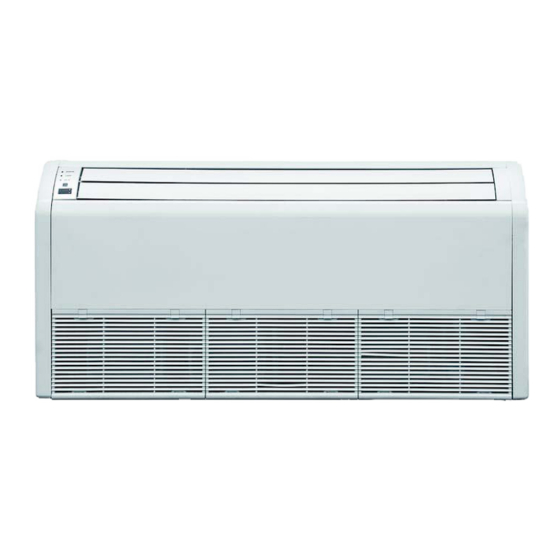
System Schematic Air Outlet Indoor Unit Air inlet Power Supply System Components* 1. Front Cabinet 2. Air Inlet 3. Wired Controller (optional) 4. Remote Controller 5. Drain Pipe 6. Gas Pipe 7. Liquid Pipe 8. Service Cover 9. Front Panel 10. -
Page 5: System Functions
SYSTEM FUNCTIONS WHISPER QUIET Not only are the stealth systems energy efficient but they are quiet too.Wall mounted units operate with sound levels starting as low as 37 dB(A). MODERN APPEARANCE Designed to be a comfortable fit in virtually any living space.This slim compact cabinet sits inconspicuously on the wall or ceiling, and blends into most interior designs. - Page 6 LCD display (not back lighted). WIRED TETHER CONTROLLER (SOLD SEPARATELY) The stealth Wired Tether Controller mounts to the wall up to 25 feet from the unit. It provides complete control over operation mode, desired temperature, fan speed, airflow direction and more.
- Page 7 SELF-DIAGNOSIS With an on-board computer using real-time diagnostics, the stealth Designer system helps to prolong its own life.The automatic diagnosis feature continuously scans for unacceptable operating conditions or malfunctions. If such conditions occur, the system takes corrective action or stops.
-
Page 8: Operation Of Wireless Remote Controller
OPERATION OF WIRELESS REMOTE CONTROLLER Remote Controller Part Name 1 Signal Transmitter 2 ON/OFF Button 3 Mode Button 4 – Button 5 + Button 6 Fan Button 7 Swing Button 8 Clock Button 9 Timer ON Button 10 X-Fan Button 11 Temp Button 12 Timer OFF Button 13 Turbo Button... - Page 9 OFF and then press “MODE“ and “––” buttons on the remote simultaneously. The wireless remote controller is the interface between the user and the stealth Designer system. Commands are entered by the user to control the system. Any command that has been entered with the remote controller will remain in memory until it is changed by the user or the batteries are replaced.
- Page 10 OPERATION OF WIRELESS REMOTE CONTROLLER MODE BUTTON : AUTO Use the “MODE” button to select one of the available modes. The selected mode will be displayed on the remote controller : COOL and the appropriate icon will be displayed. : DRY AUTO –...
- Page 11 OPERATION OF WIRELESS REMOTE CONTROLLER TIMER ON MODE The Floor/Ceiling unit can be programmed to automatically turn ON after a selected time period.With the unit in OFF mode, press TIMER button to activate the TIMER mode, and the ON/OFF icon will begin blinking.
- Page 12 OPERATION OF WIRELESS REMOTE CONTROLLER X-FAN MODE When operating in humid areas, the unit has a DRY COIL function called X-Fan that will allow the indoor fan to run for a pre-determined amount of time after the unit is turned off (cooling or dry modes) to ensure that additional moisture is removed from coil.
- Page 13 OPERATION OF WIRELESS REMOTE CONTROLLER CLOCK BUTTON Press the CLOCK button to enter Clock Setup Mode. The clock icon will begin flashing. Set the clock by pressing the + or - buttons. Press once for slow adjustment; press and hold down for fast adjustment.
-
Page 14: Care And Cleaning
CARE AND CLEANING WARNING CAUTION W RNING WARNING Take notice of the following items before cleaning your air conditioning unit. • To avoid electric shock or injury, do not attempt to clean the unit unless both the indoor and outdoor units have been turned off and disconnected from the main power supply. •... -
Page 15: Troubleshooting
TROUBLESHOOTING PROBLEM CAUSE/SOLUTION System does not restart. Cause: The system has a built-in three-minute delay to prevent short and/or rapid cycling of the compressor. Solution: Wait three minutes for the protection delay to expire. Indoor unit emits unpleasant odor Cause: Typically unpleasant odors are the result of mold or mildew forming on when started the coil surfaces or the air filter. - Page 16 TROUBLESHOOTING PROBLEM CAUSE/SOLUTION Water leaking from the indoor Cause: While it is normal for the system to generate condensate water in unit into the room. cooling mode, it is designed to drain this water via a condensate drain system Solution: If water is leaking into the room, it may indicate one of the following. •...
-
Page 17: Diagnostic Codes
DIAGNOSTIC CODES The Designer System has on board diagnostics.The indoor unit and Tether Controller will display error codes.The following is a summary of the codes with explanation: Error Codes Error Malfunction Origin of Description Code Name Malfunction If outdoor unit detects the high pressure switch is cut off for 3-sec successively, high pressure protection will occur.All the loads (except the 4-way valve in heating mode) will be switched off. - Page 18 DIAGNOSTIC CODES Error Codes Error Malfunction Origin of Description Code Name Malfunction If indoor unit detects the condensate overflow switch warning for Condensate 8-sec successively, the system will enter condensate overflow Overflow Overflow protection.The unit will shut off and will not recover automatically. Switch Protection Switch unit off and then switch it on to eliminate this malfunction.
- Page 19 DIAGNOSTIC CODES Error Codes Error Malfunction Origin of Description Malfunction Code Name Outdoor If the memory chip of outdoor drive circuit board fails, the unit will Drive not start.The unit will not recover automatically. If thermo junction Outdoor Drive Memory Chip cannot be eliminated after switching off the unit and then energizing Board Malfunction...
-
Page 20: Energy Saving Tips
ENERGY SAVING TIPS 1. Reduce room setpoint at night: During the nighttime hours you don't require the same level of conscious cooling or heating. Try using Sleep Mode to gradually relax room temperature and allow the unit to run less and save energy. 2. - Page 21 Phone No. / E-mail STEALTH (1HVAC Energy LLC) warrants this product against failure due to defect in materials or workmanship under normal use and maintenance as follows. All warranty periods begin on the date of original installation. If the date cannot be verified, the warranty period begins one hundred twenty (120) days from date of manufacture.
Need help?
Do you have a question about the Designer SC-18FM-UM and is the answer not in the manual?
Questions and answers