Table of Contents
Advertisement
Available languages
Available languages
ELECTRIC START CAPABLE 2-CYCLE POLE SAW
MOTOSIERRA DE PÉRTIGA DE 2 TIEMPOS CON CAPACIDAD PARA ARRANQUE ELÉCTRICO
IF YOU HAVE QUESTIONS OR COMMENTS, CONTACT US.
SI TIENE DUDAS O COMENTARIOS, CONTÁCTENOS.
1-888-331-4569
769-22950 / 00
OPERATOR'S MANUAL | MANUAL DEL OPERADOR
WWW.CRAFTSMAN.COM
P210
CMXGJAMD25PS
08/19
Advertisement
Chapters
Table of Contents

Related Manuals for Craftsman P210


Summary of Contents for Craftsman P210
- Page 1 OPERATOR’S MANUAL | MANUAL DEL OPERADOR ELECTRIC START CAPABLE 2-CYCLE POLE SAW MOTOSIERRA DE PÉRTIGA DE 2 TIEMPOS CON CAPACIDAD PARA ARRANQUE ELÉCTRICO P210 CMXGJAMD25PS IF YOU HAVE QUESTIONS OR COMMENTS, CONTACT US. SI TIENE DUDAS O COMENTARIOS, CONTÁCTENOS. 1-888-331-4569 WWW.CRAFTSMAN.COM...
-
Page 2: Table Of Contents
TABLE OF CONTENTS All information, illustrations, and specifications in this manual are based on the latest product information available at the time of printing. We Safety ..........2 reserve the right to make changes at any time without notice. - Page 3 • IMPORTANT SAFETY INSTRUCTIONS • READ ALL INSTRUCTIONS BEFORE OPERATING SAFETY WARNINGS FOR GAS UNITS WARNING: WARNING: When using the unit, all safety Gasoline is highly flammable and instructions must be followed. Please read these its vapors can explode if ignited. Take the following instructions before operating the unit in order to ensure the precautions: safety of the operator and any bystanders.
- Page 4 POLE SAW SAFETY • If the unit strikes or becomes entangled with a foreign object, stop the unit immediately. Check for damage. If damaged, do WARNING: not restart or operate the unit until it is repaired. Do not operate the unit with loose or damaged parts. Do not operate the unit near electrical cables or power lines (Fig.
- Page 5 KICKBACK SAFETY Kickback Safety Precautions Take the following steps to reduce the chance of accident or injury: WARNING: • Do not rely exclusively upon the safety devices built into the unit. Kickback may occur when the • Do not overreach. Always keep proper footing and balance. Take nose or tip of the guide bar touches an object, or when the extra care when working on stairs, steep slopes or inclines.
- Page 6 OTHER SAFETY WARNINGS • Maintain the unit with care. Follow all maintenance instructions in this manual. • Do not perform maintenance procedures other than those described in this manual. All service, other than the maintenance procedures described in this manual, should be performed by an authorized service dealer.
- Page 7 • SAFETY & INTERNATIONAL SYMBOLS • This operator's manual describes safety and international symbols and pictographs that may appear on this product. Read the operator's manual for complete safety, assembly, operating and maintenance and repair information. SYMBOL MEANING SYMBOL MEANING •...
- Page 8 SYMBOL MEANING SYMBOL MEANING • WEAR HEAD, EYE AND HEARING PROTECTION • KICKBACK WARNING: Thrown objects and loud noise can WARNING: Contact of the guide bar tip with any cause severe eye injury and hearing loss. Wear eye object should be avoided. Tip contact may cause the protection meeting current ANSI Z87.1 standards and guide bar to move suddenly upward and backward, ear protection when operating this unit.
-
Page 9: Know Your Unit
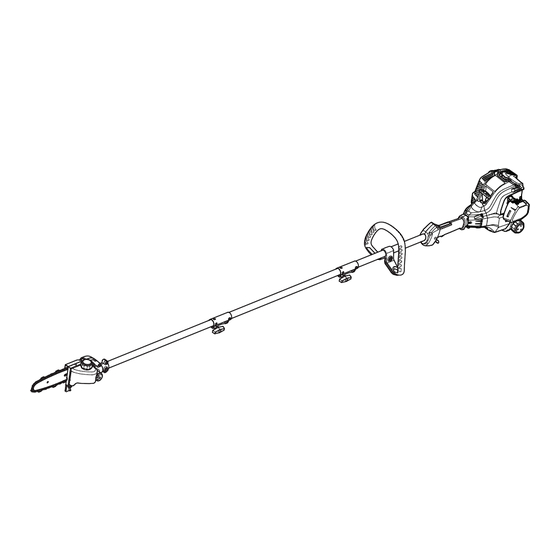
KNOW YOUR UNIT Muffler Spark Plug APPLICATIONS Starter Rope Grip As a pole saw: • Pruning trees Other optional attachments may be used with this unit. Shaft Grip Throttle Lockout On/Off Switch ASSEMBLY TOOLS REQUIRED Fuel Cap Handle • Flat-head screwdriver Upper Shaft Housing Throttle Control... -
Page 10: Essential Terms And Definitions
ESSENTIAL TERMS AND DEFINITIONS • POLE SAW - A tool designed to prune branches with a saw chain. A pole saw is an integrated unit comprised of an engine, saw chain, guide bar, pole, and grips (handles) that are designed to be held by two hands during operation. •... -
Page 11: Specifications
SPECIFICATIONS* Engine Type ..................Air-Cooled, 2-Cycle Displacement. -
Page 12: Assembly
ASSEMBLY INSTALLING AND REMOVING THE ATTACHMENT The coupler enables the use of various optional attachments. WARNING: Before using any attachment, read and understand the manual that came with the attachment. Follow all safety information contained within. Loosen WARNING: To avoid serious personal injury and damage to the unit, shut the unit off before removing or Tighten installing an attachment. - Page 13 INSTALLING AND ADJUSTING THE HANDLE Handle Installing the Handle 1. Push the handle down onto the upper shaft housing (Fig. 4). Make sure the bolt hole faces to the right (Fig. 4). Safety Label Upper 2. Insert the bolt into the bolt hole and push it through (Fig. 4). Shaft Tighten the bolt with a flat-head screwdriver, but do not tighten Housing...
-
Page 14: Oil And Fuel
OIL AND FUEL FUELING THE UNIT OIL AND FUEL MIXING INSTRUCTIONS The use of old and/or improperly mixed fuel is the most common cause WARNING: Gasoline is extremely flammable. Ignited of performance problems. Use only fresh, clean unleaded gasoline. vapors may explode. Always stop the engine and allow it Follow the instructions carefully for the proper gasoline/oil mixture. -
Page 15: Starting And Stopping
STARTING AND STOPPING WARNING: On/Off Switch Operate this unit only in a well-ventilated outdoor area. Carbon monoxide exhaust fumes can be (I = On / O = Off) lethal in a confined area. WARNING: Avoid accidentally starting the unit. To avoid serious injury, the operator and the unit must be in a stable Throttle position when pulling the starter rope (Fig. - Page 16 This unit can be started with an optional electric start accessory (items sold separately). Refer to the electric start accessory operator’s manual for the proper use of this feature. Please contact your local Craftsman retailer, call 1-888-331-4569 or visit www.craftsman.com for more information. STARTING INSTRUCTIONS NOTE: To prevent the throttle control from being squeezed accidentally, this unit has a throttle lockout.
-
Page 17: Operation
OPERATION WARNING: WARNING: Always check the chain tension and adjust as Do not use a pole saw to fell a tree. Do not necessary before beginning operation. Refer to Adjusting the use a pole saw to limb or buck a fallen tree. Use a chain Chain Tension in the Maintenance section. - Page 18 CUTTING PROCEDURE BASICS 1. Start the unit. Refer to Starting Instructions in the Starting and Stopping section. Keep your fingers off the throttle control until you are ready to make a cut. 2. Make sure that oil is flowing onto the guide bar and saw chain. A small spray should be visible.
-
Page 19: Maintenance
MAINTENANCE FREQUENCY MAINTENANCE REQUIRED WARNING: To avoid serious personal injury, always stop the engine and allow it to cool before cleaning or maintaining Before each • Check for loose screws, nuts or bolts the unit. Never perform cleaning or maintenance while the (tighten as needed) unit is running. - Page 20 Filling the Chain Oil Reservoir 1. Set the unit on a flat, level surface. Position the unit with the chain oil cap facing up (Fig. 10). 2. To prevent debris from entering the chain oil reservoir, use a damp cloth to clean the chain oil cap and surrounding area. 3.
- Page 21 ADJUSTING THE CHAIN TENSION CAUTION: The guide bar, saw chain, and saw bearings will wear more rapidly if the saw chain is not properly tensioned. Maintaining proper chain tension will improve cutting performance and prolong the life of the saw chain. WARNING: To prevent serious injury, never touch the saw chain or adjust the chain tension while the unit is...
- Page 22 SETTING THE CHAIN OIL ADJUSTMENT SCREW Chain Oil WARNING: If the chain oil reservoir becomes empty, the Adjustment Screw chain oil adjustment screw hole becomes clogged, or the saw chain fails to receive proper lubrication in any way, the saw chain will overheat. This can cause irreparable damage to the unit and serious personal injury.
- Page 23 MAINTAINING THE SAW CHAIN WARNING: The saw chain is very sharp. Always wear heavy-duty protective gloves when handling or performing maintenance on the saw chain. WARNING: An improperly sharpened saw chain increases the chance of kickback. Failure to replace or properly maintain the saw chain can cause serious injury.
- Page 24 MAINTAINING THE AIR FILTER Air Filter Cover Tab Failure to maintain the air filter can result in poor performance or can cause permanent damage to the engine. Engine failure due to improper air filter maintenance is not covered by the product warranty. Cleaning the Air Filter 1.
-
Page 25: Cleaning And Storage
CLEANING AND STORAGE CLEANING STORAGE • Loosen the saw chain if the chain tension was adjusted during WARNING: To avoid serious personal injury, always stop operation. The saw chain will contract as the unit cools, which the engine and allow it to cool before cleaning or maintaining could damage the unit if the chain is too tight. -
Page 26: Troubleshooting
TROUBLESHOOTING PROBLEM SOLUTION THE ENGINE WILL NOT START The fuel tank is empty Fill the fuel tank with properly-mixed fuel The primer bulb was not pressed enough Press the primer bulb 10 times or until fuel is visible Move the choke lever to Position 3, press the throttle lockout, squeeze The engine is flooded the throttle control and pull the starter rope until the engine starts The fuel is old (over 30 days) and/or improperly mixed... -
Page 27: Warranty
Limited Warranty The limited warranty set forth herein is given by MTD LLC to the Initial Purchaser (as defined herein) with respect to new Craftsman branded hand held product (“Product”). This limited warranty does not cover Emission Control Systems and is not a Federal Emission Control Warranty Statement as defined by U.S. - Page 28 This Warranty Does Not Cover And MTD LLC Disclaims Any Responsibility For: 1. Loss of time or loss of use of the Product. 2. Transportation costs and other expenses incurred in connection with the transport of the Product to and from the authorized service provider. 3.
-
Page 29: Seguridad
TABLA DE CONTENIDO Toda la información, las ilustraciones y las especificaciones contenidas en este manual se basan en la información más reciente Seguridad ......... . .29 disponible en el momento de impresión del manual. - Page 30 • INSTRUCCIONES DE SEGURIDAD IMPORTANTES • LEA TODAS LAS INSTRUCCIONES ANTES DE USAR LA ADVERTENCIAS DE SEGURIDAD PARA LAS UNIDADES UNIDAD A GASOLINA ADVERTENCIA: ADVERTENCIA: La gasolina es Se deben respetar sumamente inflamable y sus vapores pueden explotar si se todas las instrucciones de seguridad al usar la unidad.
- Page 31 SEGURIDAD DE LA SIERRA DE PÉRTIGA • No toque el motor ni el silenciador. Estas partes se ponen extremadamente calientes por el funcionamiento, incluso después de que se apaga la unidad. ADVERTENCIA: No haga funcionar la • No opere la unidad a una velocidad mayor a la necesaria para la unidad cerca de cables eléctricos o líneas de energía (Fig.
- Page 32 SEGURIDAD AL REBOTAR Compresión ADVERTENCIA: Puede haber un rebote cuando la punta de la barra de guía toca un objeto, o cuando la madera se cierra y comprime la cadena de la sierra en el corte. En ciertos casos, el contacto de la punta puede ocasionar una acción inversa relámpago, haciendo recular rápidamente la barra de guía hacia el operador.
- Page 33 OTRAS ADVERTENCIAS DE SEGURIDAD • Utilice dispositivos que reduzcan los riesgos relacionados con el retroceso, como ser cadenas de retroceso bajo, protectores de • El mantenimiento de la unidad debe ser minucioso. Siga todas punta de barra guía, frenos de cadena y barras de guía de las instrucciones de mantenimiento de este manual.
- Page 34 • SÍMBOLOS INTERNACIONALES Y DE SEGURIDAD • Este manual del operador describe símbolos de seguridad e internacionales, así como pictogramas, que pueden aparecer en este producto. Lea el manual del operador para obtener información completa sobre seguridad, montaje, funcionamiento, mantenimiento y reparaciones. SÍMBOLOS SIGNIFICADO SÍMBOLOS SIGNIFICADO •...
- Page 35 SÍMBOLO SIGNIFICADO SÍMBOLO SIGNIFICADO • PROTÉJASE LA CABEZA, LOS OJOS Y LOS OÍDOS • REBOTE ADVERTENCIA: ADVERTENCIA: Los objetos lanzados y el ruido Se debe evitar el contacto de la fuerte pueden ocasionar lesiones graves a los ojos y punta de la barra de guía con cualquier objeto. El pérdida de la audición.
-
Page 36: Conozca Su Unidad
CONOZCA SU UNIDAD Silenciador Bujía de encendido USOS Agarre de la cuerda Como sierra de pértiga: de arranque • Poda de árboles Empuñadura del eje Con esta unidad se pueden usar otros dispositivos de sujeción opcionales. Bloqueo del acelerador Interruptor de Encendido / Apagado HERRAMIENTAS NECESARIAS PARA Tapa del tanque... -
Page 37: Términos Y Definiciones Fundamentales
TÉRMINOS Y DEFINICIONES FUNDAMENTALES • SIERRA DE PÉRTIGA - Herramienta diseñada para podar ramas con una cadena de sierra. Una sierra de pértiga es una unidad integrada compuesta por un motor, cadena de sierra, barra de guía, pértiga y empuñaduras (manijas) que están diseñadas para agarrarlas con las dos manos durante la operación. -
Page 38: Especificaciones
ESPECIFICACIONES* Tipo de motor ................Enfriado por aire, de 2 tiempos Cilindrada. -
Page 39: Ensamblaje
ENSAMBLAJE INSTALACIÓN Y EXTRACCIÓN DEL ACCESORIO El acoplador permite el uso de varios accesorios opcionales. ADVERTENCIA: Antes de comenzar a utilizar cualquiera de los accesorios, lea y comprenda el manual que viene con dicho accesorio. Tenga en cuenta toda la Afloje información de seguridad que incluye. - Page 40 INSTALACIÓN Y AJUSTE DE LA MANIJA Manija Instalación de la manija 1. Oprima la manija hacia abajo sobre el alojamiento del eje superior (Fig. 4). Asegúrese de que el orificio del perno mire Etiqueta de Alojamiento hacia la derecha (Fig. 4). seguridad del eje 2.
-
Page 41: Aceite Y Combustible
ACEITE Y COMBUSTIBLE INSTRUCCIONES PARA LA MEZCLA DEL ACEITE Y EL COMBUSTIBLE El uso de combustible viejo y/o mal mezclado es la causa más frecuente de los problemas de rendimiento. Sólo se debe utilizar gasolina nueva, limpia y sin plomo. Siga atentamente las instrucciones para que la mezcla de gasolina/aceite sea adecuada. -
Page 42: Arranque Y Parada
ARRANQUE Y PARADA ADVERTENCIA: Opere esta unidad únicamente en una Interruptor encendido / apagado zona bien ventilada, al aire libre. Los humos de escape de monóxido de carbono pueden ser mortales en un lugar (I = Encendido / cerrado. O = Apagado) ADVERTENCIA: Se debe evitar arrancar accidentalmente Bloqueo del... - Page 43 Para más información, comuníquese con su distribuidor local Craftsman llamando al 1-888-331-4569 o visite www.craftsman.com. INSTRUCCIONES DE ARRANQUE NOTA: Para evitar apretar el control del acelerador accidentalmente, esta unidad tiene un bloqueo del acelerador.
-
Page 44: Operación
OPERACIÓN ADVERTENCIA: ADVERTENCIA: Controle siempre la tensión de la No utilice la sierra de pértiga para cadena y ajuste si es necesario antes de comenzar la talar un árbol. No utilice una sierra de pértiga para el operación. Consulte Ajuste de la tensión de la cadena en la desramado y trozado de un árbol caído. - Page 45 ASPECTOS BÁSICOS DEL PROCEDIMIENTO DE CORTE 1. Arranque la unidad. Consulte Instrucciones de arranque en la sección Arranque y detención. No coloque los dedos sobre el control del acelerador hasta estar listo para cortar. 2. Asegúrese de que fluya aceite hacia la barra guía y la cadena de la sierra.
-
Page 46: Mantenimiento
MANTENIMIENTO FRECUENCIA MANTENIMIENTO REQUERIDA ADVERTENCIA: A fin de evitar lesiones personales graves, siempre pare el motor y deje que se enfríe antes de Antes de cada • Verifique si hay tornillos, tuercas o pernos limpiar o mantener la unidad. No realice ninguna tarea de flojos (ajústelos según sea necesario). - Page 47 2. Asegúrese de que el depósito de aceite de la cadena esté lleno hasta la mitad como mínimo (Fig. 10). Si el nivel de aceite es demasiado bajo, agregue aceite para la barra y la cadena. Consulte Llenado del depósito de aceite de la cadena. Llenado del depósito de aceite de la cadena 1.
- Page 48 AJUSTE DE LA TENSIÓN DE LA CADENA PRECAUCIÓN: Si la cadena de la sierra no está correctamente tensionada, la barra de guía, la cadena y los cojinetes se gastarán más rápidamente. Mantener la tensión adecuada de la cadena de la sierra mejora el rendimiento del corte y prolonga la vida útil de la cadena.
- Page 49 GRADUACIÓN DEL TORNILLO DE AJUSTE DE ACEITE DE LA CADENA Tornillo de ajuste del aceite de la cadena ADVERTENCIA: Si el depósito de aceite de la cadena se vacía, el orificio del tornillo de ajuste de aceite se tapa, o la cadena de la sierra deja de estar adecuadamente lubricada por algún motivo, la cadena se recalentará.
- Page 50 MANTENIMIENTO DE LA CADENA DE LA SIERRA ADVERTENCIA: La cadena de la sierra es muy filosa. Cuando manipule o efectúe el mantenimiento en la cadena de la sierra, use siempre guantes de protección reforzados. ADVERTENCIA: Si la cadena de la sierra tiene un afilado inadecuado aumenta la posibilidad de tensión de retroceso.
- Page 51 MANTENIMIENTO DEL FILTRO DE AIRE Lengüeta Filtro de aire de la tapa Si no se mantiene el filtro de aire se puede obtener un rendimiento insuficiente o se pude dañar el motor de manera permanente. Las averías del motor ocasionadas por un mantenimiento inadecuado del filtro de aire no están cubiertas por la garantía del producto.
-
Page 52: Limpieza Y Almacenamiento
MANTENIMIENTO DE LA BUJÍA 1. Detenga el motor y deje que se enfríe. Sujete con firmeza la funda de la bujía y tire para sacarla de la bujía. 2. Limpie alrededor de la bujía. Retire la bujía de la tapa del cilindro con una llave de cubo de 5/8 pulgadas, girando en sentido contrario a las agujas del reloj. -
Page 53: Localización Y Solución De Problemas
LOCALIZACIÓN Y SOLUCIÓN DE PROBLEMAS PROBLEMA SOLUCIÓN EL MOTOR NO ARRANCA El tanque de combustible está vacío Llene el tanque de combustible con la mezcla adecuada La pera del cebador no se oprimió lo suficiente Oprima la pera del cebador 10 veces o hasta que se vea el combustible Mueva la palanca del cebador a la Posición 3, presione el bloqueo El motor está... -
Page 54: Garantía
La garantía limitada establecida en este documento es otorgada por MTD LLC al Comprador Inicial (como se define aquí) con respecto al nuevo producto manual de marca Craftsman ("Producto"). La presente garantía limitada no cubre los Sistemas de control de emisiones y no constituye una Declaración de garantía del control de las emisiones federal según lo definido por las leyes federales de los Estados Unidos. - Page 55 Lo que NO Cubre esta Garantía Limitada Esta Garantía Limitada No Cubre lo Siguiente (las “Exclusiones”): 1. Los productos adquiridos fuera de los Estados Unidos. 2. Los daños producidos por la falta de mantenimiento y/o un mantenimiento inadecuado, según se describe en el manual del operador. 3.
- Page 56 ® IS A REGISTERED TRADEMARK OF STANLEY BLACK & DECKER, INC., USED UNDER LICENSE. ES UNA MARCA REGISTRADA DE STANLEY BLACK & DECKER, INC., UTILIZADA BAJO LICENCIA. © 2019 CRAFTSMAN PRODUCT MANUFACTURED BY: / PRODUCTO FABRICADO POR: MTD LLC P.O. Box 361131 Cleveland, OH 44136-0019 U.S.
Need help?
Do you have a question about the P210 and is the answer not in the manual?
Questions and answers
Started cord not engaging to turn motor
The starter cord on the Craftsman P210 may not be engaging to turn the motor due to the engine being flooded, the choke not being in the correct position, or improper starting technique. If the cord is physically stuck, it may be due to a jammed recoil mechanism or internal engine issue.
This answer is automatically generated