Milwaukee M18 2606-20 Operator's Manual
Cordless 1/2" drill/driver and hammer drill/driver
Hide thumbs
Also See for M18 2606-20:
- Operator's manual (41 pages) ,
- Operator's manual (82 pages) ,
- Operator's manual (135 pages)
Table of Contents
Advertisement
Available languages
Available languages
Quick Links
Cat. No. / No de cat.
2606-20, 2607-20
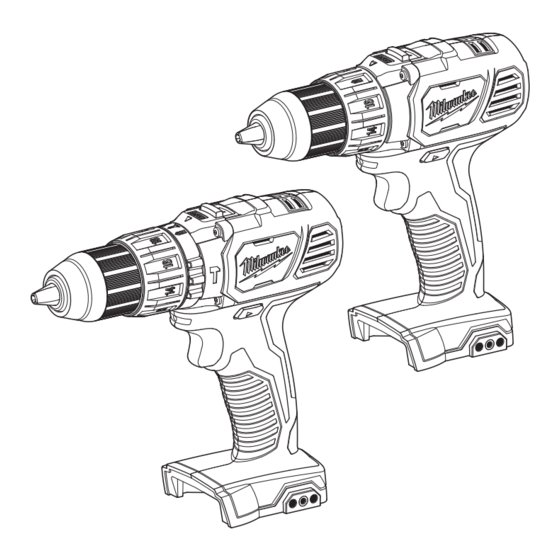
M18™ CORDLESS 1/2" DRILL/DRIVER AND HAMMER
DRILL/DRIVER
PERCEUSE-VISSEUSE ET PERCEUSE À PERCUSSION
DE M18™ 13 mm (1/2")
TALADRO DESTORNILLADOR Y TALADRO DE PERCUSIÓN
DE 13 mm (1/2") M18™
WARNING
AVERTISSEMENT
comprendre le manuel.
ADVERTENCIA
To reduce the risk of injury, user must read and understand operator's manual.
Afin de réduire le risque de blessures, l'utilisateur doit lire et bien
Para reducir el riesgo de lesiones, el usuario debe leer y entender el manual.
OPERATOR'S MANUAL
MANUEL de L'UTILISATEUR
MANUAL del OPERADOR
Advertisement
Table of Contents

Related Manuals for Milwaukee M18 2606-20


Summary of Contents for Milwaukee M18 2606-20
- Page 1 OPERATOR'S MANUAL MANUEL de L'UTILISATEUR MANUAL del OPERADOR Cat. No. / No de cat. 2606-20, 2607-20 M18™ CORDLESS 1/2" DRILL/DRIVER AND HAMMER DRILL/DRIVER PERCEUSE-VISSEUSE ET PERCEUSE À PERCUSSION DE M18™ 13 mm (1/2") TALADRO DESTORNILLADOR Y TALADRO DE PERCUSIÓN DE 13 mm (1/2") M18™ WARNING To reduce the risk of injury, user must read and understand operator's manual.
-
Page 2: General Power Tool Safety Warnings
GENERAL POWER TOOL • Remove any adjusting key or wrench before turning the power tool on. A wrench or a key left SAFETY WARNINGS attached to a rotating part of the power tool may Read all safety warnings, instruc- WARNING result in personal injury. -
Page 3: Specifications
Shorting the battery terminals together operating instructions or you feel the work is beyond may cause burns or a fire. your capability; contact Milwaukee Tool or a trained • Under abusive conditions, liquid may be ejected professional for additional information or training. -
Page 4: Functional Description
Installing the Side Handle FUNCTIONAL DESCRIPTION If your drill/driver did not come with a side handle, visit www.milwaukeetool.com for the appropriate accessory handle. Hooks 1. To install the side handle, loosen the side handle grip until the hooks are far enough apart to fit Slots into the slots on the gear case ring. - Page 5 Selecting Hammer, Drill or Drive Action Using the Control Switch (Cat. No. 2607-20) The control switch may be set to three positions: 1. To use the hammer-drilling mode, forward, reverse and lock. Due to a lockout mecha- rotate the application selector col- nism, the control switch can only be adjusted when lar until the hammer symbol the ON/OFF switch is not pressed.
-
Page 6: Maintenance
MILWAUKEE to be defective in material or workman- Inspect your tool for issues such as undue noise, ship for a period of five (5) years** after the date of purchase unless otherwise noted. -
Page 7: Sécurité Électrique
RÈGLES DE SÉCURITÉ GÉNÉRALES Warranty Registration is not necessary to obtain the applicable war- ranty on a MILWAUKEE power tool product. The manufacturing date RELATIVES AUX OUTILS ÉLECTRIQUES of the product will be used to determine the warranty period if no proof of purchase is provided at the time warranty service is requested. -
Page 8: Sécurité Individuelle
SÉCURITÉ INDIVIDUELLE • Entretenir les outils électriques et les acces- soires. Vérifier qu'aucune pièce mobile n'est mal • Rester attentif, prêter attention au travail et faire alignée ou bloquée, qu'aucune pièce n'est brisée preuve de bon sens lors de l'utilisation de tout et s'assurer qu'aucun autre problème risque outil électrique. -
Page 9: Entretien
; veuillez contacter Milwaukee Tool ou un professionnel formé pour recevoir plus d’information ou formation. • Maintenir en l’état les étiquettes et les plaques d’identification.Des informations importantes y... -
Page 10: Description Fonctionnelle
Installation de la poignée latérale DESCRIPTION FONCTIONNELLE Si votre perceuse/tournevis ne dispose pas d’une poignée latérale, visitez www.milwaukeetool.com pour une poignée accessoire appropriée. 1. Pour installer la poignée latérale, desserrer la prise de celle ci jusqu’à ce que les crochets soient suf- fisamment éloignés pour s’insérer dans les fentes situées sur la bague de la boîte d’engrenage. - Page 11 Sélection du mode perçage ou vissage No de Cat. 2606-20 (No de Cat. 2606-20) Réglage de 1. Pour utiliser le mode perforage (N•m) Applications l’accoupement uniquement, faire tourner le collier 1,7-3,4 Petites vis dans le bois mou. de sélection jusqu’à ce que le symbole perforateur appara- Vis moyennes dans le bois mou...
- Page 12 Une pression trop grande ralentit le foret la batterie ou le chargeur. Pour toute réparation, et diminue l’efficacité du perçage. Une pression trop consultez un centre de service MILWAUKEE ac- faible fait glisser le foret sur la surface de la pièce et crédité.
- Page 13 L’enregistrement de la garantie n’est pas nécessaire pour bénéficier de la garantie en vigueur sur un outil électrique MILWAUKEE. La date CENTRE DE RÉPARATIONS ET DE SERVICE de fabrication du produit servira à établir la période de garantie, si Composer le 55 4160-3547 aucune preuve d’achat n’est fournie lorsqu’une demande de service...
-
Page 14: Seguridad En El Área De Trabajo
ADVERTENCIAS DE SEGURIDAD • Utilice equipo de protección personal. Siempre use protección para los ojos. El equipo de protección, GENERALES PARA LA tal como una máscara contra polvo, calzado antidesli- HERRAMIENTA ELÉCTRICA zante, casco o protección auditiva, utilizado para condi- Lea todas las advertencias de ADVERTENCIA ciones adecuadas disminuirá... -
Page 15: Mantenimiento
La exposición a fuego capacidades, comuníquese con Milwaukee Tool o con o temperatura a más de 130° C (265° F) puede un profesional capacitado para recibir capacitación causar explosiones. -
Page 16: Especificaciones
ESPECIFICACIONES SIMBOLOGÍA Volts.............. 18 CD Volts Tipo de batería ..........M18™ Tipo de cargador ..........M18™ Corriente continua Temperatura ambiente recomendada Revoluciones por minuto sin carga (RPM) para operar ....-18°C a 50°C (0°F a 125°F) Cat. No............2606-20 Impactos por minuto bajo carga (BPM) RPM ............Baja 0 - 450 UL Listing mark para Alta 0 - 1 800... - Page 17 Selección de la acción de percusión, OPERACION taladro o atornillado Con el fin de minimizar el ADVERTENCIA (Cat. No. 2607-20) riesgo de lesiones, siempre 1. Para usar el modo de martillo-taladro gire el col- utilice la protección de ojos adecuada indicada larín selector de martillo/taladro para cumplir con lo dispuesto en la norma ANSI hasta que el símbolo...
- Page 18 Selección de la velocidad APPLICACIONES El selector de velocidad está sobre el alojamiento Para reducir el riesgo de ADVERTENCIA del motor. Deje que la herramienta se detenga por electrocución, antes de tal- completo antes de cambiar velocidades. Consulte adrar o colocar tornillos verifique que en el área “Aplicaciones”...
- Page 19 Al devolver la herramienta eléctrica a un la herramienta antes de darle cualquier manten- Centro de Servicio de la fábrica de MILWAUKEE o a una Estación imiento. Nunca desarme la herramienta ni trate de Servicio Autorizada de MILWAUKEE, se requiere que el flete esté...
- Page 20 Miguel de Cervantes Saavedra No.301 Piso 5, Torre Norte 11520 Colonia Ampliación Granada Miguel Hidalgo, Ciudad de Mexico, Mexico Modelo: Fecha de Compra: Sello del Distribuidor: MILWAUKEE TOOL 13135 West Lisbon Road Brookfield, WI 53005 USA 58142609d6 961011802-02(A) 10/19 Printed in China...
Need help?
Do you have a question about the M18 2606-20 and is the answer not in the manual?
Questions and answers