B&G ZEUS S Installation Manual
Hide thumbs
Also See for ZEUS S:
- Quick start manual (2 pages) ,
- Detailed app manual (19 pages) ,
- Basic operation manual (31 pages)
Table of Contents
Advertisement
Quick Links
Advertisement
Table of Contents

Related Manuals for B&G ZEUS S


Summary of Contents for B&G ZEUS S
- Page 1 ZEUS ® INSTALLATION MANUAL ENGLISH Scan here www.bandg.com to save a copy...
- Page 2 Copyright Copyright © 2023 Navico Holding AS. Trademarks ®Reg. U.S. Pat. & Tm. Off, and ™ common law marks. Visit www.navico.com/intellectual-property to review the global trademark rights and accreditations for Navico Holding AS and other entities. • Navico is a trademark of Navico Holding AS. ®...
-
Page 3: Table Of Contents
CONTENTS 4 Introduction 4 Parts included 5 Front controls 5 Connectors 6 Card reader 7 Installation 7 General mounting guidelines 8 Corner clip fitment and removal 9 Panel mounting 9 U-bracket mounting 10 Wiring 10 Wiring guidelines 10 Power and power control 12 External alarm 12 NMEA 2000 ®... -
Page 4: Introduction
INTRODUCTION Parts included Display unit Panel mounting kit Sun cover Corner clips Power cable Fuse holder and fuse Documentation package U-bracket mounting kit - 7” and 9” units U-bracket mounting kit - 12” unit... -
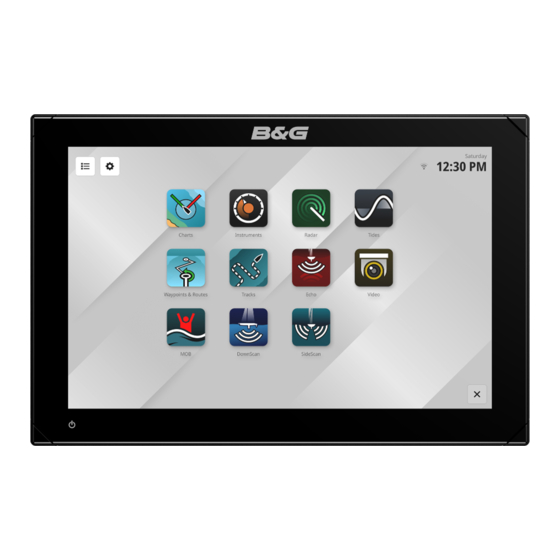
Page 5: Front Controls
Front controls Power key • Press and hold to turn the unit on or off. • Press once to display the quick access menu. Repeat short presses to toggle through the default screen brightness levels. Touchscreen Connectors 7” unit A E D 9”... -
Page 6: Card Reader
Card reader A microSD card can be used to: ® • Provide detailed charts • Update software • Transfer user data (waypoints, routes, tracks, screenshots). Notes: ¼ • If a microSD card and USB storage device are both inserted, by default, data and ®... -
Page 7: Installation
INSTALLATION General mounting guidelines ⚠ WARNING: Do not install the unit in a hazardous/flammable atmosphere. Always wear appropriate eye wear, ear protection and dust mask when drilling, cutting, or sanding. Remember to check the reverse side of all surfaces whenever drilling or cutting. Note: Choose a mounting location that will not expose the unit to conditions that exceed the ¼... -
Page 8: Corner Clip Fitment And Removal
Wi-Fi ® It is important to test the Wi-Fi performance before the location of the unit is decided. ® Construction material (steel, aluminum or carbon) and heavy structure might affect Wi-Fi ® performance. The following guidelines apply: • Select a location where there is a clear, direct line of sight between Wi-Fi connected units. -
Page 9: Panel Mounting
Panel mounting Refer to the separate mounting template for panel mounting instructions. U-bracket mounting Place the bracket in the desired mounting location. Ensure the chosen location has enough height to accommodate the unit, and allows the unit to be tilted. Adequate space is also required on both sides to allow tightening and loosening of the knobs. -
Page 10: Wiring
WIRING Wiring guidelines Don’t: • Make sharp bends in the cables. • Run cables in a way that allows water to flow down into the connectors. • Run the data cables adjacent to radar, transmitter, or large/high current carrying cables or high frequency signal cables. - Page 11 Power connection The unit is designed to be powered by 12 V DC. It is protected against reverse polarity, under voltage and over voltage (for a limited duration). A fuse or circuit breaker should be fitted to the positive supply. For the recommended fuse rating, refer to the Specifications section of this manual.
-
Page 12: External Alarm
Power controlled by ignition The unit will turn on when the ignition is turned on to start engines. Note: Engine start batteries and house batteries should have a common ground connection. ¼ Power control (yellow) Ignition switch External alarm Connect the blue wire on the power cable to an external buzzer or siren to trigger an external alarm. External alarm output (blue) Siren and relay Buzzer... - Page 13 Plan and install an NMEA 2000 network ® An NMEA 2000 network consists of a powered backbone from which drop cables connect to ® NMEA 2000 devices. The backbone needs to run within 6 m (20 ft) of the locations of all products ®...
-
Page 14: Usb Port
USB port The 9” and 12” display units have a USB-A port that can be used to connect a: • Storage device or • Card reader Note: USB devices should be standard PC-compatible hardware. ¼ Ethernet The Ethernet port(s) can be used for transfer of data and synchronization of user-created data. It is recommended that each device in the system is connected to the Ethernet network. -
Page 15: Supported Data
SUPPORTED DATA 127509 Inverter Status 128259 Speed, Water referenced NMEA 2000 PGN (receive) ® 128267 Water Depth 128275 Distance Log 59392 ISO Acknowledgement 129025 Position, Rapid Update 59904 ISO Request 129026 COG & SOG, Rapid Update 60160 ISO Transport Protocol, Data Transfer 129029 GNSS Position Data 60416... -
Page 16: Nmea 2000 ® Pgn (Transmit)
NMEA 2000 PGN (transmit) ® 129808 DSC Call Information 129809 AIS Class B “CS” Static Data Report, Part A 60160 ISO Transport Protocol, Data Transfer 129810 AIS Class B “CS” Static Data Report, Part B 60416 ISO Transport Protocol, Connection M 130060 Label 126208... -
Page 17: Dimensions
DIMENSIONS 7” unit 220.0 mm 107.0 mm (8.66 in) (4.21 in) 195.0 mm 8.0 mm 71.5 mm (7.68 in) (0.32 in) (2.82 in) 62.0 mm (2.44 in) 9” unit 263.0 mm 109.9 mm (10.35 in) (4.33 in) 239.0 mm 8.0 mm 72.6 mm (9.40 in) (0.32 in) -
Page 18: Specifications
SPECIFICATIONS Display 7” 9” 12” Resolution (px) 1024 x 600 1280 x 720 1280 x 800 Brightness >1000 nits Touchscreen Full touchscreen (multi-touch) Viewing angles in degrees 85° (top, bottom, left, and right) (typical value at contrast ratio = 10) Electrical Supply voltage 12 V DC (10 - 17 V DC min - max) - Page 20 ®Reg. U.S. Pat. & Tm. Off, and ™ common law marks. Visit www.navico.com/intellectual-property to review the global trademark rights and accreditations for www.bandg.com Navico Holding AS and other entities.
Need help?
Do you have a question about the ZEUS S and is the answer not in the manual?
Questions and answers