Cisco 8941 Reference Manual
Hide thumbs
Also See for 8941:
- Administration manual (170 pages) ,
- User manual (120 pages) ,
- Release notes (16 pages)

Related Manuals for Cisco 8941


Summary of Contents for Cisco 8941
- Page 1 Cisco VoIP 8941/8945 Phones Reference Guide ICIT Technology Training and Advancement – training@uww.edu Updated on 7/31/2014...
-
Page 2: Table Of Contents
TABLE OF CONTENTS Phone Overview ............................4 Phone Terms ............................. 5 Operating Your Phone........................... 7 Place a Call ..............................7 Dialing an Outside Number ........................7 Answer a Call ............................. 7 End a Call ..............................7 Redial a Number ............................8 Place Call on Hold............................ - Page 3 Access Voice Mail from Your Phone ....................... 23 Access Voice Mail Remotely ........................23 Change your Voice Mail Pin ........................23 Corporate Directory ............................ 24 Cisco Self Care Portal ..........................26 Speed Dials .............................. 26 Call Forwarding ............................27 Do Not Disturb ............................28...
-
Page 4: Phone Overview
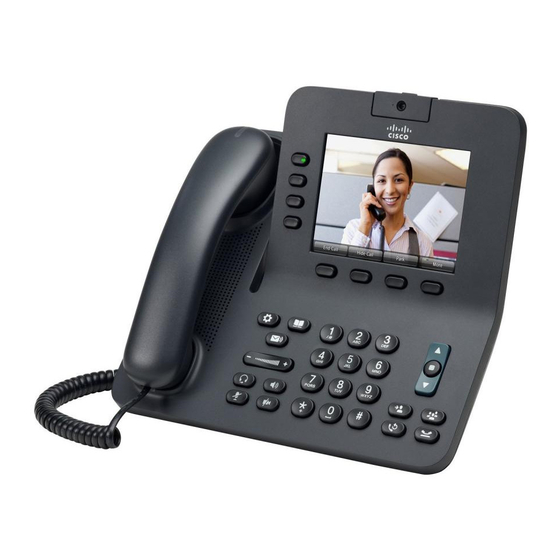
PHONE OVERVIEW 1. Phone screen 12. Video mute button 2. Video camera 13. Mute button 3. Lens cover/shutter button 14. Headset button 4. Soft key buttons 15. Volume button 5. Navigation pad and Select button 16. Messages button 6. Conference button 17. -
Page 5: Phone Terms
Phone Terms • Soft Keys – buttons located at the bottom of your phone LCD screen. To select a soft key, press the button located directly under that soft key option. NOTE: Soft key options change dynamically depending on what feature of the phone you are using. - Page 6 • Line Buttons – Depending on the model of your phone, you may have 1 to 2 line buttons available. • The first line is normally assigned your direct extension number. • The second line may be a shared line. •...
-
Page 7: Operating Your Phone
OPERATING YOUR PHONE Place a Call Use one of the following methods to place a call: • Lift the handset and dial the 4 digit extension number. • Dial the number, and then lift the handset. • Dial the number, and then press the Dial soft key. •... -
Page 8: Redial A Number
Redial a Number To redial the most recently dialed number: • Lift the handset and press the Redial button on your phone. • Press the Redial button on your phone to dial using the speakerphone. Place Call on Hold To place a call on hold while on the call: Press the Hold button on your phone. -
Page 9: Mute A Call
The party will be put on hold. Make note of the park number assigned to your call. Step 3 From another UW-Whitewater Cisco phone, dial the park number assigned to your phone. You will now be placed into the original call. -
Page 10: Shared Lines
Shared Lines A shared line is one extension that is assigned to multiple phones. When a shared line rings, it can either ring one phone at a time, on each phone assigned to that call group until the call is answered, or it can ring on all phones in a call group at the same time. -
Page 11: Phone Volume
To return to the original call: Step 1 Use the up/down buttons on the Navigation pad to select the original call. Step 2 Press the Resume soft key to reconnect to the call or press the line button associated with the original call. For calls on a separate line: •... -
Page 12: Adjust The Ring Volume
Adjust the Ring Volume • Press the +/- symbol on the Volume button while the handset is in its cradle and the phone is idle. Changing your Ring Type Step 1 Press the (Applications) button on your phone. Use the up/down arrows on the navigation pad to select “Preferences”. -
Page 13: Transfer A Call
Transfer a Call Redirects the call after first allowing you to speak to the transfer recipient. Step 1 During an active call, press the (Transfer) button on your phone. The call is placed on hold. Step 2 Dial the number to which you want to transfer the call. Wait for the call to be answered, then speak to the transfer recipient notifying them that you will be transferring a call. -
Page 14: Transfer Call To Voice Mail
Transfer Call to Voice Mail NOTE: You must have an active voice mail account for this feature to work. Step 1 During an incoming call, press the Divert soft key to send the call directly to voice mail. Transfer a Call to another User’s Voice Mail Step 1 During an active call, press the (Transfer) -
Page 15: Forward All Calls
Forward All Calls To forward all incoming calls to another number: Step 1 Press the Forward All soft key. Dial the number to which you want to forward all of your calls. NOTE: If forwarding to an outside phone number, dial 9, then 1, then the area code and phone number. -
Page 16: Forward All Calls To Voice Mail
Forward All Calls to Voice Mail Step 1 Press the Forward All soft key button on your phone. Step 2 Press the (Messages) button on your phone. All incoming calls will now be transferred directly to voice mail. NOTE: To remove call forwarding, press the Forward Off soft key. The phone display is updated to show that calls will no longer be forwarded. -
Page 17: Place And Establish A Conference Call
Place and Establish a Conference Call NOTE: There can be a maximum of 6 participants in a conference call. NOTE: For conference calls with 3 or more participants, it is strongly recommended that you use WebEx Meeting Center. WebEx is a cost-effective conferencing system that offers voice, web, and video as a feature-rich alternative to audio-only meetings. -
Page 18: End A Conference Call
End a conference call: • Hang up the handset, or press the End Call soft key. The conference call will remain active for other users still in the call. Displaying Users in a Conference Call Step 1 Once successfully joined into a conference call, press the View Details soft key button. -
Page 19: Do Not Disturb
Do Not Disturb You can use the Do Not Disturb (DND) feature to turn off the ringer on your phone. Enable Do Not Disturb: 1. Press the line button to the left of the Do Not Disturb option on your phone. A message appears that Do Not Disturb is active and the line button will turn red in color. -
Page 20: Video Camera Operations
VIDEO CAMERA OPERATIONS The following section describes how to enable and disable video on your phone or while on a call. Enable the Video Camera NOTE: The video camera on your phone is enabled by default. If the video camera feature is not working on your phone, please do the following to verify that this feature is enabled. -
Page 21: Camera Shutter Control
Camera Shutter Control • Open Camera Shutter: Slide the button on top of the camera to the right. The shutter will now be open. • Close Camera Shutter: Slide the button on top of the camera to the left. The shutter will now be closed. -
Page 22: Video Mute
Video Mute Video mute allows you to temporarily “mute” your video camera while leaving the end caller’s video enabled. When you mute your video, the end caller will see a black screen until you “unmute”. Step 1 While on an active call, press the (Mute Video) button on your phone. -
Page 23: Voice Mail
NOTE: A more comprehensive list of voice mail prompts can be found on the UW-Whitewater Phones (Cisco VoIP) Training and Documentation page located: http://www.uww.edu/icit/services/phones. Access Voice Mail from Your Phone 1. Pick up the handset on your phone and press the (Messages) button. -
Page 24: Corporate Directory
CORPORATE DIRECTORY To access the UW-Whitewater Corporate directory: Step 1 Press the (Contacts) button on your phone. Step 2 Use the up/down buttons on the navigation pad to select Corporate Directory. Press the Open soft key button. Step 3 Press the up/down buttons on the navigation pad to select the Last, First, or Number field search option. - Page 25 Step 6 Use the up/down buttons on the navigation pad to select the user you wish to call. Press the Dial soft key to place your call.
-
Page 26: Cisco Self Care Portal
CISCO SELF CARE PORTAL NOTE: The Cisco Self Care Portal page is only available while on the UW-Whitewater network. If you need to access this page remotely, please establish a VPN connection to the UW-Whitewater network. Speed Dials To configure speed dials on your phone, log into the Cisco Self Care Portal by going to http://phone.uww.edu. -
Page 27: Call Forwarding
Your new speed dial will now display as a line option on your phone. NOTE: To edit your speed dial, click the pencil icon to the right of your speed dial entry on the Cisco Self Care Portal webpage. Click the X button to delete your speed dial. -
Page 28: Do Not Disturb
Forward All soft key button on your phone or through your Jabber client. Do Not Disturb Step 1 From the Cisco Self Care Portal page, select IM & Availability from the top toolbar. Step 2 Under the Do Not Disturb heading, check the box to “Turn on”...
Need help?
Do you have a question about the 8941 and is the answer not in the manual?
Questions and answers