Table of Contents
Advertisement
Quick Links
WARNING: FIRE OR EXPLOSION HAZARD
Failure to follow safety warnings exactly could result in serious injury, death, or property damage.
- Do not store or use gasoline or other flammable vapors and liquids in the vicinity of this or any
other appliance.
- WHAT TO DO IF YOU SMELL GAS
• Do not try to light any appliance.
• Do not touch any electrical switch; do not use any phone in your building.
• Leave the building immediately
• Immediately call your gas supplier from a neighbor's phone. Follow the gas supplier's
instructions.
• If you cannot reach your gas supplier, call the fire department.
- Installation and service must be performed by a qualified installer, service agency or the gas supplier.
A barrier designed to reduce the risk of burns from
the hot viewing glass is provided with this appliance
and shall be installed for the protection of children
and other at-risk individuals.
This appliance may be installed in an aftermarket, permanently located, manufactured home
(USA only) or mobile home, where not prohibited by local codes.
This appliance is only for use with the type of gas indicated on the rating plate. A conversion
kit is supplied with the appliance.
INSTALLER: Leave this manual with the appliance.
CONSUMER: Retain this manual for future reference.
Travis Industries, Inc.
Copyright 2018, T.I.
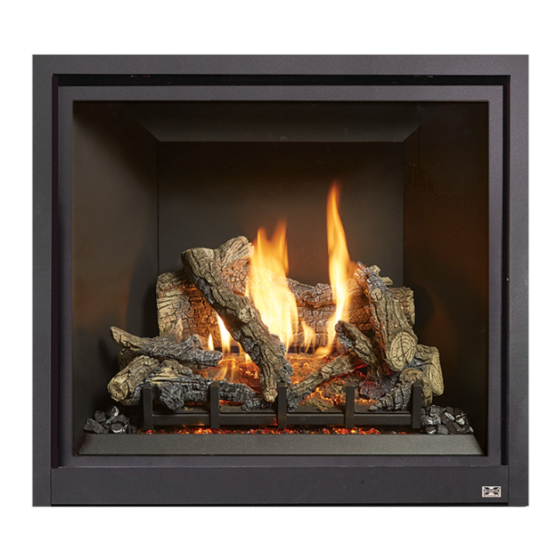
ProBuilder 36
CleanFace MV
Owner's Manual
HOT GLASS WILL CAUSE
BURNS
DO NOT TOUCH GLASS
UNTIL COOLED
NEVER ALLOW CHILDREN
TO TOUCH GLASS
12521 Harbour Reach Dr., Mukilteo, WA 98275
$10.00
Omni-Test Laboratories, Inc.
Operation
Maintenance
9/24/18
Tested and Listed by
Report # 0028GF115S
Portland, Oregon
ANSI Z21.88-2016
CSA 2.33-2016
CSA 2.17-2017
www.travisproducts.com
100-01490
Advertisement
Table of Contents

Subscribe to Our Youtube Channel
Related Manuals for FireplaceXtrordinair ProBuilder 36 CleanFace MV


Summary of Contents for FireplaceXtrordinair ProBuilder 36 CleanFace MV
- Page 1 ProBuilder 36 CleanFace MV Owner’s Manual WARNING: FIRE OR EXPLOSION HAZARD Failure to follow safety warnings exactly could result in serious injury, death, or property damage. - Do not store or use gasoline or other flammable vapors and liquids in the vicinity of this or any other appliance.
-
Page 2: Introduction
Table of Contents Introduction We welcome you as a new owner of a ProBuilder gas fireplace. This manual details operation and maintenance of this fireplace. Please familiarize yourself with the Owner's Manual before operating your heater and save the manual for future reference. Important Information No other ProBuilder gas fireplace has the same serial Register your warranty online at:... -
Page 3: Table Of Contents
Introduction Table of Contents Introduction ........... 2 Glass Frame Removal and Installation ....10 Log Set Installation ........13 Important Information ........2 Maintaining Your Heater's Appearance ..20 Installation Warnings ........2 Cleaning The Glass ..........20 ... - Page 4 Safety Precautions IF YOU SMELL GAS: * Do not light any appliance * Extinguish any open flame * Do not touch any electrical switch or plug or unplug anything * Open windows and vacate building * Call gas supplier from neighbor's house, if not reached, call fire department This unit must be installed by a qualified installer to prevent the possibility of an explosion.
- Page 5 Safety Precautions Do not place clothing or other Light the heater using the built-in flammable items on or near the igniter. Do not use matches or heater. Because this heater can any other external device to light be controlled by a thermostat your heater.
-
Page 6: Before You Begin
Operation Before You Begin Read this entire manual before you use your new fireplace (especially the section "Safety Precautions" on pages 4 & 5). Failure to follow the instructions may result in property damage, bodily injury, or even death. Location of Controls There is a door on the lower portion of the screen assembly to provide access to the manual controls on the fireplace. -
Page 7: Starting The Pilot
Operation Starting the Pilot Remove the glass frame before starting the pilot. The pilot flame is required to ignite the main burners (it also plays a safety role). It should be left on once lit. It will stay lit unless the gas control valve is turned to "OFF". -
Page 8: Starting The Heater For The First Time
Operation Starting the Heater for the First Time Burn the heater at a low setting with the blower off for an extended period (up to 48 hours). This will cure the painted surfaces. Fumes from the paint curing and oil burning off the steel will occur. This is normal. -
Page 9: Normal Operating Odors
Operation Normal Operating Odors This appliance has several areas that reach high temperatures. Dust or other particles on these areas may burn and create an odor. This is normal during start-up. You may notice the smell is more acute if the appliance was left idle for a long period. -
Page 10: Glass Frame Removal And Installation
Maintenance Glass Frame Removal and Installation A barrier designed to reduce the risk of burns from the hot viewing glass is provided with this appliance and shall be installed for the protection of children and other at-risk individuals. If the barrier becomes damaged, the barrier shall be replaced with the manufacturer’s barrier for this appliance. - Page 11 Maintenance Open the latches holding the glass frame in place (start with the bottom) - follow the directions shown to the right. Pliers may be used Latch Top of Firebox Glass Lift the glass frame up and pull it forward to remove. NOTE: You may need to lift the glass frame...
- Page 12 Maintenance The latch can come loose from glass frame anchor. This occurs when it is turned 1/4 turn when it is disengaged. Follow the directions below to re-install the latch if it becomes loose. © Travis Industries 9/24/18 - 1490 PB Lin MV Operation...
-
Page 13: Log Set Installation
Maintenance Log Set Installation Installation Warnings NOTE: Consult the installation manual for order of installation. If using propane (LP), convert the appliance before installing the log set. If using firebacks, install them prior to installing the log set. The logs are fragile, especially after being exposed to heat. ... - Page 14 Maintenance Rear Log The rear log has two pockets that insert over two tabs on the back burner (see photos below). Place the log in place and push it back. The log straddles the burner and does not cover any burner holes. Make sure the corner of the log is lined up with the rivet on the burner as shown in the lower left picture.
- Page 15 Maintenance Right Log The right log has a channel (C) on the bottom that fits over a ridge on the burner and a notch (D) that contacts the grate. Right Front Twig The right front twig has a hole for a locating pin on the bottom and a notch to rest on the grate at one end. Place twig over the pin and adjust so the notch is in contact with the grate as shown below.
- Page 16 Maintenance Right Rear Twig The right rear twig is shown below. It has a hole for a locating pin on the bottom. When in place, the front tip just barely rests on the right log as shown below. © Travis Industries 9/24/18 - 1490 PB Lin MV Operation...
- Page 17 Maintenance Center Log The right front twig has a hole for a locating pin on the bottom and a notch to rest on the grate at one end. Ember Chunk Identification There are (2) ember chunks, that look very similar, included with this log set. It is important that they are on the correct side of the burner or they may cause flame impingement.
- Page 18 Maintenance Left Ember Chunk The left ember chunk and has a flat bottom and charred end. The chunk fits behind the bar, 2 from the left, of the log grate. The charred end should be to the left. Place the ember chunk as shown below. Make sure the chunk is positioned so it does not cover any burner holes.
- Page 19 Maintenance Ember Installation A bag of embers is provided to further enhance the firebox. Place the embers on the firebox floor and on the burner. Do not place embers over any of the burner holes or air channels. Rock Wool Placement The included rock wool is placed on top of the burner to enhance the glow from the burner.
-
Page 20: Maintaining Your Heater's Appearance
Maintenance Maintaining Your Heater's Appearance The appliance must be completely cool prior to conducting service. Cleaning The Glass The glass may be cleaned with a non- abrasive cleaner. To clean the inside of the glass, simply remove the glass frame, place it on a non-scratching surface, and clean the surface. -
Page 21: Yearly Service Procedure
Maintenance Yearly Service Procedure WARNING: Failure to inspect and maintain the stove may lead to improper combustion and a potentially dangerous situation. We recommend the following procedures be done by a qualified technician. Shut off gas to the fireplace and let it cool for 15 minutes. Remove the glass. Inspect and operate the pressure relief mechanism to verify relief mechanisms are free from obstruction to operate. -
Page 22: Troubleshooting Table
Maintenance Troubleshooting Table Problem: Possible Cause: Don't Call for Service Until You: A gas shut off valve is turned off Check all gas shut off valves Pilot Will Not Light The gas control knob isn't turned to "PILOT" See "Starting the Pilot Light" Step C The valve control knob isn't pushed in See "Starting the Pilot Light"... -
Page 23: Replacement Parts List
Maintenance Replacement Parts List Caution: Use only Travis Industries replacement parts. Do not use substitute materials. Warning: Do not operate appliance with the glass front removed, cracked, or broken. Replacement of the glass should be done by a licensed or qualified service person. GLASS w/FRAME 270-01009 SCREEN BARRIER, FRONT... -
Page 24: Wiring Diagram
Maintenance Wiring Diagram Caution: Label all wires prior to disconnection when servicing controls. Wiring errors can cause improper and dangerous operation. Thermopile Thermocouple Piezo Igniter On/Off Switch (on fireplace) Brown Copper Co-Axial Wire Orange Spark Electrode White Pilot Hood Optional Wall Switch, Thermostat, or Remote Control Optional Blower Wiring... -
Page 25: Safety Label
Safety Label Safety Label The safety (listing) label is attached to the operating tag (chained to the heater near the gas control valve). A copy is shown below © Travis Industries 9/24/18 - 1490 PB Lin MV Operation... -
Page 26: Conditions & Exclusions
Index Register your TRAVIS INDUSTRIES, INC. Limited 7 Year Warranty online at traviswarranty.com, or complete the enclosed Warranty card and mail it within ten (10) days of the appliance purchase date to: TRAVIS INDUSTRIES, INC., 4800 Harbour Pointe Blvd. SW, Mukilteo, WA 98275. TRAVIS INDUSTRIES, INC. warrants this gas appliance (appliance is defined as the equipment manufactured by Travis Industries, Inc.) to be defect-free in material and workmanship to the original purchaser from the date of purchase as follows: Check with your dealer in advance for any costs to you when arranging a warranty call. - Page 27 Limited 7 Year Warranty © Travis Industries 9/24/18 - 1490 PB Lin MV Operation...
-
Page 28: Index
Index Index Before You Begin ..........6 Normal Operating Odors ........9 Features ............. 3 Power Outages ..........9 Glass Frame Removal and Installation .... 10 Replacement Parts List ........23 Heating Specifications ........3 Rock Wool Placement ........19 Important Information .........
Need help?
Do you have a question about the ProBuilder 36 CleanFace MV and is the answer not in the manual?
Questions and answers