
Subscribe to Our Youtube Channel
Related Manuals for SENSECAP S210X


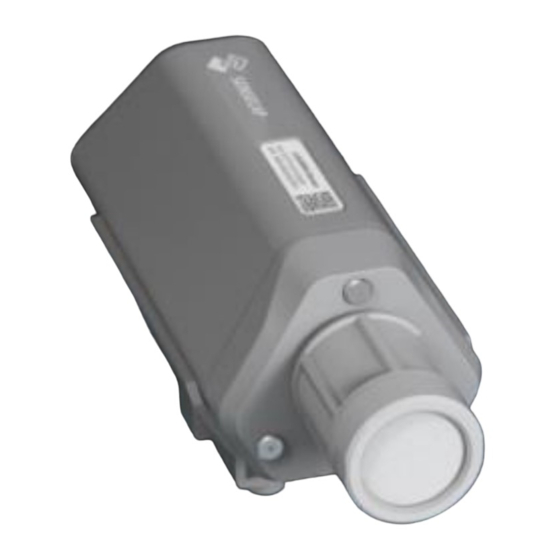
Summary of Contents for SENSECAP S210X
- Page 1 T H E N E W G E N E R A T I O N L O R A W A N S E N S O R S O F S E N S E C A P S210X Sensors User Guide...
-
Page 2: Table Of Contents
6.2.2 Preparation ................................22 6.2.3 Bind Sensor to SenseCAP Portal......................23 6.2.4 Setup the Sensor..............................25 6.2.5 Set Frequency of Sensor via SenseCAP Mate App ..............26 6.2.6 Check Data on SenseCAP Portal ......................27 6.3 Connect to SenseCAP with private TTN ................29 6.3.1 Quick Start..................................29... - Page 3 8. Connect to The Things Network ................32 9. Payload Decoder ........................33 9.1 Decoder Code ........................... 33 9.2 Packet Parsing ..........................33 9.2.1 Packet Initialization .............................33 9.3 Data Parsing Example ....................... 34 9.3.1 Measurements List..............................34 9.3.2 Example – S2101 Air Temperature and Humidity Sensor............ 36 9.3.1 Example –...
- Page 4 13.4 S2106: Calibration of pH......................57 14. Trouble Shooting ........................60 14.1 Sensors can’t join LoRa network, how to do? ............60 14.2 Why is the new sensor’s battery not 100%? ............... 60 14.3 Battery Life Prediction ......................60 14.4 Support............................. 60 14.5 Document Version ........................
-
Page 5: Product Introduction
API for device & data management. The next generation of SenseCAP LoRaWAN sensors, the S210X series offers users’ industrial long-distance data acquisition via LoRa. The S210x series is suitable for a wide variety of different industries such as smart agriculture, smart buildings and industrial control. -
Page 6: Part List
IoT into the Wild Part List Before installing, please check the part list to ensure nothing is missing. Picture Name Quantity Sensor Node Bracket Quick Start Guide KA4*20mm Self-drilling Screw... -
Page 7: Key Parameters Of The Sensor
IoT into the Wild Key Parameters of the Sensor Using the LoRaWAN protocol generally involves the following parameters. Parameters Description LoRaWAN v1.0.3 Version OTAA (Default) Join Type ABP (It can be modified via App) Unique identification of device, one of the join network Device EUI parameters on OTAA mode. -
Page 8: Led Of Sensor Working Status
IoT into the Wild LED of Sensor Working Status You can refer to the LED indicator for the Sensor Node for its working status. Please see the status explanations in the chart below: Actions Description Green LED Status LED flashes at 1s frequency, waiting for Bluetooth connection. - Page 9 IoT into the Wild Waiting for Bluetooth connection: LED flashes at 1s frequency 2. Enter configuration mode after Bluetooth Press and hold for 3s Activate Bluetooth again connection is successful: LED flashes at 2s frequency If Bluetooth is not connected within 1 minute, the device will reboot and join LoRa network.
-
Page 10: Sensecap Mate App
SenseCAP Mate App Download App As a tool, SenseCAP Mate App is used to config LoRa parameters, set interval, bind devices to your account and check device basic information. For iOS, please search for “SenseCAP Mate” in the App Store and download For Android, please search for “SenseCAP Mate”... -
Page 11: Connect To Sensor To App
1) Select register account, enter email information and click "register", the registered email will be sent to the user's mailbox. 2) Open the "SenseCAP…"Email, click the jump link, fill in the relevant information, and complete the registration. 3) Return to the login interface and complete the login. - Page 12 IoT into the Wild 2) Please select “S210X Sensor”, it includes S210X series products. Please click the “Setup” button to turn on Bluetooth and click “Scan” to start scanning the sensor's Bluetooth. 3) Select the Sensor by S/N (S/N is on the front label of the sensor). Then, the...
-
Page 13: Configure Parameters Through App
2s frequency. Configure parameters through App 5.3.1 Select the Platform and Frequency S210x Sensors are manufactured to support universal frequency plan from 863MHz ~928MHz in one SKU. That is to say, every single device can support 7 frequency plans. - Page 14 When there is the Helium network around the user, data can be uploaded using sensors. Devices run on a private SenseCAP for Helium Helium console of SenseCAP. Users do not need to create devices on Helium console, right out of the box. Helium Connect Sensor to public Helium console.
- Page 15 IoT into the Wild We built a private Helium Console with an embedded SenseCAP Portal. When users get the SenseCAP sensors, you can use it by scanning the code and binding it to the Portal. “SenseCAP for Helium” is selected by default. The device runs in a fixed main frequency and sub-band, refer to Helium Frequency Plan (https://docs.helium.com/lorawan-on-helium/frequency-plans/...
- Page 16 5) Other Platform: When you use other LoRaWAN network server, please select Other Platform. At this point, you need to determine the sensor frequency band according to the gateway frequency and sub-band. S210x Sensors support the following frequency plan:...
- Page 17 Note2: 1) When using the SenseCAP platform, the EUI, APP EUI and APP Key are fixed and are the same as the sensor label. 2) When the sensor is selected to be used with a public platform such as Helium...
-
Page 18: Set The Interval
Uplink Interval Unit: minutes, number from 1 to 1440. Note: The SenseCAP portal has a limit on uplink interval: minimum interval is 5 minutes. The interval using the other platforms ranges from 1 to 1440 minutes. 5.3.3 Set the EUI and Key The device uses OTAA to join the LoRaWAN network by default. -
Page 19: Set The Packet Policy
IoT into the Wild 5.3.4 Set the Packet Policy The sensor uplink packet strategy has three modes. Parameter Description 2C+1N (2 confirm packets and 1 none-confirm) is the best strategy, the mode can minimize the packet loss rate, 2C+1N (default) however the device will consume the most data packet in TTN, or date credits in Helium network. -
Page 20: Restore Factory Setting
The factory defaults to a fixed value. 5.3.6 Restore Factory Setting When selecting the SenseCAP platform, you must use the fixed EUI/App EUI/App Key. Therefore, you need to restore the factory Settings before switching back to the SenseCAP platform from other platforms. -
Page 21: Connect To The Sensecap Portal
Connect to the SenseCAP Portal SenseCAP Portal The main function of the SenseCAP Portal is to manage SenseCAP devices and to store data. It is built on Azure, a secure and reliable cloud service from Microsoft. You can apply for an account and bind all devices to this account. SenseCAP provides the web portal and API. -
Page 22: Other Functions
6.1.3 API Instruction SenseCAP API is for users to manage IoT devices and data. It includes 3 types of API methods: HTTP protocol, MQTT protocol, and Websocket protocol. With HTTP API, users can manage LoRa devices, to get raw data or historical ... -
Page 23: Connect To Sensecap With Helium Network
IoT into the Wild Connect to SenseCAP with Helium Network 6.2.1 Quick Start Follow this process to quickly use the sensor, see the following section for details. 6.2.2 Preparation 1) SenseCAP Mate App Download the App, please refer to section 5 for using. -
Page 24: Bind Sensor To Sensecap Portal
You can purchase M1, M2 gateways to cover your surroundings with the Helium network: https://www.sensecapmx.com/ 6.2.3 Bind Sensor to SenseCAP Portal Please open SenseCAP Mate App. (1) Scan QR Code 1) Click “Add device” on the upper-right corner of device page to enter the device binding page. - Page 25 IoT into the Wild (2) Manually fill in the EUI If the QR code sticker is damaged, you can manually fill in the EUI of the device to bind the device to your account. Please make sure you put in the EUI in the format suggested by the system and then click “confirm”.
-
Page 26: Setup The Sensor
IoT into the Wild 6.2.4 Setup the Sensor 1) Open the SenseCAP Mate App 2) Press button and hold for 3 seconds, the LED will flash at 1s frequency. 3) Please click the “Setup” button to turn on Bluetooth and click “Scan” to start scanning the sensor's Bluetooth. -
Page 27: Set Frequency Of Sensor Via Sensecap Mate App
6.2.5 Set Frequency of Sensor via SenseCAP Mate App Set the corresponding frequency band based on the frequency band of the gateway. Please refer to section 5 for detail. 1) Click the “Setting” and select the platform is “SenseCAP for Helium”. -
Page 28: Check Data On Sensecap Portal
6) After joining the network successfully, LED flashes fast for 2s. 6.2.6 Check Data on SenseCAP Portal On the SenseCAP App or the website http://sensecap.seeed.cc/ , you can check the device online status and the latest data. In the list for each Sensor, you can... - Page 29 IoT into the Wild...
-
Page 30: Connect To Sensecap With Private Ttn
Download the App, please refer to section 5 for using. 2) SenseCAP Outdoor Gateway Now, the sensor needs to be used with the SenseCAP Outdoor Gateway (https://www.seeedstudio.com/LoRaWAN-Gateway-EU868-p-4305.html) to transmit data to the SenseCAP Portal. a) Setup the Gateway, connect to power cable and Internet. -
Page 31: Bind Sensor To Sensecap Portal
6.3.5 Set Frequency of Sensor via SenseCAP Mate App Set the corresponding frequency band based on the frequency band of the gateway. Please refer to section 5 for detail. 1) Click the “Setting” and select the platform is “SenseCAP for The Things Network”. -
Page 32: Check Data On Sensecap Portal
5) When the device is disconnected from Bluetooth, the LED lights up for 5 seconds and then flashes as a breathing light. 6) After joining the network successfully, LED flashes fast for 2s. 6.3.6 Check Data on SenseCAP Portal Please refer to the section 6.2.6... -
Page 33: Connect To Helium Network
IoT into the Wild Connect to Helium Network Please refer to the manual to connect sensors to Helium public console: https://files.seeedstudio.com/products/SenseCAP/S210X/How%20to%20Connect% 20SenseCAP%20S210X%20to%20Helium%20Network.pdf Connect to The Things Network Please refer to this manual: https://files.seeedstudio.com/products/SenseCAP/S210X/How%20to%20Connect% 20SenseCAP%20S210X%20to%20The%20Things%20Network.pdf Please refer to the link to use the TTN platform: The Things Network website: https://www.thethingsnetwork.org... -
Page 34: Payload Decoder
Decoder/blob/main/decoder_datacake.js Packet Parsing 9.2.1 Packet Initialization After being powered on or reboot, SenseCAP Sensors will be connected to the network using the OTAA activation method. Each Sensor Node will send data packets to the server, including the following data: Initial packets(no need to learn about these initial packets)... -
Page 35: Data Parsing Example
IoT into the Wild Measurement data packets The only thing we should pay attention to is the sensor measurement data packets. Packet Structure The structure of the frame is shown in the image below. 1 byte for channel,default as 1, means the sensor has been well connected. 2 bytes for frame type, in this case, it will be 0110 and 0210, means temperature value and humidity value 4 bytes for content, is the sensor value with CRC... - Page 36 IoT into the Wild Soil Moisture 0x1007 4103 Soil EC (Electrical 0x100C 4108 0.01 dS/m Conductivity) For the complete list, see: https://sensecap-docs.seeed.cc/measurement_list.html...
-
Page 37: Example - S2101 Air Temperature And Humidity Sensor
IoT into the Wild 9.3.2 Example – S2101 Air Temperature and Humidity Sensor Air Temperature and Humidity Sensor measurement packet: 01 0110 B0680000 01 0210 88F40000 8CFF Part Value Raw Data Description 01 is the channel number. 0110 is 0x1001 ( little-endian byte order), which is the measurement ID for air temperature. -
Page 38: Example - S2102 Light Intensity Sensor
IoT into the Wild 9.3.1 Example – S2102 Light Intensity Sensor Light Intensity Sensor measurement packet: 01 0310 A8550200 E3E9 Part Value Raw Data Description 01 is the channel number. 0310 is 0x1003 ( little-endian byte order ) , which is the measurement ID 01 0310 A8550200 for Light Intensity. -
Page 39: Example - S2103 Co2, Temperature And Humidity Sensor
IoT into the Wild 9.3.2 Example – S2103 CO2, Temperature and Humidity Sensor CO2, Temperature and Humidity Sensor measurement packet: 01 0410 80140700 01 0110 F4650000 01 0210 7C7D0100 3C4D Part Value Raw Data Description 01 is the channel number. 0410 is 0x1004 (... -
Page 40: Example - S2104 Soil Moisture And Temperature Sensor
IoT into the Wild 9.3.3 Example – S2104 Soil Moisture and Temperature Sensor Soil Moisture and Temperature Sensor measurement packet: 01 0610 245E0000 01 0710 BCB10000 A3D9 Part Value Raw Data Description 01 is the channel number. 0610 is 0x1006 ( little-endian byte order), which is the measurement ID for soil temperature. -
Page 41: Example - S2105 Soil Moisture, Temperature And Ec Sensor
IoT into the Wild 9.3.4 Example – S2105 Soil Moisture, Temperature and EC Sensor Soil Moisture, Temperature and EC Sensor measurement packet: 01 0610 5C5D0000 01 0710 48A30000 01 0C10 B4000000 DD0A Part Value Raw Data Description 01 is the channel number. 0610 is 0x1006 (... -
Page 42: Battery Information
IoT into the Wild Part Value Raw Data Description 01 is the channel number. 0110 is 0x1001 ( little-endian byte order), which is the measurement ID for air temperature. 01 0110 72650000 Temperature 72650000 is actually 0x00006572, whose equivalent decimal value is 25970. - Page 43 IoT into the Wild Example: Battery & Soil Moisture and Temperature Sensor(S2104) measurement packet: 00070064000500010610B45F0000010710A41F00003259 Part Value Raw Data Description 00 is the channel number. 0700 is 0x0007 ( little-endian byte order), which is the measurement ID for battery. 6400 is 0x0064 ( little-endian byte Battery 00 0700 6400 0500 order )...
-
Page 44: Lorawan Downlink Command
IoT into the Wild 10. LoRaWAN Downlink Command 10.1 Set the Data Uplink Interval (1) Using the Network Server’s portal or API to send downlink command, then the Node will respond to the ack. The downlink command takes effect and responds the next time the node uploads data. - Page 45 IoT into the Wild Example: Set the Node’s data interval is 10 minutes. Send the downlink command (HEX) via FPort=2: 00 89 00 11 22 0A 00 38 B4 crc- crc- 0x00 0x89 0x00 prepareId_L prepareId_H duty_L duty_H ACK Response: 00 1F 00 11 22 01 00 78 0F 0x00 0x1F...
-
Page 46: Reboot The Device
IoT into the Wild 10.2 Reboot the device FPort = 2 Command: 00C800000000002B26 10.3 How to send downlink Example: use the Helium Console to send... -
Page 47: Error Code
IoT into the Wild Error code 11.1 Details If you’re experiencing these error code, you could contact us for debugging: sensecap@seeed.cc Type Error code(Dec) SENSOR_NOT_RESPONSE 2000001 SENSOR_DATA_HEAD_ERROR 2000002 SENSOR_ARG_INVAILD 2000003 SENSOR_DATA_ERROR_UNKONW 2000257 Example: Raw data E8973577 is actually 0x773597E8, whose equivalent decimal value is... -
Page 48: Device Installation
IoT into the Wild 12. Device Installation 12.1 The Do's and Don'ts Do not remove the sensor probe. Otherwise, it will cause leaks and wire fracture. If accidentally unscrewed, it needs to be tightened to ensure waterproof performance. ( like the ①②) Do not open the inside of the sensor unless the battery needs to be replaced. -
Page 49: Installing Bracket
IoT into the Wild 12.2 Installing Bracket 12.2.1 Installing the Sensor Bracket Specially designed for installing SenseCAP Sensors, the bracket is a sliding cap. With designated screw-holes, the bracket helps fasten the Sensor Node firmly onto a pole or a wall. -
Page 50: Mount On Pole And Wall
IoT into the Wild 12.2.1 Mount on Pole and Wall 12.2.2 Antenna Installation Direction When installing, pay attention to the antenna installation direction for better signal strength and longer communication range between sensor and gateway. Aim the antenna towards the gateway and install both sensor and gateway at higher elevations to reduce obstructions in line of sight between them. -
Page 51: Installation Considerations For Sensors
IoT into the Wild 12.3 Installation Considerations for Sensors 12.3.1 Install the S2101/S2103 Temperature and humidity sensors are generally installed on walls or pillars with the probe facing downwards. If the device is installed outdoors, it is important to avoid direct sunlight as it can cause thermal effects and result in higher temperature readings. -
Page 52: Install The S2104/S2105
IoT into the Wild Note that: 1) There should be no obstructions above or in front of the sensor facing the light source. 2) Orienting the probe directly towards the light source during installation can improve accuracy. 12.3.1 Install the S2104/S2105 Soil sensors need to be installed into the soil and ensure good contact between the sensor and soil. -
Page 53: Replace The Battery
IoT into the Wild 12.4 Replace the Battery 12.4.1 How to Buy the Battery We suggest buying it from Amazon. 1) EEMB ER34615: Click here 2) Search the key word: LiSOCI2 ER34615 battery. Compare the batteries that meet the following parameters. The most important thing is to match the voltage. - Page 54 IoT into the Wild The sensor and PCBA are connected by wire, please disassemble carefully. 2) Install a new battery. Note: Pay attention to the positive and negative terminals of the battery. 3) Install screws.
- Page 55 IoT into the Wild Note: During the installation, ensure that the waterproof washer is properly installed and the screws are locked; otherwise, water will flow into the device.
-
Page 56: Calibration Sensor
IoT into the Wild 13. Calibration Sensor 13.1 S2101/S2103: Temperature and Humidity The sensor uses high-precision chips and complex accuracy compensation algorithms, so annual drift is very small. In most cases, users do not need to calibrate the sensor. Long-term drift: typ. value <0.03 °C/y, Max. value is < 0.04°C/y 13.2 S2103: Calibration of CO2 The CO2 sensor is calibrated using single-point calibration. - Page 57 IoT into the Wild 3) Input the CO2 value of current CO2 level. 4) If you click to get the current measurement value, please wait for 2 minutes as the sensor needs to be warm-up before accurate measurements can be obtained.
-
Page 58: S2104 And S2105: Calibration Of Soil Moisture And Ec
We initially opened calibration options, but due to user error operation leading to measurement algorithm errors, we have disabled user calibration functions. If special calibration is required, users need to contact the SenseCAP team. Alternatively, users can choose to use the S2100 Data Logger with RS485 soil sensors for calibration purposes. - Page 59 IoT into the Wild Graduated Cylinder 1) Use the app to connect to Bluetooth and open the configuration page. 2) Prepare the standard liquid and pour an appropriate amount of the liquid into the graduated cylinder. Insert the pH probe electrode into the liquid in the graduated cylinder.
- Page 60 IoT into the Wild 3) Click the Calibrate button and select the corresponding pH value. 4) Click icon to measure the current pH Value. Click “Confirm” to complete the calibration. 5) Calibrate the remaining two liquid in the same way.
- Page 61 The power consumption table is for reference only. The battery life depends on various factors, such as frequency band, distance from the gateway, and ambient temperature. https://files.seeedstudio.com/products/SenseCAP/S210X/SenseCAP_S21XX_Sensor _ Battery_Life_Prediction.xlsx 14.4 Support Support is provided Monday to Friday, from 09:00 to 18:00 GMT+8. Due to different time zones, we cannot offer live support.
- Page 62 IoT into the Wild V1.0.3 11/11/2022 Add Platform in 6.2,6.3 V1.0.4 6/1/2023 Add calibration method Jenkin Lu V1.0.5 6/25/2023 Add Error code...
Need help?
Do you have a question about the S210X and is the answer not in the manual?
Questions and answers