Daikin FTXM28PVMK Operation Manual
Hide thumbs
Also See for FTXM28PVMK:
- Service manual (119 pages) ,
- Service manual (33 pages) ,
- Service manual (31 pages)

Subscribe to Our Youtube Channel
Related Manuals for Daikin FTXM28PVMK


Summary of Contents for Daikin FTXM28PVMK
- Page 1 DAIKIN ROOM AIR CONDITIONER OPERATION MANUAL Enjoy year-round comfort. Enjoy year-round comfort. Enjoy year-round comfort. Enjoy year-round comfort. Enjoy year-round comfort. MODELS FTXM28PVMK FTKM28PVMK...
- Page 2 Features Enhanced comfort and energy savings INTELLIGENT EYE The INTELLIGENT EYE sensor detects human movement in a room. If no one is in the room for more than 20 minutes, the operation automatically changes to energy saving operation. Page 15 WEEKLY TIMER Up to 4 timer settings can be saved for each day of the week according to your family’s life style. The WEEKLY TIMER allows you to set on/off times and the desired temperature. Page 21 Other functions COMFORT AIRFLOW OUTDOOR UNIT QUIET The airfl ow direction is upward while in OUTDOOR UNIT QUIET operation COOL operation, and downward while assures a low noise level of the in HEAT operation. This function outdoor unit. This function is useful prevents cold or warm air from blowing to maintain a quiet neighbourhood. directly on your body. Page 15 Page 18...
-
Page 3: Table Of Contents
Contents „ Read Before Operation Safety Precautions .......... Names of Parts ..........Preparation Before Operation ......„ Basic Operation AUTO · DRY · COOL · HEAT · FAN Operation ........Adjusting the Airflow Direction ... Adjusting the Airflow Rate ....„ Useful Functions COMFORT AIRFLOW / INTELLIGENT EYE Operation ... POWERFUL Operation ...... ECONO / OUTDOOR UNIT QUIET Operation ........... „ TIMER Operation ON/OFF TIMER Operation .... -
Page 4: Read Before Operation
Read Before Operation Safety Precautions Read the precautions in this manual carefully This appliance is filled with R32. before operating the unit. • Keep this manual where the user can easily find it. • The precautions described herein are classified as WARNING and CAUTION. They both contain important information regarding safety. Be sure to observe all precautions without fail. WARNING CAUTION Failure to follow these instructions properly may result in Failure to follow these instructions properly may result in property damage or personal injury, which may be serious personal injury or loss of life. depending on the circumstances. Be sure to follow the Be sure to establish an earth Never attempt. instructions. connection. • After reading, keep this manual in a convenient place so that you can refer to it whenever necessary. If the equipment is transferred to a new user, be sure also to hand over the manual. WARNING • Do not use means to accelerate the defrosting process or to clean, other than those recommended by the manufacturer. - Page 5 Read Before Operation CAUTION • Do not block the air inlets nor outlets. Impaired airflow may result in insufficient performance or trouble. • Do not sit on the outdoor unit, put things on the unit, or pull the unit. Doing so may cause accidents, such as falling or toppling down, thus resulting in injury, product malfunctioning, or product damage. • Do not place objects that are susceptible to moisture directly beneath the indoor or outdoor units. Under certain conditions, condensation on the main unit or refrigerant pipes, air filter dirt or drain blockage may cause dripping, resulting in fouling or failure of the object concerned. • After prolonged use, check the unit stand and its mounts for damage. If they are left in a damaged condition, the unit may fall and cause injury. • To avoid injury, do not touch the air inlet or aluminium fins of the indoor or outdoor units. • The appliance is not intended for use by unattended young children or infirm persons. Impairment of bodily functions and harm to health may result. • Children should be supervised to ensure that they do not play with the unit or its remote controller. Accidental operation by a child may result in impairment of bodily functions and harm health. • Avoid impacts to the indoor and outdoor units, or otherwise product damage may result. • Do not place flammable items, such as spray cans, within 1m of the air outlet. The spray cans may explode as a result of hot air from the indoor or outdoor units. • Be careful not to let pets urinate on the air conditioner. Urination on the air conditioner may result in electric shocks or fire. • Do not wash the air conditioner with water, as this may result in electric shocks or fire. • Do not place water containers (vases, etc.) above the unit, as this may result in electric shocks or fire hazards if they should topple over. • To avoid oxygen depletion, ensure that the room is adequately ventilated if equipment such as a burner is used together with the air conditioner. • Before cleaning, be sure to stop unit operation and turn off the circuit breaker. Otherwise, an electric shock and injury may result.
-
Page 6: Names Of Parts
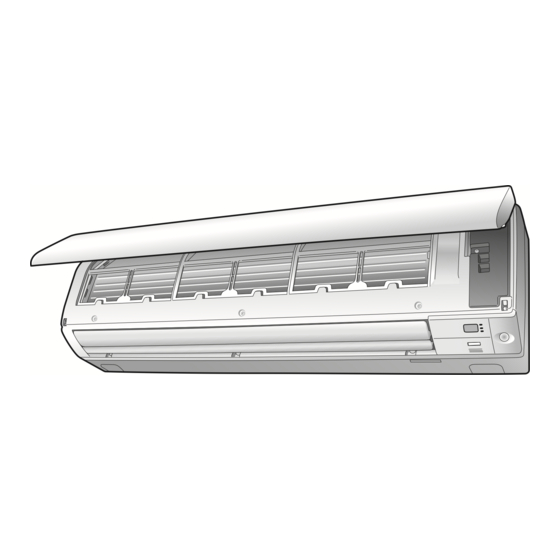
Read Before Operation Names of Parts Indoor Unit Front panel Air inlet Panel tab INTELLIGENT EYE sensor • Detects the movements of people and automatically switches between normal Model name Air outlet operation and energy saving plate operation. Page 15,16 Louvres (vertical blades) Indoor temperature sensor • The louvres are inside of the air outlet. Page 13 • Detects the air temperature around the unit. - Page 7 Read Before Operation „ Open the front panel Air fi lter Titanium apatite photocatalytic air-purifying fi lter Outdoor Unit • The appearance of the outdoor unit may differ between different models. Air inlet Outdoor temperature sensor (back) (back and side) Drain hose Earth terminal (inside) Refrigerant pipes and Air outlet inter-unit wire Model name plate...
- Page 8 Read Before Operation Names of Parts Remote Controller Signal transmitter Display (LCD) Receiver • Displays the current settings. (In this illustration, each section is • To use the remote controller, aim the shown with all its displays on for the transmitter at the indoor unit. If there is purpose of explanation.) anything blocking the signals between the unit and the remote controller, such as a curtain, the unit may not operate. • The maximum transmission distance is about 7m. TEMPERATURE adjustment button • Changes the temperature setting. Page 12 FAN setting button • Selects the airfl ow rate setting. Page 14 ON/OFF button • Press this button once to start...
- Page 9 Read Before Operation „ Open the front cover MODE selector button • Selects the operation mode. (AUTO/DRY/COOL/HEAT/FAN) Page 11 ECONO/QUIET button • ECONO/OUTDOOR UNIT QUIET operation. Page 18 COMFORT/SENSOR SWING button button • Adjusts the airfl ow direction. • COMFORT AIRFLOW and INTELLIGENT EYE operation. Page 13 Page 15 : WEEKLY button OFF TIMER button (NIGHT SET mode) : PROGRAMME button...
-
Page 10: Preparation Before Operation
Read Before Operation Preparation Before Operation To insert the batteries Slide the front cover to take it off. Position – correctly! Insert 2 dry batteries AAA.LR03 (alkaline). Replace the front cover. To fix the remote controller holder to a wall Remote controller Choose a place from where the signals reach the unit. - Page 11 Read Before Operation To set the clock Press “ ” is displayed on the LCD. “ ” and “ ” blink. Press to set the current day of the week. Press “ ” blinks. Press to set the clock to the present time. • Holding down or rapidly increases or decreases the displayed time. Press • Point the remote controller at the indoor unit when pressing the buttons. “ ” blinks. NOTE Note on setting the clock • If the indoor unit’s internal clock is not set to the correct time, the ON/OFF TIMER and WEEKLY TIMER will not operate punctually.
-
Page 12: Basic Operation
Basic Operation AUTO · DRY · COOL · HEAT · FAN Operation The air conditioner operates with the operation mode of your choice. From the next time on, the air conditioner will operate with the same operation mode. To start operation Press and select a operation mode. • Each pressing of the button changes the mode setting in sequence. HEAT PUMP model AUTO COOL HEAT COOLING ONLY model COOL Press • “ ” is displayed on the LCD. • The OPERATION lamp lights green. Display To stop operation Press again. - Page 13 Basic Operation To change the temperature setting Press • Press to raise the temperature and press to lower the temperature. COOL operation HEAT operation AUTO operation DRY or FAN operation The temperature setting cannot be 18 – 32°C 10 – 30°C 18 – 30°C changed. Tips for saving energy Keeping the temperature setting at a moderate level helps save energy. • Recommended temperature setting − For cooling: 26-28°C − For heating: 20-24°C...
-
Page 14: Adjusting The Airflow Direction
Basic Operation Adjusting the Airfl ow Direction You can adjust the airfl ow direction to increase your comfort. CAUTION • Always use a remote controller to adjust the angles of the fl aps and louvres. − I f you attempt to move the fl aps and louvres forcibly by hand when they are swinging, the mechanism may be damaged. − Inside the air outlet, a fan is rotating at a high speed. To start auto swing Up and down airfl ow direction Press • “ ” is displayed on the LCD. • The fl aps (horizontal blades) will begin to swing. Right and left airfl ow direction Press • “ ... -
Page 15: Adjusting The Airflow Rate
Basic Operation Adjusting the Airfl ow Rate You can adjust the airfl ow rate to increase your comfort. To adjust the airfl ow rate setting Press • Each pressing of changes the airfl ow rate setting in sequence. AUTO Indoor unit quiet Airflow rate 1-5 (Low to High) • When the airfl ow is set to “ ”, quiet operation starts and noise from the indoor unit will become quieter. • In the quiet operation mode, the airfl ow rate is set to a weak level. AUTO, COOL, HEAT and FAN operation DRY operation The airfl ow rate setting cannot be... -
Page 16: Useful Functions
Useful Functions COMFORT AIRFLOW / INTELLIGENT EYE Operation COMFORT AIRFLOW operation: The airfl ow direction is upward while in COOL operation, and downward while in HEAT operation. This function prevents cold or warm air from blowing directly on the occupants in the room. INTELLIGENT EYE operation: The INTELLIGENT EYE sensor detects human movement. If no one is in the room for more than 20 minutes, the operation auto- matically changes to energy saving operation. CAUTION • Do not place large objects near the INTELLIGENT EYE sensor. Also keep heating units and humidifi ers outside the sensor’s detection area. This sensor can detect undesirable objects. • Do not hit or violently push the INTELLIGENT EYE sensor. This can lead to damage and malfunction. To start operation Press and select the desired mode. • Each time is pressed, a different setting option is displayed on the LCD. • The INTELLIGENT EYE lamp lights green. Display • By selecting “ ... - Page 17 Useful Functions INTELLIGENT EYE operation is useful for energy saving „ People is detected in the sensing area. „ No people are detected in the sensing area. The air conditioner is in normal operation while the The air conditioner will switch to energy-saving mode after sensor is detecting human movement. 20 minutes. Energy saving operation • If no presence detected in the room for 20 minutes, energy saving operation starts automatically. • This operation changes the temperature by –2°C in HEAT / +2°C in COOL / +2°C in DRY operation from the set temperature. When the room temperature exceeds 30°C, the operation changes the temperature by +1°C in COOL / +1°C in DRY operation from the set temperature. • This operation decreases the airflow rate slightly in FAN operation only. NOTE Note on COMFORT AIRFLOW operation • The airflow rate will be set to AUTO. If the up and down airflow direction is selected, COMFORT AIRFLOW operation will be cancelled.
-
Page 18: Powerful Operation
Useful Functions POWERFUL Operation POWERFUL operation quickly maximizes the cooling (heating) effect in any operation mode. In this mode, the air conditioner operates at maximum capacity. To start POWERFUL operation Press during operation. • “ ” is displayed on the LCD. • POWERFUL operation ends in 20 minutes. Then the system automatically operates again with the previous settings which were used before POWERFUL operation. To cancel POWERFUL operation Press again. • “ ” disappears from the LCD. NOTE Notes on POWERFUL operation • Pressing causes the settings to be cancelled, and “ ... -
Page 19: Econo / Outdoor Unit Quiet Operation
Useful Functions ECONO / OUTDOOR UNIT QUIET Operation ECONO operation enables efficient operation by limiting the maximum power consumption. This function is useful to prevent the circuit breaker from tripping when the unit operates alongside other appliances on the same circuit. OUTDOOR UNIT QUIET operation lowers the noise level of the outdoor unit by changing the frequency and fan speed of the outdoor unit. This function is conve- nient during the night-time operation. To start operation Press and select the desired mode. • Each time is pressed, a different setting option is displayed on the LCD. blank ECONO OUTDOOR UNIT Combination No Setting QUIET To cancel operation Press until no icon is displayed. -
Page 20: Timer Operation
TIMER Operation ON/OFF TIMER Operation Timer functions are useful for automatically switching the air conditioner on or off at night or in the morning. You can also use the ON TIMER and OFF TIMER together. To use ON TIMER operation • Check that the clock is correct. If not, set the clock to the present time. Page 10 Press “ ” is displayed on the LCD. “ ” blinks. • “ ” and day of the week disappear from the LCD. Press until the time setting reaches the point you like. • Each pressing of either button increases or decreases the time setting by 10 minutes. Holding down either button changes the setting rapidly. Press again. • “ ” and setting time are displayed on the LCD. • The TIMER lamp lights orange. - Page 21 TIMER Operation To use OFF TIMER operation • Check that the clock is correct. If not, set the clock to the present time. Page 10 Press “ ” is displayed on the LCD. “ ” blinks. • “ ” and day of the week disappear from the LCD. Press until the time setting reaches the point you like. • Each pressing of either button increases or decreases the time setting by 10 minutes. Holding down either button changes the time setting rapidly. Press again. • “ ” and setting time are displayed on the LCD. • The TIMER lamp lights orange. Display To cancel OFF TIMER operation Press • “ ...
-
Page 22: Weekly Timer Operation
TIMER Operation WEEKLY TIMER Operation Up to 4 timer settings can be saved for each day of the week. This is convenient to adapt the WEEKLY TIMER to your family’s life style. Setting example of the WEEKLY TIMER T he same timer settings are used from Monday through Friday, while different timer settings are used for the weekend. [Monday] Make timer settings for programmes 1-4. Page 22 Programme 1 Programme 2 Programme 3 Programme 4 25°C 27°C 6:00 8:30 17:30 22:00 [Tuesday] Use the copy mode to make settings for Tuesday to Friday, because these settings are the same as those for Monday. Page 24 [Friday] Programme 1 Programme 2 Programme 3 Programme 4... - Page 23 TIMER Operation To use WEEKLY TIMER operation Setting mode • Make sure the day of the week and time are set. If not, set the day of the week and time. Page 10 Programme 1 Programme 2 Programme 3 Programme 4 [Monday] 25°C 27°C 6:00 8:30 17:30 22:00 Setting Displays Day and number ON/OFF Time Temperature Press • The day of the week and the reservation number of the current day will be displayed. • 1 to 4 settings can be made per day. Press to select the desired day of the week and reservation number.
- Page 24 TIMER Operation WEEKLY TIMER Operation Press to select the desired time. • The time can be set between 0:00 and 23:50 in 10-minute intervals. • To return to the ON/OFF TIMER mode setting, press • Proceed to STEP when setting the OFF TIMER. Press • The time will be set. • “ ” and the temperature blink. Press to select the desired temperature. • The temperature can be set between 10°C and 32°C. COOL or AUTO: The unit operates at 18°C even if it is set to 10 to 17°C. Page 12 HEAT or AUTO : The unit operates at 30°C even if it is set to 31 to 32°C. Page 12 • To return to the time setting, press • The set temperature is only displayed when the mode setting is on. Press • The temperature will be set and go to the next reservation setting. • The temperature is set while in ON TIMER operation, and the time is set while in OFF TIMER operation. • The next reservation screen will appear. • To continue further settings, repeat the procedure from STEP Press to complete the setting.
- Page 25 TIMER Operation Copy mode • A reservation made once can be copied to another day of the week. The whole reservation of the selected day of the week will be copied. Programme 1 Programme 2 Programme 3 Programme 4 [Monday] 25°C 27°C 6:00 8:30 17:30 22:00 COPY Programme 1 Programme 2 Programme 3 Programme 4 [Tuesday] 25°C 27°C [Friday] 6:00 8:30 17:30 22:00 Setting Displays Confi rmation Copy Paste...
- Page 26 TIMER Operation WEEKLY TIMER Operation Confi rming a reservation • The reservation can be confi rmed. Setting Displays Normal Confi rmation Press • The day of the week and the reservation number of the current day will be displayed. Press to select the day of the week and the reservation number to be confi rmed. • Pressing displays the reservation details. • To change the confi rmed reserved settings, select the reservation number and press The mode is switched to setting mode. Proceed to Setting mode STEP Page 22 Press...
- Page 27 TIMER Operation To delete reservations An individual reservation Press • The day of the week and the reservation number will be displayed. Press to select the day of the week and the reservation number to be deleted. Press • “ ” and “ ” or “ ” blink. Press until no icon is displayed. • Pressing changes the ON/OFF TIMER mode in sequence. • Selecting “blank” will cancel any reservation you may have. blank ON TIMER OFF TIMER No Setting...
-
Page 28: Care
Care Care and Cleaning CAUTION • Before cleaning, be sure to stop the operation and turn off the circuit breaker. • Do not touch the aluminum fi ns of the indoor unit. If you touch those parts, this may cause an injury. „ Quick reference Cleaning parts Front panel • Wipe it with a soft damp cloth. If dirty Page 28 Air fi lter • Vacuum dust or wash the fi lter. Once every 2 weeks Page 29 Titanium apatite photocatalytic air-purifying fi lter Indoor unit, Outdoor unit and Remote controller • Vacuum dust or replace the fi lter. - Page 29 Care CAUTION • When removing or attaching the front panel, stand on a solid, stable base and take care not to fall. • When removing or attaching the front panel, support the panel securely with your hand to prevent it from falling. „ Front panel Open the front panel. Clean the front panel. • Hold the front panel by the panel tabs on the 2 • Wipe it with a soft damp cloth. sides and open it. • Only neutral detergent may be used. • In case of washing the panel with water, wipe it with a dry soft cloth, and let it dry in the shade after washing. Panel Attach the front panel. • Align the front panel shaft on the left and right of the front panel with the grooves, then push them all the way in. Front panel shaft Groove Remove the front panel. • Slide the front panel to either the left or right and pull it toward you.
- Page 30 Care Care and Cleaning „ Air fi lter If the dust does not come off easily Open the front panel. Page 28 • Wash the air fi lters with neutral detergent thinned with lukewarm water, then let them dry in the shade. • Be sure to remove the titanium apatite photocatalytic Pull out the air fi lters. air-purifying fi lter. Refer to “ Titanium apatite photocatalytic air-purifying fi lter ” on the next page. • Push the fi lter tab at the centre of each air fi lter a little upwards, then pull it down.
- Page 31 Care „ Titanium apatite photocatalytic air-purifying fi lter [Replacement] Open the front panel and Remove the fi lter from the fi lter pull out the air fi lters. Page 28,29 frame and attach a new one. • Do not throw away the fi lter frame. Reuse the fi lter Take off the titanium apatite frame when replacing the titanium apatite photocatalytic air-purifying fi lter.
- Page 32 Care Care and Cleaning „ Prior to a long period of non-use Operate the FAN mode for several hours on a fine day to dry out the inside. • Press and select “ ” . • Press and start the operation. After operation stops, turn off the circuit breaker for the room air conditioner.
-
Page 33: When The Need Arises
When the Need Arises Indoor unit The flaps do not start swinging immediately. • T he air conditioner is adjusting the position of the flaps. The flaps will start moving soon. The air conditioner stops generating Different sounds are heard. airflow during HEAT operation. „ A sound like flowing water • O nce the set temperature is reached, the airflow rate is • T his sound is generated because the refrigerant in reduced and operation stopped in order to avoid the air conditioner is flowing. -
Page 34: Troubleshooting
When the Need Arises Troubleshooting Before making an inquiry or a request for repair, please check the following. If the problem persists, consult your dealer. Not a problem Check This case is not a problem. Please check again before requesting repairs. The air conditioner does not operate Case Description / what to check • Has the circuit breaker been tripped or the fuse blown? OPERATION lamp is off. • Is there a power failure? • Are batteries set in the remote controller? • Turn off the power with the circuit breaker and restart operation with the remote controller. OPERATION lamp is blinking. If the OPERATION lamp is still blinking, check the error code and consult your dealer. - Page 35 When the Need Arises Mist comes out Case Description / what to check • This happens when the air in the room is cooled into mist by the cold airfl ow during COOL Mist comes out of the indoor unit. or other operation. Remote controller Case Description / what to check • The batteries may be exhausted. Replace both batteries with new dry batteries AAA.LR03 (alkaline). The unit does not receive signals For details, refer to “Preparation Before Operation”.
- Page 36 When the Need Arises Troubleshooting „ Call your dealer immediately WARNING When an abnormality (such as a burning smell) occurs, stop operation and turn off the circuit breaker. • Continued operation in an abnormal condition may result in troubles, electric shocks or fire. • Consult the dealer where you bought the air conditioner. Do not attempt to repair or modify the air conditioner by yourself. • Incorrect work may result in electric shocks or fire.
- Page 37 When the Need Arises „ Fault diagnosis by remote controller • The remote controller can receive relevant error codes from the indoor unit. When is held down for about 5 seconds, “ ” blinks in the temperature display section. Press repeatedly until a continuous beep is produced. • The code indication changes as shown below, and notifi es you with a long beep. CODE MEANING NORMAL INDOOR-OUTDOOR UNIT COMBINATION FAULT SYSTEM...
-
Page 38: Specifications
When the Need Arises Specifications Indoor unit FTXM28PVMK Heat pump Outdoor unit RXM28PVMK Model name Indoor unit FTKM28PVMK Cooling only Outdoor unit RKM28PVMK Power source voltage and frequency 220-240V 50/60Hz Refrigerant name Refrigerant amount (kg) Indoor unit Net weight (kg) Outdoor unit Rated current (A) 10.2 Rated input (kW) 2.31 Condition T1 Rated capacity (Btu) 28000 SASO 2663 Rated capacity (kW) 8.21 (cooling) Energy efficiency ((Btu/h)/W) 12.12 Annual energy consumption (kWh) 6237 Rated current (A) 14.1... - Page 39 ﺇﺫﺍ ﺍﻗﺘﻀﺖ ﺍﻟﻀﺮﻭﺭﺓ ﺍﳌﻮﺍﺻﻔﺎﺕ ﺍﻟﻮﺣﺪﺓ ﺍﻟﺪﺍﺧﻠﻴﺔ FTXM28PVMK ﻣﻀﺨﺔ ﺍﻟﺘﺪﻓﺌﺔ ﺍﻟﻮﺣﺪﺓ ﺍﳋﺎﺭﺟﻴﺔ RXM28PVMK ﺍﺳﻢ ﺍﳌﻮﺩﻳﻞ ﺍﻟﻮﺣﺪﺓ ﺍﻟﺪﺍﺧﻠﻴﺔ FTKM28PVMK ﺗﺒﺮﻳﺪ ﻓﻘﻂ ﺍﻟﻮﺣﺪﺓ ﺍﳋﺎﺭﺟﻴﺔ RKM28PVMK ﻫﺮﺗﺰ ﻓﻮﻟﺖ ﻓﻮﻟﻄﻴﺔ ﻣﺼﺪﺭ ﺍﻟﺘﻴﺎﺭ ﻭﺍﻟﺘﺮﺩﺩ ﺍﺳﻢ ﺳﺎﺋﻞ ﺍﻟﺘﺒﺮﻳﺪ (ﻛﻤﻴﺔ ﺳﺎﺋﻞ ﺍﻟﺘﺒﺮﻳﺪ )ﻛﺠﻢ ﺍﻟﻮﺣﺪﺓ ﺍﻟﺪﺍﺧﻠﻴﺔ (ﺍﻟﻮﺯﻥ ﺍﻟﺼﺎﻓﻲ )ﻛﺠﻢ...
- Page 40 ﺇﺫﺍ ﺍﻗﺘﻀﺖ ﺍﻟﻀﺮﻭﺭﺓ ﺍﻟﺘﺸﺨﻴﺺ ﺍﳋﺎﻃﺊ ﺑﻮﺍﺳﻄﺔ ﻭﺣﺪﺓ ﺍﻟﺘﺤﻜﻢ ﻋﻦ ﺑﻌﺪ .ﳝﻜﻦ ﻟﻮﺣﺪﺓ ﺍﻟﺘﺤﻜﻢ ﻋﻦ ﺑﻌﺪ ﺍﺳﺘﻘﺒﺎﻝ ﺭﻣﻮﺯ ﺍﳋﻄﺄ ﺍﳌﻌﻨﻴﺔ ﻣﻦ ﺍﻟﻮﺣﺪﺓ ﺍﻟﺪﺍﺧﻠﻴﺔ • ﻟﻸﺳﻔﻞ ﻣﻊ ﺍﻻﺳﺘﻤﺮﺍﺭ ﳌﺪﺓ 5 ﺛﻮﺍ ﻥ ﹴ ﻋﻨﺪ ﺿﻐﻂ .“ ﻓﻲ ﻗﺴﻢ ﻋﺮﺽ ﺩﺭﺟﺔ ﺍﳊﺮﺍﺭﺓ ”...
- Page 41 ﺇﺫﺍ ﺍﻗﺘﻀﺖ ﺍﻟﻀﺮﻭﺭﺓ ﲢﺮﻱ ﺍﳋﻠﻞ ﻭﺇﺻﻼﺣﻪ ﺍﺗﺼﻞ ﺑﺎﻟﻮﻛﻴﻞ ﻟﺪﻳﻚ ﻋﻠﻰ ﺍﻟﻔﻮﺭ ﲢﺬﻳﺮ .ﻋﻨﺪ ﺣﺪﻭﺙ ﺃﻣﻮﺭ ﻏﻴﺮ ﻃﺒﻴﻌﻴﺔ )ﻣﺜﻞ ﺭﺍﺋﺤﺔ ﺍﺣﺘﺮﺍﻕ(، ﻗﻢ ﺑﺈﻳﻘﺎﻑ ﺍﻟﺘﺸﻐﻴﻞ ﻭﺇﻳﻘﺎﻑ ﺗﺸﻐﻴﻞ ﻗﺎﻃﻊ ﺍﻟﺪﺍﺋﺮﺓ ﺍﻟﻜﻬﺮﺑﺎﺋﻴﺔ .ﻗﺪ ﻳﺘﺴﺒﺐ ﺍﻟﺘﺸﻐﻴﻞ ﺍﳌﺴﺘﻤﺮ ﻓﻲ ﻇﻞ ﻇﺮﻑ ﻏﻴﺮ ﻃﺒﻴﻌﻲ ﻓﻲ ﺣﺪﻭﺙ ﺃﻋﻄﺎﻝ ﺃﻭ ﻭﻗﻮﻉ ﺻﺪﻣﺎﺕ ﻛﻬﺮﺑﺎﺋﻴﺔ ﺃﻭ ﻧﺸﻮﺏ ﺣﺮﻳﻖ •...
- Page 42 ﺇﺫﺍ ﺍﻗﺘﻀﺖ ﺍﻟﻀﺮﻭﺭﺓ ﻳﺘﻢ ﺇﻃﻼﻕ ﺍﻟﺮﻃﻮﺑﺔ ﻟﻠﺨﺎﺭﺝ ﺍﻟﻮﺻﻒ / ﺍﻟﺬﻱ ﻳﺠﺐ ﺍﻟﺘﺤﻘﻖ ﻣﻨﻪ ﺍﳊﺎﻟﺔ ﻳﺤﺼﻞ ﻫﺬﺍ ﻋﻨﺪﻣﺎ ﻳﺘﻢ ﺗﺒﺮﻳﺪ ﺍﻟﻬﻮﺍﺀ ﺍﳌﻮﺟﻮﺩ ﺩﺍﺧﻞ ﺍﻟﻐﺮﻓﺔ ﻟﻴﺼﺒﺢ ﺭﻃﺒ ﹰ ﺎ ﺑﻮﺍﺳﻄﺔ ﺗﺪﻓﻖ ﺍﻟﻬﻮﺍﺀ ﺍﻟﺒﺎﺭﺩ ﺃﺛﻨﺎﺀ ﺍﻟﺘﺸﻐﻴﻞ ﻓﻲ .ﻳﺘﻢ ﺇﻃﻼﻕ ﺍﻟﺮﻃﻮﺑﺔ ﻣﻦ ﺍﻟﻮﺣﺪﺓ ﺍﻟﺪﺍﺧﻠﻴﺔ •...
- Page 43 ﺇﺫﺍ ﺍﻗﺘﻀﺖ ﺍﻟﻀﺮﻭﺭﺓ ﲢﺮﻱ ﺍﳋﻠﻞ ﻭﺇﺻﻼﺣﻪ .ﻗﺒﻞ ﺍﻻﺳﺘﻌﻼﻡ ﻋﻦ ﺍﻟﺘﺼﻠﻴﺢ ﺃﻭ ﻃﻠﺐ ﺍﻟﻘﻴﺎﻡ ﺑﻪ، ﻳﺮﺟﻰ ﺍﻟﺘﺤﻘﻖ ﳑﺎ ﻳﻠﻲ .ﺇﺫﺍ ﺍﺳﺘﻤﺮ ﻇﻬﻮﺭ ﺍﳌﺸﻜﻠﺔ، ﻗﻢ ﺑﺎﺳﺘﺸﺎﺭﺓ ﺍﻟﻮﻛﻴﻞ ﻟﺪﻳﻚ ﲢﻘﻖ ﻻ ﺗﻌﺪ ﻣﺸﻜﻠﺔ .ﻳﺮﺟﻰ ﺍﻟﺘﺤﻘﻖ ﻣﺮﺓ ﺃﺧﺮﻯ ﻗﺒﻞ ﻃﻠﺐ ﺍﻟﻘﻴﺎﻡ ﺑﺎﻟﺘﺼﻠﻴﺤﺎﺕ .ﻻ ﺗﻌﺪ ﻫﺬﻩ ﺍﳊﺎﻟﺔ ﻣﺸﻜﻠﺔ ﻣﻜﻴﻒ...
- Page 44 ﺇﺫﺍ ﺍﻗﺘﻀﺖ ﺍﻟﻀﺮﻭﺭﺓ ﺍﻷﺳﺌﻠﺔ ﺍﳌﺘﻜﺮﺭﺓ ﺍﻟﻮﺣﺪﺓ ﺍﻟﺪﺍﺧﻠﻴﺔ .ﻟﻢ ﺗﺒﺪﺃ ﺍﻟﺮﻓﺎﺭﻑ ﺑﺎﻟﺘﺄﺭﺟﺢ ﻋﻠﻰ ﺍﻟﻔﻮﺭ .ﻳﻘﻮﻡ ﻣﻜﻴﻒ ﺍﻟﻬﻮﺍﺀ ﺑﻀﺒﻂ ﻣﻮﺿﻊ ﺍﻟﺮﻓﺎﺭﻑ. ﺳﺘﺒﺪﺃ ﺍﻟﺮﻓﺎﺭﻑ ﺑﺎﻟﺘﺤﺮﻙ ﻗﺮﻳﺒ ﹰ ﺎ • ﻳﺘﻮﻗﻒ ﻣﻜﻴﻒ ﺍﻟﻬﻮﺍﺀ ﻋﻦ ﺗﻮﻟﻴﺪ ﺩﻓﻖ ﺍﻟﻬﻮﺍﺀ .ﺃﺛﻨﺎﺀ ﺗﺸﻐﻴﻞ ﺍﻟﻮﺿﻊ ﺍﻟﺘﺪﻓﺌﺔ .ﻳﺘﻢ ﺳﻤﺎﻉ ﺃﺻﻮﺍﺕ ﻣﺨﺘﻠﻔﺔ ﻓﻮﺭ...
- Page 45 ﺍﻟﻌﻨﺎﻳﺔ ﺍﻟﻌﻨﺎﻳﺔ ﻭﺍﻟﺘﻨﻈﻴﻒ ﺍﻹﺟﺮﺍﺀﺍﺕ ﺍﳌﺴﺒﻘﺔ ﻋﻨﺪ ﺗﺸﻐﻴﻞ ﺍﻟﻮﺣﺪﺓ ﺍﻟﺘﻲ ﻟﻢ ﻳﺘﻢ ﺍﺳﺘﻌﻤﺎﻟﻬﺎ ﻟﻔﺘﺮﺓ ﺯﻣﻨﻴﺔ ﻃﻮﻳﻠﺔ ﻗﻢ ﺑﺎﻟﺘﺸﻐﻴﻞ ﻓﻲ ﺍﻟﻮﺿﻊ ﺍﳌﺮﻭﺣﺔ ﻟﻌﺪﺓ ﺳﺎﻋﺎﺕ ﻓﻲ ﻳﻮﻡ ﻟﻄﻴﻒ ﻭﺫﻟﻚ .ﻟﺘﺠﻔﻴﻔﻪ ﻣﻦ ﺍﻟﺪﺍﺧﻞ ﻭﻗﻢ ﺑﺎﺧﺘﻴﺎﺭ ﺍﺿﻐﻂ “ ” • .ﻭﺍﺑﺪﺃ ﺍﻟﺘﺸﻐﻴﻞ ﺍﺿﻐﻂ • ﺑﻌﺪ...
- Page 46 ﺍﻟﻌﻨﺎﻳﺔ ﻣﺮﺷﺢ ﺗﻨﻘﻴﺔ ﺍﻟﻬﻮﺍﺀ ﺍﳌﺼﻨﻮﻉ ﻣﻦ ﻣﺎﺩﺓ ﺃﺑﺎﺗﻴﺖ ﺍﻟﺘﻴﺘﺎﻧﻴﻮﻡ ﻭﺍﻟﺬﻱ ﻳﻌﻤﻞ ﺑﺎﻟﺘﺤﻔﻴﺰ ﺍﻟﻀﻮﺋﻲ []ﺍﻻﺳﺘﺒﺪﺍﻝ ﺍﻓﺘﺢ ﺍﻟﻠﻮﺣﺔ ﺍﻷﻣﺎﻣﻴﺔ ﻭﺍﺳﺤﺐ ﺍﻧﺰﻉ ﺍﳌﺮﺷﺢ ﻣﻦ ﺇﻃﺎﺭ ﺍﳌﺮﺷﺢ ﻭﻗﻢ .ﻣﺮﺷﺤﺎﺕ ﺍﻟﻬﻮﺍﺀ ﻟﻠﺨﺎﺭﺝ ﺻﻔﺤﺔ .ﺑﺘﺮﻛﻴﺐ ﺁﺧﺮ ﺟﺪﻳﺪ ، ﻻ ﺗﻌﻤﺪ ﺇﻟﻰ ﺍﻟﺘﺨﻠﺺ ﻣﻦ ﺇﻃﺎﺭ ﺍﳌﺮﺷﺢ. ﻗﻢ ﺑﺈﻋﺎﺩﺓ ﺍﺳﺘﻌﻤﺎﻝ ﺇﻃﺎﺭ ﺍﻧﺰﻉ...
- Page 47 ﺍﻟﻌﻨﺎﻳﺔ ﺍﻟﻌﻨﺎﻳﺔ ﻭﺍﻟﺘﻨﻈﻴﻒ ﻣﺮﺷﺢ ﺍﻟﻬﻮﺍﺀ ﻓﻲ ﺣﺎﻝ ﻟﻢ ﻳﺘﻢ ﺇﺯﺍﻟﺔ ﺍﻟﻐﺒﺎﺭ ﺑﺴﻬﻮﻟﺔ .ﻗﻢ ﺑﻔﺘﺢ ﺍﻟﻠﻮﺣﺔ ﺍﻷﻣﺎﻣﻴﺔ ﺻﻔﺤﺔ ﺍﻏﺴﻞ ﻣﺮﺷﺤﺎﺕ ﺍﻟﻬﻮﺍﺀ ﲟﻨﻈﻒ ﻣﺘﻌﺎﺩﻝ ﻣﺨﻔﻒ ﲟﺎﺀ ﺩﺍﻓﻰﺀ، ﻭﻣﻦ ﺛﻢ ﺩﻋﻬﺎ • .ﲡﻒ ﺑﺎﻟﻈﻞ ﺗﺄﻛﺪ ﻣﻦ ﻧﺰﻉ ﻣﺮﺷﺢ ﺗﻨﻘﻴﺔ ﺍﻟﻬﻮﺍﺀ ﺍﳌﺼﻨﻮﻉ ﻣﻦ ﻣﺎﺩﺓ ﺃﺑﺎﺗﻴﺖ ﺍﻟﺘﻴﺘﺎﻧﻴﻮﻡ .ﺍﺳﺤﺐ...
- Page 48 ﺍﻟﻌﻨﺎﻳﺔ ﺗﻨﺒﻴﻪ .ﻋﻨﺪ ﻧﺰﻉ ﺍﻟﻠﻮﺣﺔ ﺍﻷﻣﺎﻣﻴﺔ ﺃﻭ ﺗﺮﻛﻴﺒﻬﺎ، ﺍﺳﺘﻨﺪ ﻋﻠﻰ ﻗﺎﻋﺪﺓ ﺻﻠﺒﺔ ﻭﺛﺎﺑﺘﺔ ﻭﺗﻮﺧﻰ ﺍﳊﺮﺹ ﺣﺘﻰ ﻻ ﺗﺘﻌﺮﺽ ﻟﻠﺴﻘﻮﻁ • .ﻋﻨﺪ ﻧﺰﻉ ﺍﻟﻠﻮﺣﺔ ﺍﻷﻣﺎﻣﻴﺔ ﺃﻭ ﺗﺮﻛﻴﺒﻬﺎ، ﻗﻢ ﺑﺘﺜﺒﻴﺖ ﺍﻟﻠﻮﺣﺔ ﺑﺈﺣﻜﺎﻡ ﺑﻴﺪﻳﻚ ﻭﺫﻟﻚ ﻟﺘﻔﺎﺩﻱ ﺳﻘﻮﻃﻬﺎ • ﺍﻟﻠﻮﺣﺔ ﺍﻷﻣﺎﻣﻴﺔ .ﻗﻢ ﺑﺘﻨﻈﻴﻒ ﺍﻟﻠﻮﺣﺔ ﺍﻷﻣﺎﻣﻴﺔ .ﻗﻢ...
- Page 49 ﺍﻟﻌﻨﺎﻳﺔ ﺍﻟﻌﻨﺎﻳﺔ ﻭﺍﻟﺘﻨﻈﻴﻒ ﺗﻨﺒﻴﻪ .ﻗﺒﻞ ﺍﻟﺘﻨﻈﻴﻒ، ﺗﺄﻛﺪ ﻣﻦ ﺇﻳﻘﺎﻑ ﻋﻤﻞ ﺍﻟﻮﺣﺪﺓ ﻭﻗﻢ ﺑﺈﻳﻘﺎﻑ ﺗﺸﻐﻴﻞ ﻗﺎﻃﻊ ﺍﻟﺪﺍﺋﺮﺓ ﺍﻟﻜﻬﺮﺑﺎﺋﻴﺔ • .ﻻ ﺗﻠﻤﺲ ﺭﻳﺶ ﺍﻷﳌﻨﻴﻮﻡ ﺍﳋﺎﺻﺔ ﺑﺎﻟﻮﺣﺪﺓ ﺍﻟﺪﺍﺧﻠﻴﺔ. ﺇﺫﺍ ﻗﻤﺖ ﺑﻠﻤﺲ ﺗﻠﻚ ﺍﻷﺟﺰﺍﺀ، ﻓﻘﺪ ﻳﺘﺴﺒﺐ ﺫﻟﻚ ﻓﻲ ﺣﺪﻭﺙ ﺇﺻﺎﺑﺔ • ﺍﳌﺮﺟﻊ ﺍﻟﺴﺮﻳﻊ ﺗﻨﻈﻴﻒ...
- Page 50 ﺗﺸﻐﻴﻞ ﺧﺎﺻﻴﺔ ﺍﳌﺆﻗﺖ ﳊﺬﻑ ﻋﻤﻠﻴﺎﺕ ﺍﳊﻔﻆ ﻋﻤﻠﻴﺔ ﺣﻔﻆ ﻣﻨﻔﺼﻠﺔ ﺍﺿﻐﻂ .ﺳﻴﺘﻢ ﻋﺮﺽ ﻳﻮﻡ ﻣﻦ ﺃﻳﺎﻡ ﺍﻷﺳﺒﻮﻉ ﻭﺭﻗﻢ ﻋﻤﻠﻴﺔ ﺍﳊﻔﻆ • ﻻﺧﺘﻴﺎﺭ ﻳﻮﻡ ﻣﻦ ﺃﻳﺎﻡ ﺍﻷﺳﺒﻮﻉ ﻭﺭﻗﻢ ﻋﻤﻠﻴﺔ ﺍﺿﻐﻂ .ﺍﳊﻔﻆ ﻟﻴﺘﻢ ﺣﺬﻓﻬﺎ ﺍﺿﻐﻂ . “ ” “ ﺃﻭ ” “ ﻭ ”...
- Page 51 ﺗﺸﻐﻴﻞ ﺧﺎﺻﻴﺔ ﺍﳌﺆﻗﺖ ﺗﺸﻐﻴﻞ ﺧﺎﺻﻴﺔ ﺍﳌﺆﻗﺖ ﺍﻷﺳﺒﻮﻋﻲ ﺍﻟﺘﺄﻛﻴﺪ ﻋﻠﻰ ﻋﻤﻠﻴﺔ ﺍﳊﻔﻆ .ﳝﻜﻦ ﺗﺄﻛﻴﺪ ﻋﻤﻠﻴﺔ ﺍﳊﻔﻆ • ﺷﺎﺷﺎﺕ ﻋﺮﺽ ﺍﻟﺘﻬﻴﺌﺔ ﺗﺄﻛﻴﺪ ﻋﺎﺩﻱ ﺍﺿﻐﻂ .ﺳﻴﺘﻢ ﻋﺮﺽ ﻳﻮﻡ ﻣﻦ ﺃﻳﺎﻡ ﺍﻷﺳﺒﻮﻉ ﻭﺭﻗﻢ ﻋﻤﻠﻴﺔ ﺍﳊﻔﻆ ﺍﳋﺎﺹ ﺑﺎﻟﻴﻮﻡ ﺍﳊﺎﻟﻲ • ﻻﺧﺘﻴﺎﺭ ﻳﻮﻡ ﻣﻦ ﺃﻳﺎﻡ ﺍﻷﺳﺒﻮﻉ ﻭﺭﻗﻢ ﻋﻤﻠﻴﺔ ﺍﺿﻐﻂ...
- Page 52 ﺗﺸﻐﻴﻞ ﺧﺎﺻﻴﺔ ﺍﳌﺆﻗﺖ ﻭﺿﻊ ﺍﻟﻨﺴﺦ ﳝﻜﻦ ﻧﺴﺦ ﻋﻤﻠﻴﺔ ﺣﻔﻆ ﳌﺮﺓ ﻭﺍﺣﺪﺓ ﻟﻴﻮﻡ ﺁﺧﺮ ﻣﻦ ﺃﻳﺎﻡ ﺍﻷﺳﺒﻮﻉ. ﺳﻴﺘﻢ ﻧﺴﺦ ﻋﻤﻠﻴﺔ ﺍﳊﻔﻆ ﻛﻜﻞ ﻟﻴﻮﻡ ﻣﻦ ﺃﻳﺎﻡ ﺍﻷﺳﺒﻮﻉ ﺍﻟﺬﻱ • .ﰎ ﺍﺧﺘﻴﺎﺭﻩ ﺍﻟﺒﺮﻧﺎﻣﺞ ﺍﻟﺒﺮﻧﺎﻣﺞ ﺍﻟﺒﺮﻧﺎﻣﺞ ﺍﻟﺒﺮﻧﺎﻣﺞ ﺇﻳﻘﺎﻑ ﺗﺸﻐﻴﻞ ﺇﻳﻘﺎﻑ ﺗﺸﻐﻴﻞ []ﺍﻹﺛﻨﲔ ﻡ ﻡ °27 °25 22:00...
- Page 53 ﺗﺸﻐﻴﻞ ﺧﺎﺻﻴﺔ ﺍﳌﺆﻗﺖ ﺗﺸﻐﻴﻞ ﺧﺎﺻﻴﺔ ﺍﳌﺆﻗﺖ ﺍﻷﺳﺒﻮﻋﻲ .ﻻﺧﺘﻴﺎﺭ ﺍﻟﻮﻗﺖ ﺍﳌﺮﻏﻮﺏ ﺍﺿﻐﻂ .ﺩﻗﺎﺋﻖ ﺑﻔﺎﺻﻞ ﺯﻣﻨﻲ ﻳﺒﻠﻎ ﻭ ﳝﻜﻦ ﺿﺒﻂ ﺍﻟﻮﻗﺖ ﺑﲔ ﺍﻟﺴﺎﻋﺔ 23:50 0:00 • ﻟﻠﻌﻮﺩﺓ ﺇﻟﻰ ﺗﻬﻴﺌﺔ ﺍﻟﻮﺿﻊ ﺗﺸﻐﻴﻞ/ﺇﻳﻘﺎﻑ ﺍﳌﺆﻗﺖ، ﺍﺿﻐﻂ • ﺳﻴﺘﻢ ﺍﻟﻮﺻﻮﻝ ﺇﻟﻰ ﺍﳋﻄﻮﺓ .ﻋﻨﺪ ﺗﻬﻴﺌﺔ ﺧﺎﺻﻴﺔ ﺇﻳﻘﺎﻑ ﺍﳌﺆﻗﺖ •...
- Page 54 ﺗﺸﻐﻴﻞ ﺧﺎﺻﻴﺔ ﺍﳌﺆﻗﺖ ﻟﺘﺸﻐﻴﻞ ﺧﺎﺻﻴﺔ ﺍﳌﺆﻗﺖ ﺍﻷﺳﺒﻮﻋﻲ ﻭﺿﻊ ﺍﻟﺘﻬﻴﺌﺔ .ﺗﺄﻛﺪ ﻣﻦ ﺿﺒﻂ ﻛﻞ ﻳﻮﻡ ﻣﻦ ﺃﻳﺎﻡ ﺍﻷﺳﺒﻮﻉ ﻭﺍﻟﻮﻗﺖ • .ﺇﺫﺍ ﻟﻢ ﺗﻜﻦ ﻛﺬﻟﻚ، ﺍﺿﺒﻂ ﻳﻮﻡ ﻣﻦ ﺃﻳﺎﻡ ﺍﻷﺳﺒﻮﻉ ﻭﺍﻟﻮﻗﺖ ﺻﻔﺤﺔ ﺍﻟﺒﺮﻧﺎﻣﺞ ﺍﻟﺒﺮﻧﺎﻣﺞ ﺍﻟﺒﺮﻧﺎﻣﺞ ﺍﻟﺒﺮﻧﺎﻣﺞ ﺇﻳﻘﺎﻑ ﺗﺸﻐﻴﻞ ﺇﻳﻘﺎﻑ ﺗﺸﻐﻴﻞ []ﺍﻹﺛﻨﲔ 72° ﻡ 52°...
- Page 55 ﺗﺸﻐﻴﻞ ﺧﺎﺻﻴﺔ ﺍﳌﺆﻗﺖ ﺗﺸﻐﻴﻞ ﺧﺎﺻﻴﺔ ﺍﳌﺆﻗﺖ ﺍﻷﺳﺒﻮﻋﻲ ﳝﻜﻦ ﺣﻔﻆ ﻣﺎ ﻳﺼﻞ ﺇﻟﻰ 4 ﺗﻬﻴﺌﺎﺕ ﻟﻠﻤﺆﻗﺖ ﻟﻜﻞ ﻳﻮﻡ ﻣﻦ ﺃﻳﺎﻡ ﺍﻷﺳﺒﻮﻉ. ﻳ ﹸ ﻌﺪ ﻫﺬﺍ ﻣﻼﺋﻤ ﹰ ﺎ ﻟﺘﺨﺼﻴﺺ ﺧﺎﺻﻴﺔ ﺍﳌﺆﻗﺖ ﺍﻷﺳﺒﻮﻋﻲ ﺿﻤﻦ ﳕﻂ .ﺣﻴﺎﺓ ﺍﻟﻌﺎﺋﻠﺔ ﻣﺜﺎﻝ ﻋﻠﻰ ﺗﻬﻴﺌﺔ ﺧﺎﺻﻴﺔ ﺍﳌﺆﻗﺖ ﺍﻷﺳﺒﻮﻋﻲ .ﻳﺘﻢ...
- Page 56 ﺗﺸﻐﻴﻞ ﺧﺎﺻﻴﺔ ﺍﳌﺆﻗﺖ ﻻﺳﺘﻌﻤﺎﻝ ﺧﺎﺻﻴﺔ ﺇﻳﻘﺎﻑ ﺍﳌﺆﻗﺖ .ﲢﻘﻖ ﻣﻦ ﺃﻥ ﺍﻟﺴﺎﻋﺔ ﺻﺤﻴﺤﺔ • .ﺇﺫﺍ ﻟﻢ ﺗﻜﻦ ﻛﺬﻟﻚ، ﺍﺿﺒﻂ ﺍﻟﺴﺎﻋﺔ ﻋﻠﻰ ﺍﻟﻮﻗﺖ ﺍﳊﺎﺿﺮ ﺻﻔﺤﺔ ﺍﺿﻐﻂ ﻋﻠﻰ ﺷﺎﺷﺔ ﻳﺘﻢ ﻋﺮﺽ “ ” ﻳﻮﻣﺾ “ ” ﻭﻳﻮﻡ ﻣﻦ ﺃﻳﺎﻡ ﺍﻷﺳﺒﻮﻉ ﻣﻦ ﺷﺎﺷﺔ ﻳﺨﺘﻔﻲ ﻛﻞ ﹲ ﻣﻦ “...
- Page 57 ﺗﺸﻐﻴﻞ ﺧﺎﺻﻴﺔ ﺍﳌﺆﻗﺖ ﺗﺸﻐﻴﻞ ﺧﺎﺻﻴﺔ ﺗﺸﻐﻴﻞ/ﺇﻳﻘﺎﻑ ﺍﳌﺆﻗﺖ ﺗ ﹸ ﻌﺪ ﻭﻇﺎﺋﻒ ﺍﳌﺆﻗﺖ ﻣﻔﻴﺪﺓ ﻟﺘﺸﻐﻴﻞ ﻣﻜﻴﻒ ﺍﻟﻬﻮﺍﺀ ﺃﻭ ﺇﻳﻘﺎﻓﻪ ﺗﻠﻘﺎﺋﻴ ﹰ ﺎ ﻓﻲ ﺍﳌﺴﺎﺀ ﺃﻭ ﺍﻟﺼﺒﺎﺡ. ﳝﻜﻨﻚ ﺃﻳﻀ ﹰ ﺎ .ﺍﺳﺘﻌﻤﺎﻝ ﺗﺸﻐﻴﻞ ﺍﳌﺆﻗﺖ ﻭﺇﻳﻘﺎﻑ ﺍﳌﺆﻗﺖ ﺳﻮﻳ ﹰ ﺎ ﻻﺳﺘﻌﻤﺎﻝ ﺧﺎﺻﻴﺔ ﺗﺸﻐﻴﻞ ﺍﳌﺆﻗﺖ .ﲢﻘﻖ...
- Page 58 ﺍﻟﻮﻇﺎﺋﻒ ﺍﳌﻔﻴﺪﺓ ﺗﺸﻐﻴﻞ ﺧﺎﺻﻴﺔ ﺍﻗﺘﺼﺎﺩﻱ / ﺍﻟﺘﺸﻐﻴﻞ ﺍﻟﻬﺎﺩﺉ ﻟﻠﻮﺣﺪﺓ ﺍﳋﺎﺭﺟﻴﺔ ﺗﺘﻴﺢ ﺧﺎﺻﻴﺔ ﺍﻗﺘﺼﺎﺩﻱ ﺍﳊﺼﻮﻝ ﻋﻠﻰ ﺗﺸﻐﻴﻞ ﺫﻭ ﻛﻔﺎﺀﺓ ﻭﺫﻟﻚ ﻋﻦ ﻃﺮﻳﻖ ﺍﳊﺪ ﻣﻦ ﺍﺳﺘﻬﻼﻙ ﺍﻟﺘﻴﺎﺭ ﺇﻟﻰ .ﺃﻗﺼﻰ ﺣﺪ ﺗ ﹸ ﻌﺪ ﻫﺬﻩ ﺍﻟﻮﻇﻴﻔﺔ ﻣﻔﻴﺪﺓ ﳌﻨﻊ ﻗﺎﻃﻊ ﺍﻟﺪﺍﺋﺮﺓ ﺍﻟﻜﻬﺮﺑﺎﺋﻴﺔ ﻣﻦ ﺍﻟﻔﺼﻞ ﻋﻨﺪ ﺗﺸﻐﻴﻞ ﺍﻟﻮﺣﺪﺓ ﺟﻨﺒ ﹰ ﺎ ﺇﻟﻰ ﺟﻨﺐ .ﻣﻊ...
- Page 59 ﺍﻟﻮﻇﺎﺋﻒ ﺍﳌﻔﻴﺪﺓ ﺗﺸﻐﻴﻞ ﺧﺎﺻﻴﺔ ﺍﻟﻘﻮﻱ ﻳﺰﻳﺪ ﺗﺸﻐﻴﻞ ﺧﺎﺻﻴﺔ ﺍﻟﻘﻮﻱ ﻣﻦ ﺗﺄﺛﻴﺮ ﺍﻟﺘﺒﺮﻳﺪ )ﺍﻟﺘﺪﻓﺌﺔ( ﺑﺴﺮﻋﺔ ﺇﻟﻰ ﺍﳊﺪ ﺍﻷﻗﺼﻰ ﻓﻲ ﺃﻱ ﻭﺿﻊ ﺗﺸﻐﻴﻞ. ﻓﻲ .ﻫﺬﺍ ﺍﻟﻮﺿﻊ، ﻳﻌﻤﻞ ﻣﻜﻴﻒ ﺍﻟﻬﻮﺍﺀ ﺑﺎﻟﻘﺪﺭﺓ ﺍﻟﻘﺼﻮﻯ ﻟﺒﺪﺀ ﺗﺸﻐﻴﻞ ﺧﺎﺻﻴﺔ ﺍﻟﻘﻮﻱ .ﺃﺛﻨﺎﺀ ﻋﻤﻠﻴﺔ ﺍﻟﺘﺸﻐﻴﻞ ﺍﺿﻐﻂ ﻋﻠﻰ ﺷﺎﺷﺔ ﻳﺘﻢ ﻋﺮﺽ “...
- Page 60 ﺍﻟﻮﻇﺎﺋﻒ ﺍﳌﻔﻴﺪﺓ ﻳ ﹸ ﻌﺪ ﺗﺸﻐﻴﻞ ﺧﺎﺻﻴﺔ ﺍﻟﻌﲔ ﺍﻟﺬﻛﻴﺔ ﻣﻔﻴﺪ ﹰ ﺍ ﻟﺘﻮﻓﻴﺮ ﺍﻟﻄﺎﻗﺔ .ﻟﻢ ﻳﺘﻢ ﺭﺻﺪ ﺍﻷﺷﺨﺎﺹ ﻓﻲ ﻣﻨﻄﻘﺔ ﺍﻻﺳﺘﺸﻌﺎﺭ .ﻳﺘﻢ ﺭﺻﺪ ﺍﻷﺷﺨﺎﺹ ﻓﻲ ﻣﻨﻄﻘﺔ ﺍﻻﺳﺘﺸﻌﺎﺭ ﻳﻌﻤﻞ ﻣﻜﻴﻒ ﺍﻟﻬﻮﺍﺀ ﺑﺸﻜﻞﹴ ﻃﺒﻴﻌﻲ ﺑﻴﻨﻤﺎ ﻳﺮﺻﺪ ﺍﳌﺴﺘﺸﻌﺮ ﺣﺮﻛﺔ .ﺩﻗﻴﻘﺔ ﺳﻴﻘﻮﻡ ﻣﻜﻴﻒ ﺍﻟﻬﻮﺍﺀ ﺑﺎﻟﺘﺤﻮﻳﻞ ﺇﻟﻰ ﻭﺿﻊ ﺗﻮﻓﻴﺮ ﺍﻟﻄﺎﻗﺔ ﺑﻌﺪ .ﺍﻷﺷﺨﺎﺹ...
- Page 61 ﺍﻟﻮﻇﺎﺋﻒ ﺍﳌﻔﻴﺪﺓ ﺗﺸﻐﻴﻞ ﺧﺎﺻﻴﺔ ﺍﻟﺘﺪﻓﻖ ﺍﳌﺮﻳﺢ ﻟﻠﻬﻮﺍﺀ / ﺍﻟﻌﲔ ﺍﻟﺬﻛﻴﺔ ﺗﺸﻐﻴﻞ ﺧﺎﺻﻴﺔ ﺍﻟﺘﺪﻓﻖ ﺍﳌﺮﻳﺢ ﻟﻠﻬﻮﺍﺀ: ﻳﻜﻮﻥ ﺍﲡﺎﻩ ﺗﺪﻓﻖ ﺍﻟﻬﻮﺍﺀ ﻧﺤﻮ ﺍﻷﻋﻠﻰ ﺑﻴﻨﻤﺎ ﻳﺘﻢ ﺍﻟﺘﺸﻐﻴﻞ ﻓﻲ ﺍﻟﻮﺿﻊ ﺍﻟﺘﺒﺮﻳﺪ، ﻭﻳﻜﻮﻥ ﻧﺤﻮ ﺍﻷﺳﻔﻞ ﺑﻴﻨﻤﺎ ﻳﺘﻢ ﺍﻟﺘﺸﻐﻴﻞ ﻓﻲ ﺍﻟﻮﺿﻊ ﺍﻟﺘﺪﻓﺌﺔ. ﺗﻌﻤﻞ ﻫﺬﻩ ﺍﻟﻮﻇﻴﻔﺔ ﻋﻠﻰ .ﻣﻨﻊ...
- Page 62 ﺍﻟﺘﺸﻐﻴﻞ ﺍﻷﺳﺎﺳﻲ ﺿﺒﻂ ﻧﺴﺒﺔ ﺗﺪﻓﻖ ﺍﻟﻬﻮﺍﺀ .ﳝﻜﻨﻚ ﺿﺒﻂ ﻧﺴﺒﺔ ﺗﺪﻓﻖ ﺍﻟﻬﻮﺍﺀ ﻟﺰﻳﺎﺩﺓ ﺷﻌﻮﺭﻙ ﺑﺎﻟﺮﺍﺣﺔ ﻟﻀﺒﻂ ﺗﻬﻴﺌﺔ ﻧﺴﺒﺔ ﺗﺪﻓﻖ ﺍﻟﻬﻮﺍﺀ ﺍﺿﻐﻂ .ﺗﻌﻤﻞ ﻋﻠﻰ ﺗﻐﻴﻴﺮ ﺗﻬﻴﺌﺔ ﻧﺴﺒﺔ ﺗﺪﻓﻖ ﺍﻟﻬﻮﺍﺀ ﺑﺎﻟﺘﺘﺎﺑﻊ ﻓﻲ ﻛﻞ ﻣﺮﺓ ﺗﻘﻮﻡ ﺑﻬﺎ ﺑﺎﻟﻀﻐﻂ ﻋﻠﻰ ﺍﻟﺰﺭ • ﺧﺎﺻﻴﺔ ﺍﻟﺘﺸﻐﻴﻞ ﺍﻟﻬﺎﺩﺉ ﻟﻠﻮﺣﺪﺓ ﺍﻟﺪﺍﺧﻠﻴﺔ ﺍﻟﺘﻠﻘﺎﺋﻲ...
- Page 63 ﺍﻟﺘﺸﻐﻴﻞ ﺍﻷﺳﺎﺳﻲ ﺿﺒﻂ ﺍﲡﺎﻩ ﺗﺪﻓﻖ ﺍﻟﻬﻮﺍﺀ .ﳝﻜﻨﻚ ﺿﺒﻂ ﺍﲡﺎﻩ ﺗﺪﻓﻖ ﺍﻟﻬﻮﺍﺀ ﻟﺰﻳﺎﺩﺓ ﺷﻌﻮﺭﻙ ﺑﺎﻟﺮﺍﺣﺔ ﺗﻨﺒﻴﻪ .ﻗﻢ ﺩﺍﺋﻤ ﹰ ﺎ ﺑﺎﺳﺘﻌﻤﺎﻝ ﻭﺣﺪﺓ ﺍﻟﺘﺤﻜﻢ ﻋﻦ ﺑﻌﺪ ﻟﻀﺒﻂ ﺯﻭﺍﻳﺎ ﺍﻟﺮﻓﺎﺭﻑ ﻭﻓﺘﺤﺎﺕ ﺍﻟﺘﻬﻮﻳﺔ • .− ﺇﺫﺍ ﻗﻤﺖ ﲟﺤﺎﻭﻟﺔ ﲢﺮﻳﻚ ﺍﻟﺮﻓﺎﺭﻑ ﻭﻓﺘﺤﺎﺕ ﺍﻟﺘﻬﻮﻳﺔ ﺑﺎﻟﻘﻮﺓ ﺑﺎﺳﺘﻌﻤﺎﻝ ﻳﺪﻳﻚ ﺃﺛﻨﺎﺀ ﺗﺄﺭﺟﺤﻬﺎ، ﻗﺪ ﻳﺘﺴﺒﺐ ﺫﻟﻚ ﻓﻲ ﺗﻠﻒ ﺍﻵﻟﻴﺔ .−...
- Page 64 ﺍﻟﺘﺸﻐﻴﻞ ﺍﻷﺳﺎﺳﻲ ﻟﺘﻐﻴﻴﺮ ﺗﻬﻴﺌﺔ ﺩﺭﺟﺔ ﺍﳊﺮﺍﺭﺓ ﺍﺿﻐﻂ .ﳋﻔﺾ ﺩﺭﺟﺔ ﺍﳊﺮﺍﺭﺓ ﻟﺮﻓﻊ ﺩﺭﺟﺔ ﺍﳊﺮﺍﺭﺓ ﻭﺍﺿﻐﻂ ﺍﺿﻐﻂ • ﺍﻟﺘﺸﻐﻴﻞ ﻓﻲ ﺍﻟﻮﺿﻊ ﺍﻟﺘﺸﻐﻴﻞ ﻓﻲ ﺍﻟﻮﺿﻊ ﺍﻟﺘﺸﻐﻴﻞ ﻓﻲ ﺍﻟﻮﺿﻊ ﺍﻟﺘﺸﻐﻴﻞ ﻓﻲ ﺍﻟﻮﺿﻊ ﺍﳉﺎﻑ ﺃﻭ ﺍﳌﺮﻭﺣﺔ ﺍﻟﺘﻠﻘﺎﺋﻲ ﺍﻟﺘﺪﻓﺌﺔ ﺍﻟﺘﺒﺮﻳﺪ .ﻳﺘﻌﺬﺭ ﺗﻐﻴﻴﺮ ﺗﻬﻴﺌﺔ ﺩﺭﺟﺔ ﺍﳊﺮﺍﺭﺓ ﻡ ﻡ...
- Page 65 ﺍﻟﺘﺸﻐﻴﻞ ﺍﻷﺳﺎﺳﻲ · ﺍﻟﺘﺸﻐﻴﻞ ﻓﻲ ﺍﻟﻮﺿﻊ ﺍﻟﺘﻠﻘﺎﺋﻲ · ﺍﳉﺎﻑ · ﺍﻟﺘﺒﺮﻳﺪ ﺍﻟﺘﺪﻓﺌﺔ · ﺍﳌﺮﻭﺣﺔ .ﻳﻌﻤﻞ ﻣﻜﻴﻒ ﺍﻟﻬﻮﺍﺀ ﻋﻠﻰ ﻭﺿﻊ ﺍﻟﺘﺸﻐﻴﻞ ﺍﻟﺬﻱ ﺗﻘﻮﻡ ﺑﺎﺧﺘﻴﺎﺭﻩ .ﻓﻲ ﺍﳌﺮﺓ ﺍﻟﺘﺎﻟﻴﺔ ﺍﻟﺘﻲ ﺳﻴﺘﻢ ﻓﻴﻬﺎ ﺍﻟﺘﺸﻐﻴﻞ، ﺳﻴﻌﻤﻞ ﻣﻜﻴﻒ ﺍﻟﻬﻮﺍﺀ ﻋﻠﻰ ﻧﻔﺲ ﻭﺿﻊ ﺍﻟﺘﺸﻐﻴﻞ ﻟﺒﺪﺀ ﺍﻟﺘﺸﻐﻴﻞ .ﻭﻗﻢ ﺑﺎﺧﺘﻴﺎﺭ ﻭﺿﻊ ﺍﻟﺘﺸﻐﻴﻞ ﺍﺿﻐﻂ...
- Page 66 ﺍﻗﺮﺃ ﻗﺒﻞ ﺍﻟﻘﻴﺎﻡ ﺑﺎﻟﺘﺸﻐﻴﻞ ﻟﻀﺒﻂ ﺍﻟﺴﺎﻋﺔ ﺍﺿﻐﻂ ﻋﻠﻰ ﺷﺎﺷﺔ ﻳﺘﻢ ﻋﺮﺽ “ ” ﻭ ﻳﻮﻣﺾ ﻛﻞ ﻣﻦ “ ” “ ” .ﻟﻀﺒﻂ ﺍﻟﻴﻮﻡ ﺍﳊﺎﻟﻲ ﻣﻦ ﺃﻳﺎﻡ ﺍﻷﺳﺒﻮﻉ ﺍﺿﻐﻂ ﺍﺿﻐﻂ ﻳﻮﻣﺾ “ ” .ﻟﻀﺒﻂ ﺍﻟﺴﺎﻋﺔ ﻟﻠﻮﻗﺖ ﺍﳊﺎﺿﺮ ﺍﺿﻐﻂ .ﻟﻸﺳﻔﻞ ﻣﻊ ﺍﻻﺳﺘﻤﺮﺍﺭ ﻳﻌﻤﻞ ﻋﻠﻰ ﺯﻳﺎﺩﺓ ﺍﻟﻮﻗﺖ ﺍﳌﻌﺮﻭﺽ ﺃﻭ ﺗﻘﻠﻴﻠﻪ ﺑﺴﺮﻋﺔ ﺃﻭ...
- Page 67 ﺍﻗﺮﺃ ﻗﺒﻞ ﺍﻟﻘﻴﺎﻡ ﺑﺎﻟﺘﺸﻐﻴﻞ ﺍﻟﺘﺤﻀﻴﺮ ﻗﺒﻞ ﺍﻟﻘﻴﺎﻡ ﺑﺎﻟﺘﺸﻐﻴﻞ ﻹﺩﺧﺎﻝ ﺍﻟﺒﻄﺎﺭﻳﺎﺕ .ﻗﻢ ﺑﺰﻟﻖ ﺍﻟﻐﻄﺎﺀ ﺍﻷﻣﺎﻣﻲ ﻟﻨﺰﻋﻪ ﻭ ﻗﻢ ﺑﻮﺿﻊ !ﺑﺸﻜﻞﹴ ﺻﺤﻴﺢ AAA.LR03 ﺃﺩﺧﻞ 2 ﻣﻦ ﺍﻟﺒﻄﺎﺭﻳﺎﺕ ﺍﳉﺎﻓﺔ ﻣﻘﺎﺱ .()ﻗﻠﻮﻳﺔ .ﻗﻢ ﺑﺈﺭﺟﺎﻉ ﺍﻟﻐﻄﺎﺀ ﺍﻷﻣﺎﻣﻲ ﻟﺘﺜﺒﻴﺖ ﺣﺎﻣﻞ ﻭﺣﺪﺓ ﺍﻟﺘﺤﻜﻢ ﻋﻦ ﺑﻌﺪ ﻋﻠﻰ ﺍﳉﺪﺍﺭ ﻭﺣﺪﺓ...
- Page 68 ﺍﻗﺮﺃ ﻗﺒﻞ ﺍﻟﻘﻴﺎﻡ ﺑﺎﻟﺘﺸﻐﻴﻞ ﻗﻢ ﺑﻔﺘﺢ ﺍﻟﻐﻄﺎﺀ ﺍﻷﻣﺎﻣﻲ ﺯﺭ ﺍﻻﺧﺘﻴﺎﺭ ﺍﻟﻮﺿﻊ .ﻳﻌﻤﻞ ﻋﻠﻰ ﺍﺧﺘﻴﺎﺭ ﻭﺿﻊ ﺍﻟﺘﺸﻐﻴﻞ • /)ﺍﻟﺘﻠﻘﺎﺋﻲ/ﺍﳉﺎﻑ/ﺍﻟﺘﺒﺮﻳﺪ/ﺍﻟﺘﺪﻓﺌﺔ (ﺍﳌﺮﻭﺣﺔ ﺻﻔﺤﺔ ﺍﻟﺰﺭ ﺍﻗﺘﺼﺎﺩﻱ/ﺍﻟﻬﺎﺩﺉ ﺗﺸﻐﻴﻞ ﺧﺎﺻﻴﺔ ﺍﻗﺘﺼﺎﺩﻱ/ﺍﻟﺘﺸﻐﻴﻞ • .ﺍﻟﻬﺎﺩﺉ ﻟﻠﻮﺣﺪﺓ ﺍﳋﺎﺭﺟﻴﺔ ﺻﻔﺤﺔ /ﺍﻟﺰﺭ ﺍﻟﻮﺿﻊ ﺍﳌﺮﻳﺢ ﺍﳌﺴﺘﺸﻌﺮ ﺍﻟﺰﺭ ﺍﻟﺘﺄﺭﺟﺢ .ﻳﻌﻤﻞ ﻋﻠﻰ ﺿﺒﻂ ﺍﲡﺎﻩ ﺗﺪﻓﻖ ﺍﻟﻬﻮﺍﺀ ﺗﺸﻐﻴﻞ...
- Page 69 ﺍﻗﺮﺃ ﻗﺒﻞ ﺍﻟﻘﻴﺎﻡ ﺑﺎﻟﺘﺸﻐﻴﻞ ﺃﺳﻤﺎﺀ ﺍﻷﺟﺰﺍﺀ ﻭﺣﺪﺓ ﺍﻟﺘﺤﻜﻢ ﻋﻦ ﺑﻌﺪ ﺟﻬﺎﺯ ﺇﺭﺳﺎﻝ ﺍﻹﺷﺎﺭﺓ (LCD) ﺷﺎﺷﺔ ﻋﺮﺽ ﺟﻬﺎﺯ ﺍﻻﺳﺘﻘﺒﺎﻝ .ﺗﻌﻤﻞ ﻋﻠﻰ ﻋﺮﺽ ﺍﻟﺘﻬﻴﺌﺎﺕ ﺍﳊﺎﻟﻴﺔ • )ﻓﻲ ﺍﻟﺮﺳﻢ ﺍﻟﺘﻮﺿﻴﺤﻲ ﻫﺬﺍ، ﻳﺘﻢ ﻋﺮﺽ ﻛﻞ ﻗﺴﻢ ﻻﺳﺘﻌﻤﺎﻝ ﻭﺣﺪﺓ ﺍﻟﺘﺤﻜﻢ ﻋﻦ ﺑﻌﺪ، ﻗﻢ ﺑﺘﻮﺟﻴﻪ • ﻣﻊ...
- Page 70 ﺍﻗﺮﺃ ﻗﺒﻞ ﺍﻟﻘﻴﺎﻡ ﺑﺎﻟﺘﺸﻐﻴﻞ ﻗﻢ ﺑﻔﺘﺢ ﺍﻟﻠﻮﺣﺔ ﺍﻷﻣﺎﻣﻴﺔ ﻣﺮﺷﺢ ﺍﻟﻬﻮﺍﺀ ﻣﺮﺷﺢ ﺗﻨﻘﻴﺔ ﺍﻟﻬﻮﺍﺀ ﺍﳌﺼﻨﻮﻉ ﻣﻦ ﻣﺎﺩﺓ ﺃﺑﺎﺗﻴﺖ ﺍﻟﺘﻴﺘﺎﻧﻴﻮﻡ ﻭﺍﻟﺬﻱ ﻳﻌﻤﻞ ﺑﺎﻟﺘﺤﻔﻴﺰ ﺍﻟﻀﻮﺋﻲ ﺍﻟﻮﺣﺪﺓ ﺍﳋﺎﺭﺟﻴﺔ .ﺘﻠﻔﺔﻗﺪ ﻳﺨﺘﻠﻒ ﺷﻜﻞ ﺍﻟﻮﺣﺪﺓ ﺍﳋﺎﺭﺟﻴﺔ ﻋﻤﺎ ﻫﻮ ﻋﻠﻴﻪ ﻓﻲ ﺍﳌﻮﺩﻳﻼﺕ ﺍ • ﻣﺪﺧﻞ ﺍﻟﻬﻮﺍﺀ ﻣﺴﺘﺸﻌﺮ ﺩﺭﺟﺔ ﺍﳊﺮﺍﺭﺓ ﺍﳋﺎﺭﺟﻴﺔ ()ﺍﳋﻠﻔﻲ...
- Page 71 ﺍﻗﺮﺃ ﻗﺒﻞ ﺍﻟﻘﻴﺎﻡ ﺑﺎﻟﺘﺸﻐﻴﻞ ﺃﺳﻤﺎﺀ ﺍﻷﺟﺰﺍﺀ ﺍﻟﻮﺣﺪﺓ ﺍﻟﺪﺍﺧﻠﻴﺔ ﺍﻟﻠﻮﺣﺔ ﺍﻷﻣﺎﻣﻴﺔ ﻣﺪﺧﻞ ﺍﻟﻬﻮﺍﺀ ﻟﺴﺎﻥ ﺍﻟﻠﻮﺣﺔ ﻣﺴﺘﺸﻌﺮ ﺍﻟﻌﲔ ﺍﻟﺬﻛﻴﺔ ﻳﻌﻤﻞ ﻋﻠﻰ ﺭﺻﺪ ﺣﺮﻛﺔ ﺍﻷﺷﺨﺎﺹ • ﻭﻳﻘﻮﻡ ﺑﺎﻟﺘﺒﺪﻳﻞ ﺗﻠﻘﺎﺋﻴ ﹰ ﺎ ﺑﲔ ﺍﻟﺘﺸﻐﻴﻞ .ﺍﻟﻌﺎﺩﻱ ﻭﺍﻟﺘﺸﻐﻴﻞ ﺍﳌﻮﻓﺮ ﻟﻠﻄﺎﻗﺔ ، ﺻﻔﺤﺔ ﻟﻮﺣﺔ ﺍﺳﻢ ﻣﺨﺮﺝ ﺍﻟﻬﻮﺍﺀ ﺍﳌﻮﺩﻳﻞ...
- Page 72 ﺍﻗﺮﺃ ﻗﺒﻞ ﺍﻟﻘﻴﺎﻡ ﺑﺎﻟﺘﺸﻐﻴﻞ ﺗﻨﺒﻴﻪ .ﻻ ﺗﻌﻤﺪ ﺇﻟﻰ ﺳﺪ ﻣﺪﺍﺧﻞ ﺃﻭ ﻣﺨﺎﺭﺝ ﺍﻟﻬﻮﺍﺀ. ﺗﻘﻠﻴﻞ ﺗﺪﻓﻖ ﺍﻟﻬﻮﺍﺀ ﻗﺪ ﻳﺆﺩﻱ ﺇﻟﻰ ﺃﺩﺍﺀ ﻏﻴﺮ ﻛﺎﻣﻞ ﺃﻭ ﺣﺪﻭﺙ ﻣﺸﻜﻠﺔ • ﻻ ﲡﻠﺲ ﻋﻠﻰ ﺍﻟﻮﺣﺪﺓ ﺍﳋﺎﺭﺟﻴﺔ ﺃﻭ ﺗﻀﻊ ﺃﺟﺴﺎﻣ ﹰ ﺎ ﻋﻠﻰ ﺍﻟﻮﺣﺪﺓ ﺃﻭ ﺗﺴﺤﺐ ﺍﻟﻮﺣﺪﺓ. ﺇﻥ ﺍﻟﻘﻴﺎﻡ ﺑﺬﻟﻚ ﻗﺪ ﻳﺘﺴﺒﺐ ﻓﻲ ﻭﻗﻮﻉ ﺣﻮﺍﺩﺙ، ﻣﺜﻞ ﺍﻟﺴﻘﻮﻁ ﺃﻭ ﺍﻻﻧﻘﻼﺏ •...
- Page 73 ﺍﻗﺮﺃ ﻗﺒﻞ ﺍﻟﻘﻴﺎﻡ ﺑﺎﻟﺘﺸﻐﻴﻞ ﺗﻨﺒﻴﻬﺎﺕ ﺍﺣﺘﻴﺎﻃﻴﺔ ﺣﻮﻝ ﺍﻟﺴﻼﻣﺔ ﺍﻗﺮﺃ ﺍﻟﺘﻨﺒﻴﻬﺎﺕ ﺍﻻﺣﺘﻴﺎﻃﻴﺔ ﺣﻮﻝ ﺍﻟﺴﻼﻣﺔ ﺍﳌﻮﺟﻮﺩﺓ ﻓﻲ ﻫﺬﺍ ﲤﺖ ﺗﻌﺒﺌﺔ ﻫﺬﺍ ﺍﳉﻬﺎﺯ ﺑﻐﺎﺯ .ﺍﻟﺪﻟﻴﻞ ﺑﻌﻨﺎﻳﺔ ﻗﺒﻞ ﺗﺸﻐﻴﻞ ﺍﻟﻮﺣﺪﺓ .ﺍﺣﺘﻔﻆ ﺑﻬﺬﺍ ﺍﻟﺪﻟﻴﻞ ﻓﻲ ﻣﻜﺎﻥ ﳝﻜﻦ ﻟﻠﻤﺴﺘﺨﺪﻡ ﺍﻟﻌﺜﻮﺭ ﻋﻠﻴﻪ ﺑﺴﻬﻮﻟﺔ • ﰎ ﺗﺼﻨﻴﻒ ﺍﻟﺘﻨﺒﻴﻬﺎﺕ ﺍﻻﺣﺘﻴﺎﻃﻴﺔ ﺍﻟﻮﺍﺭﺩﺓ ﻫﻨﺎ ﺇﻟﻰ ﻧﻮﻋﲔ ﻭﻫﻤﺎ ﲢﺬﻳﺮ ﻭ ﺗﻨﺒﻴﻪ. ﻳﺤﺘﻮﻱ ﻛﻼﻫﻤﺎ ﻋﻠﻰ ﻣﻌﻠﻮﻣﺎﺕ ﻫﺎﻣﺔ ﺗﺘﻌﻠﻖ ﺑﺎﻟﺴﻼﻣﺔ. ﺍﺣﺮﺹ ﻋﻠﻰ ﺍﺗﺒﺎﻉ ﺟﻤﻴﻊ ﺍﻟﺘﻨﺒﻴﻬﺎﺕ •...
- Page 74 ﺍﶈﺘﻮﻳﺎﺕ ﺍﻗﺮﺃ ﻗﺒﻞ ﺍﻟﻘﻴﺎﻡ ﺑﺎﻟﺘﺸﻐﻴﻞ ..........ﺗﻨﺒﻴﻬﺎﺕ ﺍﺣﺘﻴﺎﻃﻴﺔ ﺣﻮﻝ ﺍﻟﺴﻼﻣﺔ ..................ﺃﺳﻤﺎﺀ ﺍﻷﺟﺰﺍﺀ ..........ﺍﻟﺘﺤﻀﻴﺮ ﻗﺒﻞ ﺍﻟﻘﻴﺎﻡ ﺑﺎﻟﺘﺸﻐﻴﻞ ﺍﻟﺘﺸﻐﻴﻞ ﺍﻷﺳﺎﺳﻲ · ﺍﻟﺘﺸﻐﻴﻞ ﻓﻲ ﺍﻟﻮﺿﻊ ﺍﻟﺘﻠﻘﺎﺋﻲ · ﺍﳉﺎﻑ · ﺍﻟﺘﺒﺮﻳﺪ ............ﺍﻟﺘﺪﻓﺌﺔ · ﺍﳌﺮﻭﺣﺔ ..........ﺿﺒﻂ ﺍﲡﺎﻩ ﺗﺪﻓﻖ ﺍﻟﻬﻮﺍﺀ ...........ﺿﺒﻂ ﻧﺴﺒﺔ ﺗﺪﻓﻖ ﺍﻟﻬﻮﺍﺀ ﺍﻟﻮﻇﺎﺋﻒ...
- Page 75 ﺍﳌﻤﻴﺰﺍﺕ ﺗﻌﺰﻳﺰ ﳌﻔﻬﻮﻡ ﺍﻟﺮﺍﺣﺔ ﻭﺗﻮﻓﻴﺮ ﻟﻠﻄﺎﻗﺔ ﺗﻌﺰﻳﺰ ﳌﻔﻬﻮﻡ ﺍﻟﺮﺍﺣﺔ ﻭﺗﻮﻓﻴﺮ ﻟﻠﻄﺎﻗﺔ ﻣﺴﺘﺸﻌﺮ ﺍﻟﻌﲔ ﺍﻟﺬﻛﻴﺔ ﻳﻌﻤﻞ ﻣﺴﺘﺸﻌﺮ ﺍﻟﻌﲔ ﺍﻟﺬﻛﻴﺔ ﻋﻠﻰ ﺭﺻﺪ ﺣﺮﻛﺔ ﺍﻹﻧﺴﺎﻥ ﻓﻲ ﻏﺮﻓﺔ ﻣﺎ. ﻓﻲ ﺣﺎﻝ ﻋﺪﻡ ﻭﺟﻮﺩ ﺃﻱ ﺷﺨﺺ ﺩﺍﺧﻞ ﺍﻟﻐﺮﻓﺔ ﻷﻛﺜﺮ ﻣﻦ 02 ﺩﻗﻴﻘﺔ، ﺗﺘﻐﻴﺮ ﻋﻤﻠﻴﺔ ﺍﻟﺘﺸﻐﻴﻞ ﺗﻠﻘﺎﺋﻴ ﹰ ﺎ .ﻟﺘﺼﺒﺢ...
- Page 76 DAIKIN ROOM AIR CONDITIONER OPERATION MANUAL Enjoy year-round comfort. Enjoy year-round comfort. Enjoy year-round comfort. Enjoy year-round comfort. Enjoy year-round comfort. MODELS FTXM28PVMK FTKM28PVMK The two-dimensional bar code is a manufacturing code. 3P384084-2 M14B141 (1411) HT...
Need help?
Do you have a question about the FTXM28PVMK and is the answer not in the manual?
Questions and answers