
Subscribe to Our Youtube Channel
Related Manuals for Vmac DM00030


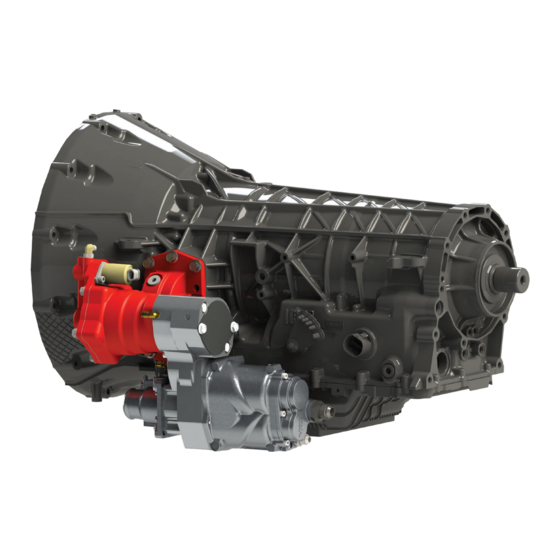
Summary of Contents for Vmac DM00030
- Page 1 ® Installation Manual for VMAC System DM00030 2023 + Ford Super Duty F250 – F600 6.7 L Diesel www.vmacair.com...
-
Page 3: Table Of Contents
Accessory Products from VMAC ........53... - Page 4 Copyright © 2023 VMAC Global Technology Inc. All Rights Reserved. These materials are provided by VMAC for informational purposes only, without representation or warranty of any kind, and VMAC shall not be liable for errors or omissions with respect to the materials. The only warranties for VMAC...
-
Page 5: Safety
VMAC will not be held responsible for any liability, consequential damages, injuries, loss or damage to individuals or to equipment as a result of the failure of anyone to properly adhere to the procedures set out in this manual or standard safety practices. -
Page 6: Warranty
1 October, 2015. Warranty Registration The VMAC warranty registration form is located near the back of this manual. This warranty registration form must be completed and sent to VMAC at the time of installation for any subsequent warranty claim to be considered valid. - Page 7 2) VMAC will provide direction for repair or replacement of the failed components. 3) If requested, failed parts must be returned to VMAC for evaluation. 4) Dealers may login to the VMAC website to view the "VMAC Labour Time Guide" (under “Agreements”) to see the allowable warranty labour times.
-
Page 8: General Information
Please contact VMAC for replacement hoses and further information. Ordering Parts To order parts, contact a VMAC dealer. The dealer will ask for the VMAC serial number, part number, description and quantity. Locate the nearest dealer online at www.vmacair.com/dealer-locator or call 1-877-912-6605. - Page 9 All fasteners must be torqued to specifications. Use manufacturers’ torque values for OEM fasteners. The torque values supplied in Table 1 are intended for VMAC supplied components, or for use as a guide in the absence of a torque value provided by an OEM.
-
Page 10: Preparing For Installation
Review the contents of the system using the illustrated parts list to ensure all components are present and in the correct quantity. If any components are missing, have the system ID ready and call VMAC Technical Support. ☐ Disconnect both batteries. -
Page 11: Modifying The Hoses, Installing The Cooler
(Figure 3). To engine 6 3/4 in 90° Figure 3 — Lower radiator hose modification VMAC - Vehicle Mounted Air Compressors VMAC Technical Support: 888-241-2289 VMAC Knowledge Base: kb.vmacair.com... - Page 12 Wrap the 6 in section around the straight section of the driver side coolant tube and secure with cable ties (Figure 5). 6 in coolant hose abrasion sleeve Figure 5 — Engine side anti-abrasion sleeve VMAC - Vehicle Mounted Air Compressors VMAC Technical Support: 888-241-2289 VMAC Knowledge Base: kb.vmacair.com...
- Page 13 Mount the cooler to the cooler bracket (Figure 6). Figure 6 — Install cooler ☐ Connect passenger and driver side radiator hoses, and tubes to the VMAC cooler. Route the steel tube connectors between the cross member and the radiator support (Figure 7).
- Page 14 (short side to cooler) Coolant elbow P/N: 1700658 Figure 8 — VMAC cooler assembly ☐ Disconnect the small flexible hose secured to the cable run tray on the front of the engine, above the steering linkage, from the metal coolant tube. Retain the OEM spring clamp (Figure 9).
- Page 15 Secure the plugged OEM flexible hose to the metal coolant tube using a cable tie. ☐ Route the hose between the body and the frame crossmembers, following the coolant tube toward the cooler. VMAC - Vehicle Mounted Air Compressors VMAC Technical Support: 888-241-2289 VMAC Knowledge Base: kb.vmacair.com...
- Page 16 Connect the hose to the small spigot on the passenger side of the cooler using a hose clamp (Figure 12). Front of vehicle Figure 12 — Connect hose to VMAC cooler ☐ Using the supplied P-clips, bolts, and clip nuts, secure the heater hose to the radiator support.
- Page 17 ☐ Using the OEM fasteners, mount the coolant valve to the bracket (Figure 14). ☐ Using a cable tie, re-secure the wire harness to the bracket. VMAC - Vehicle Mounted Air Compressors VMAC Technical Support: 888-241-2289 VMAC Knowledge Base: kb.vmacair.com...
-
Page 18: Installing The Pto
Route the hydraulic feed line from the fitting, over top of the PTO, and connect it to the corresponding fitting on the top of the PTO (Figure 15). VMAC - Vehicle Mounted Air Compressors VMAC Technical Support: 888-241-2289 VMAC Knowledge Base: kb.vmacair.com... - Page 19 Install clip nuts Figure 17 — Install the regulator ☐ Locate the M6 stud on the driver side firewall near the OEM ground strap (Figure 17). VMAC - Vehicle Mounted Air Compressors VMAC Technical Support: 888-241-2289 VMAC Knowledge Base: kb.vmacair.com...
- Page 20 Using the supplied P-clip and fasteners, secure the harnesses where they pass over the oil fill bracket (Figure 19). Figure 19 — Install oil fill bracket VMAC - Vehicle Mounted Air Compressors VMAC Technical Support: 888-241-2289 VMAC Knowledge Base: kb.vmacair.com...
-
Page 21: Installing The Air Oil Separator Tank (Aost)
(AOST) Dependent upon other installed equipment, it may be necessary to move the AOST from its intended location. The hoses used in VMAC compressor systems have a specific inner liner that is compatible with VMAC compressor oil. Use of hoses other than those supplied or recommended by VMAC may cause compressor damage and may void the warranty. - Page 22 *Using the (×2) supplied 3 in × 1/4 in pinch bolts and install them into the mounting clamps. Leave the fasteners finger tight to allow for adjustment when installing the hoses. VMAC - Vehicle Mounted Air Compressors VMAC Technical Support: 888-241-2289 VMAC Knowledge Base: kb.vmacair.com...
- Page 23 Figure 22 — Securing the AOST (Rear view) AOST orientation is critical. The arrow must be pointing up to prevent compressor failure due to oil starvation, or oil in the discharge air. VMAC - Vehicle Mounted Air Compressors VMAC Technical Support: 888-241-2289 VMAC Knowledge Base: kb.vmacair.com...
-
Page 24: Hose Requirements
Based on the desired location of the AOST, the hose lengths provided with this system may not be ideal. VMAC suggests first trying to adjust the AOST within its mounts to take up any excess slack in the hoses. If this is not effective, the hoses can be shortened or replaced as necessary, or hose extenders can be used. -
Page 25: Routing And Connecting The Hoses
Cut the tube squarely, using only the tube is fully inserted proper tubing cutters as side cutters will deform the tube. O-ring Figure 23 — Push-to-connect fittings VMAC - Vehicle Mounted Air Compressors VMAC Technical Support: 888-241-2289 VMAC Knowledge Base: kb.vmacair.com... - Page 26 Using the supplied P-clip and fasteners, secure the shorter 3/4 in hose (oil fill) to the oil fill bracket installed earlier (Figure 25). Figure 25 — Install oil fill hose VMAC - Vehicle Mounted Air Compressors VMAC Technical Support: 888-241-2289 VMAC Knowledge Base: kb.vmacair.com...
- Page 27 Connect the 90° fitting on the 3/4 in (discharge) hose to the front of the Tee fitting on the AOST. ☐ Connect the shorter 1/2 in hose (AOST to cooler) to the matching fitting on the front of the AOST. VMAC - Vehicle Mounted Air Compressors VMAC Technical Support: 888-241-2289 VMAC Knowledge Base: kb.vmacair.com...
- Page 28 Using the supplied 1 in and 3/4 in heat wrap, protect the 3/4 in and 1/2 in hoses where they pass below the exhaust (Figure 28). VMAC - Vehicle Mounted Air Compressors VMAC Technical Support: 888-241-2289 VMAC Knowledge Base: kb.vmacair.com...
- Page 29 Figure 30 — Connect remote regulator tubes ☐ Install the translucent 3/16 in PTFE tube into the 90° fitting on the remote regulator (Figure 30). VMAC - Vehicle Mounted Air Compressors VMAC Technical Support: 888-241-2289 VMAC Knowledge Base: kb.vmacair.com...
- Page 30 ☐ Using the supplied cable ties, secure the hose bundle as necessary to protect from road hazards and contact with any hot, sharp or moving parts. VMAC - Vehicle Mounted Air Compressors VMAC Technical Support: 888-241-2289 VMAC Knowledge Base: kb.vmacair.com...
-
Page 31: Installing The Air Intake
Using the supplied gear clamps, attach the flexible hose to the connector tube (Figure 33). Flexible hose Front drive shaft (4WD only) Front of vehicle Figure 33 — Installing the air filter VMAC - Vehicle Mounted Air Compressors VMAC Technical Support: 888-241-2289 VMAC Knowledge Base: kb.vmacair.com... - Page 32 Ensure the air intake hose assembly is adequately secured away from hot, sharp or moving components using rubber coated P-clips or cable ties (not supplied) as required. VMAC - Vehicle Mounted Air Compressors VMAC Technical Support: 888-241-2289 VMAC Knowledge Base: kb.vmacair.com...
-
Page 33: Adding Oil To The System
Adding Oil to the System The VMAC supplied and approved compressor oil must be used in this system. Failure to use this special oil will result in damage to the compressor and will void warranty. Do not overfill the system. Overfilling the system with oil can flood the sight glass window and make the system appear empty. -
Page 34: Installing The Control Components
Do not use a test light to probe for power on vehicle circuits, the increased current draw of the test light may damage components. • VMAC recommends using only sealed crimp and solder butt connectors for all electrical connections. •... - Page 35 Tying into OEM connectors Some OEM connectors may have locking tabs that must be disengaged prior to inserting a crimped connector. VMAC - Vehicle Mounted Air Compressors VMAC Technical Support: 888-241-2289 VMAC Knowledge Base: kb.vmacair.com...
- Page 36 Digital Throttle Control (DTC) Wire Schematic Figure 37 — Digital throttle control VMAC - Vehicle Mounted Air Compressors VMAC Technical Support: 888-241-2289 VMAC Knowledge Base: kb.vmacair.com...
- Page 37 Using the supplied cable ties, mount the inverter onto the inverter bracket (Figure 38). Figure 38 — Mount inverter ☐ Remove the driver side vent bezel (Figure 39). Figure 39 — Remove vent bezel VMAC - Vehicle Mounted Air Compressors VMAC Technical Support: 888-241-2289 VMAC Knowledge Base: kb.vmacair.com...
- Page 38 ☐ Remove the side dashboard panel (Figure 40). Figure 40 — Remove Side panel VMAC - Vehicle Mounted Air Compressors VMAC Technical Support: 888-241-2289 VMAC Knowledge Base: kb.vmacair.com...
- Page 39 Figure 41 — Remove lower dashboard ☐ Using the OEM fasteners, secure the inverter bracket behind the lower dashboard (Figure 42). fasteners Figure 42 — Install inverter assembly VMAC - Vehicle Mounted Air Compressors VMAC Technical Support: 888-241-2289 VMAC Knowledge Base: kb.vmacair.com...
- Page 40 DTC to a good ground under the dashboard. ☐ Remove the kick panel beside the hood release lever (Figure 43). Hood release lever C264 connector Figure 43 — Locate C264 connector VMAC - Vehicle Mounted Air Compressors VMAC Technical Support: 888-241-2289 VMAC Knowledge Base: kb.vmacair.com...
- Page 41 *Orange wires, with black 3-pin connector (PTO heater cable). ☐ *Red and green 14 AWG wires (PTO inverter power wires). ☐ Cover all of the engine compartment wires with plastic loom. VMAC - Vehicle Mounted Air Compressors VMAC Technical Support: 888-241-2289 VMAC Knowledge Base: kb.vmacair.com...
- Page 42 *Connect the black wire with red bullet connector to the black “PTO INDICATOR” wire. ☐ Reinstall the metal plate located behind the lower dashboard (Figure 39 on page 35). VMAC - Vehicle Mounted Air Compressors VMAC Technical Support: 888-241-2289 VMAC Knowledge Base: kb.vmacair.com...
-
Page 43: Completing The Installation
Ensure all wiring, hoses and tubes are secured with cable ties and protected with loom as required. ☐ Cover all VMAC under-hood wiring with high heat plastic loom (if not done previously). Secure the harness with cable ties as needed to avoid hot, sharp or moving components. - Page 44 A good spot for this is usually on the inside of the door or on the panel underneath the steering wheel (Figure 47). Figure 47 — Operating Instruction label VMAC - Vehicle Mounted Air Compressors VMAC Technical Support: 888-241-2289 VMAC Knowledge Base: kb.vmacair.com...
-
Page 45: Remote Operation (Optional)
Close all open air valves/tools and allow the system to build to full pressure (factory default: 150 psi). • Allow the engine speed to reduce to VMAC base idle for at least 10 seconds. • Turn the compressor off using the remote momentary “OFF” switch. -
Page 46: Recommended Accessories
Recommended Accessories While the compressor system will function without the following accessories, VMAC strongly recommends their use for optimal performance. See the “Accessory Product” section of this manual on page 53 for a list of products available for purchase through VMAC. -
Page 47: Air Receiver Tank
The VMAC compressor system will automatically depressurize when it is shutdown, therefore the hose from the VMAC AOST to the air receiver tank must have a check valve installed; this prevents blow back and moisture from the receiver tank... -
Page 48: Testing The Installation
Check all wiring for security and protection. Ensure nothing is touching the compressor body. ☐ Install the VMAC Air Test Tool (P/N: A700052) with the 70 cfm (0.190 in) orifice installed and the ball valve closed. ☐ Ensure all of the compressor outlets are closed. - Page 49 Press the “ON” button on the control box. ☐ When the VMAC system is first engaged, the engine speed should increase to approximately 2,500 rpm and then drop down to VMAC base idle (approximately 1,000 rpm) once system pressure is reached.
- Page 50 Final Testing Ensure the following has been completed: ☐ Operate the system with an air tool (or the VMAC Air Test Tool with the appropriate orifice installed) for at least 1/2 hour (1 hour preferred). ☐ Road test the vehicle for approximately 14 miles (20 km).
-
Page 51: Performance Testing And System Adjustments
Performance Testing and System Adjustment System operation can be tested using the tools that will be operated by the system or by using the VMAC Test Tool (A700052) with the 70 cfm (0.190 in) orifice in the outlet to simulate tool use (Figure 50). -
Page 52: Adjusting The Pressure Regulator
System pressure Setting bolt Bleed hole Figure 51 — Air regulator ☐ Test the system after any adjustments are made to verify it is operating properly. VMAC - Vehicle Mounted Air Compressors VMAC Technical Support: 888-241-2289 VMAC Knowledge Base: kb.vmacair.com... -
Page 53: Digital Throttle Control Operation And Adjustments
VMAC “OFF” then “ON” via the control box. MAX RPM Maximum VMAC rpm can be adjusted between 1,500 rpm and 2,600 rpm (in 50 rpm increments) via the ““ or “” buttons in the “MAX RPM” column. - Page 54 To perform a factory reset, turn the system on and allow the engine speed to drop to VMAC base idle (approximately 1,000 rpm). Using a paper clip (or similar object), push and hold the factory reset button for 5 seconds. All of the LED lights will illuminate for several seconds while the settings revert to their defaults.
-
Page 55: Accessory Products From Vmac
Compressor Service Kits 200 Hour or 6 Month Service Kit - Part number: A700229 Includes 6 L VMAC high performance compressor oil, oil filter, air filter, and next service due decal. 400 Hour or 1-Year Service Kit - Part number: A700230... - Page 56 VMAC De-icer Kit Part number: A700031 Cold climate heater package for operating VMAC compressors in cold climates; proven at temperatures of -30 °C (-22 °F). Requires 12V DC at 10A. 10 Gallon Air Receiver Tank w/ Mounting Feet Part number: A300047...
- Page 57 Notes VMAC - Vehicle Mounted Air Compressors VMAC Technical Support: 888-241-2289 VMAC Knowledge Base: kb.vmacair.com...
-
Page 58: Warranty Registration
Warranty Registration This form must be fully completed and returned to VMAC at the time the vehicle is put into service. Warranty may be void if this form is not received by VMAC within 3 months of receiving the vehicle, or 200 hours of operation, whichever occurs first. - Page 60 Manufactured by ® 888-241-2289 tech@vmacair.com 877-740-3202 warranty@vmacair.com www.vmacair.com kb.vmacair.com 1333 Kipp Road, Nanaimo, B.C., V9X 1R3 Canada...
Need help?
Do you have a question about the DM00030 and is the answer not in the manual?
Questions and answers