
Related Manuals for Vmac D600003


Summary of Contents for Vmac D600003
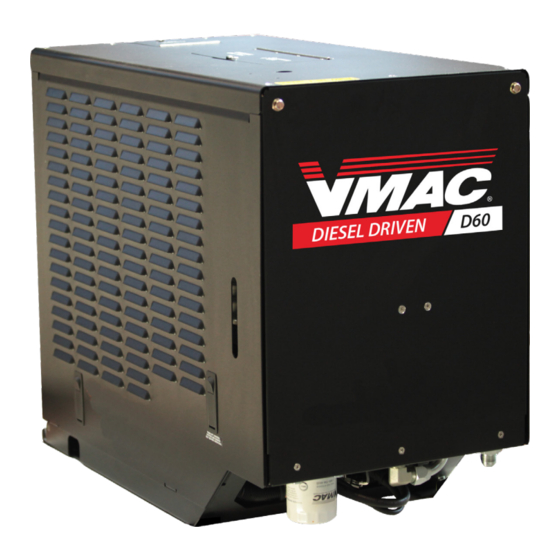
- Page 1 ® Installation and Owner’s Manual Diesel Driven Air Compressor D600003 | D600004 D60X003 | D60X004 D600017 | D600018 www.vmacair.com www.vmacair.com...
-
Page 3: Table Of Contents
Accessory Products from VMAC ........84... - Page 4 Copyright © 2021 VMAC Global Technology Inc. All Rights Reserved. These materials are provided by VMAC for informational purposes only, without representation or warranty of any kind, and VMAC shall not be liable for errors or omissions with respect to the materials. The only warranties for VMAC...
-
Page 5: Safety
VMAC will not be held responsible for any liability, consequential damages, injuries, loss or damage to individuals or to equipment as a result of the failure of anyone to properly adhere to the procedures set out in this manual or standard safety practices. -
Page 6: Safety Precautions
Proper service and repair are important to the safety of the service technician and the safe, reliable operation of the equipment. Always use genuine VMAC replacement parts. The procedures described in this manual are the only authorized methods of installation, service and repair. - Page 7 • Accumulated oil and grease can cause the system to overheat and pose a fire hazard. Keep the system clean and repair any leaks immediately. VMAC - Vehicle Mounted Air Compressors VMAC Technical Support: 888-241-2289 VMAC Knowledge Base: kb.vmacair.com...
- Page 8 • Follow all safety precautions when jump starting or charging a battery. • Never attempt to jump start a frozen battery. • Never overcharge a battery. VMAC - Vehicle Mounted Air Compressors VMAC Technical Support: 888-241-2289 VMAC Knowledge Base: kb.vmacair.com...
- Page 9 Do not operate this the D60 in environments where flamable gases may be present unless the unit is equipped with a Positive Air Shut-Off System (PASS). VMAC - Vehicle Mounted Air Compressors VMAC Technical Support: 888-241-2289 VMAC Knowledge Base: kb.vmacair.com...
-
Page 10: Warranty
1 October, 2015. Warranty Registration The VMAC warranty registration form is located near the back of this manual. This warranty registration form must be completed and sent to VMAC at the time of installation for any subsequent warranty claim to be considered valid. - Page 11 2. VMAC will provide direction for repair or replacement of the failed components. 3. If requested, failed parts must be returned to VMAC for evaluation. 4. Dealers may login to the VMAC website to view the "VMAC Labour Time Guide" (under “Agreements”) to see the allowable warranty labour times.
-
Page 12: General Information
Please contact VMAC for replacement hoses and further information. Ordering Parts To order parts, contact a VMAC dealer. The dealer will ask for the VMAC System ID (see page 33), part number, description and quantity. Locate the nearest dealer online at www.vmacair.com/dealer-locator or call 1-877-912-6605. -
Page 13: Installation Manual For Vehicle Mounting
® Installation Manual for Vehicle Mounting (For system equipped with the wheel kit (D60X003 | D60X004), turn to page 21) -
Page 15: Installation Requirements And Considerations
(diesel fuel only)? • Will the unit be used in temperatures below -5 °C (23 °F)? If so, VMAC recommends ordering the system with the optional Cold Climate Kit. VMAC - Vehicle Mounted Air Compressors VMAC Technical Support: 888-241-2289 VMAC Knowledge Base: kb.vmacair.com... -
Page 16: Mounting Locations And Ventilation Requirements
Not recommended Figure 1 — Mounting locations VMAC does not recommend mounting the unit at the back of the vehicle as the drag created when the vehicle is moving causes debris to be deposited (and accumulated) inside the unit. - Page 17 If mounted in an enclosure (including the bed of a pickup truck box), the exhaust must be vented outside of the vehicle to prevent the engine from ingesting its exhaust and overheating or stalling. VMAC - Vehicle Mounted Air Compressors VMAC Technical Support: 888-241-2289 VMAC Knowledge Base: kb.vmacair.com...
-
Page 18: Dimensions And Mounting
Dimensions and Mounting External dimensions All dimensions are in inches. 33 11/16 33 1/16 Figure 2 — External dimensions VMAC - Vehicle Mounted Air Compressors VMAC Technical Support: 888-241-2289 VMAC Knowledge Base: kb.vmacair.com... - Page 19 If alternate mounting holes are required, holes can be drilled through the bottom of the formed plate. All dimensions are in inches. 19 3/4 Ø7/16 15 3/4 Figure 3 — Base plate VMAC - Vehicle Mounted Air Compressors VMAC Technical Support: 888-241-2289 VMAC Knowledge Base: kb.vmacair.com...
- Page 20 ☐ Connect the D60 to the vehicle’s diesel fuel tank, via the VMAC Fuel pump Kit (P/N: A500030), or the optional 7 gallon external fuel tank (P/N: A500005).
- Page 21 Remove the battery post boots. ☐ Connect appropriately sized battery cables to the threaded posts (positive: 3/8 in, negative: 5/16 in). ☐ Replace battery post boots VMAC - Vehicle Mounted Air Compressors VMAC Technical Support: 888-241-2289 VMAC Knowledge Base: kb.vmacair.com...
- Page 22 (e.g. inside the cab, service body, or a cabinet). VMAC recommends that the harness extensions be soldered and sealed with heat shrink tubing, or sealed butt splices (not supplied) to provide durable, and moisture resistant connections.
-
Page 23: Setup Instructions For Wheel Kit Equipped Systems
® Setup Instructions for Wheel Kit Equipped Systems D60X003 | D60X004... -
Page 25: D60X003 | D60X004 Safety Information
Do not rely solely on the wheel brake, chock both sides of the front wheels prior to operation or leaving the D60 unattended (wheel chocks not supplied). • Do use the handle for lifting or securing the compressor system. VMAC - Vehicle Mounted Air Compressors VMAC Technical Support: 888-241-2289 VMAC Knowledge Base: kb.vmacair.com... -
Page 26: Transporting And Moving The D60 With Wheel Kit
The lifting eye is centrally balanced and can be hooked on to directly or used with a shackle (Figure 5). Lifting eye Figure 5 — Lifting eye VMAC - Vehicle Mounted Air Compressors VMAC Technical Support: 888-241-2289 VMAC Knowledge Base: kb.vmacair.com... - Page 27 Tie down points Tie down points Figure 6 — Tie down locations VMAC - Vehicle Mounted Air Compressors VMAC Technical Support: 888-241-2289 VMAC Knowledge Base: kb.vmacair.com...
- Page 28 "run away". ☐ Press down to actuate the brake, lift up to release the brake (Figure 7). Figure 7 — Wheel brake VMAC - Vehicle Mounted Air Compressors VMAC Technical Support: 888-241-2289 VMAC Knowledge Base: kb.vmacair.com...
-
Page 29: Operating Requirements And Considerations
500 lb (227 kg). Considerations: • Will the unit be used in temperatures below -5 °C (23 °F)? If so, VMAC recommends ordering the system with the optional Cold Climate Kit. • When opting not to use a receiver tank, leak free plumbing and air tools are key to preventing frequent, short duration system restarts. -
Page 30: Dimensions
Dimensions All dimensions are in inches. 40 1/4 26 1/2 Figure 8 — External dimensions VMAC - Vehicle Mounted Air Compressors VMAC Technical Support: 888-241-2289 VMAC Knowledge Base: kb.vmacair.com... -
Page 31: Completing The Installation
VMAC Air test Tool directly to the D60 air discharge port. If a VMAC Air Test Tool is not available, connect a ball valve and 200 psi pressure gauge to the output. - Page 32 Check the system for any leaks. ☐ Slowly open the ball valve on the VMAC Air Test Tool. If not using a VMAC Air Test Tool, slowly open the ball valve until the system maintains 100 psi. Allow the system to run for a minimum of 1/2 hour. This test ensures that the system has adequate ventilation.
-
Page 33: Diesel Driven Air Compressor Owner's Manual
® Diesel Driven Air Compressor Owner’s Manual... -
Page 35: Identifying Your System
(Figure 11). D600017 A BC 123 Model number Unique identifier Production date code Revision letter Figure 11 — System ID breakdown VMAC - Vehicle Mounted Air Compressors VMAC Technical Support: 888-241-2289 VMAC Knowledge Base: kb.vmacair.com... -
Page 36: System Components
Oil fill Oil supply to compressor Oil filter Cool oil from cooler Hot oil to cooler Oil drain Top view Bottom view Figure 12 — AOST VMAC - Vehicle Mounted Air Compressors VMAC Technical Support: 888-241-2289 VMAC Knowledge Base: kb.vmacair.com... - Page 37 Figure 13 — Compressor assembly Compressor Oil Cooler (Liquid to Air) Cooled oil (back to AOST) Cooling fan Hot compressor oil (from AOST) Figure 14 — Compressor oil cooler VMAC - Vehicle Mounted Air Compressors VMAC Technical Support: 888-241-2289 VMAC Knowledge Base: kb.vmacair.com...
- Page 38 Pressure sensor Coalescing filter Oil scavenge Air discharge (to customer equipment) Figure 15 — Coalescing manifold Control Box Control box Figure 16 — Control box VMAC - Vehicle Mounted Air Compressors VMAC Technical Support: 888-241-2289 VMAC Knowledge Base: kb.vmacair.com...
- Page 39 Figure 17 — Digital display panel Hoses / Tubes VMAC compressor systems include hoses that include an AQP inner liner that is compatible with VMAC compressor oil. The PTFE tubes used in VMAC systems are rated for the high temperatures VMAC compressors generate. Use of hoses or tubes other than those supplied or recommended by VMAC may fail and/or cause compressor damage and may void warranty.
-
Page 40: System Specifications
The small amount of oil recovered from the coalescing filter is returned directly to the compressor via a 1/4 in PTFE scavenge tube. The hot compressor oil is directed to VMAC’s liquid to liquid cooler (which is integrated into the diesel engine’s coolant system) before being returned to the compressor. - Page 41 Air pressure regulation is achieved via an inlet valve and is adjustable via the display panel. The system pressure (factory set at 150 psi) can be adjusted between 80 psi and 150 psi. VMAC recommends the use of a Filter Regulator Lubricator (FRL) to reduce the operating pressure delivered to the tools.
-
Page 42: Control System Features
No tachometer signal. Ǜ Starting error. Ǜ Low oil pressure. Ǜ • Separate error and warning message logging for both the engine and VMAC systems. • 500 hour and 1,000 hour compressor service reminders. • 100 hour engine service reminders. •... -
Page 43: Control System Terminology
If no demand is placed on the system the system has built to full system pressure and no air use is detected), the control system will start the "TIME TO STANDBY" timer. VMAC - Vehicle Mounted Air Compressors VMAC Technical Support: 888-241-2289 VMAC Knowledge Base: kb.vmacair.com... - Page 44 Once in the "STOPPING" state, the stop solenoid will engage for 10 seconds to allow the system to shut down. If the system is still pressurized, it will blow down air pressure from the compressor and the AOST. VMAC - Vehicle Mounted Air Compressors VMAC Technical Support: 888-241-2289 VMAC Knowledge Base: kb.vmacair.com...
-
Page 45: Starting And Stopping The D60
1 second, then release it. The display panel will indicate “GLOW PLUGS ENABLED”. The glow plugs will be active for between 1 and 15 seconds, dependent upon the ambient temperature. VMAC - Vehicle Mounted Air Compressors VMAC Technical Support: 888-241-2289 VMAC Knowledge Base: kb.vmacair.com... - Page 46 The ""DISABLE AUTO RESTART" setting will prevent the system from restarting out of "STANDBY" after a preset amount of time, this prevents the engine from restarting if it is accidentally left unattended. VMAC - Vehicle Mounted Air Compressors VMAC Technical Support: 888-241-2289 VMAC Knowledge Base: kb.vmacair.com...
- Page 47 10 seconds in which time the engine will shut down and the system will blowdown any internal air pressure. ☐ Turn the ignition key to “OFF”. VMAC - Vehicle Mounted Air Compressors VMAC Technical Support: 888-241-2289 VMAC Knowledge Base: kb.vmacair.com...
-
Page 48: Cold Or Hot Weather Operation
(air discharge closed) to full operating temperature before using air and increasing engine speed. For more details, consult the Kubota Operator's Manual (P/N: 1900973). In extremely cold weather, VMAC recommends setting the "STANDBY DELAY" to "NEVER" to prevent the engine from shutting down. Overtemperature Shutdown... -
Page 49: Diagnostics Mode
Lists the 10 most recent system messages. See page 77 for a list of warning messages. "VIEW LOGGED SERVICES" Lists the 10 most recent services logged. VMAC - Vehicle Mounted Air Compressors VMAC Technical Support: 888-241-2289 VMAC Knowledge Base: kb.vmacair.com... -
Page 50: Adjustable Parameters (User Setup)
"STANDBY". Parameter Description Adjustment Default Value Allows the engine to restart COLD ENGINE if the engine begins to reach Enabled \ Disabled. Enabled. RESTART freezing temperatures. VMAC - Vehicle Mounted Air Compressors VMAC Technical Support: 888-241-2289 VMAC Knowledge Base: kb.vmacair.com... - Page 51 5 minutes or more should be used). Parameter Description Adjustment Default Value Resets all adjustable FACTORY RESET parameters to their factory settings. VMAC - Vehicle Mounted Air Compressors VMAC Technical Support: 888-241-2289 VMAC Knowledge Base: kb.vmacair.com...
-
Page 52: General Maintenance Information
All fasteners must be torqued to specifications. Use manufacturers’ torque values for OEM fasteners. The torque values supplied below in Table 2 are intended for VMAC supplied components, or for use in the absence of a torque value provided by the OEM. - Page 53 Installation Manuals and Illustrated Parts Lists (IPL) The installation manual and illustrated parts list are an invaluable resource for when inspecting, diagnosing or repairing the system. The installation manuals and IPL’s are available free of charge from VMAC. VMAC Installation Manuals https://www.vmacair.com/support/manuals/ VMAC IPLs https://www.vmacair.com/support/ipl/...
-
Page 54: Maintenance And Repair Safety
Use only genuine VMAC parts to maintain the system. Genuine VMAC parts are designed to work with the high pressure and heat generated by the compressor. Substituted parts may void the warranty and could cause equipment damage, injury, or death. -
Page 55: Maintenance Schedule
Refer to the Kubota Operator's Manual (P/N: 1900973) for the complete engine maintenance schedule and instructions. In the event of a warranty claim, VMAC or Kubota may request service records. The D60 control system records the engine and compressor hours separately. -
Page 56: Regular Inspection Instructions
Wear appropriate Personal Protective Equipment and follow all industry standard safety practices. The VMAC supplied and approved compressor oil must be used in this system. Failure to use this special oil will result in damage to the compressor and will void warranty. - Page 57 Using a clean, dry cloth, clean the inside of the air filter housing. ☐ Install the new air filter ☐ Install and latch the air filter cover. Figure 20 — Replace air filter VMAC - Vehicle Mounted Air Compressors VMAC Technical Support: 888-241-2289 VMAC Knowledge Base: kb.vmacair.com...
- Page 58 ☐ If the pressure relief valve is showing loss of functionality, contact a local VMAC dealer for a replacement. While the pressure relief valve can be accessed and changed from the service panel side of the D60, removing the top panel may provide the easiest access.
- Page 59 The engine oil dipstick is located to the left of the starter motor and can be accessed via the service panel. Oil dipstick Figure 22 — Inspecting the engine oil VMAC - Vehicle Mounted Air Compressors VMAC Technical Support: 888-241-2289 VMAC Knowledge Base: kb.vmacair.com...
- Page 60 The Kubota coolant specification is a 50/50 mix of long life coolant and clean, soft water.* *This information is current at the time of writing (August 2020). VMAC - Vehicle Mounted Air Compressors VMAC Technical Support: 888-241-2289 VMAC Knowledge Base: kb.vmacair.com...
- Page 61 As the wheel wears, the brake may start to lose its effectiveness. ☐ Rotate the brake adjustment nut until the brake pad holds the unit in place (Figure 24). Adjustment Brake pad Figure 24 — Brake adjustment VMAC - Vehicle Mounted Air Compressors VMAC Technical Support: 888-241-2289 VMAC Knowledge Base: kb.vmacair.com...
-
Page 62: General Service Information
☐ Check the old oil for any evidence of metal filings or contamination. If any metal filings are found, flush the hoses and the AOST using the VMAC flushing kit (P/N: A700214). Push-To-Connect Fittings (Figure 25) ☐... -
Page 63: Compressor Service Procedures
Always replace the air filter element during this service. A clean engine compartment, in addition to being more efficient, makes detecting issues (i.e. oil or coolant leaks, etc.) easier. VMAC recommends cleaning the D60 as part of regular servicing. ☐... - Page 64 3/4 to 1 turn to seat the gasket. ☐ Remove the oil fill plug from the top of the AOST (Figure 28). Oil fill plug Figure 28 — Add compressor oil VMAC - Vehicle Mounted Air Compressors VMAC Technical Support: 888-241-2289 VMAC Knowledge Base: kb.vmacair.com...
- Page 65 Clean any loose debris from around the air filter housing to prevent contaminants from entering the system. ☐ Remove the air filter cover (Figure 30). Figure 30 — Replace air filter VMAC - Vehicle Mounted Air Compressors VMAC Technical Support: 888-241-2289 VMAC Knowledge Base: kb.vmacair.com...
- Page 66 Remove the coalescing filter, being careful to avoid damaging the scavenge tube or screen that is inside the filter (Figure 31). Scavenge tube Figure 31 — Remove the coalescing filter VMAC - Vehicle Mounted Air Compressors VMAC Technical Support: 888-241-2289 VMAC Knowledge Base: kb.vmacair.com...
- Page 67 Cycle through the menus using the “►“ button; once “SERVICING” is displayed, press the “ENTER” button. ☐ Press the “ENTER” button again to log the service. VMAC - Vehicle Mounted Air Compressors VMAC Technical Support: 888-241-2289 VMAC Knowledge Base: kb.vmacair.com...
-
Page 68: 100 Hour Service (Engine)
See the Kubota Operator's Manual for a complete list of maintenance recommendations and the service interval. A clean engine compartment, in addition to being more efficient, make detecting issues (i.e. oil or coolant leaks, etc.) easier. VMAC recommends cleaning the D60 as part of regular servicing. ☐... - Page 69 Install the new fuel filter element (Figure 35). 1.) O-ring. 2.) Filter element. 3.) Spring. 4.) Filter bowl. 5.) Screw ring. Figure 35 — Fuel bowl assembly VMAC - Vehicle Mounted Air Compressors VMAC Technical Support: 888-241-2289 VMAC Knowledge Base: kb.vmacair.com...
- Page 70 Figure 37 — Engine oil filter ☐ Clean the oil filter sealing surface of the engine block. ☐ Apply a thin film of clean oil to the oil filter gasket. VMAC - Vehicle Mounted Air Compressors VMAC Technical Support: 888-241-2289 VMAC Knowledge Base: kb.vmacair.com...
- Page 71 Wipe out the inside of the air filter body with a dry cloth and reinstall air filter element. ☐ Using a clean cloth, clean the inside of the air filter housing. VMAC - Vehicle Mounted Air Compressors VMAC Technical Support: 888-241-2289 VMAC Knowledge Base: kb.vmacair.com...
- Page 72 There is no way to clear the engine service reminder. Engine service reminders are displayed for 10 hours prior to the service being due, and for an additional 10 hours after the service was due. VMAC - Vehicle Mounted Air Compressors VMAC Technical Support: 888-241-2289 VMAC Knowledge Base: kb.vmacair.com...
-
Page 73: Electrical Schematic
Electrical Schematic Scan or click the QR code for a high resolution electrical schematic of all three pages. Figure 40 — Electrical schematic (control assembly) VMAC - Vehicle Mounted Air Compressors VMAC Technical Support: 888-241-2289 VMAC Knowledge Base: kb.vmacair.com... - Page 74 Figure 41 — Electrical schematic VMAC - Vehicle Mounted Air Compressors VMAC Technical Support: 888-241-2289 VMAC Knowledge Base: kb.vmacair.com...
- Page 75 Figure 42 — Electrical schematic (control assembly detail) VMAC - Vehicle Mounted Air Compressors VMAC Technical Support: 888-241-2289 VMAC Knowledge Base: kb.vmacair.com...
-
Page 76: Diagnostics And Troubleshooting
Additional troubleshooting and specific test procedures can be found on VMAC’s Knowledge Base kb.vamacair.com. See "Diagnostics Mode" on page 47 for instruction to access diagnostic information. VMAC - Vehicle Mounted Air Compressors VMAC Technical Support: 888-241-2289 VMAC Knowledge Base: kb.vmacair.com... - Page 77 The voltage signal from • Pressure sensor faulty. AIR PRESS SIGNAL the air pressure sensor is • Wiring to pressure sensor faulty. VOLTAGE HIGH above the expected value. VMAC - Vehicle Mounted Air Compressors VMAC Technical Support: 888-241-2289 VMAC Knowledge Base: kb.vmacair.com...
- Page 78 CONN ERROR control box and display panel. control box. END OF ERRORS RE- All errors have been — Press “ENTER” button to start D60. TRY STARTING? reviewed. VMAC - Vehicle Mounted Air Compressors VMAC Technical Support: 888-241-2289 VMAC Knowledge Base: kb.vmacair.com...
- Page 79 30 the battery restart delay timer DUE TO LOW BATT seconds. has counted down, the system will enter standby mode and shut down. VMAC - Vehicle Mounted Air Compressors VMAC Technical Support: 888-241-2289 VMAC Knowledge Base: kb.vmacair.com...
- Page 80 Engine is too cold to start: -40 °C (-40 °F) and below The engine is too cold. Plug the VMAC Cold Climate Kit in to warm the engine. Engine is too cold to engage compressor 5 °C (41 °F) and below Compressor will remain "Unloaded"...
- Page 81 Check temperature probe and bad electrical connection. wiring connections. Lack of compressor and / or Service system as necessary. engine service. Incorrect compressor oil used. Flush and service system. VMAC - Vehicle Mounted Air Compressors VMAC Technical Support: 888-241-2289 VMAC Knowledge Base: kb.vmacair.com...
- Page 82 40 minutes to (oil carry over). dissipate. High oil level. Correct oil level. Failed coalescing filter. Replace coalescing filter. Clean scavenge screen (page Clogged scavenge screen. 65). VMAC - Vehicle Mounted Air Compressors VMAC Technical Support: 888-241-2289 VMAC Knowledge Base: kb.vmacair.com...
-
Page 83: Compressor Performance Testing
Compressor Performance Testing System operation can be tested using the tools that will be operated by the system or by using the VMAC Test Tool (A700052) with the appropriate orifice in the outlet to simulate tool use (Figure 44). Ball valve... -
Page 84: Air Receiver Tank
The VMAC compressor system will automatically depressurize when shutdown. The AOST has a built in check valve that prevents blow back and moisture from the receiver tank entering the AOST. Installation of an additional check valve will cause erratic performance. -
Page 85: Recommended Accessories
Recommended Accessories While the compressor system will function without the following accessories, VMAC strongly recommends their use for optimal performance. See the “Accessory Product” section of this manual on page 84 for a list of products available for purchase through VMAC. -
Page 86: Accessory Products From Vmac
Accessory Products from VMAC Compressor Service Kit 500 Hour or 6 Month Service Kit - Part number: A500001 Includes VMAC high performance compressor oil, oil filter, air filter, and next service due decal. 1,000 Hour or 1-Year Service Kit - Part number: A500017... - Page 87 Part number: A300047 Air receiver tanks are used for lowering compressor duty cycle and removing water from compressed air. Recommended for optimum operation of VMAC Hydraulic Air Compressors, VMAC Diesel Driven Air Compressors, UNDERHOOD40, UNDERHOOD70 (including Green Series Air Compressors), DTM70/ DTM70-H, and VMAC Multifunction Power Systems, which include standby mode;...
- Page 88 Used to charge the D60's battery. (80 W Battery Blanket) Part number: A500196 Plugs into a power source to warm the D60's battery in cold climates. VMAC - Vehicle Mounted Air Compressors VMAC Technical Support: 888-241-2289 VMAC Knowledge Base: kb.vmacair.com...
- Page 89 Notes VMAC - Vehicle Mounted Air Compressors VMAC Technical Support: 888-241-2289 VMAC Knowledge Base: kb.vmacair.com...
-
Page 90: Warranty Registration
Warranty Registration This form must be fully completed and returned to VMAC at the time the vehicle is put into service. Warranty may be void if this form is not received by VMAC within 3 months of receiving the vehicle, or 200 hours of operation, whichever occurs first. - Page 92 Manufactured by ® 888-241-2289 tech@vmacair.com 877-740-3202 warranty@vmacair.com www.vmacair.com www.kb.vmacair.com 1333 Kipp Road, Nanaimo, B.C., V9X 1R3 Canada...
Need help?
Do you have a question about the D600003 and is the answer not in the manual?
Questions and answers