Advertisement
- 1 Overview
- 2 Features
- 3 Choosing power sources
- 4 Improving the reception
- 5 Initial setting for the DAB
- 6 Setting the clock
- 7 Operating the radio
- 8 Presetting your favourite services
- 9 Other useful functions
- 10 Changing the display
- 11 PTY (Programme Type)
- 12 Preventing Accidental Operation - HOLD Function
- 13 To reset the unit
- 14 Troubleshooting
- 15 Specifications
- 16 Documents / Resources
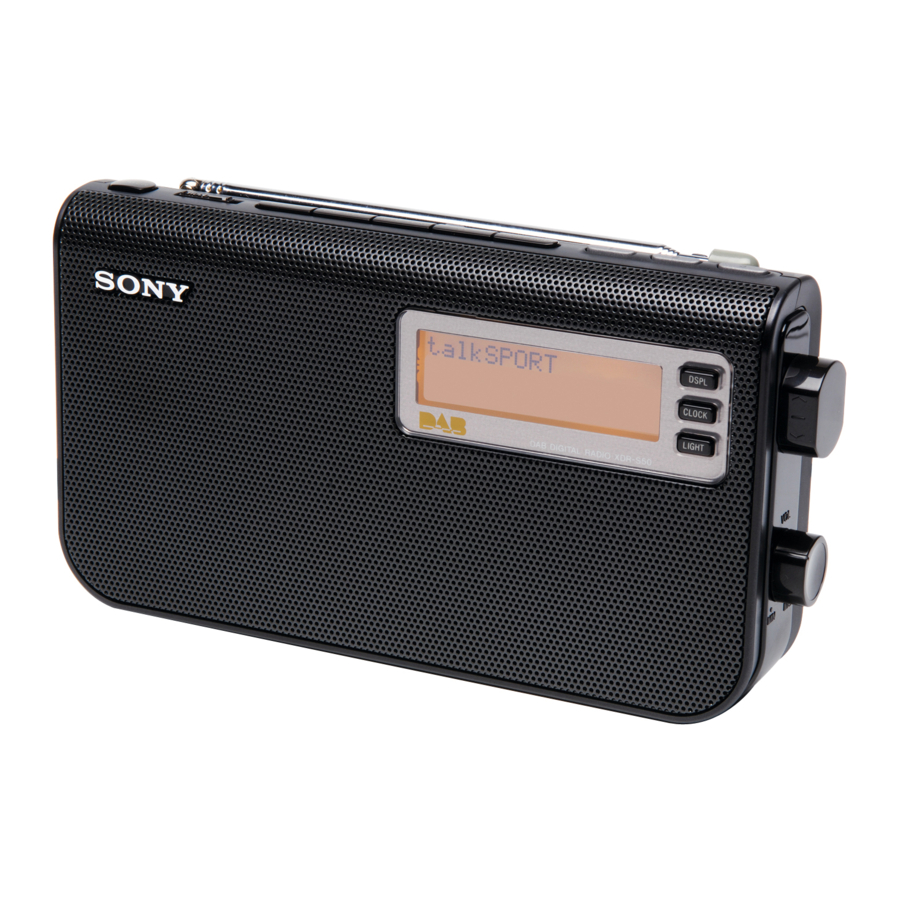
Overview

Features
- DAB(Band-III) Digital Radio.
- Easy view, 2-line character dot LCD display.
- Simple operation for station selection.
- Three Direct preset station buttons.
- Sleep timer and clock display.
- Stereo headphone jack.
- Battery (LR6 × 4) or mains operated.
Choosing power sources
Installing Batteries
- Open the battery compartment at the rear of the unit.
- Install four LR6 (size AA) alkaline batteries (not supplied), observing polarity, and then close the lid.


Battery Life (Approx. hours) (JEITA*)
| When using | DAB |
| Sony alkaline LR6 (size AA) | 9 |
* Measured by JEITA (Japan Electronics and Information Technology Industries Association) standards. The actual battery life may vary depending on the circumstance of the unit.
Knowing when to replace the batteries
When the batteries become weak, the sound becomes weak and distorted.
When the batteries are completely exhausted, "  " appears on the display and the power is turned off.
When " " appears, replace all batteries with new ones. After the batteries are replaced, press POWER to turn the indication off.
Notes on replacing the batteries
- Do not take more than about 1 minutes to replace the batteries, otherwise the clock, any lists of receivable broadcasts for DAB scan, preset favourite services and all settings will be initialized. Should that happen, set the functions again.
- If the batteries are replaced while the power is on, the unit may revert to the factory setting.
Notes on batteries
- Do not attempt to recharge dry batteries.
- Do not carry batteries with coins or other metallic objects. It can generate heat if the positive and negative terminals of the batteries are accidentally contacted by a metallic object.
- If you are not going to use the unit for a long time, remove the batteries to avoid damage from battery leakage and corrosion.
- Do not use different types of batteries at the same time.
- When you replace the batteries, replace all with new ones.
If the battery compartment lid comes off
The battery compartment lid is designed to come off when opened with excessive force. To put it back on, see the illustration.
- Insert the right hinge of the lid into the right hole of the unit.

- Insert the left hinge in the left hole of the unit.

Using House Current

Connect the AC power adaptor (supplied) to the DC IN 6 V jack firmly, and plug it into a wall outlet.
Notes on the AC power adaptor
- When operating the unit with the internal batteries, remove the AC poweradaptor from the wall outlet and the DC IN 6 V jack. Make sure that the plug of the external power source is disconnected before operating the unit.
- Use the supplied Sony AC power adaptor only. The polarity of the plugs of other manufacturers may be different. Failure to use the supplied AC power adaptor may cause the unit to malfunction.
Improving the reception
DAB Band-III:

Extend the telescopic aerial and adjust the length and the angle for best reception.
Note
Adjust the direction of the aerial by holding the bottom of it.
The aerial can be damaged when you move the aerial with excessive force.

Initial setting for the DAB
When the batteries are installed, or when the AC power adaptor is plugged in for the first time after purchase (or after resetting), the unit will automatically scan and create a list of receivable broadcasts.
If you wish to scan for the DAB broadcasts again, or when the unit is reset, do the following:
- Adjust the aerial accordingly.
- Press POWER to turn on the radio.
- Hold down AUTO TUNE for more than 2 seconds.
"![]() " appears in the display.
" appears in the display. - Press PRESET/ENTER.
No sound will be heard, and "<![]() >" appears in the display. DAB scan takes about 30 ~ 90 seconds. When finished, the unit receives the first service in alphabetical order stored by the DAB scan.
>" appears in the display. DAB scan takes about 30 ~ 90 seconds. When finished, the unit receives the first service in alphabetical order stored by the DAB scan.

 " appears in the display.
 >" appears in the display. DAB scan takes about 30 ~ 90 seconds. When finished, the unit receives the first service in alphabetical order stored by the DAB scan.
Notes
- If you do not operate within 65 seconds, the initial scan mode will be cancelled.
- If no broadcasts are found by the DAB scan, "
![]() " appears in the display.
" appears in the display.
![]()
- To cancel the DAB scan halfway, press AUTO TUNE. Any services received before you cancel are added to the list of receivable services.
- If the batteries are removed for a certain period, the received history list will be deleted, requiring you to scan again.
- If you set the initial setting, any DAB services registered as PRESET are erased.
- If you change the unit's location of use, or want to add a new service after the initial setting, press and release AUTO TUNE. "FULL <
![]() >" appears in the display and the unit will automatically scan and create a list of receivable services.
>" appears in the display and the unit will automatically scan and create a list of receivable services.
 " appears in the display.
Setting the clock
"AM 12:00" (or "0:00") will blink in the display when the batteries are installed or the AC power adaptor is plugged in, and then POWER is pressed for the first time after purchase, or after resetting.
- Hold down CLOCK for more than 2 seconds to show the time set display.
- Turn
![]() (up)/
(up)/ ![]() (down) to select "
(down) to select " ![]() " and press PRESET/ENTER.
" and press PRESET/ENTER.
The hour indication starts blinking.
Example: 12-hour system.

- Turn
![]() /
/ ![]() to set the hour, and then press PRESET/ENTER.
to set the hour, and then press PRESET/ENTER.
The minute indication starts blinking. - Turn
![]() /
/ ![]() to set the minute, then press PRESET/ENTER.
to set the minute, then press PRESET/ENTER.
The clock starts operating, and ":" starts blinking.
 " and press PRESET/ENTER.
Tips
- To set the current time rapidly, hold
![]() .
. - To set the current time exactly to the seconds, adjust the minute function in step4 and then press PRESET/ENTER to synchronize it with a time signal (such as the telephone time signal).
- The clock system varies depending on the model purchased. For example, inthe 24-hour system, "0:00" is indicated as midnight, and "12:00" is indicated as noon.
Notes
- If you do not operate within 65 seconds while setting the clock, the clock setting mode will be cancelled.
- To cancel the clock setting mode halfway, press CLOCK.
- To show the current time as DAB is received, press DISPLAY.
(See "Changing the display").
Setting the Clock Auto Adjustment Function
This function enables the built-in clock of this unit to automatically synchronize with any DAB data being received.
- Hold down CLOCK for more than 2 seconds to show the time set display.
- Turn
![]() to select "ON" and press PRESET/ENTER.
to select "ON" and press PRESET/ENTER.

"CLOCK ADJ " lights and DAB data adjusts the clock as it is received.

Notes
- If DAB is not available (depending on area), you can disable this function.
- If this function is active while adjusting the clock manually, DAB data will adjust the clock the next time the unit receives it.
Operating the radio
The unit can receive DAB services, and features ALPHABETICAL, PRESET, and MANUAL modes.
ALPHABETICAL: To select a stored service in alphabetical order.
PRESET: To select preset services. "P " appears in the display.
MANUAL: To adjust the frequency incrementally.
- Press POWER to turn on the radio.
When the unit is turned on again, the last band you listened to is received. - Press TUNE MODE to select the desired mode.
Each press changes the tuning mode between ALPHABETICAL and PRESET.
To change to MANUAL, hold down TUNE MODE for more than 2 seconds.
Press again to return to the previous mode. - Turn
![]() /
/ ![]() to tune to the desired service.
to tune to the desired service.
Two short beeps sound when the lowest ensemble of DAB is received during tuning. - Adjust the volume using VOL.
Notes in DAB usage
- Before receiving DAB broadcasts, one or more ensembles should be stored in the list by the DAB scan. (See "Initial setting for the DAB").
- If there are no services, you can choose only MANUAL mode.
- "<
![]() >" appears when the ensemble for the selected service cannot be received.
>" appears when the ensemble for the selected service cannot be received.

- If a selected service finishes broadcasting, sound stops and "<
![]() >" appears. In this case, turn
>" appears. In this case, turn ![]() to select another service.
to select another service.
 >" appears when the ensemble for the selected service cannot be received.
 >" appears. In this case, turn
 About the SC (Secondary Component)
If the selected primary component has a secondary component, "SC " blinks on the display.

Press SC to receive the desired secondary component. " SC " appears while the secondary component is received.
Turn  /
/  or pressing SC does the following:

Note
When the selected secondary component is finished, the unit returns automatically to the primary component.
Presetting your favourite services
There are two ways to preset services, Direct Preset and Preset Mode.
You can preset 10 services, including 3 services stored on the Direct Preset buttons (PRESET 1 – 3).
You can enjoy any three preset services as Direct Presets, for immediate recall by pressing one of the PRESET 1 – 3 buttons. Preset services you use often to Direct Preset for your convenience.
Presetting services
To preset by Direct Preset
- Follow steps 1 to 3 in "Operating the radio" and manually tune in to the service you wish to preset.
- Hold down one of the PRESET buttons (PRESET 1 – 3) for more than 2 seconds.
A beep sounds and "![]() " appears for one second in the display, and the service is stored.
" appears for one second in the display, and the service is stored.
 " appears for one second in the display, and the service is stored.
To preset by Preset Mode
- Follow steps 1 to 3 in "Operating the radio" and manually tune in to the service you wish to preset.
- Hold down PRESET/ENTER for more than 2 seconds.
The component label and the preset number appears in the display. - Turn
![]() to select the favourite number to preset, then press PRESET/ENTER.
to select the favourite number to preset, then press PRESET/ENTER.
"![]() " appears for one second in the display and the service is stored.
" appears for one second in the display and the service is stored.
Notes
- To preset another service, repeat these steps.
- To change the preset service, tune in to the desired service and repeat steps 2 and 3. The new service will replace the previous service.
Tuning in to a preset service
Direct Preset
Press one of the PRESET buttons (PRESET 1 – 3) on which the desired service is stored.
Preset Mode
- Press TUNE MODE repeatedly until "P " appears in the display.
- Turn
![]() to select the desired preset favourite service.
to select the desired preset favourite service.
Note
If you do not operate within 65 seconds during the above steps, the current mode will be cancelled.
Deleting a preset service
- Follow steps in "Tuning in to a preset service" and tune in to the service you wish to delete.
- Hold down PRESET/ENTER for more than 4 seconds.
"![]() " appears in the display.
" appears in the display. - Press PRESET/ENTER.
When the preset service is deleted, the preceding preset service is received.
 " appears in the display.
Note
To cancel deleting during the procedure, press DISPLAY. The preset service tuned in to in step 1 is received.
Other useful functions
Setting the Sleep Timer
You can enjoy falling asleep to the radio using the built-in sleep timer that turns off the radio automatically after a preset duration.
- Press SLEEP.
"![]() " and the timer setting appear.
" and the timer setting appear.
![]()
If you press SLEEP while the unit is turned off, the unit is turned on. - Press SLEEP repeatedly to select the desired sleep timer setting.
Each press changes the setting time as follows:

 " and the timer setting appear.

Two short beeps sound when the display returns to "  ".
".
After about 3 seconds, "SLEEP" appears in the display when the duration time is set.
The unit automatically turns off when the duration time is passed.
To change the Sleep Timer setting
Press SLEEP repeatedly to select the desired sleep timer setting even after the sleep timer has been activated.
To deactivate the Sleep Timer
Press POWER to turn off the unit before the setting time has elapsed, or press SLEEP repeatedly to set the sleep timer to "  " in step 2.
"SLEEP" disappears from the display.
To listen with headphones (not supplied)
Connect headphones to the  (headphone) jack. The sound through the speaker will not be heard.
To illuminate the LCD
Press LIGHT to select the backlight on or off.
Notes
- The first time you turn on the unit in AC operation, the backlight is set to on(default). Any change to this setting will be retained.
- When DC operation, the backlight will turn off automatically if no operation isperformed for 30 seconds.
Changing the display
To change the display mode
Press DISPLAY. The selected display mode remains even if you turn the unit off and on again, or change the band.
A dynamic label can be up to 128 characters long. PTY, service and ensemble labels can be up to 16 characters long.
Each time you press DISPLAY, the bottom in a display changes as follows:

If you turn  to change the service, the display does not change.
Notes
- If there is no service label, no message will be displayed.
- If there is no dynamic label, "<
![]() >" will appear.
>" will appear.
 >" will appear.
Stretched display
While a component label is displayed in the fist line of the display, hold down DISPLAY for more than 2 seconds. The display changes to stretched display.

Each time you press DISPLAY while the first line is displayed as stretched, it changes as follows:
Component label  Dynamic label PTY label Service label Ensemble label Frequency Clock BIT rate Signal level Component label
Holding down DISPLAY for more than 2 seconds returns the display to normal.
PTY (Programme Type)
This function indicates services in programme type, such as NEWS, SPORTS of the PTY list, transmitted in the DAB.
If the received service does not transmit the programme type, "  " appears.

Preventing Accidental Operation - HOLD Function
This function prevents the radio from being unintentionally turned on, or the radio service frequency from being accidentally changed. Slide HOLD in the direction of the arrow. When any key is pressed, "<  >" blinks for 3 seconds and all buttons on the radio become inoperative.
To cancel hold, slide HOLD in the opposite direction of the arrow.
To reset the unit
Press this button with a pointed object when the radio fails to function properly.
The clock settings, and the services you have preset, etc., will revert to the factory preset.
Troubleshooting
Should any problem persist after you have made the following checks, consult your nearest Sony dealer.
Display is dim or no indication is displayed
- The unit is being used in extremely high or low temperatures or in a place with excessive moisture.
Very weak or interrupted sound or unsatisfactory reception
- If you are in a building, listen near a window.
A service cannot be received when a PRESET button is pressed.
- The service has not been preset.
- Another service is preset. Preset the service again.
The preset services may be initialized, if a maintenance service is performed.
Please keep a copy of your settings in case you want to preset them again.
Specifications
| Time display | |
| UK | 12-hour system |
| Other countries/regions | 24-hour system |
| Frequency range | |
| Band | Frequency |
| DAB (Band-III) | 174.928 - 239.200 MHz |
 frequency table")
DAB (Band-III) frequency table (MHz)
Speaker:
Approx. 7.7 cm (3.0 inches) dia. 8 Ω
Power output:
0.3 W (at 10% harmonic distortion)
Output:
 (headphone) jack (ø 3.5 mm, stereo mini jack)
Power requirements:
6 V DC, four LR6 (size AA) alkaline batteries
External power source:
DC IN 6 V
Dimensions:
Approx. 189 × 102.8 × 37.9 mm (w/h/d)
(Approx. 7 1⁄2 × 4 1⁄8 × 1 1⁄2 inches) incl. projecting parts and controls
Mass:
Approx. 486 g (1 lb 1.1 oz ) incl. batteries
Supplied accessories:
AC power adaptor (1)
Design and specifications are subject to change without notice.

Halogenated flame retardants are not used in printed wiring boards.
http://www.sony.net/
© 2006 Sony Corporation

Documents / Resources
References
Download manual
Here you can download full pdf version of manual, it may contain additional safety instructions, warranty information, FCC rules, etc.
Advertisement


Need help?
Do you have a question about the XDR-S50 and is the answer not in the manual?
Questions and answers