Advertisement

G Series
LCD Monitor
G243CV (3BB5)
G274CV (3CD1)
G323CV (3DC3)
User Guide

Advertisement

Table of Contents
loading
Need help?

Need help?

Do you have a question about the G243CV and is the answer not in the manual?

Questions and answers

Subscribe to Our Youtube Channel

Summary of Contents for MSI G243CV

  • Page 1 G Series LCD Monitor G243CV (3BB5) G274CV (3CD1) G323CV (3DC3) User Guide...
  • Page 2: Table Of Contents

    Contents Getting Started ......................3 Package Contents ....................3 Installing the Monitor Stand ................... 4 Adjusting the Monitor
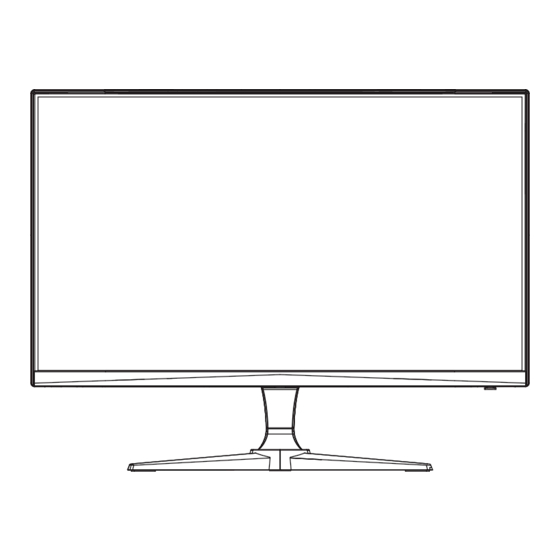
 ..................... 6 Monitor Overview ....................7 Connecting the Monitor to PC ................10 OSD Setup ........................12 Navi Key ........................ 12 Hot Key ........................13 OSD Menus........................
  • Page 3: Getting Started

    Getting Started This chapter provides you with the information on hardware setup procedures. While connecting devices, be careful in holding the devices and use a grounded wrist strap to avoid static electricity. Package Contents G243CV Monitor G274CV G323CV Documentation Quick Start Guide...
  • Page 4: Installing The Monitor Stand

    2. Push the stand towards the monitor groove until it locks in place. 3. Connect the base to the stand and tighten the base screws to secure the base. 4. Make sure the stand assembly is properly installed before setting the monitor upright. G243CV G274CV/ G323CV Getting Started...
  • Page 5 ⚠ Important Place the monitor on a soft, protected surface to avoid scratching the display panel. ∙ Do not use any sharp objects on the panel. ∙ ∙ The groove for installing the stand bracket can also be used for wall mount. Please contact your dealer for proper wall mount kit.
  • Page 6: Adjusting The Monitor

    This monitor is designed to maximize your viewing comfort with its adjustment capabilities. ⚠ Important Avoid touching the display panel when adjusting the monitor. ∙ ∙ Please slightly tilt the monitor backwards before pivoting it. G243CV -5° 20° G274CV/ G323CV -5° 20° 30° 30° Getting Started...
  • Page 7: Monitor Overview

    Monitor Overview G243CV Getting Started...
  • Page 8 G274CV/ G323CV Getting Started...
  • Page 9 Power LED Lit in white after the monitor is turned on. If no signal input, the LED will turn into orange. Lit in orange when the monitor is in Stand-by mode. Power Button & Navi Key Kensington Lock Power Jack DisplayPort HDMI Port Headphone Jack...
  • Page 10: Connecting The Monitor To Pc

    4. Connect the external power supply to the monitor power jack. (Figure B) 5. Plug the power cord into the electrical outlet. (Figure C) 6. Turn on the monitor. (Figure D) 7. Power on the computer and the monitor will auto detect the signal source. G243CV Getting Started...
  • Page 11 G274CV/ G323CV Getting Started...
  • Page 12: Osd Setup

    This chapter provides you with essential information on OSD Setup. ⚠ Important All information is subject to change without prior notice. Navi Key The monitor comes with a Navi Key, a multi-directional control that helps navigate the On-Screen Display (OSD) menu. G243CV OSD Setup...
  • Page 13: Hot Key

    G274CV/ G323CV Up/ Down/ Left/ Right: ∙ selecting function menus and items ∙ adjusting function values ∙ entering into/exiting from function menus Press (OK): ∙ launching the On-Screen Display (OSD) ∙ entering submenus ∙ confirming a selection or setting Hot Key ∙...
  • Page 14: Osd Menus

    OSD Menus Gaming 1st Level Menu 2nd/3rd Level Menu Description Game Mode User ∙ Use Up or Down Button to select and preview mode effects. ∙ Press the OK Button to confirm and apply your mode type. Racing Night Vision ∙...
  • Page 15 1st Level Menu 2nd/3rd Level Menu Description MPRT ∙ When MPRT is enabled, Brightness cannot be enabled and will be grayed out. ∙ HDCR and MPRT cannot be enabled simultaneously. ∙ Response time will be grayed out while MPRT is enabled. ∙...
  • Page 16: Professional

    1st Level Menu 2nd/3rd Level Menu Description Screen Icon None ∙ Users can adjust Screen Assistance Assistance in any mode. Adaptive-Sync ∙ Adaptive-Sync prevents screen tearing. Professional 1st Level Menu 2nd Level Menu Description Pro Mode User ∙ Use Up or Down Button to select and preview mode effects.
  • Page 17: Image

    1st Level Menu 2nd Level Menu Description MPRT ∙ When MPRT is enabled, Brightness cannot be enabled and will be grayed out. ∙ HDCR and MPRT cannot be enabled simultaneously. ∙ Response time will be grayed out while MPRT is enabled. ∙...
  • Page 18: Input Source

    1st Level Menu 2nd/3rd Level Menu Description Screen Size Auto ∙ Users can adjust Screen Size in any mode, any resolution and any screen refresh rate. 16:9 Input Source 1st Level Menu 2nd Level Menu Description HDMI ∙ Users can adjust Input Source in any mode. Auto Scan ∙...
  • Page 19: Setting

    Setting 1st Level Menu 2nd Level Menu Description Language 繁體中文 ∙ Users have to press the OK Button to confirm and apply the Language setting. English ∙ Language is an independent setting. Users’ own language setting will override Français the factory . When users set Reset to Yes, Deutsch Language will not be changed.
  • Page 20 1st Level Menu 2nd Level Menu Description HDMI CEC ∙ HDMI CEC (Consumer Electronics Control) supports Sony PlayStation®, Nintendo® Switch™, Xbox Series X|S consoles and various audio-visual devices that are CEC- capable. ∙ If HDMI CEC is set to ON: • The monitor will automatically power on when the CEC device is turned on.
  • Page 21: Specifications

    Specifications Monitor G243CV G274CV G323CV Size 23.6 inch 27 inch 31.5 inch Curvature Curve 1500R Panel Type Resolution 1920 x 1080 (FHD) Aspect Ratio 16:9 Brightness 250 nits (typ.) Contrast Ratio 3000:1 4000:1 3000:1 Refresh Rate 75Hz 4ms (GTG) Response Time 1ms (MPRT) ∙...
  • Page 22 Monitor G243CV G274CV G323CV ∙ Plate Type: 100 x 100 mm ∙ Screw Type: M4 x 10 mm VESA Mounting • Thread Diameter: 4 mm • Thread Pitch: 0.7 mm • Thread Length: 10 mm 539.8 x 413.4 x 610.5 x 437.5 x 709.4 x 519.1 x...
  • Page 23: Preset Display Modes

    Preset Display Modes ⚠ Important All information is subject to change without prior notice. G243CV/ G274CV/ G323CV Standard Resolution HDMI/ DP 640x480 @60Hz @72Hz @75Hz 640x480 @66.66Hz VESA 720x400 @70Hz SVGA 800x600 @56Hz @60Hz @72Hz @75Hz 832x624 @74.55Hz 1024x768 @60Hz...
  • Page 24 G243CV/ G274CV/ G323CV Video Timing Mode Resolution HDMI/ DP 480P 640x480P @60Hz 720x480P @60Hz 576P 720x576P @50Hz 720P 1280x720P @50Hz 1280x720P @60Hz 1080P 1920x1080P @50Hz 1920x1080P @60Hz Preset Display Modes...
  • Page 25: Troubleshooting

    Troubleshooting The power LED is off. • Press the monitor power button again. • Check if the monitor power cable is properly connected. No image. • Check if the computer graphics card is properly installed. • Check if the computer and monitor are connected to electrical outlets and are turned on.
  • Page 26: Safety Instructions

    ∙ Place the power cord in a way that people are unlikely to step on it. Do not place anything on the power cord. ∙ If this device comes with an adapter, use only the MSI provided AC adapter approved for use with this device.
  • Page 27 California, USA: The button cell battery may contain perchlorate material and requires special handling when recycled or disposed of in California. For further information please visit: https://dtsc.ca.gov/perchlorate/ Environment ∙ To reduce the possibility of heat-related injuries or of overheating the device, do not place the device on a soft, unsteady surface or obstruct its air ventilators.
  • Page 28: Tüv Rheinland Certification

    TÜV Rheinland Certification TÜV Rheinland Low Blue Light Certification Blue light has been shown to cause eye fatigue and discomfort. MSI now offers monitors with TÜV Rheinland Low Blue Light certification to ensure users’ eye comfort and well-being. Please follow the instructions below to reduce the symptoms from extended exposure to the screen and blue light.
  • Page 29: Regulatory Notices

    1. This device may not cause harmful interference, and 2. This device must accept any interference received, including interference that may cause undesired operation. MSI Computer Corp. 901 Canada Court, City of Industry, CA 91748, USA Regulatory Notices...
  • Page 30 Vietnam RoHS As from December 1, 2012, all products manufactured by MSI comply with Circular 30/2011/TT-BCT temporarily regulating the permitted limits for a number of hazardous substances in electronic and electric products.
  • Page 31 Copyright and Trademarks Notice Copyright © Micro-Star Int’l Co., Ltd. All rights reserved. The MSI logo used is a registered trademark of Micro-Star Int’l Co., Ltd. All other marks and names mentioned may be trademarks of their respective owners.

This manual is also suitable for:

G seriesG274cvG323cv3bb53cd13dc3

Table of Contents