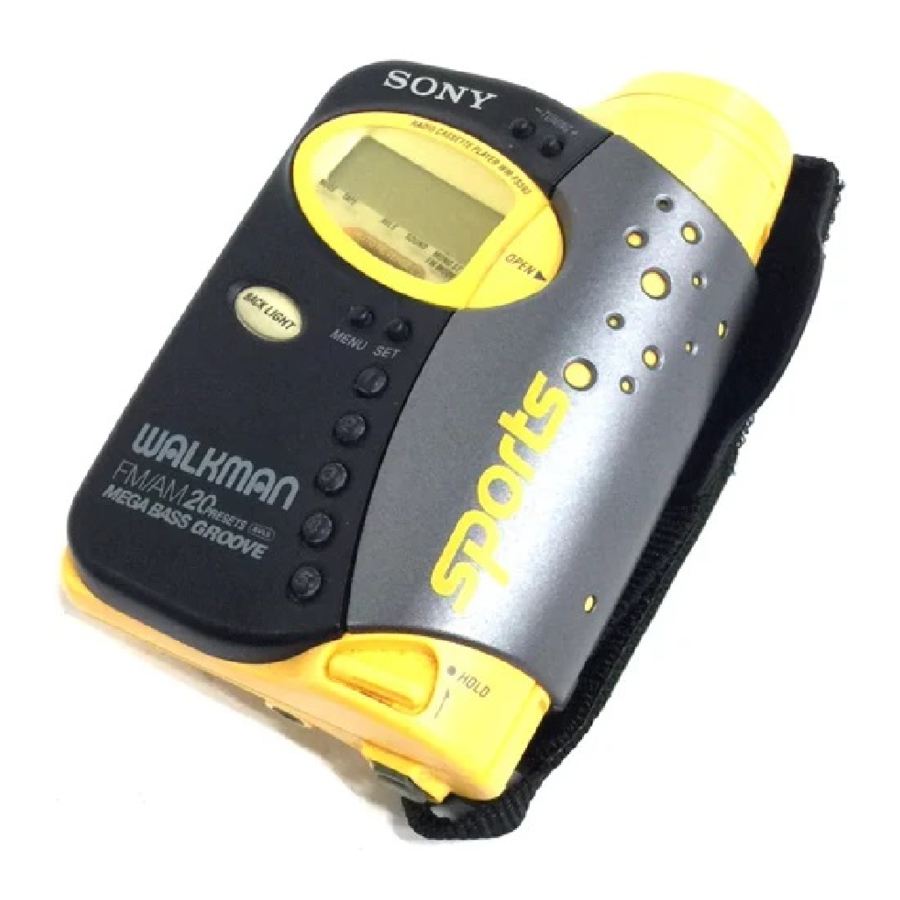
Sony Walkman WM-FS593, WM-FS595 - Radio Cassette Players Manual
- Operating instructions (2 pages) ,
- Operating instructions (2 pages)
Advertisement
- 1 Getting Started
- 2 Operating the Walkman
- 3 Using Other Functions
- 4 Additional Information
- 5 Maintenance
- 6 Troubleshooting
- 7 Specifications
- 8 Documents / Resources
Listening for many hours at maximum volume may damage your hearing.
The instructions in this manual are for WM-FS595 and WM-FS593. Before you start reading, check your model number. WM-FS595 is the model used for illustration purposes. Any differences in operation are clearly indicated in the text, for example, "FS595 only".
Getting Started
Preparing a Power Source
Dry Battery
(see Fig. A)

Open the cassette holder and open the battery compartment lid, and insert two R6 (size AA) dry batteries with correct polarity.
When to replace the batteries
Replace the batteries when " " flashes in the display.
The battery remainder mark has 3 steps to show the remaining battery power.
| Display | Condition |
 | The battery power is full. |
 | |
 | The battery power is decreasing. |
| |
 | The batteries are exhausted. Replace them with new ones. |
Notes
- The battery remainder mark may temporarily show a lower level during fast forwarding or rewinding or use in extremely low temperatures.
- When replacing batteries, replace both batteries within 30 seconds; otherwise all the memories including the preset radio stations will be canceled.
Battery life
| Battery life (Approx. hours) | (EIAJ*) | |
| Sony alkaline LR6 (SG) | Sony R6P (SR) | |
| Tape playback | 24 | 7.5 |
| Radio reception | 38 | 14 |
* Measured value by the standard of EIAJ (Electronic Industries Association of Japan). (Using a Sony HF series cassette tape)
Note
- The battery life may shorten depending on the operation of the unit.
For maximum performance we recommend that you use alkaline batteries.
Using the belt clip
Fig. B

With the supplied belt clip, you can wear your Walkman on a belt for convenient use.
To remove the belt clip (see Fig. B-a)
To attach the belt clip (see Fig. B-b)
Connecting the Headphones/ Earphones
(see Fig. C)

- Connect the headphones/ earphones to
![]()
- Wear the "L" marked side to the left ear and the "R" marked side to the right ear.

Operating the Walkman
How to use the Control-Pad
(see Fig. D)

Push the Control-Pad in any of the four directions or press down the OFF button for various operations.
Playing a Tape
(see Fig. E-a)

- Open the cassette holder and insert a cassette. Then close the cassette holder and lock the buckle.
- Make sure the HOLD function is turned off. If it is on, slide the HOLD switch to turn it off.
- Press MENU repeatedly to set the cursor to TAPE in the display.
Then press SET to select the tape type.
No message: normal (TYPE I) METAL: CrO 2 (TYPE II) or metal (TYPE IV) - Push the Control-Pad toward
![]() (play) to start playing. Then adjust the volume.
(play) to start playing. Then adjust the volume.

| To | Operation on the Control-Pad (see Fig. D) |
| play the other side | Push toward (play) during playback (play) during playback |
| stop playback | Press down  OFF (stop) OFF (stop) |
| fast forward | Push toward FF during stop |
| rewind | Push toward REW during stop |
| play the other side from the beginning (Skip Reverse function) | Push toward FF during playback |
| play the same side from the beginning (Rewind Auto Play function) | Push toward REW during playback |
To select playback mode
(see Fig. E-b)

Press MENU repeatedly to set the cursor to MODE in the display. Then press SET to select the desired mode.
| To play | Select |
| both sides repeatedly |  |
| both sides once from the side facing the cassette holder |  |
To play a tape recorded with Dolby* NR system (FS595 only)
(see Fig. E-c)

Press MENU repeatedly to set the cursor to  NR (Dolby noise reduction) in the display. Then press SET to show "ON".
* Dolby noise reduction manufactured under license from Dolby Laboratories Licensing Corporation. "DOLBY"and the double-D symbol are trademarks of Dolby Laboratories Licensing Corporation.
Listening to the Radio
(see Fig. F-a)

- Make sure the HOLD function is turned off. If it is on, slide the HOLD switch to turn it off.
- Push the Control-Pad toward BAND/RADIO ON to turn on the radio.
- Push the Control-Pad toward BAND/RADIO ON repeatedly to select FM1, FM2, FM3, or AM.
- Press TUNING+/– to tune in to the desired station. If you keep pressing TUNING+/– for a few seconds, the Walkman will start tuning to the stations automatically.
To turn off the radio
(see Fig. F-b)

Press down  OFF of the Control- Pad.
To improve the broadcast reception
- For FM (see Fig. F-c):

Extend the headphones/earphones cord, the aerial. If the reception is still not good, press MENU repeatedly to set the cursor to FM MODE or FM SENS in the display. Then press SET to choose the mode for best reception. - For AM: The Walkman has a built-in antenna. Reorient the Walkman horizontally to obtain optimum AM reception.

Note
- Do not remove the power sources while listening to the radio, or the received stations may not be stored.
Presetting Radio Stations
(see Fig. G)

You can store radio stations into the unit's memory. You can preset up to 20 radio stations, 5 for each FM1, FM2, FM3 or AM bands.
- Tune in to the station you wish to store. (Follow steps 1-4 in "Listening to the Radio")
- Press and hold one of the 1-5 buttons for more than 2 seconds. The display flashes twice with a beep sound, and the station is preset. If a station is already stored, the new station replaces the old one.
To play the preset radio stations
- Push the Control-Pad toward BAND/RADIO ON to select the band.
- Press the corresponding button (1-5) on the unit.
Receiving Stations Outside Your Country
(Excluding models for Europe and Saudi Arabia)
(see Fig. H)

The frequency range differs depending on the area (see the chart "Area indication and frequency range"). If you listen to the radio in an area of different frequency range, change the area indication in the display.
- Turn on the radio and push the Control-Pad toward BAND/ RADIO ON for more than 10 seconds until the area indication flashes in the display.
- While the display is flashing, press TUNING+/– to select either "U" or "E" indication.
- Push the Control-Pad toward BAND/RADIO ON to set the area indication.
Note
- If you change the frequency range, all the preset stations will be canceled.
Area indication and frequency range
| Area* | Frequency range | |
| FM (MHz) | AM(kHz) | |
| E | 87.5–108 | 531–1,602 |
| U | 87.5–108 | 530–1,710 |
* E: European and other countries
U: USA, Canada, and Central and South America
Using Other Functions
To lock the controls
(see Fig. I-a)

Set the HOLD switch to the direction of the arrow to lock the controls.
To emphasize bass sound
(see Fig. I-b)

Press MENU repeatedly to set the cursor to SOUND in the display. Then, press SET to select the desired mode. With each press, the indication changes as follows.
MB (MEGA BASS): emphasizes bass sound
GRV (GROOVE): emphasizes deeper bass sound
No message: off (normal)
Notes
- If the sound is distorted with the mode "GRV", select the mode "MB" or no message.
- Bass emphasis may not show great effect if the volume is turned up too high.
To protect your hearing— AVLS (Automatic Volume Limiter System) function
(see Fig. I-b)
When you set the AVLS function to active, the maximum volume is kept down to protect your ears.
Press MENU repeatedly to set the cursor to AVLS in the display. Then press SET to show " ".
".
Notes
- If the sound is distorted when you listen to the bass-boosted sound with the AVLS function, turn down the volume.
- The AVLS setting may be canceled when you replace the batteries.
To see the display in the dark
(see Fig. I-c)

Press BACK LIGHT. The backlight will illuminate the display for use in the dark. The display will glow for about 5 seconds for each operation. The BACK LIGHT button will operate even if the HOLD function is on.
Using the flasher
(FS595 for U.S.A. and Canada only)
To install the lithium battery
(see Fig. J-a)

Before using the flasher for the first time, open the battery compartment lid and insert one CR2025 lithium battery (supplied) with the correct polarity.
Note
- Be sure to close the battery compartment firmly after inserting the battery.
When to replace the lithium battery
Replace the lithium battery when the light of the flasher dims.
| Battery life* | (Approx. hours) |
| Sony lithium battery CR2025 | 80 |
* When using at 20°C (68°F) without turning off.
Note
- The battery life may shorten depending on the operation of the unit.
Notes on lithium battery
- Keep the lithium battery out of reach of children. Should the battery be swallowed, immediately consult a doctor.
- Wipe the battery with a dry cloth to assure good contact.
- Be sure to install the battery in the correct polarity position.
- Do not hold the battery with metallic tweezers, as doing so may cause a short-circuit.
- Do not break up the battery or throw it into a fire, which might cause it to explode. Carefully dispose of the used battery.
To attach the flasher to the handstrap
(see Fig. J-b)

To use the flasher
(see Fig. J-c)

Press the power switch. Each time you press it the light changes as follows;
flash → continuous light т off
Additional Information
Precautions
On batteries
- Do not charge a dry battery.
- Do not carry the dry or rechargeable batteries with coins or other metallic objects. It can generate heat if the positive and negative terminals of the batteries are accidentally contacted by a metallic object.
- When you do not use the Walkman for a long time, remove the battery to avoid any damage caused by battery leakage and subsequent corrosion.
On the unit
- Do not drop the unit or give a shock to the unit, or it may cause a malfunction.
- Do not leave the unit in a location near heat sources, or in a place subject to direct sunlight, excessive dust or sand, moisture, rain, mechanical shock, or in a car with its windows closed.
- Do not wind the headphones/ earphones cord around the unit. The buttons may be kept pressed, causing unnecessary battery usage.
- The LCD display may become hard to see or slow down when using the unit at high temperatures (above 40°C/104°F) or at low temperatures (below 0°C/32°F). At room temperature, the display will return to its normal operating condition.
- If the unit has not been used for long, set it in the playback mode and warm it up for a few minutes before inserting a tape.
On water resistance
- Before opening or closing the cassette holder, be sure to wipe off water, dust or sand on the exterior of the Walkman. (The Walkman is not water-resistant with the cassette holder open.)
- Since water in the headphones/ earphones jack may cause rust, cover it with the attached rubber cap when the headphones/ earphones are not in use.
- Since the Walkman is airtight, you may not be able to open the cassette holder because of sudden change in air pressure inside the Walkman, which happens after being transported on a plane or moving from a warm place to a cold place. To open the cassette holder, see "Troubleshooting".
- The supplied headphones/ earphones are not meant to be immersed in water or come in continuous contact with water. If they are accidentally dropped into water or get wet, dry them with a soft cloth. Never use an electric hair dryer.
- If the Walkman or the headphones/earphones are immersed in salt water, be sure to wash them in non-running fresh water. Never wash them under running water, and never use soap or detergent.
- Any sand or dust on the rubber packing will prevent the cassette holder from closing tightly, and water may leak in. Brush off the dust once in a while.
- We recommend the packing to be changed every year. Replacement packing is available at an authorized Sony Service Facility.
On tapes longer than 90 minutes
We do not recommend the use of tapes longer than 90 minutes except for a long continuous playback. They are very thin and tend to be stretched easily.
On headphones/earphones Road safety
Do not use headphones/earphones while driving, cycling, or operating any motorized vehicle. It may create a traffic hazard and is illegal in some areas. It can also be potentially dangerous to play your headphones/earphones at high volume while walking, especially at pedestrian crossings. You should exercise extreme caution or discontinue use in potentially hazardous situations.
Preventing hearing damage
Do not use headphones/earphones at high volume. Hearing experts advise against continuous, loud and extended play. If you experience a ringing in your ears, reduce volume or discontinue use.
Caring for others
Keep the volume at a moderate level. This will allow you to hear outside sounds and to be considerate to the people around you.
Maintenance
To clean the tape head and path
Use the cleaning cassette CHK-1 (not supplied) every 10 hours of use.
Note
- Use only the recommended cleaning cassette.
To clean the exterior
Use a soft cloth slightly moistened with water. Do not use alcohol, benzine or thinner.
Note
- Clean the headphones/earphones plug periodically.
Troubleshooting
The volume cannot be turned up
- If "
![]() " appears for AVLS display, press SET so that "
" appears for AVLS display, press SET so that "![]() " disappears.
" disappears.

The sound is unstable or no audio
- Insert two R6 (size AA) batteries properly.
- Replace all batteries if they are weak.
The display shows incorrect information
- The batteries are weak. Replace the batteries with new ones.
The cassette holder cannot be opened
- Open the rubber cap, then open the cassette holder. If the belt clip is attached, remove it first. When the cassette holder opens, remember to close the rubber cap to prevent intrusion of water (see Fig. K).


Specifications
Radio section
Frequency range
FM: 87.5–108 MHz
AM: 530–1,710 kHz (North, Central and South America)
531–1,602 kHz (Other countries)
Tape section
Frequency response (Dolby NR off)
Playback: 30–14,000 Hz
Output
 (Headphones/earphones) jack
Load impedance 8–300 ohms
General
Power requirements 3 V
Two R6 (size AA) batteries
Dimensions (w/h/d)
Approx. 96.5 x 130.6 x 47.8 mm (3 7 ⁄ x 5 1 ⁄ 4 x 1 15 ⁄ 8 16 inches) incl. projecting parts and controls
Mass
Approx. 295 g (10.5 oz)/Approx. 370 g (13.1 oz) incl. batteries and a cassette
Supplied accessories
Stereo headphones or Stereo earphones (1)
Belt clip (1)
Flasher (1) (FS595 for U.S.A. and Canada only)
Sony CR2025 lithium battery (1) (FS595 for U.S.A. and Canada only)
Design and specifications are subject to change without notice.

Documents / ResourcesDownload manual
Here you can download full pdf version of manual, it may contain additional safety instructions, warranty information, FCC rules, etc.
Download Sony Walkman WM-FS593, WM-FS595 - Radio Cassette Players Manual
Advertisement


Need help?
Do you have a question about the Walkman WM-FS593 and is the answer not in the manual?
Questions and answers