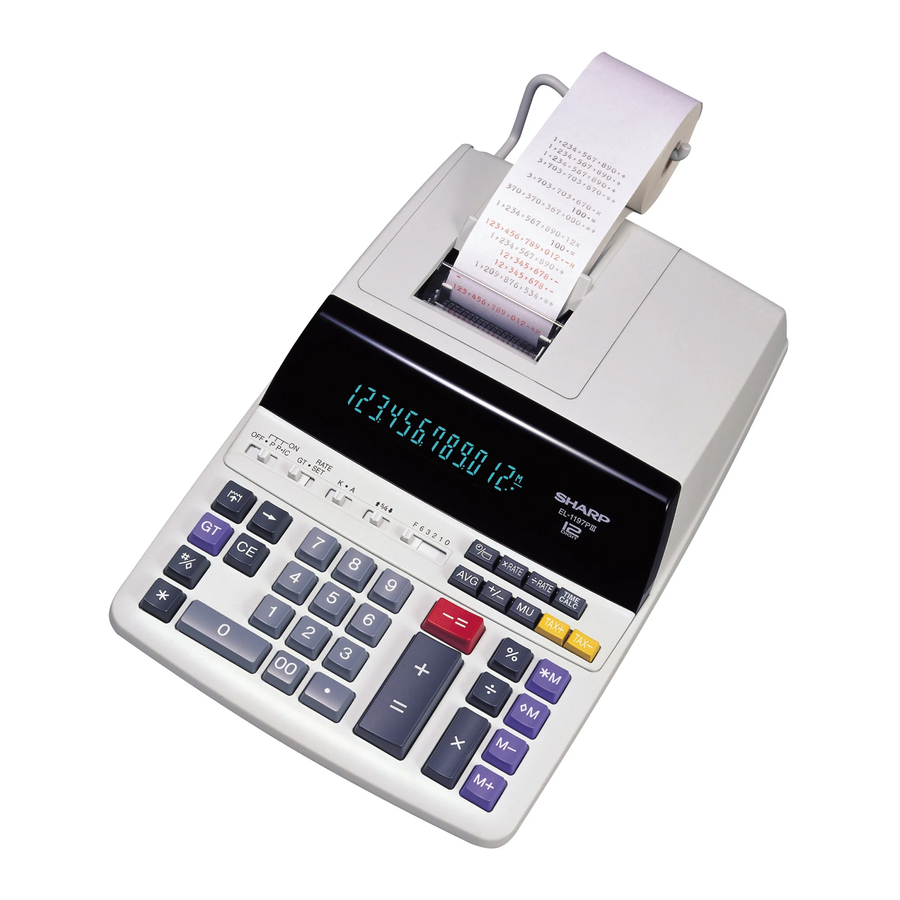
Sharp EL-1197PIII - Electronic Printing Calculator Manual
- Operation manual (2 pages) ,
- Operation manual (42 pages)
Advertisement
- 1 OPERATIONAL NOTES
- 2 USING THE CALCULATOR FOR THE FIRST TIME
- 3 OPERATING CONTROLS
- 4 INK RIBBON REPLACEMENT
- 5 PAPER ROLL REPLACEMENT
- 6 ERRORS
- 7 REPLACEMENT OF BATTERY FOR MEMORY PROTECTION
- 8 SPECIFICATIONS
- 9 RESETTING THE UNIT
-
10
CALCULATION EXAMPLES
- 10.1 PRINTING DATE AND TIME
- 10.2 MIXED CALCULATION
- 10.3 ADDITION AND SUBTRACTION WITH ADD MODE
- 10.4 CONSTANT
- 10.5 CORRECTION OF ERRORS
- 10.6 PERCENT
- 10.7 ADD-ON AND DISCOUNT
- 10.8 MARKUP AND MARGIN
- 10.9 PERCENT CHANGE
- 10.10 GRAND TOTAL
- 10.11 ITEM COUNT CALCULATION
- 10.12 AVERAGING
- 10.13 MEMORY
- 10.14 TAX RATE CALCULATIONS
- 10.15 TIME CALCULATIONS
- 10.16 CONVERSION CALCULATION EXAMPLES
- 11 LIMITED WARRANTY
- 12 FCC
- 13 Documents / Resources
OPERATIONAL NOTES
To insure trouble-free operation of your SHARP calculator, we recommend the following:
- The calculator should be kept in areas free from extremetemperature changes, moisture, and dust.
- A soft, dry cloth should be used to clean the calculator. Do notuse solvents or a wet cloth.
- Since this product is not waterproof, do not use it or store itwhere fluids, for example water, can splash onto it. Raindrops, water spray, juice, coffee, steam, perspiration, etc. will also cause malfunction.
- If service should be required, use only a SHARP servicingdealer, a SHARP approved service facility or SHARP repair service.
- Do not operate the unit with the battery insulation sheetattached. The battery insulation sheet prevents the memory protection battery from wearing, and is found on the back of the unit.
Operating with the battery insulation sheet attached may result to loss of information such as date and time, conversion rate, and tax/discount rate if the AC power plug is accidentally pulled out from the wall socket. - Do not wind the AC cord around the body or otherwise forciblybend or twist it.
SHARP will not be liable nor responsible for any incidental or consequential economic or property damage caused by misuse and/or malfunctions of this product and its peripherals, unless such liability is acknowledged by law.
USING THE CALCULATOR FOR THE FIRST TIME
First, pull out the insulation sheet for the memory protection battery (installed for retaining the date/time, conversion rate, and tax/discount rate information). Reset the calculator to initialize the unit's state, then adjust the date and time.
Removing the insulation sheet, and resetting
- Pull out the insulation sheet for the memory protection battery.

- Press the RESET switch located on the back of the unit.
(See "RESETTING THE UNIT".)

*The clock starts, indicating the current date and time asJanuary 1, 2005, 12:00:00 a.m.
Adjusting date and time
Example: When the date is September 15, 2004, and the time is 3:38 p.m.

(see "GRAND TOTAL / RATESETTING MODE SELECTOR")
*When the adjustment is complete, the clock starts at 3:38:00p.m.
OPERATING CONTROLS
POWER SWITCH; PRINT / ITEM COUNT MODE SELECTOR

"OFF": Power off.
"•": Power ON. Set to the non-print mode.
"P": Power ON. Set to the print mode.
"P•IC": Power ON. Set to the print and item count mode.
- The counter will count the number of times that the
![]() key has been pressed in addition.
key has been pressed in addition.
 key has been pressed in addition.
Note:
- Each time the
![]() key is used in subtraction, 1 will be subtracted from the count.
key is used in subtraction, 1 will be subtracted from the count. - The count is printed when the calculated result is obtained.
- Pressing of the
![]() ,
, ![]() ,
, ![]() ,
, ![]() or
or ![]() key clears the counter.
key clears the counter.
 key is used in subtraction, 1 will be subtracted from the count.
 ,
,  ,
,  ,
,  or
or  key clears the counter.
- When the grand total/rate setting mode selector is in the ON position (GT), the counter will count the number of times that the calculation results have been stored in the grand total memory. To print and clear the count, press the
![]() key.
key. - The memory item counter will count the number of times that the
![]() key has been pressed in the addition.
key has been pressed in the addition.
 key.
key. key has been pressed in the addition.
Note:
- Each time the
![]() key is used in the subtraction, 1 will be subtracted from the count.
key is used in the subtraction, 1 will be subtracted from the count. - The count is printed when the memory is recalled.
- Pressing of the
![]() key clears the counter.
key clears the counter.
 key is used in the subtraction, 1 will be subtracted from the count.
 key clears the counter.
Note: The counter has a maximum capacity of 3 digits (up to ±999). If the count exceeds the maximum, the counter will recount from zero.
DECIMAL SELECTOR

Presets the number of decimal places in the answer. In the ''F'' position, the answer is displayed in the floating decimal system.
CONSTANT/ADD MODE SELECTOR

''K'': The following constant functions will be performed:
Multiplication:
The calculator will automatically remember the first number entered (the multiplicand) and  instruction.
Division:
The calculator will automatically remember the second number entered (the divisor) and  instruction.
''•'': Neutral
''A'': Use of the Add mode permits addition and subtraction of numbers without an entry of the decimal point. When the Add mode is activated, the decimal point is automatically positioned according to the decimal selector setting.
Use of  and will automatically override the Add mode and decimally correct answers will be printed at the preset decimal position.
ROUNDING SELECTOR

"  ": An answer is rounded up.
"5/4": An answer is rounded off.
"  ": An answer is rounded down.
Note: The decimal point floats during successive calculation by the use of or .
If the decimal selector is set to "F" then the answer is always rounded down ().
GRAND TOTAL/RATE SETTING MODE SELECTOR

"GT": Grand Total
"•": Neutral
" ": To set up date, time, conversion rate, and tax/discount rate, place the switch at the "RATE SET" position.
Date:
- Enter in the order of month, day and year, then press
![]() to complete the entry.
to complete the entry. - Use
![]() to separate month, day, and year.
to separate month, day, and year. - When
![]() is pressed, the number entered is evaluated and displayed as "date" if the value is within the following range; "Error" is displayed otherwise, and the previously set date is restored.
is pressed, the number entered is evaluated and displayed as "date" if the value is within the following range; "Error" is displayed otherwise, and the previously set date is restored.
Month: 1 - 12; day: 1 - 31; Year: 2000 - 2099 (in 4 digits) or 00 - 99 (in 2 digits)
 to complete the entry.
 to separate month, day, and year.
Time:
- Enter in the order of hour, minutes, then press
![]() to complete the entry.
to complete the entry.
(There is no entry available for the seconds value. The clock starts at zero second.) - If the hour/minute digit is less than 10, it is not necessary to enter the first digit "0".
- Use
![]() to separate hour and minute values.
to separate hour and minute values. - When
![]() is pressed, the number entered is evaluated and displayed as "time" if the value is within the following range; "Error" is displayed otherwise, and the previously set time is restored.
is pressed, the number entered is evaluated and displayed as "time" if the value is within the following range; "Error" is displayed otherwise, and the previously set time is restored.
Hour: 0 - 23 (24-hour system for the hour entry), Minute: 0 - 59
Conversion rate:
- Press
![]() twice, enter the conversion rate, followed by
twice, enter the conversion rate, followed by ![]()
- A maximum of 6 digits can be stored (decimal point is not counted as a digit).
 twice, enter the conversion rate, followed by
Tax / discount rate:
- Press
![]() twice, enter the tax rate, followed by
twice, enter the tax rate, followed by ![]() .
. ![]() Press
Press ![]() twice, enter the discount rate, followed by then
twice, enter the discount rate, followed by then ![]()
- A maximum of 4 digits can be stored (decimal point is not counted as a digit).
 Press
Press Note:
- Be sure to set this selector to the "•" position after storing an each rate.
- For the conversion rate and the tax / discount rate, a single value can be stored for each. If you enter a new rate, the previous rate will be cleared.
TIME CALCULATION KEY

- Utilise this key to enter hours and minutes in time calculations.
- Press this key after entering an hour or minute value. (There is no need to press this key when entering a second value.)
- To bypass hour entry, press this key after entering 0.
- To bypass minute entry, you may press this key alone, or press it after entering 0.
- When this key is pressed, if the preceding entry is in any of the following ranges, it is set as an hour or minute value:
Hour: Within 6 digits
Minute: 0 to 99 (An entry above 60 is rounded up to one hour. If a value of more than 3 digits is entered, only the least significant two digits take effect.) - A second value is set when it is entered in the following range:
Second: 0 to 99 (An entry above 60 is rounded up to one minute. If a value of more than 3 digits is entered, only the least significant two digits take effect.)
CLOCK / CALENDAR KEY
- Each time this key is pressed, the mode switches. Calculation mode → Date display mode → Clock display mode → Calculation mode
- Use this key also to adjust date and time (see "GRAND TOTAL / RATE SETTING MODE SELECTOR").
 PAPER FEED KEY
 LAST DIGIT CORRECTION KEY
 GRAND TOTAL KEY
 CLEAR ENTRY KEY
 TOTAL KEY:
Press this key twice, followed by  , to print the set tax rate.
The tax rate is printed with the symbol "TX".
 MULTIPLICATION KEY
 DIVISION KEY
 MINUS EQUAL KEY
 PLUS EQUAL KEY
 CHANGE SIGN KEY
 MARKUP KEY
 MEMORY TOTAL CLEAR KEY
 MEMORY SUBTOTAL RECALL KEY
 MEMORY PLUS KEY
 MEMORY MINUS KEY
 TAX-INCLUDING KEY
 PRE-TAX KEY
 PERCENT KEY
 NON-ADD/SUBTOTAL KEY:
Non-add – When this key is pressed right after an entry of a number in the Print mode, the entry is printed on the left-hand side with the symbol "#". This key is used to print out numbers not subjects to calculation such as code, date, etc.
Subtotal – Used to get subtotal(s) of additions and/or
subtractions. When pressed following the  or
or  key, the subtotal is printed with the symbol "
 " and the calculation may be continued.
By pressing this key even in the Non-print mode, the displayed number is printed with the symbol "P".
- When the POWER SWITCH; PRINT / ITEM COUNT MODE SELECTOR isset "•", "P" or "P•IC" position, and Dateor Clock is displayed, press this key toprint the displayed contents, including"#" symbol, from the left side of thepaper roll.
Example:
Date printing
#9 • 15 • 2004 • • • • • •
(when the date is September 15, 2004)
Clock printing
#10 • 30 • • • • • • • • • • A
(when the time is 10:30 a.m.)
#6 • 25------------ P
(when the time is 6:25 p.m.)
- When the Date / Clock printing iscomplete, the Calculation mode isrestored.
 AVERAGE KEY:
Used to calculate the average.
 CONVERSION KEY:
This key is used:
- to store the conversion rate (by the use of the rate setting mode selector).
- obtains a value by multiplying a given number with a specified conversion rate.
- to recall the presently stored rate for check. Press
![]()
![]() first to clear the calculation register and reset an error condition, then press
first to clear the calculation register and reset an error condition, then press ![]() . The conversion rate is printed with the symbol "TC".
. The conversion rate is printed with the symbol "TC".

 . The conversion rate is printed with the symbol "TC".
 CONVERSION KEY:
This key is used to obtain a value by dividing a given number with a specified conversion rate.
DISPLAY SYMBOLS:
M: A number has been stored in memory.
–: The display value is negative.
E: Error or overflow of capacity.
• : Appears when a number is in the grand total memory.
INK RIBBON REPLACEMENT
- Remove the paper roll from the calculator. (Tear the paper andremove it from the print mechanism by using
![]() .)
.) - Turn the power off before replacing ribbon.
- Remove the printer cover. (Fig. 1)
![]()
- Remove the old ribbon by pulling it up.
- Insert the new ribbon.
- With the black side of the ribbon facing upwards, place one ofthe reels on the reel shaft on the right. (Fig. 2) Make sure that the reel is securely in place.
![]()
- Thread the ribbon around the outside of the metal guides.(Fig. 3)
![]()
- Take up any slack by manually turning one of the reels.
- Replace the printer cover. (Fig. 4)
![]()
- Replace the paper roll.


PAPER ROLL REPLACEMENT
Never insert paper roll if torn. Doing so will cause paper to jam.
Always cut leading edge with scissors first.
- Insert the leading edge of the paper roll into the opening. (Fig. 1)

- Turn the power on and feed the paper by pressing
![]() . (Fig. 2)
. (Fig. 2)
![]()
- Insert the paper roll to the paper holder. (Fig. 3)
![]()

 . (Fig. 2)

DO NOT PULL PAPER BACKWARDS AS THIS MAY CAUSE DAMAGE TO PRINTING MECHANISM.
ERRORS
There are several situations which will cause an overflow or an error condition. When this occurs, "E" will be displayed. The contents of the memory at the time of the error are retained.
If an '' '' is displayed at the time of the error,
  must be used to clear the calculator. If an ''E'' with any numerals except zero is displayed, the error may be cleared with
  or
or  and the calculation can still be continued.
Also, in rare cases, printing may stop midway and the indication "E" appear on the display. This is not a malfunction but is caused when the calculator is exposed to strong electromagnetic noise or static electricity from an external source. Should this occur, press the key and then repeat the calculation from the beginning.
Error conditions:
- Entry of more than 12 digits or 11 decimals. This error can be cleared with
![]() or
or ![]() .
. - When the integer portion of an answer exceeds 12 digits.
- When the integer portion of the contents of the memory or grand total memory exceeds12 digits.
(Ex.![]() 999999999999
999999999999 ![]() 1
1![]() )
) - When any number is divided by zero. (Ex. 5
![]() 0
0 ![]() )
)
 999999999999
  0
0  )
)REPLACEMENT OF BATTERY FOR MEMORY PROTECTION
Time for battery replacement
Life of the memory protection battery is approximately 2,500 hours at 25°C(77°F) with the power plug not connected to the socket.
* When the memory protection battery is weak, the date/time setting is initialised (1/1/2005, 12:00:00 a.m.).
Verify the date/time setting in the date/clock display mode when connecting the power plug to the socket.
If the date/time setting is modified or incorrect, promptly replace the memory protection battery with new one.
(The life of the pre-installed battery may be shorter than expected because of the time the calculator spends during shipment.)
Method of battery replacement
Use one lithium battery (CR2032).

Replacing the battery will clear the date and time settings, as well as the conversion rate, and the tax/ discount rate.
- Turn the power switch "OFF" and unplug the power supply plug from the outlet.
- Remove the battery cover on the back of the unit. (Fig. 1)

- Remove the exhausted battery and install one new lithium battery. Wipe the battery well with a dry cloth and place the plus "+" side upward. (Fig. 2)
![]()
- Replace the battery cover by reversing the removal procedure.
- Press the RESET switch on the back of the unit (See "RESETTING THE UNIT").


After battery replacement
- Connect the power supply plug to an outlet and turn the power switch "ON".
Check that "0." is displayed. If "0." is not displayed, remove the battery, reinstall it, and check the display again. - Reconfigure date, time, conversion rate, and tax/discount rate.
- On the battery replacement date label found on the back of the unit, write down the month and year when the battery is replaced, as a reference for the next battery replacement.
Precautions on battery use
- Do not leave an exhausted battery in the equipment.
- Do not expose the battery to water or flame, and do not take it apart.
- Store batteries out of the reach of small children.
Notes for handling Lithium batteries
Danger of explosion if battery is incorrectly replaced.
Replace only with the same or equivalent type recommended by the manufacturer.
Dispose of used batteries according to the manufacturer's instructions.
SPECIFICATIONS
Operating capacity: 12 digits
Power supply:
Operating: AC: 120V, 60Hz
Memory backup: 3V ... (DC) (Lithium battery CR2032 × 1)
Memory Protection Battery lifespan:
About 2,500 hours (While at 25°C(77°F), and the power plug is not connected to the socket.)
CLOCK SECTION
Accuracy: Within ±60 seconds per month average (at 25°C(77°F))
Items to be displayed: month, day, year, hour, minute, second, a.m. "A", p.m. "P"
Items to be printed: month, day, year, hour, minute, a.m. "A", p.m. "P"
Time system: 12-hour
PRINTING SECTION
Printer: Mechanical printer
Printing speed: Approx. 4.3 lines/sec.
(at room temperature of 25°C (77°F))
Printing paper: 57 mm(2-1/4") - 58 mm(2-9/32") wide
80 mm(3-5/32") in diameter (max.)
Operating temperature: 0°C – 40°C (32°F – 104°F)
Power consumption: 66 mA
Dimensions: 222 mm (W) × 327 mm (D) × 78 mm (H)
(8-3/4" (W) × 12-7/8" (D) × 3-1/16" (H))
Weight: Approx. 1.9 kg (4.19 lb.) (with battery)
Accessories:
1 lithium battery(installed), 1 battery replacement date label (attached on the unit's back body), 1 paper roll, 1 ink ribbon (installed), and operation manual

THE VOLTAGE USED MUST BE THE SAME AS SPECIFIED ON THIS CALCULATOR. USING THIS CALCULATOR WITH A HIGHER VOLTAGE THAN THAT WHICH IS SPECIFIED IS DANGEROUS AND MAY RESULT IN A FIRE OR OTHER TYPE OF ACCIDENT CAUSING DAMAGE. WE ARE NOT RESPONSIBLE FOR ANY DAMAGE RESULTING FROM USE OF THIS CALCULATOR WITH A VOLTAGE OTHER THAN THAT WHICH IS SPECIFIED.
RESETTING THE UNIT
Strong impacts, exposure to electrical fields, or other unusual conditions may render the unit inoperative, and pressing the keys will have no effect. If this occurs, you will have to press the RESET switch on the bottom of the unit. The RESET switch should be pressed only when:
- an abnormal event occurs and all keys are disabled.
Notes:
- Pressing the RESET switch will clear the set date and time configuration, as well as conversion rate, tax/discount rate, and memory contents.
- Use only a ballpoint pen to press the RESET switch. Do not use anything breakable or anything with a sharp tip, such as a needle.
- After pressing the RESET switch, connect the power supply plug to an outlet. Turn the power switch "ON" and check that "0." is displayed.


CALCULATION EXAMPLES
- Set the decimal selector as specified in each example. The rounding selector should be in the "5/4" position unless otherwise specified.
- The constant/add mode selector and grand total/rate settingmode selector should be in the "•" position (off) unless otherwise specified.
- The print/item count mode selector shouldbe in the "P" position unless otherwise specified.
- If an error is made while entering a number, press
![]() or
or ![]() and enter the correct number.
and enter the correct number. - Negative values are printed with ''–'' symbol in red.
 or
or  and enter the correct number.
PRINTING DATE AND TIME
EXAMPLE:When on October 20, 2005, 1:52:00 p.m.

*1: If the date is not shown on the display, press  to show the date.
MIXED CALCULATION

ADDITION AND SUBTRACTION WITH ADD MODE

CONSTANT

CORRECTION OF ERRORS

PERCENT

ADD-ON AND DISCOUNT

MARKUP AND MARGIN
Markup and Profit Margin are both ways of calculating percent profit.
- Profit margin is percent profit vs. selling price.
- Markup is percent profit vs. cost.
- Cost is the cost.
- Sell is the selling price.

PERCENT CHANGE
- Calculate the dollar difference (a) and the percent change (b) between two yearly sales figures $1,500 in one year and $1,300 in the previous year.

GRAND TOTAL

ITEM COUNT CALCULATION

AVERAGING

MEMORY

*: Press  to clear the memory before starting a memory calculation.
TAX RATE CALCULATIONS
EXAMPLE 1: Set a 5% tax rate.
Calculate the tax on $800 and calculate the total including tax.

EXAMPLE 2: Perform two calculations using $840 and $525, both of which already include tax. Calculate the tax on the total and the total without tax. (tax rate: 5%)

TIME CALCULATIONS
EXAMPLE 1: 4 hours 15 minutes 20 seconds + 3 hours 50 minutes 18 seconds =

EXAMPLE 2: Calculate the payroll amount at an hourly rate of $15 for the total number of hours worked for 7 hours 45 minutes per day for five days.

- Each time
![]() is pressed after a result is displayed, the result toggles between the sexagesimal and decimal formats.
is pressed after a result is displayed, the result toggles between the sexagesimal and decimal formats. - This printer calculator supports the following repertoire of time calculations: Addition, subtraction, multiplication and division, constant calculation, memory calculation, grand total memory calculation, average calculation, and percent calculation.
- Calculation range: –999999 hours 59 minutes 59 seconds – 999999 hours 59 minutes 59 seconds
- Because time calculation results are rounded down to 13 decimal places after sexagesimal-to-decimal conversion, calculation errors may be introduced. Time calculations are displayed in sexagesimal with the fraction part of a second being rounded off.
- The sexagesimal arithmetic specifications of this printer calculator are as follows: Addition (Subtraction is similar to addition. ) (Sexagesimal) + (Sexagesimal) = (Sexagesimal) (Sexagesimal) + (Decimal) = (Sexagesimal) (Decimal) + (Sexagesimal) = (Sexagesimal)
 is pressed after a result is displayed, the result toggles between the sexagesimal and decimal formats.
Multiplication (Division is similar to multiplication.) (Sexagesimal) × (Sexagesimal) = (Decimal) (Sexagesimal) × (Decimal) = (Decimal) (Decimal) × (Sexagesimal) = (Decimal)
CONVERSION CALCULATION EXAMPLES
EXAMPLE 1: Set the conversion rate ($1 = ¥123.45).

EXAMPLE 2: Convert $120 to yen ($1 = ¥123.45).

EXAMPLE 3: Set the conversion rate (1 meter = 39.3701 inches).

EXAMPLE 4: Convert 472.4412 inches to meters (1 meter = 39.3701 inches).

The socket outlet shall be installed near the equipment and shall be easily accessible
LIMITED WARRANTYYour Product: Electronic Calculator Warranty Period for this Six (6) months parts and labor from date of purchase. Where to Obtain Service: At a Sharp Authorized Servicer located in the United States. To find out the location of the nearest Sharp Authorized Servicer, call Sharp toll free at 1-800-BE-SHARP. |
TO OBTAIN SUPPLY, ACCESSORY OR PRODUCT INFORMATION, CALL 1-800-BE-SHARP.
FCC

FCC Regulations state that any unauthorized changes or modifications to this equipment not expressly approved by the manufacturer could void the user's authority to operate this equipment.
Note: This equipment has been tested and found to comply with the limits for a Class B digital device, pursuant to Part 15 of the FCC Rules. These limits are designed to provide reasonable protection against harmful interference in a residential installation. This equipment generates, uses, and can radiate radio frequency energy and, if not installed and used in accordance with the instructions, may cause harmful interference to radio communications. However, there is no guarantee that interference will not occur in a particular installation. If this equipment does cause harmful interference to radio or television reception, which can be determined by turning the equipment off and on, the user is encouraged to try to correct the interference by one or more of the following measures:
- Reorient or relocate the receiving antenna.
- Increase the separation between the equipment and receiver.
- Connect the equipment into an outlet on a circuit different from that to which the receiver is connected.
- Consult the dealer or an experienced radio/TV technician for help.
For your convenience, Genuine Sharp Supplies. Accessories, and additional Sharp Products can be purchased from the Authorized Sharp Reseller where you purchased your product or on-line at:
www.sharpplace.com

Documents / Resources
References

Download manual
Here you can download full pdf version of manual, it may contain additional safety instructions, warranty information, FCC rules, etc.
Download Sharp EL-1197PIII - Electronic Printing Calculator Manual
Advertisement


Need help?
Do you have a question about the EL-1197PIII and is the answer not in the manual?
Questions and answers