Advertisement
Quick Links
Advertisement

Related Manuals for peerless-AV dvLED Series


Summary of Contents for peerless-AV dvLED Series
- Page 1 Universal for Latching dvLED Series *Actual configuration may vary 2023-04-14 #:146-9079-1...
- Page 2 WARNING This product is designed to be installed on plywood walls. Hardware is included for plywood installation. This product is designed to be installed on flat, unobstructed, vertical walls. Do not install on curved or angled walls. Before installing make sure the supporting surface will support the combined load of the equipment and hardware.
-
Page 3: Parts List
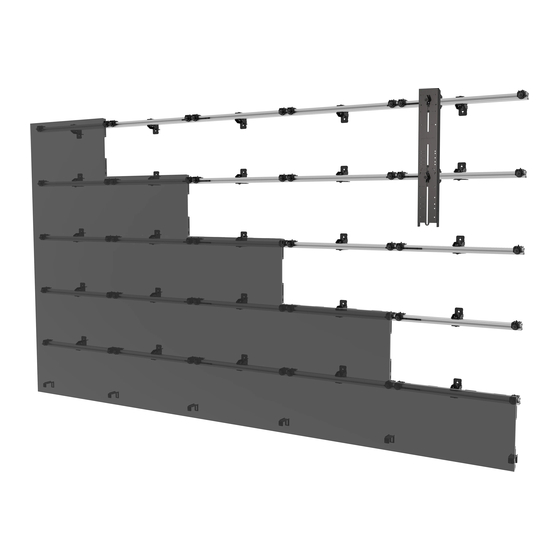
Parts (Before beginning, make sure you have all parts shown below). Refer to parts list included with your model. Parts List Description latch assembly horizontal extrusion horizontal extrusion template template wall plate depth adjustment bracket shim 3mm allen wrench connector depth adjustment wall plate plate... - Page 4 WARNING When installing Peerless wall mounts on a wood stud wall covered with plywood, verify that the wood studs are a minimum of 2" x 4" nominal size and plywood is a minimum Grade BC, 1/2" (13mm) thick. Plywood may be covered by gypsum board (drywall) up to 5/8"...
- Page 5 1a-1 Refer to drawing included for dimensions. Plumb and level outer template, drill mounting holes into supporting surface and install using wood screws provided. Repeat to install remaining center templates. 1.0" (25mm) 5/32" (4mm) MAX 80 in. • lb (9 N.M.) No gaps.
- Page 6 5/32" (4mm) 3/8" Optional: connecting two (10mm) horizontal extrusions. G (3) Do not insert MIN 25 in. • lb Front View into top channel. (2.82 N.M.) Refer to drawing included for dimensions. Cut extrusions to length. Slide wall plates onto horizontal extrusions (one wall plate per display), do not fully tighten hardware. Refer to drawing included for dimensions.
- Page 7 Optional leveling for bowed walls. Loosen. Insert. Tighten. 3/8" (10mm) Set a laser level so that it is parallel to the mounting Double check using a straight edge to span three surface (wall). Measure to the face of the extrusion so extrusions.
- Page 8 If mounting hardware is preinstalled, remove and replace with hardware provided. Not included. M8 x 16mm M6 x 16mm M10 x 16mm Z-brackets on outer displays, bottom row only. 2023-04-14 #:146-9079-1...
-
Page 9: Height Adjustment
5/32" (4mm) Hook display cabinets onto horizontal extrusion, adjust height to level and join cabinets together using connecting system. Adjust plumb, close latch, then run cables one at a time starting from left to right. HEIGHT ADJUSTMENT 3/8" (10mm) CLOSE LATCH TO SECURE OPEN LATCH TO ENGAGE EXTRUSION... - Page 10 This page intentionally left blank. 2023-04-14 #:146-9079-1...
- Page 11 This page intentionally left blank. 2023-04-14 #:146-9079-1...
- Page 12 +44 (0) 1923 200 100 +31 (0) 70 770 8037 +52 (81) 8384-8300 © 2023 Peerless Industries, Inc. Peerless-AV is a registered trademark of Peerless Industries, Inc. All rights reserved. ® Other parties’ marks are the property of their respective owners.
Need help?
Do you have a question about the dvLED Series and is the answer not in the manual?
Questions and answers