
Related Manuals for LightwaveRF LW440


Summary of Contents for LightwaveRF LW440
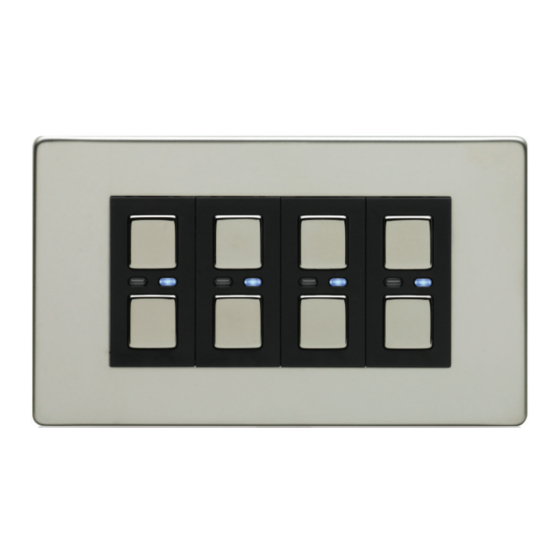
- Page 1 Version 2.1 Dimmer Switch (4 Gang) Model No. LW440 Instruction Manual Connect Series www.lightwaverf.house...
- Page 2 EN 55022: 2010, EN 61000-3-2: 2006 +A1: 2009 +A2: 2009 Class A, EN 61000-3-3: 2008, EN61000-4-2: 2009, EN 61000-4-3: 2006 +A1: 2008 +A2: 2010, EN 61000-4-4: 2012, EN 61000-4-5: 2006, EN 61000-4-6: 2009, EN 61000-4-11: 2004 For and on behalf of LightwaveRF PLC ---------------------------------------- Name J Shermer...
-
Page 3: How Do I Get Started
You will also need suitable electrical screwdrivers. Help video & further guidance For additional guidance, and to watch a video that will help guide you through the installation process, please visit the support section on www.lightwaverf.com... -
Page 4: Installation
Hold to decrease light level. the dimmer is on. IMPORTANT: All LightwaveRF products can be legally DIY installed in your own home; however, if in doubt, always consult a qualified electrician or heating engineer. It is important to install this product in accordance with... - Page 5 Installation Switched live Live in (live out) 2-Way switching Screw mounting connection hole IMPORTANT: If conducting an insulation resistance test, all LightwaveRF products must be disconnected from the mains, or damage will occur.
- Page 6 Installation IMPORTANT: Turn o the mains electrical supply. Ensure that the wall (back) box has a minimum depth of 35mm. Remove and disconnect the existing lightswitch (if applicable). It may be useful at this point to mark out or take a photograph of the connections to the existing switch so that the correct wires can easily be transferred to the new dimmer.
- Page 7 NOTE: LightwaveRF dimmers do NOT require a mains neutral wire to be connected; they only require ‘live in’ and ‘switched live out’.
- Page 8 Earth wire connects to terminal in a neutral wire. back box (can be capped o instead if no terminal present) Signal cable connection for use with LightwaveRF 2-Way Dimmer only (LOW VOLTAGE: Do not connect to live mains!) Live wire In. This should be brown or red in colour.
- Page 9 • It is recommended that LightwaveRF devices be positioned at least 30cm apart in order to prevent the risk of any radio conflict that could disrupt remote operation.
- Page 10 Installation Connecting to a 2-Way Dimmer • Any LightwaveRF dimmer switch (and any gang in a multigang dimmer) can be used in conjunction with a LightwaveRF 2-way dimmer to perform 2-way switching. For full instructions on how to install a 2-way dimmer, please consult the instruction booklet for the 2-way dimmer.
- Page 11 Installation From Lighting Circuit IMPORTANT: The signal cable input marked ‘S’ must ONLY be connected Live to the wire running to the other Switched Live dimmer NOT live mains; this will 3 - C o re cause irreparable damage. Cable Earth Live Signal Cable...
- Page 12 Compatibility & Lamps Compatibility Ensuring the compatibility of your lamps (bulbs) with LightwaveRF Dimmers will ensure that you get the best experience from your lighting setup. LightwaveRF dimmers are compatible with the following: • Selected dimmable LED lamps (see www.lightwaverf.house for further guidance and information).
- Page 13 flicker slightly at high or low brightness levels, especially if there is only a modest overall circuit load (under 10W). Stability can be achieved by a very slight adjustment to the dimming range of the LightwaveRF Dimmer. The default setting (smallest dimming range) is the most stable for LEDs. If the LEDs perform normally at this setting (most cases), then the range can be increased (if desired) using the following method.
- Page 14 Installation Compatibility & Lamps Compatibility & Lamps Tap the (top) ‘on’ button twice to enter Dimming Range Setup. The blue LED will flash to indicate that the setup menu has been accessed. The dimmer will automatically turn on at a high level of brightness. This indicates that the smallest (most stable) dimming range is currently selected.
- Page 15 • Wattage ratings for the dimmers are per gang. This means that a total load of 250W (incandescent) can be put on each circuit connected to each gang. • LightwaveRF Dimmers utilise a tiny amount of power to drive the electronics that operate the RF radio and dimming components. As a result, it is normal to experience a 5-10% reduction in light output when using incandescent lamps (bulbs).
-
Page 16: Manual Operation
Manual operation Manual operation Manual dimming • Tap the ‘on’ (top) button once to switch the dimmer on (blue LED indicator will illuminate). Press and hold the ‘on’ button to raise the light level. • Tap the ‘o ’ (bottom) button once to switch the dimmer o (amber LED indicator will illuminate). -
Page 17: Device Setup
Handheld Remote or Mood Controller) which can be linked to the dimmers. LightwaveRF dimmers each have 6 unique memory slots which means they can link with up to 6 LightwaveRF controllers in total. If you are using a smartphone/tablet/PC to control the dimmer via the Lightwave Link, this will always count as ONE controller and take up one memory slot even if you are using multiple smartphones/tablets. - Page 18 ‘o ’ and ‘on’ buttons until the blue and amber LEDs flash alternately then release them. The dimmer switch is now in linking mode. Using the LightwaveRF Smartphone App, enter the edit menu and press the delete button next to the relevant device (the App instructions will guide you through this).
- Page 19 If the distance between the transmitter and receiver is too great to achieve reliable operation, the LightwaveRF Signal Booster may be used in conjunction with this product to increase the range.
-
Page 20: Remote Operation
Remote operation Remote operation Dimming with the LightwaveRF App or a LightwaveRF controller • Press the ‘on’ button on the App (or other LightwaveRF controller) once to switch the dimmer (blue indicator will illuminate). Use the slider to raise or lower... - Page 21 • The dimmer can be ‘locked’ so that the manual buttons will not operate it. This can be achieved using the LightwaveRF App or a ‘Socket Locker’ remote. If it is locked on, then the dimmer will not turn o manually.
- Page 22 1. (Easy): Family safety Products Required: Dimmer Switch, PIR Motion Sensor Here we have a LightwaveRF Dimmer Switch paired to a PIR Motion Sensor. When somebody is detected by the sensor, it triggers the dimmer automatically and turns the light on. So, when one of the kids needs to use the bathroom in the middle of the night, the path is safely lit for them.
- Page 23 Creative ideas 2. (Intermediate): Scene lighting Required: Dimmer(s), Mood Controller, Plug-ins Dimmer Switches & Dimmable Plug-ins enable you to control all of your lounge ceiling lights and socket powered lamps individually or together as a group. The Mood Controller allows you to set and recall your own favourite lighting scenes at the touch of a button.
- Page 24 Creative ideas 3. (Advanced): Simulated occupancy Required: Dimmer(s), Power Sockets or Plugins, Link This setup gives you control over your devices from anywhere in the world. Here we have ceiling lights controlled by dimmers and lamps plugged into Lightwave Power Sockets or Plug-in Sockets. Via the Lightwave Link, every light can be controlled using a smartphone wherever you are.
-
Page 25: Troubleshooting
Problem: The switch is powered (amber or blue LEDs on), but it will not link to a LightwaveRF handset or controller. Solution: Check the controller battery strength: if the battery strength is low, it will not produce enough power to drive the RF radio signal. Tap any ‘on’... - Page 26 The dimmer is locked. This may have been done using a Socket Locker or from the LightwaveRF App. If it is locked on, then the dimmer will not turn o manually. If it is locked o , it will be possible to turn the dimmer on, but it will automatically turn o again after five minutes.
- Page 27 (standard lightswitch housing) over 35mm deep. Is it legal for me to to install the dimmer? Yes, it is fully legal to install LightwaveRF in your own home. Is there a maximum number of bulbs I can control with the dimmer? You can control any number of bulbs as long as they do not exceed the maximum loading in total.
- Page 28 What if I need a switch to operate on/o only? A LightwaveRF Relay in conjunction with a Wire-free Switch can be used for on/o switching in place of the dimmer (see www.lightwaverf.house). Can I separate and change individual switches in multigang dimmers? Multigang dimmers are not designed to have their switch modules separated and interchanged;...
-
Page 29: Specification
Technical Specification Specification RF frequency: 433.92 MHz Input rating: 220-240V~ 50Hz. Output rating: 3W~210W max (per gang) Incandescent Load: 20W min 210W max (per gang) Back Box Depth: 35mm min. Earthing Requirement: Not essential (double insulated) Standby Energy Use: Less than 1W (per gang) Wiring: Neutral wire NOT required Warranty: 2 year standard warranty... - Page 30 Version 2.1 2 Quadrant Park Mundells Welwyn Garden City Herts AL7 1FS 01707 386035 www.lightwaverf.house...
Need help?
Do you have a question about the LW440 and is the answer not in the manual?
Questions and answers