Table of Contents

Advertisement

Paper type: OK Prince Eco G100(55kg), Paper Thickness=0.08 mm // Pages in book=212 // Print scale=81%
Gap (when printed at 81% scale) = Pages in book × Paper thickness / 2 = 8.48 mm
Type for C9130/LD630C/Aficio MP C3001
Type for C9135/LD635C/Aficio MP C3501
Type for C9145/LD645C/Aficio MP C4501
Type for C9155/LD655C/Aficio MP C5501
Type for C9130G/LD630CG/Aficio MP C3001G
Type for C9135G/LD635CG/Aficio MP C3501G
Type for C9145G/LD645CG/Aficio MP C4501G
Type for C9155G/LD655CG/Aficio MP C5501G
Printed in China
EN
US
D088-7603
Read this manual carefully before you use this machine and keep it handy for future reference. For safe and correct use, be sure to read the Safety
Information in this manual before using the machine.
D0887603
Operating Instructions
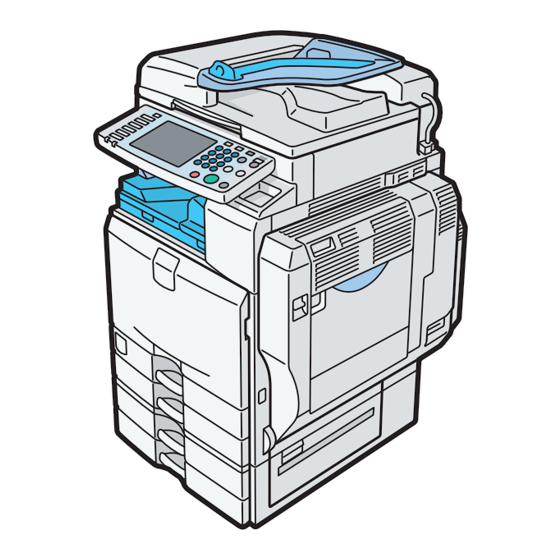
About This Machine
1
Simple Search
2
Getting Started
3
Adding Paper
4
Adding Toner and Staples
5
Entering Text
6
On-screen Operating Instructions
7
Remarks
8
Appendix

Advertisement

Table of Contents
loading

Summary of Contents for Ricoh Aficio MP C3501G

  • Page 1 Type for C9145/LD645C/Aficio MP C4501 Type for C9155/LD655C/Aficio MP C5501 Type for C9130G/LD630CG/Aficio MP C3001G Type for C9135G/LD635CG/Aficio MP C3501G Type for C9145G/LD645CG/Aficio MP C4501G Type for C9155G/LD655CG/Aficio MP C5501G Read this manual carefully before you use this machine and keep it handy for future reference. For safe and correct use, be sure to read the Safety Information in this manual before using the machine.
  • Page 2: Documentation For This Machine

    Documentation for This Machine About This Machine (This manual) ......................Troubleshooting ............................Copy and Document Server Reference ......................Using the various copier functions ......................Using the Document Server functions ......................Changing the default settings of the copier and Document Server functions, and related information ..
  • Page 3: Table Of Contents

    TABLE OF CONTENTS Documentation for This Machine........................1 Manuals for This Machine..........................8 Manuals List..............................10 What You Can Do with This Machine......................11 Using This Machine as a Copier........................11 Using This Machine as a Printer........................12 Utilizing Stored Documents.........................12 Paperless Fax Transmission and Reception....................13 Fax Transmission and Reception Over the Internet...................15 Using the Facsimile and the Scanner in a Network Environment.............16 Administrating the Machine/Protecting Documents (Security Functions)..........16...
  • Page 4 Important Safety Instructions........................44 1. Simple Search Searching by What You Want to Do......................47 I Want to Save my Paper Document!......................47 I Want to Convert Documents to Electronic Formats Easily!..............48 I Want to Register Destinations!........................49 I Want to Operate the Machine More Effectively!...................49 Searching by Keyword............................51 Paper................................51 Register/Change/Delete..........................51...
  • Page 5 Logout (Using Web Image Monitor)......................77 Changing Modes.............................78 System Reset..............................79 Turning On/Off the Power..........................80 Turning On the Main Power........................80 Turning On the Power..........................81 Turning Off the Power..........................81 Turning Off the Main Power........................82 Saving Energy..............................83 Downloading Utility Software.........................85 SmartDeviceMonitor for Admin........................85 DeskTopBinder.............................85 SmartDeviceMonitor for Client........................86 Installing the Small Size Paper Tray........................87 3.
  • Page 6 Replacing Toner............................124 Sending Faxes or Scanned Documents When Toner Has Run Out............125 Used Toner..............................125 Adding Staples...............................127 Adding Staples to Finisher SR3050......................127 Adding Staples to Finisher SR790......................128 Adding Staples to Booklet Finisher SR3000...................129 Adding Staples to Booklet Finisher SR3020...................130 Adding Staples to Booklet Finisher SR3020 (Saddle Stitch)..............131 Adding Staples to Finisher SR3030......................132 Replacing the Stamp Cartridge........................134 Replacing the Stamp Cartridge of Type 1 and 2...................134...
  • Page 7 Cleaning the Dustproof Glass........................157 Cleaning the Power Cord Plug.........................158 Backing Up Hard Disk Data.........................159 Counter................................160 Inquiry................................161 8. Appendix Software and Utilities Included on the CD-ROM..................163 Viewing the Contents of the CD-ROM.....................163 Printer Drivers for This Machine........................163 TWAIN Driver............................164 LAN-Fax Driver............................165 Specifications for the Main Unit........................167 For Users of Type 1 and 2........................167 For Users of Type 3 and 4........................171...
  • Page 8 Specifications for Punch Unit (Booklet Finisher SR3000) (Optional)............190 Specifications for Lower Paper Tray (Optional)..................191 Specifications for Lower Paper Trays (Optional)..................192 Specifications for the Small Size Paper Tray (Optional)................193 Specifications for Tray 3 (LCT) (Optional)....................194 Specifications for Large Capacity Tray (LCT) (Optional)................195 Specifications for Bridge Unit (Optional).....................196 Specifications for Internal Tray 2 (Optional)....................197 Specifications for Internal Shift Tray (Optional)..................198...
  • Page 9: Manuals For This Machine

    Manuals for This Machine Read this manual carefully before you use this machine. Refer to the manuals that are relevant to what you want to do with the machine. • Media differ according to manual. • The printed and electronic versions of a manual have the same contents. •...
  • Page 10 • Change the user name and password of the administrator using Web Image Monitor. For details, see “Setting up the Machine”, Security Reference. Be sure to read this manual when setting the enhanced security functions, or user and administrator authentication. PostScript 3 Supplement Explains how to set up and use PostScript 3.
  • Page 11: Manuals List

    Manuals List Printed Manuals HTML Manuals PDF Manuals Manual Name Provided Provided Provided About This Machine Troubleshooting Copy and Document Server Reference Facsimile Reference Printer Reference Scanner Reference Network and System Settings Reference Security Reference PostScript 3 Supplement VM Card Extended Feature Settings Device Reference VM Card Extended Feature Settings Web Reference...
  • Page 12: What You Can Do With This Machine

    What You Can Do with This Machine This section introduces the features of this machine. • For details about options, see “Options”. • p.63 "Options" Using This Machine as a Copier You can make copies of originals. CAS004 • You can make copies in full color. You can switch the color copy mode depending on the type of originals used and the desired finish.
  • Page 13: Using This Machine As A Printer

    Using This Machine as a Printer You can print documents created in applications. CAS005 • This machine supports network and local connections. • If the optional media slot or the optional PostScript 3 unit is installed, you can send PDF files directly to the machine for printing, without having to open a PDF application.
  • Page 14: Paperless Fax Transmission And Reception

    CAS006 • You can retrieve stored documents scanned in scanner mode. • Using the file format converter (optional), you can download documents stored in copier, Document Server, or printer mode to your computer. • For details about machine's settings, see “Network Settings Required to Use Document Server”, Network and System Settings Reference •...
  • Page 15 CAS007 You can use Web Image Monitor to check, print, delete, retrieve, or download documents using your computer (Storing received documents). • See “Confirming/Printing/Deleting Received and Stored Documents”, Facsimile Reference Transmission You can send a fax from your computer over the network (Ethernet or wireless LAN) to this machine, which then forwards the fax via its telephone connection (LAN-Fax).
  • Page 16: Fax Transmission And Reception Over The Internet

    Fax Transmission and Reception Over the Internet You can send and receive faxes over your LAN and the Internet. CAS009 E-mail Transmission This machine converts scanned document images to e-mail format, and transmits and receives this data over the Internet. •...
  • Page 17: Using The Facsimile And The Scanner In A Network Environment

    Using the Facsimile and the Scanner in a Network Environment You can use a facsimile and a scanner over the network. CAS010 • You can send scan files to a specified destination using e-mail (Sending scan files by e-mail). • You can send scan files directly to folders (Sending scan files by Scan to Folder). •...
  • Page 18: Monitoring And Setting The Machine Via Computer

    CAS011 • You can protect documents from unauthorized access and stop them from being copied without permission. • You can control the use of the machine, as well as prevent machine settings from being changed without authorization. • By setting passwords, you can prevent unauthorized access via the network. •...
  • Page 19 • Using Web Image Monitor, you can check and specify the initial settings (System Settings, Printer Features, network settings, security settings/certificate management, and e-mail notification), control print jobs, display the print job journal, and protect the data in the machine using authentication.
  • Page 20: Notice

    Notice Important In no event will the company be liable for direct, indirect, special, incidental, or consequential damages as a result of handling or operating the machine. For good copy quality, the manufacturer recommends that you use genuine toner from the manufacturer. The manufacturer shall not be responsible for any damage or expense that might result from the use of parts other than genuine parts from the manufacturer with your office products.
  • Page 21: How To Read This Manual

    The model names of the machines do not appear in the following pages. Check the type of your machine before reading this manual. • Type 1: C9130/LD630C/Aficio MP C3001/C9130G/LD630CG/Aficio MP C3001G • Type 2: C9135/LD635C/Aficio MP C3501/C9135G/LD635CG/Aficio MP C3501G • Type 3: C9145/LD645C/Aficio MP C4501/C9145G/LD645CG/Aficio MP C4501G • Type 4: C9155/LD655C/Aficio MP C5501/C9155G/LD655CG/Aficio MP C5501G...
  • Page 22: Names Of Major Items

    Names of Major Items Major items of this machine are referred to as follows in this manual: • Auto document feeder • Large capacity tray (optional) • Envelope Feeder EF3000 Small size paper tray Notes Contents of this manual are subject to change without prior notice. Colors on color keys or the color circle may differ slightly from the colors of actual copies.
  • Page 23: Safety Information

    Safety Information When using this machine, the following safety precautions should always be followed. Safety During Operation In this manual, the following important symbols are used: Indicates a potentially hazardous situation which, if instructions are not followed, could result in death or serious injury.
  • Page 24 • Do not place heavy objects on the machine. Doing so can cause the machine to topple over, possibly resulting in injury. • Make sure the room where you are using the machine is well ventilated and spacious. Good ventilation is especially important when the machine is used heavily. •...
  • Page 25 • Do not use power cords that are damaged, broken, or modified. Also, do not use power cords that have been trapped under heavy objects, pulled hard, or bent severely. Doing so could result in fire or electric shock. • Touching the prongs of the power cable's plug with anything metallic constitutes a fire and electric shock hazard.
  • Page 26 • When disconnecting the power cord from the wall outlet, always pull the plug, not the cord. Pulling the cord can damage the power cord. Use of damaged power cords could result in fire or electric shock. • Be sure to disconnect the plug from the wall outlet and clean the prongs and the area around the prongs at least once a year.
  • Page 27 • Keep the polythene materials (bags, etc.) supplied with this machine away from babies and small children at all times. Suffocation can result if polythene materials are brought into contact with the mouth or nose. • Unplug the power cord from the wall outlet before you move the machine. While moving the machine, take care that the power cord is not damaged under the machine.
  • Page 28 • Do not remove any covers or screws other than those explicitly mentioned in this manual. Inside this machine are high voltage components that are an electric shock hazard and laser components that could cause blindness. Contact your sales or service representative if any of the machine's internal components require maintenance, adjustment, or repair.
  • Page 29 • Do not incinerate toner (new or used) or toner containers. Doing so risks burns. Toner will ignite on contact with naked flame. • Do not store toner (new or used) or toner containers anywhere near naked flames. Doing so risks fire and burns.
  • Page 30 • When removing jammed paper or replacing toner, avoid getting toner (new or used) on your clothing. If toner comes into contact with your clothing, wash the stained area with cold water. Hot water will set the toner into the fabric and make removing the stain impossible. •...
  • Page 31: Safety Labels Of This Machine

    Safety Labels of This Machine This section explains the machine's safety information labels. Positions of WARNING and CAUTION labels for Users of Type 1 and 2 This machine has labels for WARNING and CAUTION at the positions shown below. For safety, please follow the instructions and handle the machine as indicated.
  • Page 32 CAS017 Do not touch the parts a label indicates. The inside of the machine could be very hot. Caution should be taken when removing misfed paper. Paper tray CAS019 CAS020 The inside of the machine could be very hot. Do not touch the parts which a label is put on. Otherwise, an injury might occur.
  • Page 33 Booklet Finisher SR3000 CAS021 CAS022 Keep your hands clear of the booklet finisher tray when pulling out or pushing in the finisher's staple unit, or removing paper jam. You might trap your fingers if you do not. Take care not to touch the booklet finisher tray during operation.
  • Page 34: Positions Of Warning And Caution Labels For Users Of Type 3 And 4

    Finisher SR790 CAS127 CAS128 During operation, rollers for transporting the paper revolve. Take care not to touch rollers during operation. Otherwise, an injury might occur. Positions of WARNING and CAUTION labels for Users of Type 3 and 4 This machine has labels for WARNING and CAUTION at the positions shown below.
  • Page 35 Main unit CAS024 CAS015 Do not touch! Surface may be very hot. CAS025 Do not touch the parts a label indicates. The inside of the machine could be very hot. Caution should be taken when removing misfed paper. CAS016 High temperature parts. Wait a while to allow the Fusing Unit to cool down before removing misfed paper.
  • Page 36 CAS017 Do not touch the parts a label indicates. The inside of the machine could be very hot. Caution should be taken when removing misfed paper. Paper tray CAS026 CAS020 The inside of the machine could be very hot. Do not touch the parts which a label is put on. Otherwise, an injury might occur.
  • Page 37 Finisher SR3030 or Booklet Finisher SR3020 CAS027 CAS128 During operation, rollers for transporting the paper revolve. Take care not to touch rollers during operation. Otherwise, an injury might occur. CAS022 Keep your hands clear of the booklet finisher tray when pulling out or pushing in the finisher's staple unit, or removing paper jam.
  • Page 38 CAS023 Keep your hands clear of the booklet finisher tray when pulling out or pushing in the finisher's staple unit, or removing paper jam. You might trap your fingers if you do not. Finisher SR790 CAS126 CAS128 During operation, rollers for transporting the paper revolve. Take care not to touch rollers during operation. Otherwise, an injury might occur.
  • Page 39: Power Switch Symbols

    Power Switch Symbols The meanings of the symbols for the switches on this machine are as follows: • : POWER ON • : STANDBY...
  • Page 40: Energy Star Program

    ENERGY STAR Program ® ENERGY STAR Program Requirements for Imaging Equipment ® This company is a participant in the ENERGY STAR Program. This machine is compliant with the regulations specified by the ® ENERGY STAR Program. ® The ENERGY STAR Program Requirements for Imaging Equipment encourage energy conservation by promoting energy efficient computers and other office equipment.
  • Page 41: Energy Saving Functions

    Energy Saving Functions To reduce its power consumption, this machine has the following functions: Low Power Mode • If this machine remains idle for a specified period, it automatically reduces its electrical consumption. • The default period the machine waits before entering Low Power Mode is “Off”. This default time can be changed.
  • Page 42 Type 3 Type 4 Reduced Electrical Consumption by 1.2 W 1.2 W Sleep Mode Time of Switch into Sleep Mode 1 minute 1 minute Time of Switch out from Sleep Mode 19 seconds 32 seconds • Specifications can vary depending on which options are installed on the machine. •...
  • Page 43: Laws And Regulations

    Laws and Regulations Legal Prohibition Do not copy or print any item for which reproduction is prohibited by law. Copying or printing the following items is generally prohibited by local law: bank notes, revenue stamps, bonds, stock certificates, bank drafts, checks, passports, driver's licenses. The preceding list is meant as a guide only and is not inclusive.
  • Page 44: Notes To Users In The United States Of America

    (1) This device may not cause harmful interference, and (2) this device must accept any interference received, including interference that may cause undesired operation. Responsible party: Ricoh Americas Corporation Address: 5 Dedrick Place, West Caldwell, NJ 07006 Telephone number: 973-882-2000...
  • Page 45: Important Safety Instructions

    • Consult the dealer or an experienced radio /TV technician for help. Caution: Changes or modifications not expressly approved by the party responsible for compliance could void the user's authority to operate the equipment. Warning: This device complies with part 15 and 18 of the FCC Rules and RSS-Gen of IC Rules. Operation is subject to the following two conditions: (1) This device may not cause harmful interference, and (2) This device must accept any interference received, including interference that may cause undesired...
  • Page 46 Save these instructions. IMPORTANTES MESURES DE SÉCURITÉ Certaines mesures de sécurité doivent être prises pendant l'utilisation de material téléphonique afin de réduire les risques d'incendie, de choc électrique et de blessures. En voici quelques-unes: • Ne pas utiliser l'appareil près de l'eau, p.ex., près d'une baignoire, d'un lavabo, d'un évier de cuisine, d'un bac à...
  • Page 48: Simple Search

    1. Simple Search You can search for a procedure either by keyword or by what you want to do. Searching by What You Want to Do You can search for a procedure by what you want to do. I Want to Save my Paper Document! This section explains the functions and procedures that you can use to reduce your printing and running costs easily.
  • Page 49: I Want To Convert Documents To Electronic Formats Easily

    1. Simple Search Sending files from the computer without printing them (LAN-Fax) See “Sending Fax Documents from Computers”, Facsimile Reference I Want to Convert Documents to Electronic Formats Easily! This section explains the functions and procedures you can use to convert documents to electronic formats easily.
  • Page 50: I Want To Register Destinations

    Searching by What You Want to Do I Want to Register Destinations! You can find explanations of the functions and procedures that you can use to register destinations easily. BRL060S Using the control panel to register destinations in the Address Book See “Registering Entered Destinations to the Address Book”, Facsimile Reference See “Entering an E-mail Address Manually”, Scanner Reference Using Web Image Monitor to register destinations from a computer...
  • Page 51 1. Simple Search BQX139S Registering and using frequently-used settings (Program) See “Registering Frequently Used Functions”, Copy and Document Server Reference See “Registering Frequently Used Settings”, Facsimile Reference See “Registering Frequently Used Settings”, Scanner Reference Registering frequently-used settings as initial settings (Program as Defaults (Copier/Fax/ Scanner)) See “Changing the Default Functions of the Copy's Initial Display”, Copy and Document Server Reference...
  • Page 52: Searching By Keyword

    Searching by Keyword Searching by Keyword You can search for a procedure by keyword. Paper I want to load paper. p.91 "Loading Paper" I want to change the paper size. p.99 "Changing the Paper Size" I want to know what the paper specifications are. p.111 "Recommended Paper Sizes and Types"...
  • Page 53: Color

    1. Simple Search I want to copy the contents of the machine's Address Book to the LAN-Fax address book. See “Using the Machine's Address Book as the LAN-Fax Destination List”, Facsimile Reference Color I want to scan a color original (Normal Color Scan) See “Scan Settings”, Scanner Reference I want to minimize the amount of storage required when scanning color originals (High Compression PDF)
  • Page 54: Install

    Searching by Keyword I want to view the transmission result. See “Scanned Files Status”, Scanner Reference Install I want to install the printer driver so I can use the SmartDeviceMonitor for Client port. See “Using the Smart Device Monitor for Client Port”, Printer Reference I want to install the printer driver so I can use the Standard TCP/IP port.
  • Page 55 1. Simple Search...
  • Page 56: Getting Started

    2. Getting Started This chapter describes how to start using this machine. Guide to Components This section introduces the names and functions of the components. Guide to Components of Type 1 and 2 This section introduces the names and functions of the components of type 1 and 2. •...
  • Page 57 2. Getting Started 1. ADF Lower the ADF over originals placed on the exposure glass. If you load a stack of originals in the ADF, the ADF will automatically feed the originals one by one. This ADF can be used for two-sided originals. 2.
  • Page 58 Guide to Components Front and right view CAS029 1. Ventilation holes Prevent overheating. 2. Bypass tray Use to copy or print on OHP transparencies, label paper (adhesive labels), envelopes and custom size paper. 3. Extender Pull this extender out when loading sheets larger than A4 in the bypass tray.
  • Page 59: Guide To Components Of Type 3 And 4

    2. Getting Started Rear and right view CAS030 1. Ventilation holes Prevent overheating. • p.68 "Control Panel" • p.80 "Turning On/Off the Power" Guide to Components of Type 3 and 4 This section introduces the names and functions of the components of type 3 and 4. •...
  • Page 60 Guide to Components Front and left view CAS093 1. ADF Lower the ADF over originals placed on the exposure glass. If you load a stack of originals in the ADF, the ADF will automatically feed the originals one by one. This ADF can be used for two-sided originals.
  • Page 61 2. Getting Started 7. Front cover Open to access the inside of the machine. 8. Paper trays (trays 1 2) Load paper here. 9. Lower paper trays (optional) Load paper here. 10. Operation switch Press to turn the power on (the operation switch indicator lights up). To turn the power off, press again (the operation switch indicator goes off).
  • Page 62: About The Guide On The Internal Tray 2 (Optional)

    Guide to Components Rear and left view CAS033 1. Ventilation holes Prevent overheating. • To cool the machine's interior, the fan may continue running after the machine finishes a large print job. For details, see “When You Have Problems Operating the Machine”, Troubleshooting •...
  • Page 63 2. Getting Started CAS034 To lower the guide on internal tray 2 Push down on the top surface of the guide. CAS035...
  • Page 64: Options

    Options Options This section introduces the names and functions of main optional parts. External Options This section provides explanations about external options. External options for type 1 and 2 This section provides explanations about external options for type 1 and 2. CAS094 1.
  • Page 65 2. Getting Started 2. Handset Used as a receiver when a fax unit is installed. 3. Small size paper tray Holds small size sheets of paper or envelopes. To use the small size paper tray, install it in tray 2 or the lower paper trays. The small size paper tray cannot be installed in the lower paper tray.
  • Page 66 Options • p.87 "Installing the Small Size Paper Tray" External options for type 3 and 4 This section provides explanations about external options for type 3 and 4. CAS095 1. Media slot With this media slot, you can save scan files on a removable memory device. You can also print files stored on a removable memory device.
  • Page 67 2. Getting Started 4. Small size paper tray Holds small size sheets of paper or envelopes. To use the small size paper tray, install it in trays 2 4. For details, see “Installing the Small Size Paper Tray”. 5. Tray 3 (LCT) Holds up to 2,000 sheets of paper.
  • Page 68: Internal Options

    Options Internal Options This section describes the options that can be installed in the machine. • Fax unit Allows you to use the facsimile function. • Extra G3 interface unit This lets you add a G3 fax line. • PictBridge card Allows you to directly print images taken with a PictBridge-compatible digital camera.
  • Page 69: Control Panel

    2. Getting Started Control Panel This section introduces the names and functions of the components on the control panel. • Do not turn off the main power switch while the operation switch indicator is lit or blinking. Doing so may damage the hard disk. This illustration shows the control panel of the machine with options fully installed.
  • Page 70 Control Panel 5. [Program] key (copier, Document Server, facsimile, and scanner mode) • Press to register frequently used settings, or to recall registered settings. See “Registering Frequently Used Functions” and “Registering Frequently Used Functions for Printing Stored Documents from the Document Server”, Copy and Document Server Reference See “Registering Frequently Used Settings”, Facsimile Reference See “Registering Frequently Used Settings”, Scanner Reference •...
  • Page 71 2. Getting Started 13. Number keys Use to enter the numbers for copies, fax numbers and data for the selected function. 14. [Clear/Stop] key • Clear Press to delete a number entered. • Stop Press to stop a job in progress, such as copying, scanning, faxing, or printing. 15.
  • Page 72: Display Panel

    Display Panel Display Panel The display panel shows machine status, error messages, and function menus. • Don't apply strong impact or force to the screen. Or it may be damaged. Maximum force allowable is approx. 30N (approx. 3 kgf). (N = Newton, kgf = Kilogram force. 1 kgf = 9.8N.) The function items displayed serve as selector keys.
  • Page 73: Changing The Display Language

    2. Getting Started Press the [Simplified Display] key. CAS097 This illustration shows the copier function's simplified display. CAS100 1. [Key Color] Press to increase screen contrast by changing the color of the keys. This is available only for the simplified display. •...
  • Page 74 Display Panel Press the [User Tools/Counter] key. CAS098 Press [Español]. The language is changed to Spanish. Press [Salir.] The menu appears in Spanish. • If you want to return the display language to “English”, repeat the step above.
  • Page 75: When The Authentication Screen Is Displayed

    2. Getting Started When the Authentication Screen is Displayed This section explains the authentication screen. • Ask the user administrator for the Login User Name, Login Password, and User Code. For details about user authentication, contact your administrator. • User Code to enter on User Code Authentication is the numerical value registered in the Address Book as “User Code”.
  • Page 76: User Code Authentication (Using A Printer Driver)

    When the Authentication Screen is Displayed • Press the [Energy Saver] key after jobs are completed. User Code Authentication (Using a Printer Driver) This section explains the procedure for logging in to the machine using a printer driver while User Code Authentication is active.
  • Page 77: Logout (Using The Control Panel)

    2. Getting Started Enter a Login Password, and then press [OK]. When the user is authenticated, the screen for the function you are using appears. • If authentication fails, the "Authentication has failed." message appears. Check that the Login User Name and Login Password are correct.
  • Page 78: Login (Using A Printer Driver)

    When the Authentication Screen is Displayed Press [Yes]. Login (Using a Printer Driver) This section explains the procedure for logging in to the machine using a printer driver. If Basic Authentication, Windows Authentication, LDAP Authentication, or Integration Server Authentication is active, make encryption settings in the printer properties of the printer driver, and then specify a Login User Name and Login Password.
  • Page 79: Changing Modes

    2. Getting Started Changing Modes This section explains how to change modes. CAS101 • You cannot switch modes in any of the following situations: • When scanning a fax message for transmission • During immediate transmission • When accessing User Tools / Counter / Inquiry •...
  • Page 80: System Reset

    Changing Modes • While scanning an original • The copy display is set as the default screen when the machine is turned on. You can change this default setting under Function Priority. See “System Settings”, Network and System Settings Reference System Reset This section explains System Reset.
  • Page 81: Turning On/Off The Power

    2. Getting Started Turning On/Off the Power This section discusses how to turn on/off the power. Power supply This machine has two power switches: operation switch and main power switch. • Operation switch (right side of the control panel) Press to activate the machine. When the machine has finished warming up, you can make use of each function.
  • Page 82: Turning On The Power

    Turning On/Off the Power • After you switch the main power on, a screen may appear to indicate that the machine is initializing. Do not switch the power off during this process. Initialization takes about three minutes. Turning On the Power This section explains how to turn on the power.
  • Page 83: Turning Off The Main Power

    2. Getting Started CAS096 • Even if you press the operation switch, the operation switch indicator does not go out, but blinks in the following cases: • During communication with external equipment. • When the hard disk is active. • When the internal cooling fan is active. Turning Off the Main Power This section explains how to turn off the main power.
  • Page 84: Saving Energy

    Turning On/Off the Power • For details, see “Turning Off the Main Power / In the Event of Power Failure”, Troubleshooting Saving Energy This section explains the machine's energy saving functions. This machine has the following energy saving functions. Energy Saver If you do not use the machine for a certain period after an operation, or when you press the [Energy Saver] key, the display disappears and the machine goes into Energy Saver mode.
  • Page 85 2. Getting Started • When data is being processed • When operations are suspended during printing • When the On-hook dialing function is in use • When the handset is in use • When a recipient is being registered in the address list or group dial list •...
  • Page 86: Downloading Utility Software

    Downloading Utility Software Downloading Utility Software This section explains the utility software for this machine. SmartDeviceMonitor for Admin This section describes the functions available with SmartDeviceMonitor for Admin. SmartDeviceMonitor for Admin is an application that monitors network printers. It can monitor multiple network printers using IP address.
  • Page 87: Smartdevicemonitor For Client

    2. Getting Started • For details about the functionality, see Help of DeskTopBinder. SmartDeviceMonitor for Client This section describes the functions available with SmartDeviceMonitor for Client. SmartDeviceMonitor for Client allows you to manage and print various data such as files created with an application, images scanned with a scanner, and existing images as one document.
  • Page 88: Installing The Small Size Paper Tray

    Installing the Small Size Paper Tray Installing the Small Size Paper Tray This section describes how to install the small size paper tray. To use the small size paper tray, install it in tray 2 or the lower paper trays. In the following example procedure, the small size paper tray is installed in tray 2.
  • Page 89 2. Getting Started Lift the front of the small size paper tray, and then carefully push it fully in. CAS048 Press the [User Tools/Counter] key. CAS098 Press [System Settings]. Check that [General Features] is selected.
  • Page 90 Installing the Small Size Paper Tray Press [Small Size Paper Tray]. If the setting to be specified does not appear, press [ Next] to scroll down to other settings. Press [On] for Tray 2. Press [OK]. Turn off the machine, and then turn it back on. •...
  • Page 91 2. Getting Started...
  • Page 92: Adding Paper

    3. Adding Paper This chapter describes recommended paper sizes and types, and how to load paper into the paper tray. Loading Paper This section describes how to load paper into the paper tray. • When loading paper, take care not to trap or injure your fingers. •...
  • Page 93: Changing The Paper Size In Trays 2 - 4

    3. Adding Paper Carefully pull out the paper tray until it stops. CAS041 Square the paper and load it print side up. Do not stack paper over the limit mark. CAS042 Carefully push the paper tray fully in. • When loading a low number of sheets, be sure not to squeeze the side fences in too tightly. If the paper bows, it might not feed in properly.

Table of Contents