Table of Contents
Advertisement
Quick Links
Advertisement
Table of Contents

Related Manuals for Blue Wave SAVANNAH


Summary of Contents for Blue Wave SAVANNAH
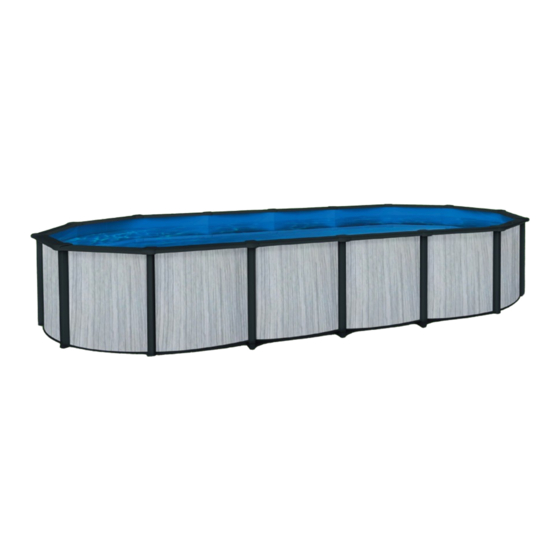
- Page 1 SKU# NB19824 SAVANNAH OVAL 52-IN DEEP RESIN POOL WITH 8-IN TOP RAIL INSTRUCTION MANUAL Questions, problems, missing parts? Before returning to your retailer, call our Consumer Hotline at 1-800-759-0977, Monday – Friday. 8am – 5pm (CST) V1: 02.2021...
-
Page 2: Table Of Contents
IMPORTANT SAFETY INSTRUCTIONS ....................4 GENERAL WATER SAFETY ........................5 ADDITIONAL POOL AND WATER SAFETY GUIDELINES ..............6 SAVANNAH OVAL STYLE POOL - PARTS LIST ..................7 SELECTING A SUITABLE SITE ........................8 POOL SETUP .............................. 9 LEVELING THE AREA ..........................10 POOL FRAME ASSEMBLY ......................... -
Page 3: Thank You
THANK YOU! Thank you for purchasing this product. We work around the clock and around the globe to ensure that our products maintain the highest possible quality. However, in the rare case of issues during assembly or use of this product, please contact our Consumer Hotline at 800-759-0977 for immediate assistance before contacting your retailer. -
Page 4: Important Safety Instructions
IMPORTANT SAFETY INSTRUCTIONS Please examine equipment before use. If there are any damaged or missing parts at the time of purchase, do not assemble or operate until parts are replaced. To lessen the risk of serious injury or death, follow these rules. The following instructions contain important safety information, please read these important safety instructions and abide by them when installing and using this pool. -
Page 5: General Water Safety
GENERAL WATER SAFETY • Always supervise children around water. • Ensure a pool fence is correctly installed and functioning if it is required by your local municipality or state code. • Follow all local and National Pool Safety Codes. • Learn CPR and keep in practice. •... -
Page 6: Additional Pool And Water Safety Guidelines
ADDITIONAL POOL AND WATER SAFETY GUIDELINES • Name only one safety supervisor when people are in the pool. • Reinforce supervision when there are several users in the swimming pool. Have personal flotation aids available (for people who cannot swim). •... -
Page 7: Savannah Oval Style Pool - Parts List
SAVANNAH OVAL STYLE POOL - PARTS LIST (Not to scale) Check all parts and ensure they are present and undamaged before assembly. Images and objects may differ. Report missing or damaged parts immediately to have them replaced. For damaged or replacement parts, contact Blue Wave Customer Service at (800)759-0977. -
Page 8: Selecting A Suitable Site
SELECTING A SUITABLE SITE Carefully select the site for your new pool. This is the most important decision to ensure the safety and success of your pool’s construction. An incorrect site could cause problems in the future that may result in injury, death, or financial loss. Carefully read the check list below when selecting your site. Acceptable: Tools and Materials Required: •... -
Page 9: Pool Setup
POOL SETUP POOL SITE PREPARATION Remember ground preparation is the most important step in the installation of the pool. Do not install the pool over underground power lines, sewer lines, or other structures. Do not install on cement, asphalt, or other hard surfaces. 1. -
Page 10: Leveling The Area
LEVELING THE AREA WARNING! Leveling is extremely important: take as much time as necessary to ensure the pool site is completely firm and leveled. • WARNING: The pool contains thousands of gallons of water. Should the pool collapse due to unleveled ground, it could cause significant property damage and even result in injury or death. -
Page 11: Pool Frame Assembly
POOL FRAME ASSEMBLY • Follow the parts list and match against diagram 4. • Work off to the side of the pool site to connect the L support, fixing plate, and connection plate as shown in diagram, using the nut, washer, and bolt provided. This will prevent you from disturbing the pool site ground preparation. - Page 12 POOL FRAME ASSEMBLY continued • To check the alignment of the assembled frames, hold a string along the back of the assembled frames (the back of the L support) about 7-in - 8-in (200-mm) above the ground between two steel pegs, position A and B (see diagram 6).
-
Page 13: Concrete Pads And Assembled Frame
CONCRETE PADS AND ASSEMBLED FRAME • IMPORTANT: The use of pre-cast concrete blocks or mixed cement at each end of the assembled frame is critical as it distributes the load carried by the frames evenly into the soil. Not creating concrete pads will result in the frame sinking into the ground or sliding out of alignment and disturbing the level of your pool. - Page 14 CONCRETE PADS AND ASSEMBLED FRAME (Diagram 10B) (Diagram 10C)
-
Page 15: Assembling The Pool Rail
ASSEMBLING THE POOL RAIL • IMPORTANT: Leave about 0.4-inch (1 cm) gap between the 2 ends of the Bottom Rail. • Place the metal foot plates equally around the curved ends of the pool (see diagram 11). • Slide the resin bottom rail into the metal foot plate (see diagram 12). Repeat this process for all bottom rails. -
Page 16: Installing The Pool Wall
INSTALLING THE POOL WALL • DO NOT ATTEMPT WALL INSTALLATION ON A WINDY DAY! • CAUTION: It is advisable to wear protective gloves when handling the metal wall. • CAUTION: Have 2 or 3 additional people for the installation of the pool wall into the bottom rail. This is necessary to hold the pool wall upright until the wall ends are connected and the bolts have been inserted in the bolt holes. -
Page 17: Measuring The Level And Shape Of The Pool Wall
MEASURING THE LEVEL AND SHAPE OF THE POOL WALL • WARNING: A pool that is not level is very dangerous and may collapse at any time. • Check the pool wall level by placing a 2-in x 4-in board or similar across the diameter of the pool wall and placing a level on the top of the board. -
Page 18: Protective Sand Cushion
PROTECTIVE SAND CUSHION Making a Protective Sand Cushion at the Foot of the Inner Pool Wall (Diagram 21) (Diagram 22) ATTENTION: THIS IS A CRITICAL STEP THAT WILL PREVENT THE LINER FROM BEING FORCED OUT UNDER THE WALL, TEARING, AND RELEASING THOUSANDS OF GALLONS OF WATER INTO THE YARD. -
Page 19: Installing The Pool Liner
INSTALLING THE POOL LINER These instructions only apply to overlap liner installation. Follow the liner manufacturer’s instructions for other style liners. IMPORTANT: Only attempt to install the liner on a warm and sunny day, preferably above 72 °F (22° C). Unfold the liner and put it in the sun for 2 hours. This helps to soften the liner. If the temperature is below 60°... - Page 20 INSTALLING THE POOL LINER continued • Remove the clothes pins one at a time while applying the fix rail coping and the round top rails (see diagram 27). Slide the rail connectors into one end of the top rail, then connect another top rail and continue around the circle until all top rails are joined together.
-
Page 21: Assembly Of The Resin Vertical Supports
ASSEMBLY OF THE RESIN VERTICAL SUPPORTS • Line up all the screw holes for the resin vertical supports. The first resin vertical support should be placed over the joint in the pool wall. Fix resin vertical supports onto the metal plates. Line up the screw holes and check if the vertical sections are in line. -
Page 22: Assembly Of The Resin Top Platforms
ASSEMBLY OF THE RESIN TOP PLATFORMS • Place a resin top platform over a metal plate and attach using four bolts, continue this process until all the resin top platforms are attached to all the metal plates at the top (see diagram 31) •... -
Page 23: Checking All Connections And Joints
CHECKING ALL CONNECTIONS AND JOINTS • Once completed, check all connections and tighten loose screws and bolts, but do not over tighten. • See diagram 35 for identification of pool components. (Diagram 35) INSTALLING THE SKIMMER • For protection and safety, all edges of the skimmer and return fitting windows must be covered by vinyl tape or rust proofing paint. -
Page 24: Filling The Pool With Water
FILLING THE POOL WITH WATER • Before filling the pool with water, thoroughly check to see if there are any loose screws not tightened during the pool frame installation process. Also, check for holes or tears in the liner. • Fill the pool until the water is halfway up the skimmer opening or a minimum of 6-in (15-cm) from the top of the pool wall (see diagram 36). -
Page 25: Safety Warnings
SAFETY WARNINGS • Install all safety warning decals and signs included with the pool. • The filter pump must be turned off when there are swimmers in the pool! WARNING DECALS TOP LEDGE DECALS: Round pools require three (3) of these warning labels (see diagram 37). Decals should be placed along the top ledge of the pool so that they are visible upon entry. -
Page 26: Pool Maintenance
POOL MAINTENANCE 1. Keep the pool clean and maintain proper water chemistry by applying the correct pool chemicals. Unsanitary water is a serious health hazard. 2. Maintain pool pH level between 7.2 to 7.6. 3. Carefully follow the installation and other instructions in the filtration system manual. 4. -
Page 27: Savannah Pool Warranty
SAVANNAH POOL WARRANTY Warranties for the skimmer, ladder, liner, and filter system are found in their respective installation manuals. Thirty-Year Prorated Limited Warranty IMPORTANT Carefully read and apply all safety warnings, cautions, and instructions detailed in the installation manual and the safety and warning package that came with the pool. The do not jump or dive decals and signs must be installed on the pool. - Page 28 Year 16-Year 30 80% of List Price WARRANTY VALIDATION AND PROCEDURE TO START A WARRANTY CLAIM: • The pool warranty must be registered with the local retailer or Blue Wave Products within 30 days of the ® date of purchase. The warranty registration form is located in your safety and warning package.
Need help?
Do you have a question about the SAVANNAH and is the answer not in the manual?
Questions and answers