Table of Contents
Advertisement
Quick Links
HARD DISK CAMCORDER
GZ-MG50E/EK
GZ-MG40E/EK
GZ-MG30E/EK
GZ-MG20E/EK
INSTRUCTIONS
GETTING STARTED
VIDEO RECORDING &
PLAYBACK
STILL IMAGE RECORDING
& PLAYBACK
ADVANCED OPERATIONS
MENU SETTINGS
REFERENCES
To deactivate the demonstration,
set "DEMO MODE" to "OFF".
(
pg. 48)
LYT1472-001C
ENGLISH
7
22
28
31
48
52
EN
Advertisement
Chapters
Table of Contents

Subscribe to Our Youtube Channel
Related Manuals for JVC GZ-MG50E


Summary of Contents for JVC GZ-MG50E
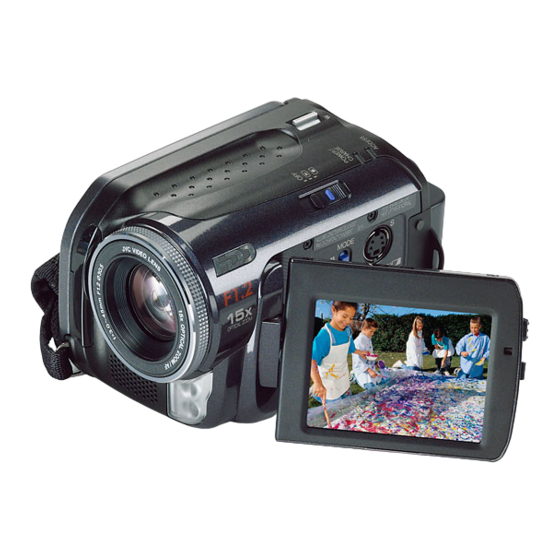
- Page 1 ENGLISH GETTING STARTED VIDEO RECORDING & HARD DISK CAMCORDER PLAYBACK GZ-MG50E/EK STILL IMAGE RECORDING GZ-MG40E/EK & PLAYBACK GZ-MG30E/EK ADVANCED OPERATIONS GZ-MG20E/EK MENU SETTINGS REFERENCES To deactivate the demonstration, set “DEMO MODE” to “OFF”. pg. 48) INSTRUCTIONS LYT1472-001C...
- Page 2 Major Features of this Camera Built-in Hard Disk Editing Files on your PC This hard disk camera records images to a USB 2.0 enables the large, built-in hard disk drive (HDD) instead of a smooth transfer of video DV tape like conventional video cameras. This and still images to a enables extended hours of high-resolution, computer.
-
Page 3: Table Of Contents
ADVANCED OPERATIONS Contents RECORDING FEATURES ........31 Backlight Compensation ........ 31 GETTING STARTED Spot Exposure Control ........31 LED Light ............31 Provided Accessories ........7 Manual Settings in MSET Menu ....32 Index .............. 10 How to Select a Menu Item ....... 32 Power ............. - Page 4 BE SURE to replace the fuse only with an monitor playback are possible anywhere. identical approved type, as originally fitted, ● Use the JVC BN-VF707U battery pack and, to and to replace the fuse cover. recharge it or to supply power to the camera...
- Page 5 If you wish to dispose of this product, please visit DO read the operating instructions before you our web page www.jvc-europe.com to obtain attempt to use the equipment. information about the take-back of the product.
- Page 6 When requesting repairs for breakdowns by your example with curtains or soft furnishings. dealer or JVC service centre, be sure to bring your Overheating will cause damage and shorten the life camera together with the SD Memory Card. If one of the equipment.
-
Page 7: Getting Started
GETTING STARTED AC Adapter AP-V14E or AP-V17E Provided Accessories Power Cord (AP-V14E only) Battery Pack BN-VF707U Audio/Video Cable USB Cable (Refer to the software installation and USB connection guide.) Shoulder Strap (See page 8 for attachment) Lens Cap (See page 8 for attachment) CD-ROM Remote Control Unit RM-V730UE Lithium Battery CR 2025* (for remote control... - Page 8 GETTING STARTED Attaching the Shoulder Strap Attaching the Lens Cap Follow the illustration. To protect the lens, attach the provided lens Open the velcro strip. cap to the camera as Thread the strap through the eyelet. shown in the illustration. Fold it back and thread it through the strap NOTE: guide and the buckle.
- Page 9 GETTING STARTED Attaching the Core Filter LCD Monitor Attach the core filters to the cables. The core Pull on the end of the LCD monitor and open filter reduces interference. the LCD monitor fully. It can rotate 270°. Release the stoppers on both ends of the core filter.
-
Page 10: Index
GETTING STARTED Index ATTENTION: ● Be careful not to cover , and during shooting. ● Be careful not to cover during playback. - Page 11 GETTING STARTED Controls Indicators Mode Switch [MODE] ( pg. 17) Power/Charge Lamp [POWER/CHARGE] pg. 14, 17) Light Button [LIGHT] ( pg. 31) Access Lamp [ACCESS] (Lights up or blinks Information Button [INFO/ pg. 38) when you access to any files. Do not turn off Play/Pause Button [49] ( pg.
- Page 12 GETTING STARTED Indications on LCD Monitor During Video Recording only During both Video and Still Image Recording [0h56m] Mode Indicator ( pg. 17) Wide Mode Indicator ( pg. 50) Wind Cut Indicator ( pg. 50) 11:30 Picture Quality: [U] (ultra fine), [F] (fine), [N] 10.11.
- Page 13 GETTING STARTED During Video Playback During Still Image Playback 11:30 10. 11. 2005 Mode Indicator ( pg. 17) Folder/File Number Slide Show Playback Indicator ( pg. 29) Battery Indicator ( pg. 55) Date/Time ( pg. 49) 10. 11. 2005 Selected Medium Indicator ( pg.
-
Page 14: Power
GETTING STARTED Set the power switch to OFF. Power With the arrow on the battery pack pointing downward, push the battery pack slightly against This camera’s 2-way power supply system lets the battery pack mount. you choose the most appropriate source of ●... - Page 15 ● This product includes patented and other Perform steps 2 – 3 in “Charging the Battery proprietary technology and will operate only Pack”. with JVC Data Battery. Use the JVC BN- Maximum continuous recording time VF707U/VF714U/VF733U battery packs. Using generic non-JVC batteries can cause damage...
- Page 16 In such a To resume the original function of the case, consult your nearest JVC dealer. accurate battery power indication ● The recordable time display should only be If the battery power indication differs from the used as a guide.
-
Page 17: Operation Mode
GETTING STARTED 2 Recording/Playback Mode Operation Mode Select the recording/playback mode using the To turn on the camera, set the power switch to MODE switch. while pressing down the lock button : Video mode ( pg. 22, 24) located on the switch. : Still image mode ( pg. -
Page 18: Language Setting
GETTING STARTED Language Setting Date/Time Settings The language on the display can be changed. The recording start date/time is recorded on the pg. 48, 49) video/still image file and it can be checked by pressing INFO during playback. ( pg. 24, 29) Set the power switch to In addition, you can find the desired file by the Press MENU. -
Page 19: Brightness Adjustment Of The Display
GETTING STARTED Brightness Adjustment of the Grip Adjustment Display Adjust the velcro strip. Pass your right hand The brightness of the display can be adjusted. through the loop and grasp Set the power switch to while the grip. pressing down the lock button located on the Adjust your thumb and switch. -
Page 20: Inserting/Removing An Sd Card
GETTING STARTED Inserting/Removing an SD Card Formatting a Recording Medium You can use an SD card as a recording medium You can format (initialise) the built-in hard disk in the SD slot. See page 62 for the guaranteed (HDD) or SD cards. You have to format the media to work with this camera. -
Page 21: Selecting A Recording Medium
GETTING STARTED Drop Detection Selecting a Recording Medium This function turns off the power automatically to Select the recording medium before starting prevent HDD damage when the camera is recording or playback. ( pg. 48, 49) accidentally dropped. This function is set to on Example: When recording still images to an SD at time of shipment. -
Page 22: Video Recording
VIDEO RECORDING & PLAYBACK Video Recording NOTES: ● If the camera is left without any operation during recording or playback (video or still image) for 5 minutes when using the battery pack, the Power Switch camera is turned off automatically to conserve power. -
Page 23: Zooming
● The S-Video cable is optional. Be sure to use the Use the zoom function for close-up or wide- YTU94146A S-Video cable. Consult the JVC angle shooting. You can zoom in up to 15x* by Service Centre described on the sheet included in using the optical zoom. -
Page 24: Video Playback
VIDEO RECORDING & PLAYBACK To play back files in the [EXTMOV] folder Video Playback If the data cannot be recorded properly, the video files are saved to the [EXTMOV] folder. pg. 22) To play back the files in the [EXTMOV] folder, Power Switch press the recording start/stop button or START/ STOP button on the remote control while the... -
Page 25: How To Use The Scroll Bar
VIDEO RECORDING & PLAYBACK How to Use the Scroll Bar Locating the start point of the file or skip the file You can use the vertical scroll bar on the index Press to locate the start point of the next file. screen to find the desired files quickly. -
Page 26: Connecting To A Tv, Vcr Or Vdr
● The S-Video cable is optional. Be sure to use then stop playback on the camera. the YTU94146A S-Video cable. Consult the JVC Service Centre described on the sheet included in the package for details on its availability. Make sure to connect the end with a core filter to the camera. -
Page 27: Playback Using The Remote Control
VIDEO RECORDING & PLAYBACK Buttons and Functions Playback Using the Remote Control The full-function remote control unit can operate this camera from a distance as well as the basic operations (playback, stop, pause, fast-forward and rewind) of your VCR. Installing the Battery The remote control uses one lithium battery (CR2025). -
Page 28: Still Image Recording
STILL IMAGE RECORDING & PLAYBACK Zooming Still Image Recording Use the zoom function for close-up or wide- angle shooting. For details, see page 23. Power Switch Continuous Shooting If the continuous shooting mode is set to on, Lock Button keeping the recording start/stop button pressed Zoom Lever in step 3 in “Still Image Recording”... -
Page 29: Still Image Playback
STILL IMAGE RECORDING & PLAYBACK Slide Show Still Image Playback You can playback all the images stored in recording media automatically. Power Switch Set the power switch to Set the MODE switch to Lock Button ● A still image is displayed. MODE ●... -
Page 30: How To Use The Scroll Bar
STILL IMAGE RECORDING & PLAYBACK How to Use the Scroll Bar Playback Zoom You can use the vertical scroll bar on the index You can magnify the playback image up to 5x. screen to find the desired files quickly. The scroll Set the power switch to bar is useful when deleting files ( pg. -
Page 31: Recording Features
RECORDING FEATURES Backlight Compensation LED Light Backlight compensation brightens the subject When shooting with insufficient light at night, the quickly. With simple operation, dark portions of LED light turns on to improve visibility during the subject are brightened by increasing the shooting. -
Page 32: Manual Settings In Mset Menu
RECORDING FEATURES Manual Exposure Manual Settings in MSET Menu Manual exposure is recommended in the following situations: You can use manual recording functions easily When shooting using reverse lighting or when ● the background is too bright. by selecting items in the MSET menus. When shooting on a reflective natural ●... -
Page 33: Manual Focus
RECORDING FEATURES Manual Focus To return to automatic focus Select [AUTO] in step 2. The camera's Full Range AF system offers Manual focus is recommended in situations continuous focusing ability from close-up to listed below: infinity. However, the correct focus may not be When two subjects overlap in the same scene. -
Page 34: White Balance
RECORDING FEATURES White Balance Manual White Balance Adjustment Select [MWB] in WB menu. ( pg. 34) The white balance is usually adjusted Hold a sheet of automatically for correctness of the colour plain white paper in reproduction under various lighting. However, front of the subject. -
Page 35: Shutter Speed
RECORDING FEATURES Shutter Speed To change the shutter speed Press 49, then select the shutter speed by You can set the shutter speed manually. A fast pressing and press 49. shutter speed can freeze the motion of a fast- To return to automatic shutter speed moving subject and a slow shutter speed can Select [AUTO] in step 3. -
Page 36: Program Ae
RECORDING FEATURES Program AE Effect You can use the program AE settings for specific You can add special effects to your recording shooting situations. images. Select [P.AE] in the MSET menu. ( pg. 32) Select [EF] in the MSET menu. ( pg. -
Page 37: Playback Features
PLAYBACK FEATURES Wipe or Fader Effects Playback Effects You can view videos with various effects of You can view videos or still images with special scene transition. image effects. Set the power switch to Set the power switch to Set the MODE switch to Set the MODE switch to Press MENU. -
Page 38: Viewing File Information
MANAGING FILES Viewing File Information Protecting Files You can view the file information in playback You can protect files from the accidental erasure. mode. Set the power switch to Information on Video Files Select the file type (video or still image) using the MODE switch. -
Page 39: Deleting Files
MANAGING FILES To protect all files Deleting Files Press to select [PROTECT ALL], then press 49. You can delete unnecessary files. Press to select [EXECUTE], then Deleting by the Button press 49. ● All files are protected. Set the power switch to To release protection of all files Select the file type (video or still image) using Select [CANCEL ALL], then press 49. -
Page 40: Cleaning Up A Recording Medium
MANAGING FILES To delete by selecting multiple files Cleaning Up a Recording Press to select [FILE SELECT], then Medium press 49. ● The index screen appears. Writing speed of recording media tends to Press to select the file you want become slow after long period of repeated use. -
Page 41: Copying/Moving Still Image Files
MANAGING FILES To copy or move by selecting files Copying/Moving Still Image Press to select [FILE], then press 49. Files ● The index screen appears. Press to select a desired file, You can copy or move still image files between then press 49. -
Page 42: Resetting The File Number
MANAGING FILES Resetting the File Number Creating Play List By resetting the file number (name), a new folder You can create a play list by collecting the will be made. The new files you are going to desired scenes from the previously recorded make will be stored in the new folder. -
Page 43: Playing Back Play List
MANAGING FILES To check the play list by playing back the Playing Back Play List video You can check the play list before saving it. By playing back the play list, you can view your After step 10, press to select a thumbnail original video clips. - Page 44 MANAGING FILES Add/Delete Files in Play List Changing Play List Name You can edit existing play lists by adding or The default name of play list is its creation date deleting files. and time. You can change the name on the keyboard screen as you like.
- Page 45 MANAGING FILES Deleting Play List Dubbing Using Play List You can delete unnecessary play lists. Dubbing to an external device using a play list is possible. Set the power switch to Connect the camera and your VCR with the Set the MODE switch to S/AV cable.
-
Page 46: Dpof Print Setting
MANAGING FILES To print all still images (One print for each) DPOF Print Setting Display the DPOF menu screen. ( “To print by selecting a still image”) This camera is compatible with DPOF (Digital Print Order Format). You can set which images Press to select [ALL1], then press to be printed and the number of prints with this... -
Page 47: Direct Printing With A Pictbridge Printer
MANAGING FILES To cancel print setting Direct Printing with a PictBridge Press to select [CANCEL], then press Printer To stop printing after printing starts If your printer is compatible with PictBridge, still Press 49. The confirmation screen appears. images can be printed easily by connecting the Press to select [EXECUTE], then camera with the USB cable directly to the... -
Page 48: Changing The Menu Settings
MENU SETTINGS Changing the Menu Settings Common Menus for All Modes You can change the menu settings to customize [ ] = Factory-preset your camera. Access the desired menu screen BASIC SETTING by following the steps below, then change the various settings. - Page 49 MENU SETTINGS REMOTE NO. RESET OFF: Makes the camera not to receive the signal [VIDEO] / IMAGE from the remote control. By resetting the file number (name), a new folder [ON]: Enables the operation with the remote will be made. The new files you are going to control.
-
Page 50: Video Recording Menus
Mode Size (pixels) Bit rate (In order of the quality) ZOOM [ULTRA FINE] 720 x 576 8.5 Mbps GZ-MG50E/EK/GZ-MG40E/EK FINE 720 x 576 5.5 Mbps 15X: Only optical zoom is available up to 15x. NORMAL 720 x 576 4.2 Mbps [60X]: Digital zoom is available up to 60x. -
Page 51: Still Image Recording Menus
MENU SETTINGS Still Image Recording Menus Still Image Playback Menus [ ] = Factory-preset [ ] = Factory-preset DPOF QUALITY “DPOF Print Setting” ( pg. 46) [FINE] / STANDARD Select the desired image quality. DIRECT PRINT “Direct Printing with a PictBridge Printer” IMAGE SIZE* pg. -
Page 52: References
LCD monitor turns off. If the problem still exists, please consult your HTo cancel the sleep mode, perform any operation nearest JVC dealer. such as zooming. 8 To reset the camera The power was turned off accidentally. Press RESET using a piece of wire or other ●... - Page 53 REFERENCES The recorded image is white The recorded image is too bright. ● Shutter speed is set to NIGHTSCOPE or slow ● The subject is too bright. speed. HTry manual exposure. ( pg. 32) HNIGHTSCOPE and slow speed are only for use in White balance setting cannot be activated.
- Page 54 58) monitor become dark. The data process is too slow after the power HConsult your nearest JVC dealer. is switched on or the mode is changed. Coloured bright spots appear all over the ● There is a large number of still images (approx.
-
Page 55: Warning Indications
REFERENCES CHECK CARD’S WRITE PROTECTION Warning Indications SWITCH Appears when you attempt recording when the The following indications appear on the screen. write protection tab on the SD card is set to the “LOCK” position. ( pg. 20) (Battery indicator) Displays the battery remaining power. - Page 56 REFERENCES NO VIDEO MANAGEMENT FILE RECORDING FAILURE VIDEO FILES HAVE BEEN MOVED TO MPEG Performance of recording medium is poor. Use ● FOLDER the Cleanup function [CLEAN UP] in the menu. The data cannot be recorded properly, or the pg. 40, 49) video management file is deleted or not found.
-
Page 57: Cleaning The Camera
REFERENCES Cleaning the Camera Cautions Battery Packs Before cleaning, turn off the camera and remove the battery pack and AC adapter. The supplied battery Terminals To clean the exterior pack is a lithium-ion Wipe gently with a soft cloth. Put the cloth in battery. - Page 58 Using generic • Do not touch the metal parts. non-JVC batteries can cause damage to the ● Copy the recorded files to your PC. JVC internal charging circuitry. shall not be responsible for any lost data. (It is recommended that you copy the data ●...
- Page 59 When requesting repairs for malfunctioning by ... in places subject to extremely high (over 40°C) or your dealer or JVC service centre, be sure to extremely low (under 0°C) temperatures. bring your camera together with the recording ● DO NOT leave the unit medium.
-
Page 60: Specifications
REFERENCES Lens Specifications GZ-MG50E/EK/GZ-MG40E/EK: F 1.2 to 2.8, f = 3.0 mm to 45 mm, 15:1 power Camera zoom lens GZ-MG30E/EK/GZ-MG20E/EK: F 1.8 to 3.2, f = 2.2 mm to 50 mm, 25:1 power For general zoom lens Power supply... - Page 61 (incl. battery) Format JPEG Design and specifications subject to change Image size without notice. GZ-MG50E/EK/GZ-MG40E/EK: 3 modes (1152 x 864 / 1024 x 768 / 640 x 480) GZ-MG30E/EK/GZ-MG20E/EK: Only 1 mode (640 x 480) Picture quality 2 modes (FINE/STANDARD)
- Page 62 (The numbers indicate “minutes”.) The tables below show the approximate recording time and number of storable images. Built-in hard disk ● The number increases or decreases depending GZ-MG50E/EK GZ-MG40E/EK on the conditions such as image size and/or Quality GZ-MG30E/EK GZ-MG20E/EK picture quality.
- Page 63 9999 STANDARD* FINE* 1152 x 864/ 1024 x 768/ 1725 9999 9999 FINE* STANDARD* 1152 x 864/ 1152 x 864/ 1425 2745 9999 9999 STANDARD* FINE* * For GZ-MG50E/EK/GZ-MG40E/EK only. 1152 x 864/ 9999 9999 STANDARD* * For GZ-MG50E/EK/GZ-MG40E/EK only.
-
Page 64: Terms
TERMS ............16 ........32, 33 AC Adapter Manual Exposure ........... 33 Manual Focus ............. 32 MSET Menu ........31 Backlight Compensation ............. 14 Battery Pack ........19, 49 ..........48 Brightness Control Operation Sound ...... 48 – 51 ..........50, 51 Changing The Menu Settings Picture Quality ......... - Page 65 ENGLISH SOFTWARE INSTALLATION AND USB CONNECTION GUIDE LYT1473-001A...
- Page 66 (Windows ) ..........14 The right to use the Program is granted by Victor ® Company of Japan, Limited (“JVC”) to You only Copying Files to the PC (Windows ) ..... 16 ® on the condition that You agree to the following.
- Page 67 WARRANTIES, EITHER EXPRESS OR Agreement without giving any notice to You. IMPLIED, INCLUDING BUT NOT LIMITED In this event, JVC may claim against You for TO IMPLIED WARRANTIES OF any damages caused by Your breach. Should MERCHANTABILITY AND FITNESS FOR A...
- Page 68 FAR part 12.212 and is only licensed to You to the execution, interpretation and with the same use rights JVC grants all performance of this Agreement. commercial end users pursuant to the terms Victor Company of Japan, Limited of this Agreement.
- Page 69 ● Do not attempt to modify this software. hole. ● Changes or modifications not approved by JVC ● Do not use conventional disc cleaners or could void user’s authority to operate the cleaning spray.
-
Page 70: Notice For Users
Notice for Users Use of this software is authorized according to the terms of the software license. When contacting the nearest JVC office or agency in your country about this software (refer to the JVC Worldwide Service Network at http://www.jvc-victor.co.jp/english/worldmap/index-e.html), please fill out the following and have the appropriate information ready. - Page 71 For technical inquiries, please contact the PIXELA User Support Center in your region. Location Region Phone # North America Los Angeles +1-213-341-0163 Europe +44-1489-564-764 U.K. Asia Philippines +63-2-438-0090 Please check the PIXELA website for latest information and downloading. http://www.pixela.co.jp/oem/jvc/e/index.html – 7 –...
-
Page 72: System Requirements
System Requirements ® Windows 8 Digital Photo Navigator The following requirements must be satisfied to connect a camera to a PC and to use Digital Photo Navigator. ® : Windows 2000 Professional SP4 [2000] (pre-installed), ® Windows XP Home Edition [XP] (pre-installed), ®... - Page 73 8 CyberLink DVD Solution The following requirements must be satisfied to use CyberLink DVD Solution. ® : Windows 2000 Professional SP4 [2000] (pre-installed), ® Windows XP Home Edition [XP] (pre-installed), ® or Windows XP Professional [XP] (pre-installed) ® ® : Intel Pentium III, at least 700 MHz ®...
- Page 74 CU-VUSD70, the PC card adapter CU-VPSD60 or the floppy disk adapter CU-VFSD50 to load the files in the memory card to the hard disk on your PC. (Refer to “JVC Accessories” on our world web site at: http://www.jvc-victor.co.jp/english/accessory/) – 10 –...
-
Page 75: Software Installation (Windows ® )
Load the provided CD-ROM into the PC. ® Software Installation (Windows After a moment, the [SETUP] screen appears. ● From the [SETUP] screen, you can install the desired software. Follow the procedure described below to install ● If the [SETUP] screen does not appear, double- the software. - Page 76 Click [Next]. Click [Next]. [License Agreement] screen appears. [Setup Type] screen appears. Click [Yes]. Select the program(s) you want to install, then click [Next]. [Customer Information] screen appears. [Setup Status] screen appears. Wait for a Confirm your information and click [Next]. moment until the installation is finished and ●...
-
Page 77: Connections (Windows ® )
NOTES: ® Connections (Windows ● If PowerDirector/PowerProducer/PowerDVD have already been installed on the PC, uninstall them before installing the provided software. Connecting the USB cable Video files captured with this camera can only be Connect the USB cable to copy still images and handled on the provided software. -
Page 78: Viewing The Contents Of A Recording Medium
® When using Windows 2000: Viewing the Contents of a Recording 1 Double-click ® Medium (Windows the [My Computer] icon on the desktop. If you want to view the contents in the SD The [Removable Memory Card, make sure that the card is set Disk] icon which in the camera. - Page 79 Folder structure within the recording medium NOTES: Video files: Stored in the [PRGxxx] folder (where ● Any folders or files other than those described xxx is a number), within the [SD_VIDEO] folder. above are also recorded in the recording medium. Still image files: Stored in the [xxxJVCSO] folder ●...
-
Page 80: (Windows ® )
NOTES: ® Copying Files to the PC (Windows ● Never disconnect the USB cable while the ACCESS lamp on the camera lights or blinks. ● File transfer takes considerable time in PCs. Usage Still images and video files that are stored in a of a PC that supports USB 2.0 is required. -
Page 81: Playing Back Files On The Pc (Windows ® )
Disconnecting the USB cable Playing Back Files on the PC ® ® (Windows (Windows Before loading or unloading recording mediums Still images or turning off the PC, first disconnect the USB Use an application that can handle the JPEG file cable and turn off the camera. -
Page 82: User's Guide/Help/Readme (Windows ® )
Click [OK]. User’s Guide/Help/Readme ® Windows 2000: If a message indicating that the ® device can be safely removed appears, click [OK] (Windows and then click [Close]. This manual only refers to software installation and PC connection. For more details of each software, refer to its User’s Guide/Help/Readme. -
Page 83: Backing Up Video Files (Windows ® )
8 Digital Photo Navigator ® Backing Up Video files (Windows The User’s Guide is included on the CD-ROM in PDF format. Right-click the CD-ROM icon in [My Computer], then click [Open]. Double-click the Set the camera to playback mode. [Docs] folder, then double-click the [PhotoNavi] Connect the camera to the PC with the folder. -
Page 84: Playing Back Copied Video (Windows ® )
Copy the entire [SD_VIDEO] folder. Playing Back Copied Video When returning folders backed up to the PC back to the camera, be sure to first erase the ® (Windows [SD_VIDEO] folder in the camera HDD before copying the [SD_VIDEO] folder of the PC. Creating play lists using multiple files and viewing video Click the bottom right of the operation... -
Page 85: How To Create Dvds Simply (Windows ® )
How To Create DVDs simply (Example of transition) ® (Windows Start PowerDirector Express NE and click [Load a media folder] of the import button, then select the folder that you have copied to PC to register it to the library. Select [Produce a Disc], and then click [Next]. - Page 86 Select [DVD Format] and click [Next]. Click [Start] to create the file. After the ● If the video is [ULTRA FINE], [FINE], or completion of video file creation, [NORMAL], select [High Quality NTSC (or PAL) PowerProducer 2 Gold NE starts DVD].
-
Page 87: Creating A Dvd With Titles (Windows ® )
Remove the check mark for [Include Menu] Creating a DVD with Titles in the [Preview] screen, and then click []]. ® (Windows Connect the camera to the PC with the USB cable, or remove the SD Memory Card from the camera and connect it to the PC using the card reader. - Page 88 Drag and drop the videos from the library Select [Create a File (Everio Series)], and to the timeline/storyboard in the playback then select [Next]. order. ● If necessary, edit transition or title on the timeline/storyboard. Click [Produce] after finish editing. ●...
- Page 89 Click [Start]. Click [Open media files]. The file that was This starts conversion of the edited file. The file is saved before is opened. Organize the files in saved to the location displayed in the storage the order they will be played by checking location.
-
Page 90: Software Installation (Macintosh)
Click [Continue] on the Introduction Software Installation (Macintosh) screen. Read Me screen appears. Follow the procedure described below to install the software. Before start installing, quit any other software you are using. Capty MPEG Edit EX This application is used to edit video files (MPEG-2 format) and write them into QuickTime and a variety of formats. - Page 91 Click [Agree] if you agree with the license Enter the Macintosh Administrator name agreement. and password in [Name] and [Password] Select a Destination screen appears. respectively, and click [OK]. Finish Up screen appears. ● If you are not the owner, this screen will not be Select the desitination volume and click appeared.
-
Page 92: Connections (Macintosh)
Connections (Macintosh) Viewing the Contents of a Recording Medium (Macintosh) Connect the USB cable to copy still images and video files in a recording medium to the PC. If you want to view the contents in the SD Memory Card, make sure that the card is set in the camera. - Page 93 Double-click the memory card icon on the NOTES: desktop. ● Any folders or files other than those described The folders in the recording medium appear. above are also recorded in the recording medium. ● Saving the wrong kinds of files in a recording medium or deleting files or folders from a recording medium can cause problems with the operation of the camera.
-
Page 94: Copying Files To The Pc (Macintosh)
Copying Files to the PC (Macintosh) Disconnecting the USB cable (Macintosh) Still images and video files that are stored in recording medium can be copied to the PC and Before loading or unloading recording medium or played back on the PC. turning off the PC, first disconnect the USB cable Double-click the recording and turn off the camera. -
Page 95: Help/Readme (Macintosh)
The usage is described. ReadMe The file is in the [ReadMe] folder. Support information and the limit are mentioned. INFORMATION For the exclusive URL for Everio, refer to PIXELA web site: http://www.pixela.co.jp/oem/jvc/e/ index.html CONTINUED ON NEXT PAGE – 31 –... - Page 96 Step2 Click [Open] to import the file. To combine two or more files, they need to first be linked in File Combination Mode. If the files will not be combined, proceed to Step 6. To switch to File Combination Mode, from the Capty MPEG Edit EX menu, Click [View].
-
Page 97: File Trimming (Macintosh)
Step4 Select the file format. File Trimming (Macintosh) Normally, select MPEG (system stream) format. See Help for other file formats. Skip to Step9 if you do not edit video files. Select the file format, and click [Execute]. Step5 Switching to Trimming Mode. Click [View] from the Capty MPEG Edit EX menu bar. - Page 98 Step7 Step8 Editing Saving The point selected first in the trimming Select the trimming range processing range is displayed in the GOP list or frame method. list. To edit in frame units, insert a check mark Delete trimming range to display the frame in the frame list. ●...
- Page 99 ● Video files in the Everio hard disk can be used without conversion. For more information, refer to PIXELA web site: http://www.pixela.co.jp/oem/jvc/e/ NOTES: ● MPEG files edited with the [Create a File (Everio Series)] command through the Windows version of CyberLink’s PowerDirector Express NE (in Normal...
- Page 100 Printed in Japan © 2005 Victor Company of Japan, Limited M5E3 0605FOH-AL-VP...
- Page 101 MultiMediaCards are not supported. When requesting repairs for breakdowns by your dealer or JVC ● For video recording, use a high-speed SD Memory Card (at least service center, be sure to bring your camera together with the SD ●...
- Page 102 This file has been downloaded from: www.UsersManualGuide.com User Manual and User Guide for many equipments like mobile phones, photo cameras, monther board, monitors, software, tv, dvd, and othes.. Manual users, user manuals, user guide manual, owners manual, instruction manual, manual owner, manual owner's, manual guide, manual operation, operating manual, user's manual, operating instructions, manual operators, manual operator, manual product, documentation manual, user maintenance, brochure, user reference, pdf manual Downloaded from:...
Need help?
Do you have a question about the GZ-MG50E and is the answer not in the manual?
Questions and answers