
Related Manuals for RS PRO RS-1327


Summary of Contents for RS PRO RS-1327
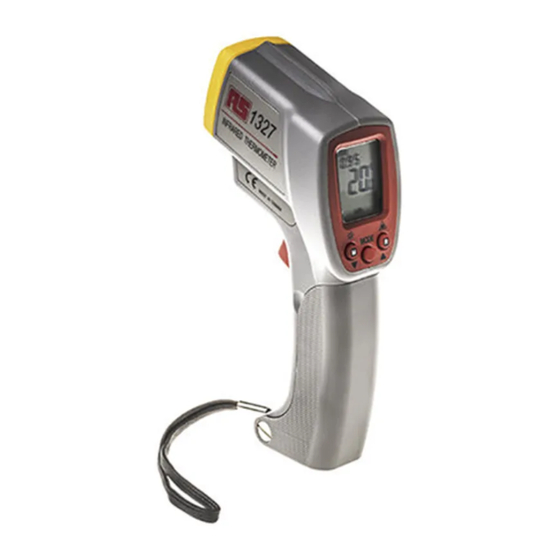
- Page 1 Instruction Manual RS-1327 Infrared Thermometer Remote Temperature Measurement (Non-Contact)
-
Page 2: Table Of Contents
TABLE OF CONTENTS TITLE PAGE INTRODUCTION ..............1 Ⅰ. SAFETY INFORMATION.............1 Ⅱ. FEATURES................3 Ⅲ. SPECIFICATIONS ...............3 Ⅳ. GENERAL LAYOUT AND OPERATING CONTROLS ..5 Ⅴ. LCD DISPLAY DESCRIPTION ..........7 Ⅵ. EMISSIVITY ADJUSTMENT ..........7 Ⅶ. TEMPERATURE MEASUREMENT ........11 Ⅷ. SETTING MODE..............13 Ⅸ. BATTERY REPLACEMENT ..........15... -
Page 3: Introduction
INTRODUCTION The RS 1327 hand-held Infrared Thermometer is easy to use and operate. The thermometer has a laser to assist in sighting the sensor for making measurements. The Liquid Crystal Display has a backlight function which may be turned on to assist measurements made in a dark place. - Page 4 2. Precautions: a). Do not operate the thermometer in the presence of strong electrical or magnetic fields, as this may prevent correct operation. b). Use and store the thermometer away from direct sunlight or other strong source of light, high temperatures, high humidity or dust.
-
Page 5: Ⅱ. Features
Ⅱ. FEATURES °C/ °F Selectable. Backlit LCD display. Sighting laser. Auto-hold function. Maximum/minimum reading recorder function. Auto power-off. Ⅲ. SPECIFICATIONS 3-1 General Information: Display: Backlit LCD display. Auto power-off time: Approx.15 sec. Data memory capacity: 50 set. (Direct reading on LCD display) Over-range indication: “OL”... - Page 6 Storage temperature -10°C to 60°C (14°F to 140°F), Humidity: Below 70%RH. Dimensions: 172(L)×118(W)×46(H) mm 6.8(L)×4.6(W)×1.8(H) inches. Weight: Approx. 220g with battery. Accessories: Instruction manual, carrying case, battery. 3-2 Electrical specifications: Measuring range: -20°C to 500°C (-4°F to 932°F) Resolution: 0.1°C, 0.2°F Accuracy: ±...
-
Page 7: Ⅳ. General Layout And Operating Controls
Ⅳ. GENERAL LAYOUT AND OPERATING CONTROLS CAUTION AVOID EXPOSURE LASER RADIATION IS EMITTED FROM THIS APERTURE LASER RADIATION DO NOT STARE INTO BEAM OUTPUT < 1mW WAVELENGTH 630-670nm CLASS (II) LASER PRODUCT Complies with IEC 60825-1:(1998-01) Edition 1.1, EN 60825-1:1994/All:1996 °... - Page 8 1. Display. Press and hold Button Press once for 3 seconds From MAX/MIN Enter MAX/MIN recording mode. mode will exit this MAX MIN Current reading (MAX/MIN) mode and return to MODE normal operation. From normal mode will enter setting mode. From normal mode will turn the backlight on or off From Read mode, decrements the...
-
Page 9: Ⅴ. Lcd Display Description
Ⅴ. LCD DISPLAY DESCRIPTION ° C ° F ° C ° F 1. Hold function 11. Lo alarm 2. Maximum reading 12. Alarm function 3. Minimum reading 13. Hi alarm 4. Low battery indicator 14. Memory and Read address number 5. - Page 10 2. Emissivity adjustment Apply black tape, matt-black paint or black magic marker to the object if it is safe to do so. ε “ ” is set at 0.95 to indicate correctly from a dark surface. Aim the sensor at the black surface, pull the trigger and note the reading as T1.
- Page 11 Steel plate (oxidized) Iron plate (rusted) 0.7 to 0.85 Cast iron (rough) rusted 0.95 Rough ingot iron EMISSIVITY VALUES Typical Emissivity Values; Metals SURFACE EMISSIVITY Molten cast iron Molten mild steel 0.3 to 0.4 Stainless steel (polished) Stainless steel (various) 0.2 to 0.6 Aluminum Polished aluminum...
- Page 12 Emissivity Values; Non-metals Refractory & Building materials Red brick (rough) 0.75 to 0.9 Fire clay 0.75 Asbestos 0.95 Concrete Marble Carborundum 0.85 Plaster Alumina (fine grain) 0.25 Alumina (coarse grain) 0.45 Silica (fine grain) Silica (coarse grain) 0.55 ℃ Zirconium silicate up to 500 0.85 ℃...
-
Page 13: Ⅶ. Temperature Measurement
Ⅶ. TEMPERATURE MEASUREMENT 1. Measurement : Pull the trigger to turn the meter on and start measuring. Release the trigger to stop measuring and auto-hold the reading. The meter will turn off automatically after 15 seconds. 2. MAX/MIN hold function : Pull &... - Page 14 Note: Laser offset: The laser beam is offset 18mm (0.71in) from the focal lens. Choose a sampling spot that is large enough to include the laser offset. Surface Temperature: The thermometer will measure the temperature of the first surface it detects, e.g. a glass cover, dust or fog.
-
Page 15: Ⅷ. Setting Mode
Ⅷ. SETTING MODE Pull trigger to turn the meter on. Press & hold the MODE button for 3 seconds until “SET” appears on the LCD. 1. Parameter settings for measuring: Under the infrared parameter setting mode, the LCD will button to select setting of “℃/ ℉”, show . - Page 16 Setting procedure: a). Press and hold the MODE key for 3 seconds until the LCD displays the “SET” mark. b). Press “▲” button to select ℃ unit. c). Press the MODE button once to enter ALARM ON/OFF setting mode, then press the ▲ or ▼ key to select “ON” mode.
-
Page 17: Ⅸ.battery Replacement
Ⅸ.BATTERY REPLACEMENT appears on the LCD screen, there is When the symbol insufficient power in the battery to provide an accurate measurement. Replace the battery with a fresh one as follows: a) Ensure the instrument is turned off b) Open battery compartment cover on the rear of the grip. c) Remove the exhausted battery from the compartment.
Need help?
Do you have a question about the RS-1327 and is the answer not in the manual?
Questions and answers