Table of Contents
Advertisement
Quick Links
GB
OPERATING MANUAL . . . . . . . . . . . . . . . . . . . . . . . . . . . . . PAGE 2
D
GEBRAUCHSANWEISUNG . . . . . . . . . . . . . . . . . . . . . . . . . . . . PAGE 18
F
MANUAL D'UTILISATION . . . . . . . . . . . . . . . . . . . . . . . . . . . PAGE 36
NL
GEBRUIKSAANWIJZING . . . . . . . . . . . . . . . . . . . . . . . . . . . . . PAGE 54
E
INSTRUCCIONES DE USO . . . . . . . . . . . . . . . . . . . . . . . . . . . . PAGE 70
I
ISTRUZIONI D'USO . . . . . . . . . . . . . . . . . . . . . . . . . . . . . . . . . PAGE 86
DK
BRUGERVEJLEDNING . . . . . . . . . . . . . . . . . . . . . . . . . . . . . . . PAGE 102
N
BRUKERINSTRUKSEN . . . . . . . . . . . . . . . . . . . . . . . . . . . . . . . PAGE 118
S
INSTRUKTIONERNA INNAN ANVANDNING . . . . . . . . . . . . . . PAGE 134
FIN
KäyTTöOHJEET . . . . . . . . . . . . . . . . . . . . . . . . . . . . . . . . . . . PAGE 150
LC – SL530
Advertisement
Table of Contents

Related Manuals for Toyotomi Zibro LC-SL530


Summary of Contents for Toyotomi Zibro LC-SL530
- Page 1 LC – SL530 OPERATING MANUAL . . . . . . . . . . . . . . . . . . . . . . . . . . . . . PAGE 2 GEBRAUCHSANWEISUNG .
- Page 2 Référence et numéro de lot ou de série de l’article : se reporter au produit En cas d´insatisfaction, consultez d´abord: Distributed in Europe by: TOYOTOMI EUROPE SALES B.V. Taylorweg 6, 5466 AE Veghel, The Netherlands Email: info@toyotomi.eu Website: www.toyotomi.eu Si une difficulté...
- Page 3 We hope that you’ll enjoy your Toyotomi appliance for years to come! We invite you to read this instruction manual first, to ensure the maximum lifetime for this appliance. Get to know us better…visit us at www.toyotomi.eu for our full line of products. 1 Read the diRections foR Use fiRst.
-
Page 4: General Directions For Use
geneRal diRections foR Use Below you will find the main steps to be taken for using your heater. For more details, please refer to the MANUAL. Remove all packaging materials (Fig. A). Fill the removable tank 7 (refer to Section B, Fig. D). Insert the plug into the wall-socket. -
Page 5: What You Need To Know In Advance
What YoU need to KnoW in adVance ALWAYS MAKE SURE THAT THERE IS SUFFICIENT VENTILATION Read this user manual carefully before using the appliance and keep it for future reference. Install this device only when it complies with local/national legislation, ordinances and standards. -
Page 6: Installing The Heater
THE RIGHT FUEL Your heater has been designed for use with high-quality water-free pure paraffin oil. Only fuels of this kind will ensure clean and proper burning. Lower quality fuel may result in: increased possibility of malfunctioning incomplete burning ... - Page 7 5 Insert the plug K into the wall-socket (230 Volts - AC / 50 Hz) and set the correct time using the adjustment keys O (refer to Section C). 6 Your heater is now ready for use. FILLING FUEL Fill the removable tank in a suitable place since there can always be some spillage. Follow the procedure below: 1 Make sure that the heater is switched off.
- Page 8 IGNITING THE HEATER When used for the first time, a new heater may give out a smell for a short while. You should therefore provide extra ventilation. Always ignite the heater with the button M. Never use matches or a cigarette lighter.
-
Page 9: Automatic Deactivation
e - 8 Defective booster. Contact your dealer. e - 9 Air filter dirty; or Clean filter Fuel pump dirty. Contact your dealer. The heater has been in operation continuously for a period of 50 hours and has turned itself off automatically. Switch the heater back on. -
Page 10: Childproof Lock
CHILDPROOF LOCK The childproof lock can be used to prevent children accidentally changing the heater settings. When the heater is burning and the childproof lock is on, the heater can only be switched off. Other functions are blocked then. If the heater has already been switched off, the childproof lock also prevents accidental ignition of the heater. - Page 11 indicator is blinking and VENT indicator ( ) is lit. After improving the ventilation of the room (e.g. by opening a door or window a little more), the heater can be ignited by pushing M again. MAINTENANCE Switch off the heater and let it cool down, before you start any maintenance work.
- Page 12 4 Always move the heater in an upright position. 5 Make the fixed tank empty with a fuel pump before transportation or in case of wrong or dirty fuel. First remove the fuel filter and then insert the fuel pump into the empty fixed tank. Follow the same procedure if the fuel tank contains water.
- Page 13 * Highly inflammable substances may induce uncontrollable burning, causing flames to break out. Should this happen, never try to move the heater, but always switch off the heater immediately. In case of emergency you may use a fire extinguisher, but only a type B extinguisher: a carbon dioxide or powder extinguisher. 15 TIPS FOR SAFE USE Children should be supervised to ensure that they do not play with the appliance.
-
Page 14: Programming The Week Timer
WEEK TIMER Here is an example on how the week timer can be programmed: Monday Tuesday Wednesday Thursday Friday Saturday Sunday P1 ON 6:30 6:30 6:30 6:30 6:30 10:00 9:00 P1 OFF 8:45 8:45 8:45 8:45 8:45 23:00 23:00 P2 ON 12:00 15:00 18:00... - Page 15 Then, use the adjustment keys O to set the minute. Press the adjustment key M to increase the minute and the key N to decrease the minute. Press extension/day/set S to select the right minute. Use the adjustment keys O to set the hour at which the heater must shutt off.
- Page 16 Use the adjustment keys M or M O to choose copy. Press extension/day/set S to select the copy function. Use the adjustment keys M or M O to select the day to which the settings should be copied. Press extension/day/set S to choose the selected day.
-
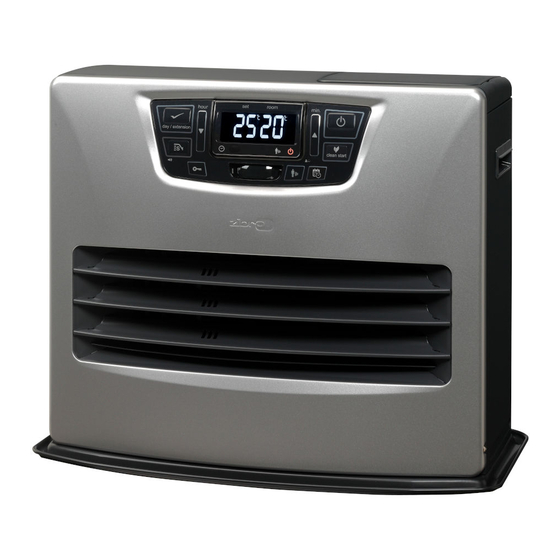
Page 18: Main Components
MAIN COMPONENTS Front plate Grid Base plate Lid for removable tank Operation panel Handle Removable tank Air filter Vent filter Thermostat Plug + cord Information display Childproof lock Adjustment keys (time and temperature) TIMER SAVE key Indicator lights Extension / day / set (weektimer) Air quality control system... - Page 19 In caso aveste bisogno di ulteriori informazioni o riscontraste particolari problemi che non sono presi in considerazione nel presente manuale, vi invitiamo a visitare il nostro sito www .toyotomi .eu o contattare la nostra assistenza (il cui numero di telefono é indicato nel nostro sito www .toyotomi .eu) Hvis du onsker yderligere information eller, hvis der opstar problemer, som ikke behandles i brugsanvisningen, bedes du besoge vores webside www .toyotomi .eu eller kontakt afdelin-...
Need help?
Do you have a question about the Zibro LC-SL530 and is the answer not in the manual?
Questions and answers