
Related Manuals for Saeco Intelia Deluxe HD8771/93


Summary of Contents for Saeco Intelia Deluxe HD8771/93
- Page 1 Register your product and get support at www.saeco.com/welcome HD8771/93 4219_460_3158_1_Book_Simp_A5_v2.indd 1 12/10/15 15:33...
- Page 3 English 5...
- Page 4 ESPRESSO CAPPUCCINO ESPRESSO LUNGO MILK FROTH CARAFE QUICK CLEAN MENU...
-
Page 5: Table Of Contents
English Contents Introduction Important safeguards Caution Instructions for the power supply cord General description Important Warning Caution Electromagnetic fields (EMF) The display First installation Manual rinsing cycle Water filter Installing the water filter Replacing the water filter Measuring the water hardness Using the machine Brewing coffee with beans Brewing coffee with pre-ground coffee... -
Page 6: Introduction
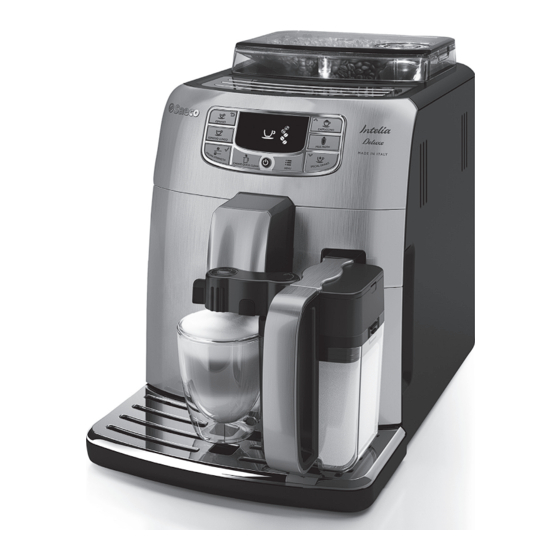
The machine is suitable for preparing espresso coffee using whole coffee beans. You can use the milk carafe to prepare perfect cappuccino in a quick and easy way.To fully benefit from the support that Saeco offers, please register your product at www.saeco.com/welcome. This user manual applies to all Intelia/Intelia Deluxe models with milk carafe. -
Page 7: Instructions For The Power Supply Cord
English 5 For optimal taste of your coffee, use purified or bottled water. Periodic descaling is still recommended every 2-3 months. 6 Do not use caramelized or flavored coffee beans. Instructions for the power supply cord - A short power-supply cord (or detachable power-supply cord) is to be provided to reduce risks resulting from becoming entangled in or tripping over a longer cord. -
Page 8: Important
English Important Read and follow the safety instructions carefully and only use the machine as described in this user manual to avoid accidental injury or damage due to improper use of the machine. Keep this user manual for future reference. Warning - Check if the voltage indicated on the machine corresponds to the local voltage before you connect the machine... -
Page 9: Electromagnetic Fields (Emf)
English - If you are not going to use your coffee machine for a prolonged period (e.g. a holiday), we recommend that you discard any water left inside the tank. Before you use the coffee machine again, clean the water tank and perform a manual rinsing cycle. -
Page 10: First Installation
English - CAPPUCCINO button = UP button: press this button to scroll up through the display menu. CAPPUCCINO - SPECIAL DRINKS button = DOWN button: press this button to scroll down through the display menu. First installation 1 Slide the drip tray with drip tray cover into the machine. 2 Remove the water tank. -
Page 11: Water Filter
English 7 Press the OK button to start hot water dispensing. Dispense water until the display shows the no water icon. 8 Fill the water tank with fresh water up to the MAX level and remove the container. The machine is ready for use. Water filter The “MAVEA”... -
Page 12: Replacing The Water Filter
English Replacing the water filter - The display shows the following icon to indicate the water filter needs to be replaced. 1 Replace the filter as described in section 'Installing the water filter'. 2 Press the MENU button and press the UP/DOWN button to scroll trough the options on the menu until the following icon is displayed. -
Page 13: Using The Machine
English 2 Press the OK button and select the water hardness in your area. 3 Press the OK button to confirm. 4 Press the ESC button to return to the main menu. Using the machine Brewing coffee with beans 1 Adjust the coffee dispensing spout to suit the size of your cup. 2 Press the AROMA STRENGTH button to select the desired coffee strength from 1-5 beans. -
Page 14: Cappuccino, Baby Cappuccino And Milk Froth
English 5 Brew 2-3 coffees to taste the difference. Cappuccino, baby cappuccino and milk froth Note: You can adjust the cappuccino and milk froth quantity. 1 Remove the hot water dispensing spout. 2 Remove the milk carafe lid. Fill the milk carafe with milk to a level between the MIN and MAX level and place back the lid. -
Page 15: Descaling Procedure
If you want to exit the descaling cycle, press the ESC button. 6 Pour the entire bottle of Saeco descaling solution (250ml) into the water tank. 7 Add water to the descaling solution in the water tank up to the CALC CLEAN indication. -
Page 16: Interruption Of The Descaling Cycle
English 13 Fill the milk carafe with fresh water up to the MIN level and place it back into the machine. Place the container back under both spouts. 14 Press the OK button to start the rinsing cycle (this takes approximately 4 minutes). - Page 17 English 2 Remove the coffee residues drawer. 3 To remove the brew group, press the lever and pull the brew group out of the machine. 4 Rinse the brew group with fresh water and let it air dry. 5 To place the brew group back, make sure that the lever is in contact with the base of the brewing unit.
-
Page 18: Lubrication
English Lubrication Lubricate the brew group after approximately 500 cups of coffee or once a month. 1 Apply some lubricant around the shaft in the bottom of the brewing unit. 2 Apply lubricant to the rails on both sides, as shown in the illustration. 3 Slide the brew group back into the machine along the guiding rails on the sides until it clicks into position. -
Page 19: Weekly Cleaning Of The Milk Carafe
English 2 Turn the milk dispensing spout up to the reference mark (indicated by a dot). 3 Lift the milk carafe dispenser to remove it from the lid and wash it with lukewarm water. Remove all milk residues. 4 Put the milk dispensing spout back onto the milk carafe lid. To insert it, align the dot on the spout with the indication on the lid. - Page 20 English 14 Press the button indicated with the arrow to unlock the cover of the milk dispensing spout. 15 To remove the cover, press the sides of the dispensing spout lightly and pull the cover downwards off the dispensing spout. 16 Pull the milk frothing unit upwards.
-
Page 21: Monthly Full Milk Carafe Cleaning With Milk Circuit Cleaner
21 Reassemble all parts following in reverse order. Monthly full milk carafe cleaning with milk circuit cleaner To keep the entire milk circuit clean of milk residues, use the Saeco milk circuit cleaner. Note: Before you start the procedure, make sure that the water tank is filled up to the MAX level. -
Page 22: Ordering Maintenance Products
English Ordering maintenance products - MAVEA (CA6702) - Descaling solution (CA6700) Disposal This product may contain lead and mercury. Disposal of these materials may be regulated due to environmental considerations. For disposal or recycling information, please contact your local authorities or visit www.recycle.philips.com. -
Page 23: Meaning Of Error Codes
English - Close the service door. - Remove the coffee grounds container and empty it. - There is too much powder in the brew group. Clean the brew group. - If an error code is triggered, check the section 'Meaning of error codes' to see what the code on the display means and what you can do. -
Page 24: Troubleshooting
If the above solutions do not help to remove the error code icon from the display and bring the machine back to normal working order, contact the Philips Saeco hotline. Contact details can be found in the warranty booklet or on www.saeco.com/support. - Page 25 English The brew group cannot be The brew group is not in the correct The brew group was not put in rest inserted. position. position before it was placed back. Make sure that the lever is in contact with the base of the brew group and that the hook of the brew group is in the correct position.
- Page 26 The machine is not placed on a Place the machine on a horizontal horizontal surface. surface so that the drip tray full indicator works properly. Note: If you are unable to solve the problem with the information in this table, contact the Philips/ Saeco hotline.
- Page 28 4219.460.3158.1 REV00 4219_460_3158_1_Book_Simp_A5_v2.indd 80 13/10/15 15:33...
Need help?
Do you have a question about the Intelia Deluxe HD8771/93 and is the answer not in the manual?
Questions and answers