Sign In
Upload
Download
Table of Contents
Contents
Add to my manuals
Delete from my manuals
Share
URL of this page:
HTML Link:
Bookmark this page
Add
Manual will be automatically added to "My Manuals"
Print this page
×
Bookmark added
×
Added to my manuals
Manuals
Brands
VEMAG Manuals
Industrial Equipment
HP25E
Operating instructions manual
VEMAG HP25E Operating Instructions Manual
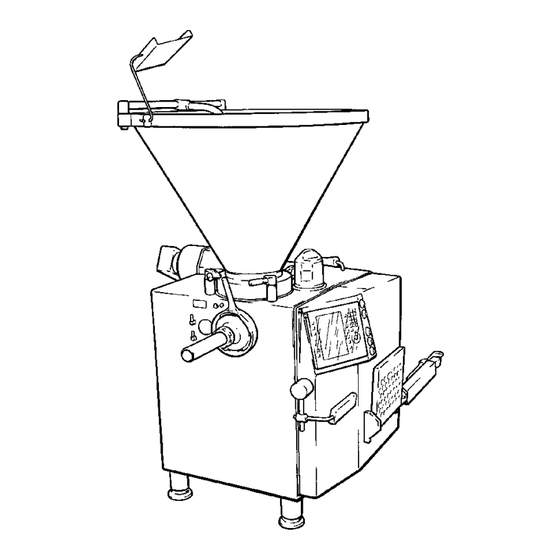
Vacuum filler
Hide thumbs
1
2
3
4
5
6
7
8
9
10
11
12
13
14
15
16
17
18
19
20
21
22
23
24
25
26
27
28
29
30
31
32
33
34
35
36
37
38
39
40
41
42
43
44
45
46
47
48
49
50
51
52
53
54
55
56
57
58
59
60
61
62
63
64
65
66
67
68
69
70
71
72
73
74
75
76
77
78
79
80
81
82
83
84
85
86
87
88
89
90
91
92
93
94
95
96
97
98
99
100
101
102
103
104
105
106
107
108
109
110
111
112
113
114
115
116
117
118
119
120
121
122
123
124
125
126
127
128
129
130
131
132
133
134
135
136
137
138
139
140
141
142
143
144
145
146
147
148
149
150
151
152
153
154
155
156
157
158
159
160
161
162
163
164
165
166
167
168
169
170
171
172
173
174
175
176
177
178
179
180
181
182
183
184
185
186
187
188
189
page
of
189
Go
/
189
Contents
Table of Contents
Troubleshooting
Bookmarks
Table of Contents
Declaration of Conformity
Safety Instructions
Sphere of Application
Use in Accordance with Purpose
Explanation of Symbols
General Safety Instructions
Special Safety Instructions
Brief Description
Installation and Commissioning
Transporting the Machine
Setting up the Machine
Electrical Connection
Checking Direction of Rotation
General Information
Setting the Vacuum
Operation
Working with the Machine
Control Panel
Basic Parameters
Supplementary Parameters
Numerical Keypad
Plus/Minus Keys
Status and Error Messages
Principles of Operation
List of Messages
General Information
Vacuum System
Cleaning the Machine
Cleaning Schedule
General Recommendations
Maintenance
General Information
Front Door
Grease Gun
Maintenance Schedule
Daily Maintenance
Weekly Maintenance
Intake (Air Filter)
Monthly Maintenance
Six-Monthly Maintenance
Annual Maintenance
Biennial Maintenance
General Information
Troubleshooting Table
Hydraulic Plan
Individual Parts
Miscellaneous Accessories
Proper Disposal
Intended Use
Maintenance
Troubleshooting
Ec Declaration of Conformity
Advertisement
Quick Links
1
Setting up the Machine
2
Maintenance
3
Troubleshooting Table
4
Individual Parts
5
Troubleshooting
Download this manual
Vacuum filler
HP25E (from 1640800)
HP30E (from 1660917)
Operating instructions
Table of
Contents
Previous
Page
Next
Page
1
2
3
4
5
Advertisement
Table of Contents
Troubleshooting
General Information
163
Troubleshooting
178
Need help?
Do you have a question about the HP25E and is the answer not in the manual?
Ask a question
Questions and answers
Subscribe to Our Youtube Channel
Related Manuals for VEMAG HP25E
Industrial Equipment VEMAG HP10E Operating Instructions Manual
Vacuum filler (168 pages)
Industrial Equipment VEMAG ROBOT HP7E Operating Instructions Manual
Vacuum filler (182 pages)
Industrial Equipment VEMAG ROBOT HP7C Operating Instructions Manual
Vacuum filler (94 pages)
Industrial Equipment VEMAG ROBOT HP10C Operating Instructions Manual
Vacuum filler (94 pages)
Industrial Equipment VEMAG ROBOT HP15C Operating Instructions Manual
Vacuum filler (94 pages)
Industrial Equipment VEMAG HP30E Operating Instructions Manual
Vacuum filler (189 pages)
This manual is also suitable for:
Hp30e
Table of Contents
Save PDF
Print
Rename the bookmark
Delete bookmark?
Delete from my manuals?
Login
Sign In
OR
Sign in with Facebook
Sign in with Google
Upload manual
Upload from disk
Upload from URL


Need help?
Do you have a question about the HP25E and is the answer not in the manual?
Questions and answers