ProJet MJP 5600 User Manual
Hide thumbs
Also See for MJP 5600:
- Quick start manual (38 pages) ,
- Start-up (20 pages) ,
- User manual (263 pages)
Table of Contents
Advertisement
Quick Links
8/11/22, 10:47 AM
User Guide
NOTE: Please refer back to http://infocenter.3dsystems.com/projetmjp5600/user-guide for the most
up-to-date User Guide
INTRODUCTION
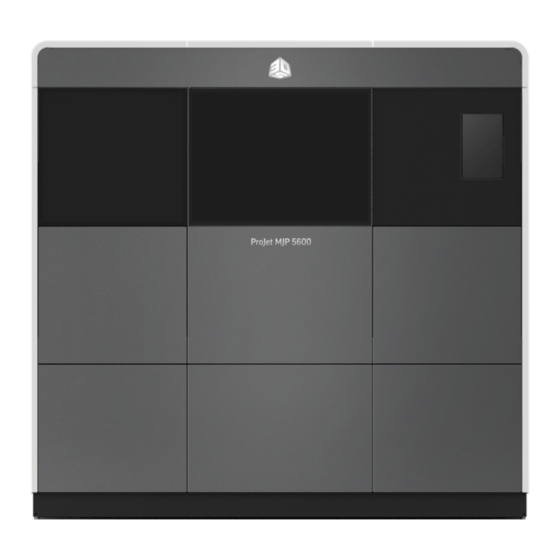
The ProJet® MJP 5600 3D printer system is a Multi-Jet Printer (MJP) printer. The solid imaging 3D printer
produces plastic prototype parts from 3D solid Computer-Aided Design (CAD) models and through the 3D
printer system client software. The parts are generated in a rapid prototype (RP) environment. The primary
features of the printer are the user interface, build chamber including the print engine, and the material
delivery module (MDM), which contains the materials and waste bag.
infocenter.3dsystems.com/projetmjp5600/print/book/export/html/706
User Guide
ProJet MJP 5600
®
User Guide
Rev E
Original Instructions
1/119
Advertisement
Table of Contents

Subscribe to Our Youtube Channel
Related Manuals for ProJet MJP 5600


Summary of Contents for ProJet MJP 5600
- Page 1 User Guide INTRODUCTION The ProJet® MJP 5600 3D printer system is a Multi-Jet Printer (MJP) printer. The solid imaging 3D printer produces plastic prototype parts from 3D solid Computer-Aided Design (CAD) models and through the 3D printer system client software. The parts are generated in a rapid prototype (RP) environment. The primary features of the printer are the user interface, build chamber including the print engine, and the material delivery module (MDM), which contains the materials and waste bag.
-
Page 2: Important Safety Information
8/11/22, 10:47 AM User Guide IMPORTANT SAFETY INFORMATION Safety Symbols and De nitions READ SYMBOL: Read the Service Manual before opening doors or removing panels. Access panels are for Service only and should be opened only by authorized service personnel or trained maintenance personnel. -
Page 3: Safety Guidelines
8/11/22, 10:47 AM User Guide Safety Guidelines Before using the 3D printer system, your company should have a safety program in place. The safety program should: Label and point out hazardous equipment, materials, and procedures. Explain what to do in case of an emergency. Provide information about hazards of equipment and materials in the form of Global Health and Safety sheets. -
Page 4: Ultraviolet (Uv) Light
8/11/22, 10:47 AM User Guide Electrical WARNING: HAZARDOUS VOLTAGE EXISTS INSIDE THE 3D PRINTER SYSTEM. INJURY OR DEATH FROM ELECTRICAL SHOCK CAN RESULT IF YOU REMOVE THE 3D PRINTER SYSTEM’S EXTERNAL PANELS. PANELS SHOULD ONLY BE REMOVED FOR SERVICE BY AUTHORIZED SERVICE PERSONNEL. TO PREVENT ELECTRICAL SHOCK, THE 3D PRINTER SYSTEM WILL NOT OPERATE UNLESS EXTERNAL PANELS ARE INSTALLED. -
Page 5: Material Handling
8/11/22, 10:47 AM User Guide Support Material, cured or uncured, is not hazardous. To nd out facility disposal requirements, contact an approved waste disposal provider. Your local environmental regulatory agency should have a list of quali ed providers. You will need to give disposal service provider a copy of the build material Global Health and Safety sheets, and possibly other forms included in the Appendix of your VisiJet Post Processing Guide,... -
Page 6: Personal Protective Equipment
8/11/22, 10:47 AM User Guide Emergency Chemtrec USA (800) 424-9300; Europe +1-703-527-3887 Packaging Inspection: VisiJet materials are supplied in bottles. These bottles are packaged with cardboard packing material inside the shipping carton. Upon receipt of material shipments, inspect cardboard carton exterior for signs of damage and leakage. -
Page 7: Ecological Information
8/11/22, 10:47 AM User Guide In case of eye contact: Irritating to eyes. Causes redness, swelling and pain. Immediately ush eyes with plenty of water for at least 15 minutes. Remove contact lenses immediately. Get medical attention if symptoms persist. In case of ingestion: Irritating to mouth, throat and stomach. -
Page 8: Waste Removal
8/11/22, 10:47 AM User Guide Advise the service provider involved of the spilled material, and provide other material information prior to contact with the material. Advise them of disposal requirements for build material and clean-up products if build material (uncured) is the spilled material. Tools contaminated with build material should be cleaned prior to reuse. - Page 9 8/11/22, 10:47 AM User Guide Always check bottle’s expiration date before loading. Do not load bottles into 3D printer system if they are about to expire. When 3D printer system detects an expired bottle, it aborts the build and rejects the bottle if the expiration date has expired for support material or more than one year past the expiration date for build material.
- Page 10 Simultaneously use Two Materials for Part Building The ProJet® MJP 5600 provides the simultaneous use of two build materials along with a support material. The 3D printer system has a total of four material delivery modules, (MDM). Each MDM holds two bottles of material.
- Page 11 VisiJet® CR-CL 200 Rigid Clear Build Material VisiJet® CR-WT 200 Rigid White ABS-like Build Material The following support materials are available for the ProJet® MJP 5600: VisiJet® S500. NOTE: For more detailed information regarding ProJet 5600 material characteristics please click here. infocenter.3dsystems.com/projetmjp5600/print/book/export/html/706...
-
Page 12: Touchscreen Control Panel
AT A GLANCE The ProJet® MJP 5600 Printer The ProJet® MJP 5600 is a multi-jet 3D printing system. The solid imaging 3D printer system produces plastic prototype parts from 3D solid Computer-Aided Design (CAD) models. File types include: .stl, .ctl, .obj, .ply, .zpr, .zbd, .amf, .wrl, .3ds, .fbx, .mjpddd, .bdz, .iges, .igs, .step, .stp and .slc, The primary components are the touchscreen, build chamber, material delivery modules (MDMs), and waste drawers. ... - Page 13 The support material is delivered in 1.75 kg. plastic bottles and the part material is delivered in 2 kg. plastic bottles. The bottles are placed in the machine’s MDM. The ProJet® MJP 5600 allows for the simultaneous use of two different part materials.
-
Page 14: Build Chamber
Build Chamber The gure below shows the ProJet® MJP 5600 with the build chamber door open. The user will access the build chamber to install a print platform before each build and to remove the completed parts at the completion of a build. The build chamber door is equipped with an interlock which prevents the user from accessing the build chamber during a build. - Page 15 3D SPRINT is a client workstation software package that is used to manipulate the .stl, .ctl, .obj etc. les that are subsequently sent to the ProJet® MJP 5600 as print jobs. Print jobs cannot be submitted locally (at the 3D printer system itself), and must be submitted through 3D SPRINT.
- Page 16 8/11/22, 10:47 AM User Guide Touchscreen Control Panel Throughout this document, the touchscreen control panel will be referred to as the “touchscreen”. The top portion of the touchscreen displays the printer name, the 3D printer system type, software version and print time remaining. Depending on the tool selected, the toolbar section of the touchscreen will display various screens in relation to the selected tool.
- Page 17 8/11/22, 10:47 AM User Guide INDICATION & NAVIGATION ICONS Warm up Select this icon when the machine is in a Standby or Conserve state. This will begin warming the machine. infocenter.3dsystems.com/projetmjp5600/print/book/export/html/706 17/119...
- Page 18 8/11/22, 10:47 AM User Guide Delete Select a print job and press this key to delete the print job from the print queue. Copy Select a print job and press this key to duplicate the print job. The duplicate will appear in the print queue. Move to Top Select a print job and press this key to move the print job to the rst position in the print queue.
- Page 19 8/11/22, 10:47 AM User Guide infocenter.3dsystems.com/projetmjp5600/print/book/export/html/706 19/119...
- Page 20 8/11/22, 10:47 AM User Guide To enter the name, press the data eld adjacent to Printer Name. The keypad is displayed. Enter the text needed and press the Enter key. To enter the IP Address, press the data eld adjacent to “IP Address”. The keypad is displayed. Press the key to enter numeric data.
- Page 21 8/11/22, 10:47 AM User Guide Systems Information - Provides printer name, printer type and software version File Name - Displays name of the current build Build Quality - Indicates the build quality for the current print Alerts - Displays the current status of the printer Progress Bar - The solid bar shows the progress of warm-up time, printing time, bottle melt time or current progress of an...
-
Page 22: Print Screen
8/11/22, 10:47 AM User Guide Chamber Light - Toggles the chamber light on and off Build Time - Indicates the start time, total print time, remaining print time and nish time of the current build Material Status - Indicates the levels of the installed material Print Screen Print Queue: When you press Prints... - Page 23 8/11/22, 10:47 AM User Guide Print Queue : Press the key to access the speci c print job. The edit keys allow you to delete, copy and change the order of the print jobs. infocenter.3dsystems.com/projetmjp5600/print/book/export/html/706 23/119...
- Page 24 8/11/22, 10:47 AM User Guide Delete Select a print job and press this key to delete the print job from the print queue. Copy Select a print job and press this key to duplicate the print job. The duplicate will appear in the print queue. Move to Top Select a print job and press this key to move the print job to the rst position in the print queue.
- Page 25 8/11/22, 10:47 AM User Guide infocenter.3dsystems.com/projetmjp5600/print/book/export/html/706 25/119...
- Page 26 8/11/22, 10:47 AM User Guide Materials Screen The material screen represents the 3D printer system’s four Material Delivery Modules, (MDM) and provides information for each material bottle position within the MDM. Touch the screen to select a particular bottle and Information for that bottle is displayed in the support material or part material message boxes.
- Page 27 8/11/22, 10:47 AM User Guide Indicates a partially full support material bottle. The larger icon indicates the active support material bottle in the upper MDM. Indicates a full support material bottle. The smaller icon indicates the inactive support material bottle in the upper MDM. Indicates there are no support material bottles present in this position.
-
Page 28: Tools Screen
8/11/22, 10:47 AM User Guide Indicates a full part material bottle. The larger icon indicates the active part material bottle in the lower MDM. Indicates there are no part material bottles present in this position. Provides speci c information about the selected part material bottle. Tools Screen This screen will provide diagnostic information about the 3D printer system. - Page 29 8/11/22, 10:47 AM User Guide Print Diagnostics: Allows you to select the Quick Test Print, Drop Mass, Tag Test, Veri cation, and Saber Angle. Printer Info: Provides information about the Control Version, Print3D Version, Machine Type, IP Address, Mac Address and Serial Number. infocenter.3dsystems.com/projetmjp5600/print/book/export/html/706 29/119...
- Page 30 8/11/22, 10:47 AM User Guide Printer Usage: Provides 3D printer system usage information in hours, minutes, and seconds. Also indicates the amount of part and build material that have been used. infocenter.3dsystems.com/projetmjp5600/print/book/export/html/706 30/119...
- Page 31 8/11/22, 10:47 AM User Guide Material Change Wizard: If a different material is needed, the Material Change Wizard purges the old material out of the 3D printer system and primes the system with newly chosen material. infocenter.3dsystems.com/projetmjp5600/print/book/export/html/706 31/119...
- Page 32 8/11/22, 10:47 AM User Guide infocenter.3dsystems.com/projetmjp5600/print/book/export/html/706 32/119...
-
Page 33: Settings Screen
8/11/22, 10:47 AM User Guide Printer Shutdown: Press on the tab to shutdown the 3D printer system. Press the tab to reboot the 3D printer system or to restart the 3D printer system software. Settings Screen The settings screen allows you to select the 3D printer system you want to use, con gure the network settings for that 3D printer system, con gure the user interface that is presented and con gure the recipients and type of alerts that will be issued. - Page 34 8/11/22, 10:47 AM User Guide Alerts: press “Alerts” to display e-mail alerts, machine e-mail and administrator e-mail. E-mail Alert: You can control e-mail alerts by sliding the “On” button to receive alerts or sliding to “Off” to stop alerts. Material Changeover Alerts: ...
- Page 35 8/11/22, 10:47 AM User Guide Network: This screen displays the network set up of the selected 3D printer system and also allows the settings to be changed. The network settings for a 3D printer system will be assigned by the customers IT department.
- Page 36 8/11/22, 10:47 AM User Guide infocenter.3dsystems.com/projetmjp5600/print/book/export/html/706 36/119...
- Page 37 8/11/22, 10:47 AM User Guide Select Machine: The user can select from the list of 3D printer systems that are presented on the touchscreen. After selecting a 3D printer system, press the button. After communication with the selected 3D printer system is established, the 3D printer system name is displayed in the Current Printer eld.
- Page 38 8/11/22, 10:47 AM User Guide infocenter.3dsystems.com/projetmjp5600/print/book/export/html/706 38/119...
-
Page 39: Printer Setup
8/11/22, 10:47 AM User Guide PRINTER SETUP The purpose of this section is to execute the following: Power the 3D printer system on. Load support and build material cartridges into the material delivery modules. Install a print platform. Perform a successful Quick Test Print. Remove the nished parts from the 3D printer system. - Page 40 8/11/22, 10:47 AM User Guide Support material is loaded into both MDMs located on the left side of the machine, for a total of four bottles. All bottles of support material must be the same type. Build material is loaded into the MDMs located on the right side of the 3D printer system. The upper MDM is designated MDM “A”...
- Page 41 8/11/22, 10:47 AM User Guide 2. Press and release the upper left material delivery module to open it. Install two bottles of support material into the MDM. Press on the top of the material bottle until you hear a click to make certain the bottles are fully seated.
-
Page 42: Install Print Platform
8/11/22, 10:47 AM User Guide Install Print Platform 1. Clean the platform (both front and back), using 91% isopropyl alcohol before installing the platform into the 3D printer system. Also, ensure that the platform plate mount is clean of materials residue from previous build. 2. - Page 43 8/11/22, 10:47 AM User Guide 5. Slide the platform toward the rear of the 3D printer system until it is rmly pressed against the rear brackets. Press down on the platform at the points indicated to make certain the platform is “seated” onto the Z- carriage. ...
- Page 44 8/11/22, 10:47 AM User Guide 3. Press Quick Test Print. infocenter.3dsystems.com/projetmjp5600/print/book/export/html/706 44/119...
- Page 45 8/11/22, 10:47 AM User Guide 4. Select Upper or Lower for a single material Quick Test Print. 5. Select Multi for a multi-material Quick Test Print. infocenter.3dsystems.com/projetmjp5600/print/book/export/html/706 45/119...
- Page 46 8/11/22, 10:47 AM User Guide . Select the mode for the Quick Test Print. 7. For a single material Quick Test Print, the available modes are only. . For a multi-material Quick Test Print, the available modes are UHD only. infocenter.3dsystems.com/projetmjp5600/print/book/export/html/706 46/119...
- Page 47 8/11/22, 10:47 AM User Guide 9. The system displays Purge and continue? Y?N. Select Yes. This will home X and Y and perform a printhead cleaning. infocenter.3dsystems.com/projetmjp5600/print/book/export/html/706 47/119...
- Page 48 8/11/22, 10:47 AM User Guide 10. The system displays PLATFORM EMPTY & DOOR CLOSED? Y/N. infocenter.3dsystems.com/projetmjp5600/print/book/export/html/706 48/119...
- Page 49 8/11/22, 10:47 AM User Guide 11. Make certain the platform is empty, the door is closed and press YES. 12. The 3D printer system starts the Quick Test Print. 13. The Quick Test Print will take approximately 2-3 minutes. 14. Remove Print from machine and con rm a test print was performed. infocenter.3dsystems.com/projetmjp5600/print/book/export/html/706 49/119...
- Page 50 8/11/22, 10:47 AM User Guide Remove Print Platform When the touchscreen shows DONE: <job_name>, you can remove the print platform. 1. Open the chamber door. 2. To remove the platform, Pull the platform forward until you feel it contact the stops. 3.
- Page 51 8/11/22, 10:47 AM User Guide Remove Part from Print platform To remove your part from the print platform: Place the platform in a freezer for ten to fteen minutes. As the parts and platform cool, they contract at different rates and separate. Alternatively, the parts can be mechanically separated from the print platform by force using a tool with a stiff thin blade such as a putty knife.
- Page 52 8/11/22, 10:47 AM User Guide Standby and Conserve Mode NOTE: If the 3D printer system is to be used within 7 to 10 days of the last build, it is recommended to leave your 3D printer system in either standby or conserve mode, instead of powering off the 3D printer system.
- Page 53 8/11/22, 10:47 AM User Guide 3D printer system Shutdown and Power Off NOTE: Before shutdown and power off, verify that there is no need to build parts again soon. CAUTION: Switching off or disconnecting the 3D printer system power without performing the following ...
-
Page 54: Shrink Compensation For Projet Visijet Materials
Shrink Compensation Shrink Compensation for ProJet VisiJet Materials ® ® Material shrinkage occurs in thermosets as they transition from liquid state to solid state during the curing process. - Page 55 ProJet® MJP 5600 Default Shrink Compensation Values for all materials (as of 20171101) are as follows. New default values MAY be rolled out without software update noti cation.
- Page 56 8/11/22, 10:47 AM User Guide X measurement of CAD model = 3.000" Y measurement of CAD model = 5.000" X measurement of printed part = 2.998" Y measurement of printed part = 4.989" X Scaling Factor = (3.000 - 2.998) / 2.998 x 100 = 0.067% Y Scaling Factor = (5.00 - 4.989) / 4.989 x 100 = 0.22% infocenter.3dsystems.com/projetmjp5600/print/book/export/html/706 56/119...
-
Page 57: Touchpad Operation
8/11/22, 10:47 AM User Guide TOUCHPAD OPERATION Pause A Job Pause a Print job To pause an active print job, press the Pause key. infocenter.3dsystems.com/projetmjp5600/print/book/export/html/706 57/119... - Page 58 8/11/22, 10:47 AM User Guide A message will display PAUSE JOB? Y/N. Select Yes. The message bar will display PAUSE ACKNOWLEDGED until the 3D printer system has completed printing the current layer. infocenter.3dsystems.com/projetmjp5600/print/book/export/html/706 58/119...
- Page 59 8/11/22, 10:47 AM User Guide After the current layer is complete, the message bar will display PRINT PAUSED. The message bar will also display AUTO RESUME: 05:00, indicating that the 3D printer system will automatically resume printing in ve minutes. infocenter.3dsystems.com/projetmjp5600/print/book/export/html/706 59/119...
- Page 60 8/11/22, 10:47 AM User Guide The user may also manually resume the print job by pressing the Start key. infocenter.3dsystems.com/projetmjp5600/print/book/export/html/706 60/119...
- Page 61 8/11/22, 10:47 AM User Guide Abort A Job Abort a Print job 1. To abort an active print job, press the Abort key. 2. Press to the message, ABORT JOB? Y/N. infocenter.3dsystems.com/projetmjp5600/print/book/export/html/706 61/119...
- Page 62 8/11/22, 10:47 AM User Guide 3. The message bar will display ABORT ACKNOWLEDGE. infocenter.3dsystems.com/projetmjp5600/print/book/export/html/706 62/119...
- Page 63 8/11/22, 10:47 AM User Guide 4. Select to continue. infocenter.3dsystems.com/projetmjp5600/print/book/export/html/706 63/119...
- Page 64 8/11/22, 10:47 AM User Guide 5. The message bar will display FINISHING PRINT. infocenter.3dsystems.com/projetmjp5600/print/book/export/html/706 64/119...
- Page 65 8/11/22, 10:47 AM User Guide . The 3D printer system will continue multiple curing cycles so the user will not be exposed to uncured material when removing the print. The 3D printer system will continue to display FINISHING PRINT during the curing cycles.
-
Page 66: Copy A Job
8/11/22, 10:47 AM User Guide . Press to the REMOVE PRINT message. Open the build chamber and remove the print job from the build chamber. Copy A Job Copy a Print job Select Prints icon, then select the key for the job you want to copy. 2. - Page 67 8/11/22, 10:47 AM User Guide 3. Print job you selected is displayed. infocenter.3dsystems.com/projetmjp5600/print/book/export/html/706 67/119...
- Page 68 8/11/22, 10:47 AM User Guide 4. Press the copy icon. 5. Press to the displayed message, Copy selected job? infocenter.3dsystems.com/projetmjp5600/print/book/export/html/706 68/119...
- Page 69 8/11/22, 10:47 AM User Guide . The print job is placed at the end of the print queue. infocenter.3dsystems.com/projetmjp5600/print/book/export/html/706 69/119...
- Page 70 8/11/22, 10:47 AM User Guide If you need to position the copied print job to a different position in the print queue: 7. Press key for the job you would like to reposition in the print queue. . Use the arrow keys to move the print job to a different position in the print queue.
-
Page 71: Delete A Job
8/11/22, 10:47 AM User Guide Delete A Job Delete a Print Job 1. Select the Prints icon from the tool bar. 2. The Print Queue screen is displayed. 3. On the Print Queue screen press key for the job you wish to delete. infocenter.3dsystems.com/projetmjp5600/print/book/export/html/706 71/119... - Page 72 8/11/22, 10:47 AM User Guide 5. Press the delete icon. infocenter.3dsystems.com/projetmjp5600/print/book/export/html/706 72/119...
- Page 73 8/11/22, 10:47 AM User Guide 7. Press to the displayed message, Delete job: ? infocenter.3dsystems.com/projetmjp5600/print/book/export/html/706 73/119...
- Page 74 8/11/22, 10:47 AM User Guide . The print job is deleted from the print queue. infocenter.3dsystems.com/projetmjp5600/print/book/export/html/706 74/119...
- Page 75 8/11/22, 10:47 AM User Guide infocenter.3dsystems.com/projetmjp5600/print/book/export/html/706 75/119...
-
Page 76: Maintenance
8/11/22, 10:47 AM User Guide MAINTENANCE MCO - Material Changeover Procedure Material Change (Material Changeout Wizard) Before Beginning this Procedure Check the Software Version. The printer must be running software version xxxxxxxx or later. Install new software if needed. Pre-Existing Service Issues. If the printer has any pre-existing service issues, do not attempt to perform this procedure. - Page 77 8/11/22, 10:47 AM User Guide Check the Message Bar on the user interface. If the message displayed is STANDBY NOT PRINTING or CONSERVE NOT PRINTING, the printer will need time to warm up before beginning this procedure. The amount of warm up time for each mode is: Standby ...
- Page 78 8/11/22, 10:47 AM User Guide If you see either of the adjacent messages (outlined in red), proceed as follows: 1. Press the Start key. 2. Cancel any prompts that appear. 3. Wait the time speci ed above for the printer to warm up. When the Message Bar displays READY TO PRINT, you may proceed to the next page to begin the material...
- Page 79 8/11/22, 10:47 AM User Guide 3. On the touchscreen, select Tools -> Material Change Wizard. 4. Press the grey Start key to start the material change process. infocenter.3dsystems.com/projetmjp5600/print/book/export/html/706 79/119...
- Page 80 8/11/22, 10:47 AM User Guide 5. You will be prompted with the adjacent dialog box "Commence Material Change?". . Select to continue. Pressing will terminate the material change process. infocenter.3dsystems.com/projetmjp5600/print/book/export/html/706 80/119...
- Page 81 8/11/22, 10:47 AM User Guide 7. The system will allow you to select the Upper Lower MDM. For this example we will select the lower MDM. infocenter.3dsystems.com/projetmjp5600/print/book/export/html/706 81/119...
- Page 82 8/11/22, 10:47 AM User Guide . You will be prompted with the adjacent dialog box. 9. Select to continue. Pressing will terminate the material change process. infocenter.3dsystems.com/projetmjp5600/print/book/export/html/706 82/119...
- Page 83 8/11/22, 10:47 AM User Guide 10. Open the lower MDM. 11. Remove both material cartridges from the lower MDM. 12. Close the lower MDM. 13. Select to continue. Pressing will terminate the material change process. infocenter.3dsystems.com/projetmjp5600/print/book/export/html/706 83/119...
- Page 84 8/11/22, 10:47 AM User Guide 14. Make certain the HMS waste bag is empty. 15. Make certain the platform is empty. 1 . Select to continue. Pressing will terminate the material change process. infocenter.3dsystems.com/projetmjp5600/print/book/export/html/706 84/119...
- Page 85 8/11/22, 10:47 AM User Guide 17. Make certain the waste reservoir bag (right waste bag), is empty. 1 . Machine will now home X,Y & Z. 19. The printhead will move over the station. 20. The system will begin pumping the existing material out of the and the printhead.
- Page 86 8/11/22, 10:47 AM User Guide 21. This process of pumping out the existing material will take approximately 20-30 minutes. 22. The status of the process is indicated by the changing progress bars. 24. When the adjacent dialog box is displayed, open the lower MDM.
- Page 87 8/11/22, 10:47 AM User Guide WARNING: THE MDM HOLDER AND MOLTEN MATERIAL WILL BE HOT; AVOID TOUCHING THE SIDES OF THE HOLDER DURING THE CLEANING PROCESS. WEAR PROTECTIVE HEAT RESISTANT GLOVES, PROTECTIVE SLEEVES AND GOGGLES. DISPOSE OF THE MATERIAL ACCORDING TO ALL LOCAL, STATE AND FEDERAL REGULATORY GUIDELINES.
- Page 88 8/11/22, 10:47 AM User Guide This dialog box is displayed when the MCO Cleaner 5600 is being installed into the MDM. infocenter.3dsystems.com/projetmjp5600/print/book/export/html/706 88/119...
- Page 89 8/11/22, 10:47 AM User Guide 30. Once the machine has successfully installed the cleaners, the machine will automatically begin to ush MCO Cleaner through the MDM and Printhead. Note: If bottles are cold, warm up could take as long as 30 minutes. ...
- Page 90 8/11/22, 10:47 AM User Guide 34. When the machine has completed the cleaning process, the following prompt will appear. 35. Select to continue. Pressing will terminate the material change process. 3 . Remove both of the MCO Cleaners cartridges from the MDM. Close the lower drawer.
- Page 91 8/11/22, 10:47 AM User Guide 3 . The system will pump the remaining cleaner out of the system and into the HMS waste bag. 37. This may take up to 10 to 15 minutes, please wait. infocenter.3dsystems.com/projetmjp5600/print/book/export/html/706 91/119...
- Page 92 8/11/22, 10:47 AM User Guide 37. When you are prompted by this screen, open lower MDM. infocenter.3dsystems.com/projetmjp5600/print/book/export/html/706 92/119...
- Page 93 8/11/22, 10:47 AM User Guide 3 . Use a lint free cloth to wipe out the MDM holders to remove any residual cleaner material. Make certain you use a lint free cloth to avoid manifold contamination. WARNING: THE MDM HOLDER AND MOLTEN MATERIAL WILL BE HOT; AVOID TOUCHING THE SIDES OF THE HOLDER DURING THE CLEANING PROCESS.
- Page 94 8/11/22, 10:47 AM User Guide 4 . This screen is displayed when the changeover process is on the last cycle of completion. infocenter.3dsystems.com/projetmjp5600/print/book/export/html/706 94/119...
- Page 95 8/11/22, 10:47 AM User Guide 4 . This screen is displayed when the changeover process is completed. 49. Select OK. infocenter.3dsystems.com/projetmjp5600/print/book/export/html/706 95/119...
-
Page 96: Changing The Carbon Filter
8/11/22, 10:47 AM User Guide Changing the Carbon Filter Changing the Carbon Filter The carbon lter will need to be replaced every 90 days to ensure the 3D printer system will perform at it’s optimal level. The part number for the carbon lter is 318587-00. WARNING: YOU MUST WEAR NITRILE GLOVES AND PROTECTIVE SLEEVES WHEN PERFORMING THIS PROCEDURE. - Page 97 8/11/22, 10:47 AM User Guide 4. Pull open the cover panel located below the chamber door. 5. Use a at bit screwdriver to loosen the screws on the bracket and remove bracket. infocenter.3dsystems.com/projetmjp5600/print/book/export/html/706 97/119...
- Page 98 8/11/22, 10:47 AM User Guide Remove carbon lter. Install carbon lter. Install bracket to secure lter and tighten screws. 9. Replace the cover panel. Close the build chamber door. Cleaning MDM Holders Cleaning MDM Holders When changing material bottles during printing, molten material may be present in the MDM holder after the...
-
Page 99: Surface Cleaning
8/11/22, 10:47 AM User Guide Dispose waste material and all used clothes according to your local codes. Surface Cleaning Cleaning 3D printer system Surfaces NOTE: Do not remove any outer panels when cleaning the 3D printer system. Panels must only be removed by quali ed 3D Systems Technical Support Representatives. ... - Page 100 8/11/22, 10:47 AM User Guide Replace the plastic waste for each drawer. . Gently scrape material stuck onto interior surface waste drawer bin. Use a exible plastic scraper avoid damaging the paint. Vacuum inside waste drawer to remove scraping. Wipe inside surfaces of waste drawer using a clean cloth.
-
Page 101: Status And Error Messages
3 or less. NOT BUILDING The 3D printer is ready to build Press Start to build ProJet [X.X] When 3D printer system is initially powered-up the latest version of NONE month dd yyyy rmware is brie y displayed. TIME XX:XX:XX Material Messages Use the following messages to help manage print jobs before, during, and after building. - Page 102 8/11/22, 10:47 AM User Guide Messages appear either on the Status line or the Message line. Read both lines together to determine the exact state of the 3D printer system. The Status line generally indicates current state of the 3D printer system.
- Page 103 8/11/22, 10:47 AM User Guide HOMING X - Y The 3D printer system is NONE initializing the X-axis and Y-axis prior to building. INSTALL The 3D printer system does not Install a clean platform. PLATFORM detect a platform. NOT BUILDING The 3D printer system is ready Press Start...
- Page 104 8/11/22, 10:47 AM User Guide SHUTDOWN 3D printer system cool down is Wait for OK TO POWER OFF message, then COMPLETE complete; 3D printer system is switch power off at the 3D printer system’s ready for power off. rear panel. NOTE: Before you switch power off, verify you will not need to build parts again soon.
- Page 105 8/11/22, 10:47 AM User Guide UI PROMPTS Material infocenter.3dsystems.com/projetmjp5600/print/book/export/html/706 105/119...
-
Page 106: Troubleshooting
Cycle power to the 3D printer system. If this does not restore communication, evm6x_hpi_open() communication contact your Certi ed 3D Systems Service Provider. error occurred. ProJet [X.X] month Cycle power to the 3D printer system. If this does not restore communication, dd yyyy communication contact your Certi ed 3D Systems Service Provider. -
Page 107: Thermal Shutdown
8/11/22, 10:47 AM User Guide THERMAL SHUTDOWN MESSAGE CAUSE ACTION RT_ERROR:******* Out of The temperature of a heater exceeded Press “Yes” to restart. Range the set range of temperatures. The If the error message For example: system issues a Real Time (RT)error, occurs again, do not RT_ERROR: Adapter Temp shuts off all heaters and stops the build. - Page 108 8/11/22, 10:47 AM User Guide Support (or A material bottle was inserted into the wrong feed The build will abort if it needs build) slot to use the questionable bottle material to nish the build. bottle Follow discard instructions incorrect type posted to touchscreen.
- Page 109 8/11/22, 10:47 AM User Guide MESSAGE CAUSE ACTON RT_ERROR: Cycle power to the 3D printer system. If error message occurs again, UV Lamp sensor contact your Certi ed 3D Systems Service Provider. Power Too detected CAUTION: To prevent skin exposure to uncured part material, possible do not handle parts in a build without wearing gloves and full fault.
- Page 110 8/11/22, 10:47 AM User Guide NOTE: If the 3D printer system is in Power Off Recovery, the build chamber will not be able to open until 3D printer system completes recovery. infocenter.3dsystems.com/projetmjp5600/print/book/export/html/706 110/119...
- Page 111 8/11/22, 10:47 AM User Guide FINISHING When the build is complete, refer to the Post Processing Guide for information on how to detach parts from print platform, remove support material from parts and clean parts. infocenter.3dsystems.com/projetmjp5600/print/book/export/html/706 111/119...
-
Page 112: Customer Support Hotline
Customer Support Hotline. Before you call Customer Support with a problem or question, please make sure that you have the following information: The serial number of your ProJet® 5600 is printed on a label inside the lter door or by accessing the UI and selecting Tools >... -
Page 113: Legal Notices
3D Systems, Inc. No copies of the document may be sold or given to any person or other entity. ProJet, VisiJet, Geomagic, 3D Systems and the 3D Systems logo are registered trademarks of 3D Systems, Inc. -
Page 114: Limitations Of Warranty And Liability
8/11/22, 10:47 AM User Guide LIMITATIONS OF WARRANTY AND LIABILITY This information is provided by 3D Systems for the convenience of its customers. It is believed to be reliable, but NO REPRESENTATIONS, GUARANTEES, OR WARRANTIES OF ANY KIND ARE MADE AS TO ITS ACCURACY, FITNESS FOR A PARTICULAR USE, OR THE RESULTS TO BE OBTAINED THEREFROM. -
Page 115: Basic Regulations
8/11/22, 10:47 AM User Guide BASIC REGULATIONS 3D Systems has tested this printer to electromagnetic emission and immunity standards. These standards are designed to mitigate interference caused or received by this printer in a typical o ce environment. United States This equipment has been tested and found to comply with the limits for a Class A digital device, pursuant to Part 15 of the FCC Rules. - Page 116 8/11/22, 10:47 AM User Guide GLOSSARY Build Material - is a paste-like acrylic compound that is an ultraviolet (UV) curable material. Print platform - metal surface used on which the 3D printer system builds parts. Support structures link the parts to the print platform and must be removed from the 3D printer system once complete. Chamber Door - the chamber door prevents harmful UV radiation from escaping the build chamber during the build process.
-
Page 117: Frequently Asked Questions (Faq)
The parts nisher makes removing bulk support material from VisiJet parts e cient and easy. Forced air ow and precision temperature control deliver faster, shorter, and more predictable VisiJet part nishing times. See the ProJet MJP 5600 Part Post Processing . infocenter.3dsystems.com/projetmjp5600/print/book/export/html/706... - Page 118 Are there any special facility requirements or operating systems necessary to install and operate the 3D printer system? Refer to the ProJet MJP 5600 Facility Requirements Guide . Can more than one user process les and build parts? Multiple users can send les to the 3D printer system build queue, move, delete, and set build priorities in the build queue.
-
Page 119: Ec Declaration Of Conformity
8/11/22, 10:47 AM User Guide EC DECLARATION OF CONFORMITY infocenter.3dsystems.com/projetmjp5600/print/book/export/html/706 119/119...
Need help?
Do you have a question about the MJP 5600 and is the answer not in the manual?
Questions and answers