
Related Manuals for USX-MOUNT XTL008


Summary of Contents for USX-MOUNT XTL008
- Page 1 XTL008 INSTRUCTION MANUAL For 37-70" TV If you have any questions along the way, just give us a call 1-800-460-0956 or message to us. We’re ready to help! USA-B0...
- Page 2 CAUTION: PLEASE READ ENTIRE MANUAL PRIOR TO USE AND SAVE THESE INSTRUCTIONS Before getting started, let’s check below lists to make sure it is just right for you! MAX:600mm/23.62" (MIN:200mm/7.87") Check your TV VESA is within No? This mount is NOT compatible. Min and Max size MAX:400mm/15.75"...
-
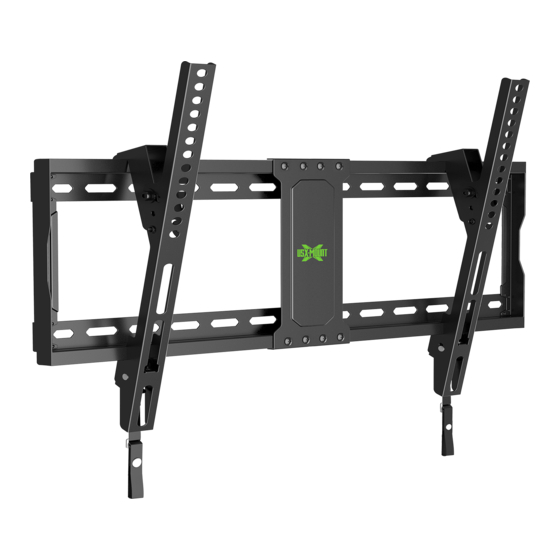
Page 3: Wall Plate
Dimensions TV INTERFACE WALL PLATE MAX:600mm/23.62" 609.6mm/24" 457.2mm/18" 406.4mm/16" 304.8mm/12" 203.2mm/8" MAX:400mm/15.75" 420mm/16.54" MIN:100mm/3.94" 158mm/6.22" 222mm/8.74" 650.5mm/25.61" SIDE VIEW SIDE VIEW 38mm/1.50" 0°~ -8°... -
Page 4: Parts And Hardware
Parts and Hardware WARNING: This product contains small items that could be a choking hazard if swallowed. Before starting assembly, verify all parts are included and undamaged. If any parts are missing or damaged, do not return the damaged item to your dealer; contact Customer Service. - Page 5 Parts and Hardware for STEP 2 Wall plate(Left) Wall plate(Right) Lag Bolt M8x60mm Allen Key M5x8mm Bolt Concrete wall anchor (NOT INCLUDED) Contact us at telephone 1-800-460-0956 (USA) or message to us to have these additional pieces shipped directly to you. Concrete Wall Anchor 4pcs 609.6mm(24")
- Page 6 Assemble Wall plate STEP 3 Wall plate unit...
-
Page 7: Step 1 Attach Brackets To Tv
STEP 1 Attach Brackets to TV 1-1 Select TV Screws... - Page 8 1-2 Figure out the suitable position of brackets HIGH MOUNTING HOLES LOW MOUNTING HOLES TV BRACKETS MUST BE LEVEL INSTALL UP/DOWN IF NEEDED...
- Page 9 1-4 Attach the TV Plate 1-3 Need Spacer? No, choose suitable screws and washers. Yes, choose suitable screws, washers and spacers. Tips: If you need to combine M6/M8(c/e/f) screws with 2.5mm spacers( i ), you have to remove the inner circle.
- Page 10 STEP 2A Attach Wall Plate to Wall Wood Stud Option CAUTION: Avoid potential personal injury or property damage! ● Drywall covering the wall, must not exceed 5/8 in. (16 mm) ● Minimum wood stud size: common 2 x 4 in. (51 x 102 mm) nominal 1½ x 3½ in. (38 x 89 mm) ●...
- Page 11 3. Drill pilot holes using a 7/32 in. (5.5 mm) diameter drill bit. IMPORTANT: Pilot holes must be drilled to a depth of 2.5 in. (64 mm). Be sure to drill into the center of the studs. 4. Install wall plate using lag bolts .
- Page 12 STEP 2B Attach Wall Plate to Solid Concrete Wall CAUTION: Avoid potential personal injury or property damage! ● Mount the wall plate assembly unit directly onto the concrete surface ● Minimum solid concrete thickness: 8 in. (203 mm) 1. Position the mounting template on the wall at your desired height. Level the mounting template and mark the hole locations.
- Page 13 3. Insert anchors. CAUTION: Be sure the anchors are seated flush with the concrete surface. 4. Insert wall plate using lag bolts . Tighten the lag bolts only until they are pulled firmly against the wall plate. CAUTION: Improper use could reduce the holding power of the lag bolt. DO NOT over-tighten the lag bolts.
- Page 14 STEP 3 Hang and Secure TV to Wall Plate Before hanging TV, please conduct "wall plate installation integrity test" first.
- Page 15 STEP 4 Hang and Secure TV to Wall Plate TV Brackets Pull down...
- Page 16 STEP 5 Adjustments Tilting angle adjustment (0°/-8°) : Pull TV to your desired angle then fasten 2 tilting bolts with Allen key Tighten Loosen 0° -8°...
- Page 17 STEP 6 Take Down the TV from the Mount Pull down the straps...
Need help?
Do you have a question about the XTL008 and is the answer not in the manual?
Questions and answers