Table of Contents
Advertisement
Quick Links
Advertisement
Table of Contents

Related Manuals for KERN OZL-9


Summary of Contents for KERN OZL-9
- Page 1 KERN & Sohn GmbH Ziegelei 1 Tel: +49-[0]7433- 9933-0 D-72336 Balingen Fax: +49-[0]7433-9933-149 E-mail: info@kern-sohn.com Internet: www.kern-sohn.com User instructions Stereo microscope set KERN OZL-9 OZL 961, OZL 963 Version 1.1 12/2020 OZL-9-BA-e-2011...
-
Page 3: Table Of Contents
KERN OZL-9 Version 1.1 12/2020 User instructions Stereo microscope set Table of contents Before use ..................3 General notes ..........................3 Notes on the electrical system ....................3 Storage ............................4 Maintenance and cleaning ....................... 5 Nomenclature ................6 Basic data ..................8 Assembly .................. -
Page 4: Before Use
If you are using an extension cable, then the mains cable you use must be earthed. When carrying out any procedures whereby you come into contact with the electrical system of the device, such as, for example, changing the bulb or fuse, only carry out these procedures when the power is disconnected. OZL-9-BA-e-2011... -
Page 5: Storage
In most cases, if dust and dirt gets inside the optical unit of a microscope this can cause irreversible errors or damage. The best way to store accessories which consist of optical elements, such as, for example, eyepieces and objectives, is in a dry box with desiccant. OZL-9-BA-e-2011... -
Page 6: Maintenance And Cleaning
Special cleaner for optical lenses Special optical cleaning cloths Bellows Brush When handled correctly and checked regularly, the microscope should give many years of efficient service. Should repairs still be necessary, please contact your KERN dealer or our Technical Department. OZL-9-BA-e-2011... -
Page 7: Nomenclature
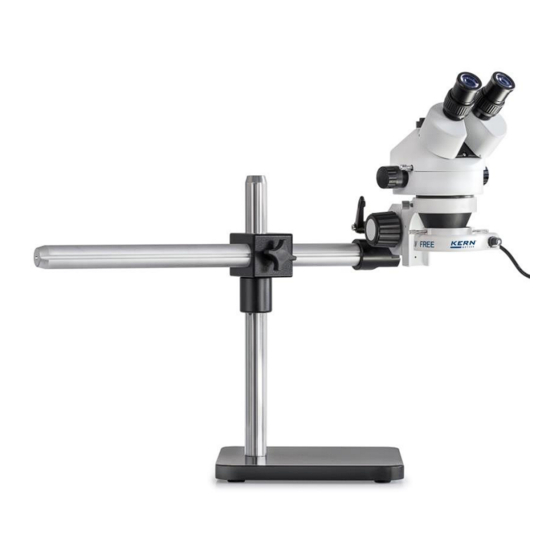
2 Nomenclature Using the OZL 963 as an example (Trinocular) OZL-9-BA-e-2011... - Page 8 OZL-9-BA-e-2011...
-
Page 9: Basic Data
Optical system Greenough Dimmable lighting Magnification ratio 6,4:1 Tube angled at 45° 55 – 75 mm Interpupillary distance Dioptre adjustment On both sides Eyepiece HWF 10x / Ø 20mm Ø 28,6 – 4,4 Field of view (mm) Standard configuration OZL-9-BA-e-2011... -
Page 10: Assembly
When doing this, please be particularly careful that you do not touch the optical lenses with your fingers and that no dust enters the apertures. You should also never fit two eyepieces with different magnifications. OZL-9-BA-e-2011... - Page 11 You can fit a C-mount adapter to the appropriate connection point on the top of the microscope head for trinocular devices (OZL 963). This enables you to fit and use digital cameras (remove protective cap first) (see section 5.8). OZL-9-BA-e-2011...
-
Page 12: Operation And Functionality
As soon as the lefthand and righthand visual fields exactly overlap each other, this is the correct interpupillary distance. 5.3 Adjusting the magnification As the KERN OZL-9 series are stereo zoom microscopes, then you adjust the magnification using the two zoom adjustment wheels on the lefthand and righthand side of the microscope head. -
Page 13: Dioptre Adjustment And Focussing
11. Then look through the left eyepiece with the left eye and use the lefthand dioptre adjustment ring to also adjust the optimum focus of the object. 12. In this way, the object being observed will be in focus at any zoom setting. OZL-9-BA-e-2011... -
Page 14: Adjusting The Stand
In order to effect an inclined position of the microscope head, you need to vary the alignment of the joint between microscope arm end and microscope holder connecting piece and fasten it with help of the clamp lever. OZL-9-BA-e-2011... -
Page 15: Using Eye Cups / High Eye Point Eyepieces
In order to maintain hygiene, we would therefore recommend that you clean the eye cups regularly (e.g. with a damp cloth). Eye cups High Eye Point eyepiece (identified by the glasses symbol) OZL-9-BA-e-2011... -
Page 16: Brightness Adjustment
5.7 Brightness adjustment There is only the usage of incident illumination available when working with KERN stereo microscope sets. Therefor a LED ring light (see picture below) is required, that can be mounted to the bottom of the microscope head (see chapter 4 Assembly). -
Page 17: Fitting And Adjusting A Camera
The image which is shown on the camera connected to the device can often have a different level of focus compared with the image on the eyepiece. In order to be able to bring both images into focus, the focus can be adjusted by those adapters when turning the attached black plastic ring. OZL-9-BA-e-2011... -
Page 18: Using Additional Accessories
You can fit these objectives by simply screwing them onto the thread of the objective housing which is located at the bottom of the microscope head. When you are doing this, you must avoid touching the objective lenses with your fingers or leaving any dust between the standard objective and the auxiliary objective. OZL-9-BA-e-2011... -
Page 19: Optical Data
The torque of the focus wheels is set too high The microscope head slips down The torque of the focus wheels is set too low while you are viewing the object Eyes get tired easily The dioptre adjustment is not correct The brightness adjustment is not correct OZL-9-BA-e-2011... -
Page 20: Service
The device may only be opened by trained service engineers who have been authorised by KERN. 9 Disposal The packaging is made of environmentally-friendly materials, which you can dispose of at your local recycling centre. - Page 21 Notes OZL-9-BA-e-2011...
Need help?
Do you have a question about the OZL-9 and is the answer not in the manual?
Questions and answers