
Related Manuals for Electrolux GF9


Summary of Contents for Electrolux GF9
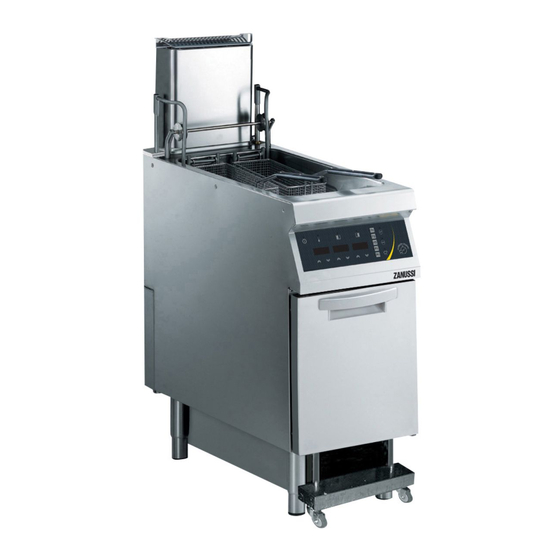
- Page 1 Electronic Fryers GF9 / EF9 Installation and operating manual * 59589FA02- 2020.04 *Original instructions...
- Page 2 Foreword The installation, use and maintenance manual (hereinafter Manual) provides the user with information necessary for correct and safe use of the machine (or “appliance“). The following must not be considered a long and exacting list of warnings, but rather a set of instructions suitable for improving machine performance in every respect and, above all, preventing injury to persons and animals and damage to property due to im- proper operating procedures.
-
Page 3: Table Of Contents
Contents A WARNING AND SAFETY INFORMATION....................5 General information ........................5 Personal protection equipment ......................6 General safety ..........................6 General safety rules ........................7 Safety signs to be placed near the machine area ................. 8 Transport, handling and storage ...................... 9 Installation and assembly ....................... - Page 4 Manual cooking mode ......................... 23 G.5.1 Heating ........................... 23 G.5.2 Temperature setting......................23 G.5.3 Cooking time setting ......................23 Gas models..........................23 G.6.1 Ignition..........................23 G.6.2 Switching off ........................24 Interlock ........................... 24 Melting ............................. 24 G.8.1 Programming (all versions)....................24 G.8.2 Programming block ......................
-
Page 5: Awarning And Safety Information
WARNING AND SAFETY INFORMATION General information To ensure safe use of the machine and a proper understanding of the manual it is necessary to be familiar with the terms and typographical conventions used in the documentation. The following symbols are used in the manual to indicate and identify the various types of hazards: WARNING Danger for the health and safety of operators. -
Page 6: Personal Protection Equipment
Personal protection equipment Summary table of the Personal Protection Equipment (PPE) to be used during the various stages of the machine's service life. Stage Protective Safety Gloves Glasses Safety garments footwear helmet — ● ○ — ○ Transport — ● ○... -
Page 7: General Safety Rules
• Air recirculation must take into account the air necessary for combustion, 2 m³/h/kW of gas power, and also the “well-being“ of persons working in the kitchen. • Inadequate ventilation causes asphyxia. Do not obstruct the ventilation system in the place where this appliance is installed. -
Page 8: Safety Signs To Be Placed Near The Machine Area
Residual risks • The machine has several risks that were not completely eliminated from a design standpoint or with the installation of adequate protection devices. Nevertheless, through this manual the Manufacturer has taken steps to inform operators of such risks, carefully indicating the personal protection equipment to be used by them. -
Page 9: Transport, Handling And Storage
Prohibition Meaning Keep the area around the appliance clear and free from combustible materials. Do not keep flammable materials in the vicinity of the appliance Install the appliance in a well-ventilated place to avoid the creation of dangerous mixtures of unburnt gases in the same room Danger Meaning... -
Page 10: Electrical Connection
Electrical connection Before connecting, make sure the mains voltage and frequency match those indicated on the appliance data plate. • Work on the electrical systems must only be carried out by specialised personnel. • Connection to the power supply must be carried out in compliance with the regulations and provisions in force in the country of use;... -
Page 11: Reasonably Foreseeable Improper Use
– should this happen, remove the traces of glue with a non-corrosive solvent, rinsing it off and drying thoroughly; – go over all stainless steel surfaces vigorously with a cloth moistened with paraffin oil in order to create a protective film. •... -
Page 12: Machine Disposal
Preventive maintenance • In order to ensure the safety and performance of your equipment, it is recommended that service is undertaken by Electrolux authorised engineers every 12 months, in accordance with Electrolux Service Manuals. Please contact your local Electrolux Service Centre for further details. - Page 13 Warranty does not include scheduled maintenance activities (including the parts required for it) or the supply of cleaning agents unless specifically covered within any local agreement, subject to local terms and conditions. Check on Electrolux Professional website the list of authorized customer care.
-
Page 14: Ctechnical Data
TECHNICAL DATA Dataplate position IMPORTANT This instruction manual contains information relevant to various appliances. See the dataplate located under the control panel to identify the appliance (see fig. below). IMPORTANT When installing the appliance, make sure the electrical connection is carried out in compliance with that specified on the data plate. -
Page 15: Technical Data
Pmbar Electrolux Professional SpA Viale Treviso 15 33170 Porde- manufacturer none Italy Technical data Gas models TYPE CODES Data GF91L23 GF91E23 GF91R23 +9KKLBBAMCG Models +9KKLBBAMCGE +9KKLQBAMCG +9KKHBBAMCG +9KKIBBAMCG +9KKHQBAMCG +9KKIQBAMCG +9KKJBBAMCG +9KKJQBAMCG +9KKHBBAMCGE +9KKIBBAMCGE 400mm +9KKJBBAMCGE Power supply voltage... -
Page 16: Keeping The Manual
• operations carried out by non-specialised personnel; Manufacturer Electrolux Professional SpA or any other • unauthorized modifications or operations; service centre authorised by Electrolux Professional SpA. • missing, lack or inadequate maintenance;... -
Page 17: Finstallation And Assembly
electrical cable sheathing, etc.) the operator for normal machine use must: • immediately deactivate the machine and disconnect all the supplies (electricity, gas, water). INSTALLATION AND ASSEMBLY WARNING 4. Turn one of the two plates inside the appliances 180℃ (Fig.1C); Refer to “WARNING and Safety Information“... -
Page 18: Floor Fixing
reduce it’s overheating (for installation follow the instructions in F.8.4 Connection (depending on the appliance and/or the accessory manual) model) Monoblock models Floor fixing 1. See the installation diagram for the position of the gas connection on the bottom of the appliance. To avoid accidental tipping of built-in half-module appliances installed separately, fix them to the floor. -
Page 19: Conversion To Another Type Of Gas
F.8.6 Conversion to another type of gas F.9.3 Primary air checking Nozzle Table “B“ (see Appendix) gives the type of nozzles to The primary air is correctly adjusted when the flame does not be used when replacing those installed by the manufacturer float with the burner cold and there is no flareback with the (the number is engraved on the nozzle body). -
Page 20: Electrical Connection
F.13 Power cable 8. Prior to operation, test the gas pressure regulator for leaks. Unless otherwise specified, our appliances are not equipped with a power cable. The installer must use a flexible cable having characteristics not lower than the H07RN-F rubber insulated type. Protect the section of cable outside the appliance with a metal or rigid plastic tube. -
Page 21: Ginstruction For The User
INSTRUCTION FOR THE USER CAUTION Fryer use Top up the oil tank whenever it falls below DANGER the minimum level, marked by the special reference notch (danger of fire). Do not use exhausted oil or fat cause due to a low flash point CAUTION Tank emptying must be done when the oil and easily reach boiling point. -
Page 22: Control Panels
Control panels Fig. 1 Versions with lifting system 15 14 Fig. 2 Versions without lifting system 1. ON/OFF key 2. temperature setting key 3. left basket programme start key 4. right basket programme start key 5. temperature (work and set) display 6. -
Page 23: Cooking Mode
Cooking mode 4. Press keys “3“ or “4“ to start lowering the left/right lifter. Display “6“ corresponding to “6“ will start the set time The fryer allows cooking in two different ways: count-down. 1. Manual mode (refer to G.5 Manual cooking mode) On reaching the value 00:00, the cycle ends with the lifter 2. -
Page 24: Switching Off
WARNING NOTE! At the time of installation no programs are stored; DO NOT CLOSE VIOLENTLY when saving a program, what previously saved in that location is replaced by the latest saving. THE DOOR: slamming the door may cause the pilot flame to shut G.8.2 Programming block off. -
Page 25: Automatic Oil Recirculation (Version Full Optional)
3. Turn the handle “L“ slowly clockwise to open the drain tap; G.9.2 Signalling and recording an anomalous event When the cycle is controlled by the HACCP, if the oil bath temperature falls below the set minimum value, • the display “5“ flashes to indicate that the critical temper- ature has been reached;... -
Page 26: Storing An Haccp Programme
IMPORTANT • Hour and minutes of recording the event; To insert a new date, stay within the HACCP • Set frying programme (from 1 to 5); menu, otherwise the entire procedure will have • Set temperature; to be repeated (see To access the menu: •... -
Page 27: G.10 Automatic Cooking
Anomalous events historical data 8. Press key “3“ to start the auto learning cycle; the basket starts dropping and the heating elements activate; printout The flashing wording “AUTO“ appears on the right display paragraph); “6b“; 4. Press key “2“ to delete the data of the day selected; 9. -
Page 28: Cleaning The Appliance And Accessories
H.1.2 Cleaning the appliance and accessories Tanks and collection drawers (even several times a day) Before using the appliance, clean all the internal parts and • Remove any grease, oil, food residuals, etc., from trays, accessories with lukewarm water and neutral soap or products drawers and containers in general used for collection. -
Page 29: Warnings Codes
The pilot burner is • Work thermostat not fed. • Call service. still lit but the main • Work thermostat wires disconnected. • Call service. burner does not light • Insufficient pressure in gas pipes. • Follow lightning procedure and remember to press the ignition Knob pressure •... -
Page 30: Maintenance Contacts (Only For Australia)
• During decommissioning and handling of the various parts, the minimum height from the floor must be maintained. Maintenance contacts (only for • Zanussi - Electrolux Professional Australia Pty Ltd – 5– 7 Keith Campbell Court — Scoresby, 3179 — call 03-9765-... -
Page 31: Jenclosed Documents
The symbol on the product indicates that this Different regulations are in force in the various countries, product should not be treated as domestic therefore comply with the provisions of the laws and compe- waste, but must be correctly disposed of in tent bodies in the country where scrapping takes place. - Page 34 Electrolux Professional SPA Viale Treviso 15 33170 Pordenone www.professional.electrolux.com...
Need help?
Do you have a question about the GF9 and is the answer not in the manual?
Questions and answers