
Related Manuals for Motorola T600 Series


Summary of Contents for Motorola T600 Series
- Page 1 TALKABOUT TWO-WAY RADIO T600 SERIES USER GUIDE MARCH 2023 *MN009247A01* MN009247A01-AA © 2023 Motorola Solutions, Inc. All rights reserved...
-
Page 2: Table Of Contents
MN009247A01-AA Contents Contents Intellectual Property and Regulatory Notices............3 General Safety Information..................4 Chapter 1: Radio Overview..................9 1.1 Radio Controls......................... 9 1.2 Radio Display.........................11 Chapter 2: Getting Started..................13 2.1 Installing and Charging Batteries...................13 2.2 Attaching the Belt Clips......................13 2.3 Removing the Belt Clips......................14 2.4 Turning the Radio On and Off....................14 2.5 Channel and Sub Codes......................15 Chapter 3: Navigating the Menu Pages..............16... -
Page 3: Intellectual Property And Regulatory Notices
License Rights The purchase of Motorola Solutions products shall not be deemed to grant either directly or by implication, estoppel or otherwise, any license under the copyrights, patents or patent applications of Motorola Solutions, except for the normal non-exclusive, royalty-free license to use that arises by operation of law in the sale of a product. -
Page 4: General Safety Information
National and international regulations require manufacturers to comply with the RF energy exposure limits for portable two-way radios before they can be marketed. Your Motorola Solutions two-way radio is designed, manufactured, and tested to comply with all applicable national and international regulations for human exposure to radio frequency electromagnetic energy. - Page 5 (and other parts of the radio including the antenna) at least 1 in. (2.5 cm) away from the nose or lips. Antenna should be kept away from the eye. • When worn on the body, always place the radio in a Motorola Solutions-approved clip, holder, holster, case, or body harness for this product. •...
- Page 6 MN009247A01-AA General Safety Information • For a list of Motorola Solutions-approved accessories please refer to your user manual or visit https://www.motorolasolutions.com. Acoustic Safety Exposure to loud noises from any source for extended periods of time may temporarily or permanently affect your hearing. The louder the volume of the radio, the sooner your hearing will be affected.
- Page 7 CAUTION: Use only Motorola Solutions approved batteries. • Risk of explosion if the battery is replaced by an incorrect type. • Charge your battery using the approved Motorola Solutions charger. • Connect the charger/power supply to a nearby and easily accessible power outlet. •...
- Page 8 There must be no substitution of items, even if the substitute has been previously approved with a different Motorola Solutions communications equipment unit. Approved configurations are listed by the approving agency (FM, UL, CSA, CENELEC).
-
Page 9: Chapter 1: Radio Overview
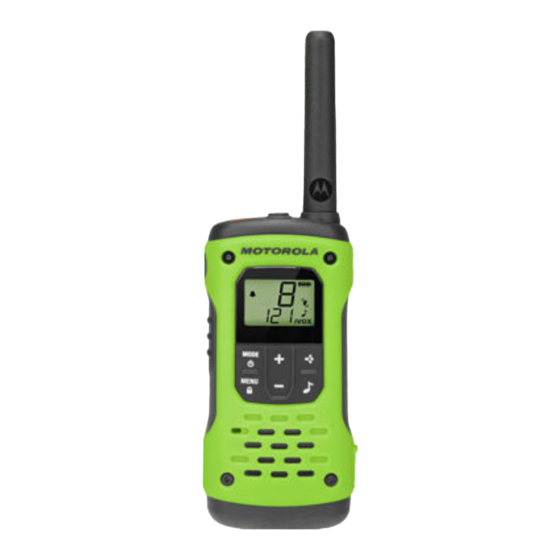
MN009247A01-AA Radio Overview Chapter 1 Radio Overview This chapter explains the buttons and functions of the radio. Radio Controls Figure 1: Radio Control Functions 13 14 Table 1: Radio Controls Item Number Buttons and Functionality Antenna. Flashlight button. Turn on or off the flashlight and to change light color between red and white by pressing the Flashlight button. - Page 10 MN009247A01-AA Chapter 1 : Radio Overview Item Number Buttons and Functionality • Exit menu screen and return to home screen by pressing the PTT High/PTT Low button. NOTE: PTT Low button always transmit at 0.5 W. PTT High button transmits at a higher power when you select a high power channel (channel 1–7 and channel 15–22).
-
Page 11: Radio Display
MN009247A01-AA Chapter 1 : Radio Overview Radio Display This chapter explains the icons on the display of the radio. Figure 2: LED Icons and Indicators 18 17 9 10 Table 2: Radio Icon Descriptions Item Number Description Mute Easy Pairing Scan Roger Tone Dual Channel Monitor... - Page 12 MN009247A01-AA Chapter 1 : Radio Overview Item Number Description Channel Weather Radio Mode Two-Way Radio Mode...
-
Page 13: Chapter 2: Getting Started
NOTE: • You can use Alkaline AA batteries. • Motorola Solutions recommends that you use only the battery that comes with your radio. Otherwise, your radio might sink. Attaching the Belt Clips Procedure: 1 Attach the belt clip to the belt clip slot at the back of the radio until the clip clicks in place. -
Page 14: Removing The Belt Clips
MN009247A01-AA Chapter 2 : Getting Started Removing the Belt Clips Procedure: 1 To release the latch, pull the release tab on top of the belt clip. 2 Push the belt clip with your other hand towards the top of the radio. Turning the Radio On and Off Procedure: Hold the Mode Switch/Power button until the display turns on or off. -
Page 15: Channel And Sub Codes
Motorola Solutions recommends setting your sub code to zero if you are using T600 series radios with radios that do not support the sub code feature. For detailed instructions on ways to change settings, see Navigating the Menu Pages on page 16 •... -
Page 16: Chapter 3: Navigating The Menu
MN009247A01-AA Chapter 3 : Navigating the Menu Pages Chapter 3 Navigating the Menu Pages This chapter shows the ways you can navigate through the buttons in various modes and the instructions. Procedure: 1 Use the Menu button to scroll through the menu screen. 2 Press the PTT to exit any screen and return to home screen. -
Page 17: Operations In The Menu Screen
MN009247A01-AA Chapter 3 : Navigating the Menu Pages Operations in the Menu Screen This section shows you the operations available in the menu screen and its instructions. Table 3: Menu Navigation Instruction Menu Screen Use the + or - button to do the following: Two-Way Mode •... - Page 18 MN009247A01-AA Chapter 3 : Navigating the Menu Pages Menu Screen Use the + or - button to do the following: This tone is transmitted when you release the PTT button, similar to saying "Roger" or "Over." This tone indicates to others that you have finished talking.
-
Page 19: Chapter 4: Radio Usage
MN009247A01-AA Radio Usage Chapter 4 Radio Usage This section shows the ways you can use your radio. Talking or Transmitting Ensure that you are in the Two-Way mode by looking for the Two-Way icon on the LCD. You can return to the Two-Way mode by pushing the PTT button briefly. Procedure: 1 Press and hold the PTT button, then start talking into the microphone. -
Page 20: Listening To Weather Broadcast
MN009247A01-AA Chapter 4 : Radio Usage Listening to Weather Broadcast Procedure: 1 Go to the Weather Radio page to listen to the weather broadcast. NOTE: Your radio does not receive signal from other two-way radios when in the Weather Radio page. 2 From the Weather Radio page, press the Menu/Lock button. -
Page 21: Chapter 5: Advanced Features
MN009247A01-AA Advanced Features Chapter 5 Advanced Features This chapter explains the advanced features of your radio. For ways to operate the features mentioned in this chapter, refer to Operations in the Menu Screen on page iVOX or VOX The microphone detects if you are talking when using Internal Voice Operated Transmission (iVOX) or Voice Operated Transmission (VOX). -
Page 22: Ip-67 Waterproof Rating
After pressing the Emergency button, a warbling alert tone is emitted from your radio and transmitted to the radios in your group. The T600 series radios in your group automatically advance the speaker volume to the maximum setting and sound a warbling alert tone for 8 seconds. After 8 seconds, the alert tone stops. -
Page 23: Chapter 6: Additional Information
MN009247A01-AA Additional Information Chapter 6 Additional Information This chapter explains the features of your radio. Battery Information • The rated battery life is measured under the industrial standard 5-5-90 duty cycle under lab conditions. 5 % of the time transmitting, 5 % receiving with speaker on, and 90 % waiting for incoming call. -
Page 24: Channels And Frequencies
MN009247A01-AA Chapter 6 : Additional Information Channels and Frequencies This section shows the channels and its frequencies available for the radio. Table 6: Channels and Frequencies Channel Frequency Power (W) Channel Frequency Power (W) (MHz) (MHz) 462.5625 467.6625 462.5875 467.6875 462.6125 467.7125 462.6375... -
Page 25: Licensing Information
Licensing Information USA (FCC)/CANADA(ISED) According to FCC Part 95, FRS devices do not require a license. Use of Motorola Solutions radio in Canada is subject to the rules and regulations in ISED RSS 210 and do not require a license. -
Page 26: Warranty
What will MOTOROLA SOLUTIONS, INC. do? Motorola Solutions, Inc., at its option, will at no charge repair, replace or refund the purchase price of any Products or Accessories that do not conform to this warranty. We may use functionally equivalent reconditioned/refurbished/pre-owned or new Products or Accessories. - Page 27 Call the telephone number designated above for the Product with which they are used. You will receive instructions on how to ship the Products or Accessories at your expense, to Motorola Solutions or a Motorola Solutions Authorized Repair Center. To obtain service, you must include the following: •...
- Page 28 MN009247A01-AA Warranty Table 10: Accessories Information Accessories Information Links https://www.facebook.com/MotorolaTalkabout- WalkieTalkies http://bit.ly/Talkabout http://www.motorolasolutions.com/talkabout...
Need help?
Do you have a question about the T600 Series and is the answer not in the manual?
Questions and answers