Advertisement
Quick Links
REPAIR INSTRUCTION
®
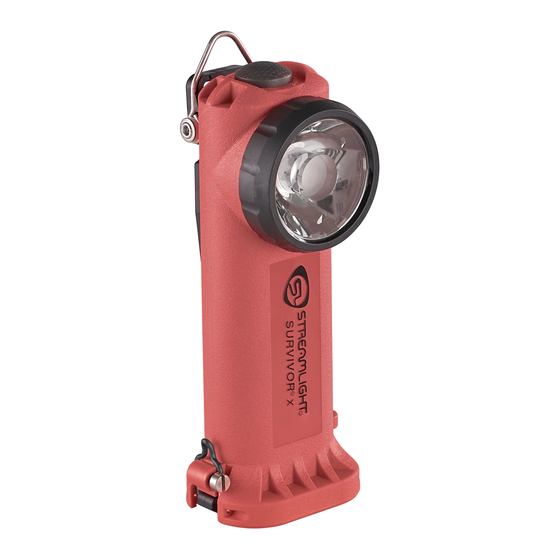
SURVIVOR LED
®
SURVIVOR LED ATEX
This Streamlight manual is provided "AS IS" and for informational purposes only. It is
intended as a guide for the maintenance and repair of common problems specific to the
product.
STREAMLIGHT MAKES NO WARRANTY OF ANY KIND REGARDING THE INFORMATION
CONTAINED IN THIS MANUAL.
STREAMLIGHT TAKES NO RESPONSIBILITY FOR THE INFORMATION, OR WHATEVER YOU
DO WITH THE INFORMATION. It may not necessarily be correct, accurate, safe, effective
or reliable, and it may not apply to your specific application. It is subject to change at any
time without notice. Any modifications you make to your Streamlight product are AT
YOUR OWN RISK. Always consult the product's operating instructions or a Streamlight
authorized service center with any questions or when selecting and using parts for your
Streamlight product.
For products using lithium CR123A cells: WARNING: FIRE, EXPLOSION, BURN HAZARD -
USE ONLY STREAMLIGHT, PANASONIC, SANYO, OR ENERGIZER CR123A OR DURACELL
123. DO NOT MIX BRANDS OR OLD AND NEW BATTERIES.
This disclaimer and the information contained in this service manual is the proprietary
intellectual property of Streamlight, Inc.
No part of this service manual may be
reproduced without Streamlight's written authorization.
December 2011
Page 1 of 14
Advertisement

Related Manuals for StreamLight Survivor LED


Summary of Contents for StreamLight Survivor LED
- Page 1 SURVIVOR LED ® SURVIVOR LED ATEX This Streamlight manual is provided "AS IS" and for informational purposes only. It is intended as a guide for the maintenance and repair of common problems specific to the product. STREAMLIGHT MAKES NO WARRANTY OF ANY KIND REGARDING THE INFORMATION CONTAINED IN THIS MANUAL.
- Page 2 CAUTION: LED Radiation (RG-2)-Do not stare into the beam. May be harmful to eyes. 1) The Survivor LED features a top mounted push button switch. Check switch for proper operation: • Push switch until click on to test “on” function.
- Page 3 SURVIVOR LED-REPAIR INSTRUCTIONS II. LED MODULE ASSEMBLY-REPLACEMENT A. Disassembly 1) Release latch on Battery Door Assembly (Item 3) and remove Battery Carrier Assembly (Item 4A or 4B). ATEX ONLY: Remove Insert Screw (Item 5) to release latch on Battery Door Assembly (Item 3). Body will have Insert.
- Page 4 SURVIVOR LED-REPAIR INSTRUCTIONS II. LED MODULE ASSEMBLY-REPLACEMENT A. Disassembly (cont’d.) 3) Inspect Battery Door Assembly (Item 3) for damage or corrosion. If replacement is required, remove assembly by pressing out the Battery Retaining Pin (Item 7) from body and battery door assembly. Replace Battery Door Assembly as required.
- Page 5 SURVIVOR LED-REPAIR INSTRUCTIONS II. LED MODULE ASSEMBLY-REPLACEMENT B. Reassembly (cont’d.) 3) Install Clip Bracket with (2) mounting Screws (2) as shown (Picture 2), fastening to LED Module Assembly. Tighten firmly. 4) Insert Double Torsion Spring inside the clip bracket with the legs of the spring flat against the bracket and pointing towards the top of the housing.
- Page 6 SURVIVOR LED-REPAIR INSTRUCTIONS II. LED MODULE ASSEMBLY-REPLACEMENT B. Reassembly (cont’d.) 6) Place belt clip over spring. Aligning slot in tab (A) with bridge (B) on spring (Picture 4). Picture 4 7) While holding the angled tool, push the Clip down and forward against the angled tool until the holes in the clip line up with the holes in the spring (Picture 5).
- Page 7 SURVIVOR LED-REPAIR INSTRUCTIONS II. LED MODULE ASSEMBLY-REPLACEMENT B. Reassembly (cont’d) 8) While holding the belt clip in position, insert the tapered pin tool (from kit) through the holes on the belt clip and spring until it is flush with the clip (Picture 6).
- Page 8 SURVIVOR LED-REPAIR INSTRUCTIONS II. LED MODULE ASSEMBLY-REPLACEMENT B. Reassembly (cont’d) 11) Inspect and lubricate o-ring (item 2). Clean and/or replace lens as needed. Note: Reference Section-III for replacement. KEY SLOT-BATTERY Picture 9 Picture 10 12) Install Face Cap Assembly. Tighten until seated firmly against body.
- Page 9 SURVIVOR LED-REPAIR INSTRUCTIONS II. LED MODULE ASSEMBLY-REPLACEMENT B. Reassembly (cont’d) SCREW-ATEX ONLY Picture 11 14) Close and secure hinged Battery Door Assembly. Applying pressure to door will ease fastening latch (Picture 11). ATEX ONLY: Re-install Insert Screw once Battery Door Assembly is secure (see arrow).
- Page 10 SURVIVOR LED-REPAIR INSTRUCTIONS III. LENS AND REFLECTOR- REPLACEMENT NOTE: P/N #905055-Survivor LED Lens Installation/Removal Tool-Required Picture 1 Picture 2 1) Remove Facecap Assembly from flashlight (not shown). 2) Insert Facecap Assembly (Picture 1-Item B), threaded side up, into Base (Picture 1-Item A).
- Page 11 SURVIVOR LED-REPAIR INSTRUCTIONS III. LENS AND REFLECTOR- REPLACEMENT (cont’d) 6) Remove any particles from Reflector with compressed air. Insert the reflector into the Facecap until it is seated flat in the groove in the Facecap. 7) Install the O-Ring in the groove above the Reflector and into the Facecap.
- Page 12 903059 SL-90X O-Ring Lens Qty. 1 905083 Reflector –New Style Important: Must be used with P/N#905082/LED Module Assembly-New Style Starting with Bodies with Serial Number 216821 Survivor LED And Serial NumberA014945 Survivor LED ATEX. Page 12 of 14 DEC. 2011...
- Page 13 Reference Tools required: P/N # 90556-Survivor LED Belt Clip Installation Tool (Reference Section II). P/N # 905055-Survivor LED Lens Installation/Removal Tool (Reference Section III). IV. Contact Information To find the nearest Authorized Service Center go to: http://www.streamlight.com/support/authorized-service-centers.aspx...
-
Page 14: Appendix A /Troubleshoot
SURVIVOR LED-REPAIR INSTRUCTIONS V. Appendix A /Troubleshoot Page 14 of 14 DEC. 2011...
Need help?
Do you have a question about the Survivor LED and is the answer not in the manual?
Questions and answers