Table of Contents
Advertisement
Quick Links
Advertisement
Table of Contents

Subscribe to Our Youtube Channel
Related Manuals for Baumatic BTEL60X


Summary of Contents for Baumatic BTEL60X
- Page 1 BTEL60X Cooker Hood...
- Page 2 User Manual for your Baumatic BTEL60X Cooker Hood NOTE : This User Instruction Manual contains important information, including safety & installation points, which will enable you to get the most out of your appliance. Please keep it in a safe place so that it is easily available for future reference; for you or any person not familiar with the operation of the appliance.
-
Page 3: Table Of Contents
Contents Page Environmental note IMPORTANT SAFETY INFORMATION 5 – 7 Specifications of your cooker hood BTEL60X Using your Baumatic cooker hood 9 - 10 Before first use To use your cooker hood 9 - 10 Cleaning your Baumatic cooker hood... -
Page 4: Environmental Note
Cut the cable off directly behind the appliance to prevent misuse. This should be undertaken by a competent person. o The packaging materials that Baumatic uses are environmentally friendly and can be recycled. o Please discard all packaging material with due regard for the environment. -
Page 5: Important Safety Information
IMPORTANT SAFETY INFORMATION Your safety is of the utmost importance to Baumatic. Please make sure that you read this instruction booklet before attempting to install or us e the appliance. If you are unsure of any of the information contained in this booklet, please contact the Baumatic Advice Line. - Page 6 o When installed between adjoining wall cabinets, the cabinets must not overhang the hob. o The edges of the cooker hood are sharp – be mindful of this as you handle your appliance, especially during installation and cleaning. DO NOT CLEAN IN BEHIND THE GREASE FILTERS! o If the room where the cooker hood is to be use d contains a fuel burning appliance such as a central heating boiler then its flue must be of the sealed or balanced flue type.
- Page 7 o Remember that when in extraction mode, your cooker hood is removing air from your room. Ensure that pr oper ventilation measures are being observed. o Note that it removes odours from your room, not steam. o Warning - Always ensure that the cooker hood been disconnected...
-
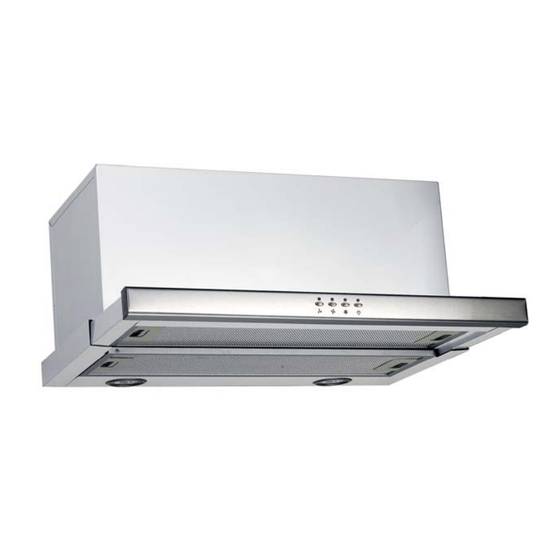
Page 8: Specifications Of Your Cooker Hood
Slider control operation o 3 x speeds o 2 x metallic grease filters o 2 x light Optional extras: 1 x Pair of S2 Carbon filters for air recirculation All of the optional extras are available from the Baumatic Spares Department. -
Page 9: Using Your Baumatic Cooker Hood
Using your Baumatic cooker hood Before first use IMPORTANT: THIS PROCESS MUST BE FOLLOWED BEFORE THE COOKER HOOD IS USED FOR THE FIRST TIME. o You should use a good quality stainless steel cleaner on ALL of the stainless steel areas of your cooker hood, before it is used for the first time. - Page 10 Motor speed switch. This switch controls the speed of the motor as well as turning the hood on and off. You can change the fan speed at any time during operation. 0 = OFF I = Low speed II = Mid-speed III = High speed Light ON / OFF switch.
-
Page 11: Cleaning Your Baumatic Cooker Hood
Cleaning your cooker hood IMPORTANT: BEFORE CLEANING, ALWAYS ENSURE THAT YOU HAVE SWITCHED YOUR COOKER HOOD OFF AT THE OMNI-POLAR SWITCH, SET AT THE WALL FROM THE CABLE. Cleaning o Clean the external parts of y our cooker hood with mild liquid detergent and a new damp cloth. -
Page 12: Maintenance
Maintenance Removing and cleaning the metal filter o First remove the grease filter by pulling down on the handle and pulling it away from the cooker hood. o Soak the metal filters in hot water and washing up liquid for about an hour. -
Page 13: Changing A Light Bulb
Changing a light bulb IMPORTANT: BEFORE ATTEMPTING TO CHANGE A LIGHT BULB, YOU MUST ENSURE THAT YOU HAVE DISCONNECTED THE COOKER HOOD FROM YOUR MAINS SUPPLY. o Remove the metal filters by pull ing down on the handle and pulling them away from the cooker hood. This will allow you access to the lamp area. - Page 14 1) Remove the metal filters by pulling down the handle and pulling them away from the cooker hood. This will allow you access to the motor. 2) Hook the carbon filter over the pins that are located at the end of the motor.
-
Page 15: Installation
Installation IMPORTANT: Before installation read all the instructions and make sure that the voltage (V) and the frequency (Hz) indicated on the rating plate are exactly the same as the voltage and frequency in your home. The rating plate can be found behind the grease filters. -
Page 16: Before Beginning Installation
Blue = Neutral Brown = Live You will only find two wires in the main’s lead (blue and brown) which means neither must be connected to the earth terminal. o As the colours of the wires in the appliance’s mains lead may not correspond with the coloured markings identifying the terminals in your spur box, please proceed as follows: o The blue wire must be connected to the... -
Page 17: Installing Your Cooker Hood
o Do not tile, grout or silicone this appliance to the wall or cabinetry. Installing your cooker hood IMPORTANT: YOU WILL HAVE TO DECIDE BEFORE INSTALLING YOUR COOKER HOOD WHETHER TO USE IT IN EXTRACTION MODE OR RECIRCULATION MODE. PLEASE TURN TO PAGE 21 NOW TO UNDERSTAND THE DIFFERENCES BETWEEN THESE TWO MODES. - Page 18 6) Tighten the screws the rest of the way in. 7) For the extraction function, connect the exhaust outlet pipe to the collar strip. Find the scre w holes on the top of th e cooker hood. Tighten the bolts from inside the hood. Installation into the underside of a kitchen cabinet 1) Drill holes of 4 mm diameter on the bottom of the cupboard you wish to hang the hood from in a ccordance with the diagram...
-
Page 19: Connecting To External Ducting
The discharge outlet should have a cross section of at least 150 cm² (please note that the d ucting hose is not supplied with the appliance but one can be obtained from the Baumatic Spares Department). o The maximum distance between the coupling and your discharge outlet should be 3 metre s, with one 90 deg ree bend. -
Page 20: Extraction Mode Or Recirculation Mode
Extraction mode or recirculation mode? IMPORTANT: YOU WILL HAVE TO DECIDE BEFORE INSTALLING YOUR COOKER HOOD WHETHER TO USE IT IN EXTRACTION MODE OR RECIRCULATION MODE. What is the difference between extraction and recirculation modes? In extraction mode, the stale air will be taken via the grease filter and out of the room via external ducting. -
Page 21: My Appliance Isn't Working Correctly
Or any installation other than the one specified by Baumatic has been completed. Please refer to the conditions of guarantee that appear on the warranty card that you receive with the appliance. - Page 22 Customer Care Telephone 0344 692 3605 Spare Part Telephone 0344 692 3606...
- Page 23 Part of the Hoover Group 11 Beacontree Plaza Gillette Way Reading RG2 0BS www.baumatic.co.uk...
Need help?
Do you have a question about the BTEL60X and is the answer not in the manual?
Questions and answers