Advertisement

Quick Links

W
O
R
L
D
FOR QUALIFIED INSTALLER ONLY. This basic Installation Sheet is an initial release. If a complete Operations
Manual (for the unit being installed) is required or needed, please refer to the Lancer web site (lancerworldwide.com)
for immediate access, or for your convenience, scan this QR code with a mobile device (app required) for immediate
access Contact Lancer Customer Service for assistance as required.
ABOUT THIS MANUAL
This booklet is an integral and essential part of the product and
should be handed over to the operator after the installation and
preserved for any further consultation that may be necessary.
Please read carefully the guidelines and warnings contained
herein as they are intended to provide the user with essential
information for the continued safe use and maintenance of the
product. In addition, it provides GUIDANCE ONLY to the user on
the correct services and site location of the unit.
The installation and relocation, if necessary, of this product must be carried out by qualified personnel with
up-to-date safety and hygiene knowledge and practical experience, in accordance with current regulations.
IMPORTANT SAFETY INSTRUCTIONS
H WARNING
Warning; flammable material. Taking care to avoid causing a fire by igniting flammable material.
H Refrigerant Warning
This system uses a flammable refrigerant under pressure. Do not tamper with it. Contact qualified service personal before disposal.
In order to minimize the risk of possible ignition due to incorrect parts or improper service, only factory authorized personnel should
perform service on the appliance and its component parts. Do not store explosive substances such as aerosol cans with a
flammable propellant in this appliance. Replace component parts with like components. Only use genuine Lancer parts or parts
certified by Lancer. Do not damage the refrigerant circuit.
! Intended Use
The dispenser is for indoor use only. This unit is not a toy. Children should be supervised not to play with appliance. It should not
be used by children or infirm persons without supervision. This appliance is not intended for use by persons (including children)
with reduced physical, sensory or mental capabilities, or lack of experience and knowledge, unless they have been given
supervision or instruction concerning use of the appliance by a person responsible for their safety. Cleaning and user maintenance
shall not be performed by children without supervision. The min/max ambient operating temperature for the dispenser is 65°F to
105°F (18°C to 40°C). Do not operate unit below minimum ambient operation conditions. Should freezing occur, cease operation of
the unit and contact authorized service technician. Service, cleaning and sanitizing should be accomplished only by trained
personnel. Applicable safety precautions must be observed. Instruction warnings on the product being used must be followed.
®
9000
®
W
D
E
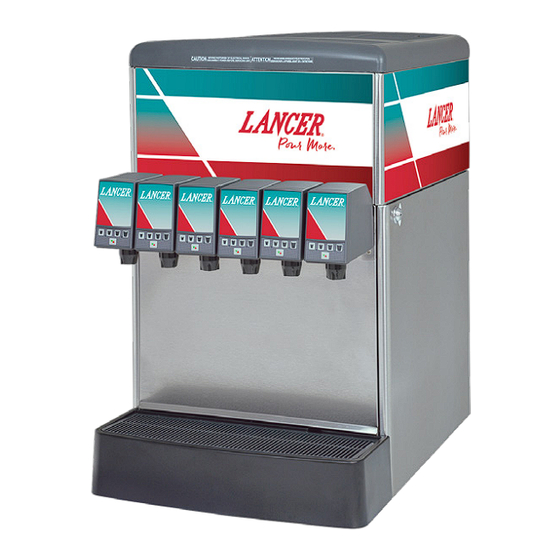
Model 9000
CED-600 R-290
BEFORE GETTING STARTED
Each unit is tested under operating conditions and is thoroughly
inspected before shipment. At the time of shipment, the carrier
accepts responsibility for the unit. Upon receiving the unit,
carefully inspect the carton for visible damage. If damage exists,
have the carrier note the damage on the freight bill and file a
claim with carrier. Responsibility for damage to the dispenser lies
with the carrier.
LANCER INSTALLATION GUIDE
Lancer PN: 28-3040
Revision: 00-0 - April 2020

Advertisement

Table of Contents
loading
Need help?

Need help?

Do you have a question about the 9000 and is the answer not in the manual?

Questions and answers

Summary of Contents for lancer 9000

  • Page 1 FOR QUALIFIED INSTALLER ONLY. This basic Installation Sheet is an initial release. If a complete Operations Manual (for the unit being installed) is required or needed, please refer to the Lancer web site (lancerworldwide.com) for immediate access, or for your convenience, scan this QR code with a mobile device (app required) for immediate access Contact Lancer Customer Service for assistance as required.
  • Page 2: Specifications

    READ THIS MANUAL This manual was developed by the Lancer Worldwide as a reference for the owner/operator and installer of this dispenser. Please read this guide before installation and operation of this dispenser. If service is required please call your Lancer Service Agent or Lancer Customer Service.
  • Page 3: Dispenser Installation

    NOTE permanently to counter or placed on a counter using the legs If unit is to be transported, it is advisable to leave the (included in the Lancer kit, PN 82-1704). unit secured to the plywood shipping base. NOTE NSF listed units must be sealed to the counter or use If leg kit has been provided, assemble legs by tilting unit.
  • Page 4 Route appropriate tubing from the water source to the 14. Using tubing cutters, cut water supply line and install “U” carbonator pump inlet at the unit, and connect tubing to fitting, (PN 01-2128/01). water source. A. Line to Water Source ! CRITICAL - to maximize performance B.
  • Page 5 H WARNING Never energize the machine if there is any trace of A. CO Regulator damage. Contact Lancer Customer Service for B. Wrench assistance. C. 1/4” nut, Stem D. CO Supply...
  • Page 6: Dispenser Setup

    B. Syrup Closed Unplug the Pump Motor Connector from the control box. Use Using a Lancer brix cup verify water flow rate (5 oz. in 4 the wiring diagram either on the unit control box or in the sec.). Use a screwdriver to adjust if needed.
  • Page 7 Activate valve to purge syrup until steady flow is achieved. Verify the drink type by pressing “Carb Toggle” to select “C” Using a Lancer brix cup, activate the valve and capture a for carbonated or “n” for non-carbonated. sample. Verify that the syrup level is even with the water Press the “Enter”...
  • Page 8: Cleaning And Sanitizing

    CLEANING AND SANITIZING GENERAL INFORMATION Lancer equipment (new or reconditioned) is shipped from the factory cleaned and sanitized in accordance with NSF guidelines. The operator of the equipment must provide continuous maintenance as required by this manual and/or state and local health department guidelines to ensure proper operation and sanitation requirements are maintained.
  • Page 9: Cleaning And Sanitizing Nozzles

    • Clean and sanitize the unit using the appropriate procedures outlined in the Cleaning and Sanitizing Every Six Months section of this manual. • Clean water bath interior, including evaporator coils and refrigeration components. Yearly • Clean the entire exterior of the unit. Cleaning and Sanitizing Nozzles Cleaning and Sanitizing Syrup Lines Disconnect power, so as to not activate valve while cleaning.
  • Page 10: Dispenser Troubleshooting

    DISPENSER TROUBLESHOOTING TROUBLE CAUSE REMEDY Water leakage around O-ring not properly installed above diffuser Install or replace o-ring correctly. nozzle. O-ring is damaged or missing. Replace o-ring. Leakage between upper Gap between upper and lower valve bodies. Tighten all six (6) retaining screws. and lower bodies.
  • Page 11 TROUBLE CAUSE REMEDY Water only dispensed; Water or syrup shutoff on mounting block not Open shutoff fully. no syrup; or syrup only fully open. Remove valve from mounting block, open dispensed, no water Improper or inadequate water or syrup flow. shutoffs slightly and check water and syrup flow.
  • Page 12 WIRING/PLUMBING DIAGRAMS Wiring Diagram Plumbing Diagram PRESSURE SETTINGS 75 psi WATER 50 psi PLAIN WATER COILS CARB. HIGH PRESSURE WATER PUMP ® PLUMBING DIAGRAM DELTA III 9000 PLAIN WATER INLET TO CARBONATOR Lancer Worldwide 800-729-1500 Technical Support/Warranty: 800-729-1550 ® custserv@lancerworldwide.com lancerworldwide.com...

This manual is also suitable for:

Ced-600R-290

Table of Contents