Sign In
Upload
Download
Table of Contents
Contents
Add to my manuals
Delete from my manuals
Share
URL of this page:
HTML Link:
Bookmark this page
Add
Manual will be automatically added to "My Manuals"
Print this page
×
Bookmark added
×
Added to my manuals
Manuals
Brands
signia Manuals
Battery Charger
BTE P
User manual
signia BTE P User Manual
Dry&clean charger
Hide thumbs
1
Table Of Contents
2
3
4
5
6
7
8
9
10
11
12
13
14
15
16
17
18
19
20
21
22
23
24
25
26
27
28
29
30
31
32
33
34
35
36
37
38
39
40
41
42
43
44
45
46
47
48
page
of
48
Go
/
48
Contents
Table of Contents
Troubleshooting
Bookmarks
Table of Contents
Table of Contents
Before You Start
Components
Connecting the USB Power Cable
Charging
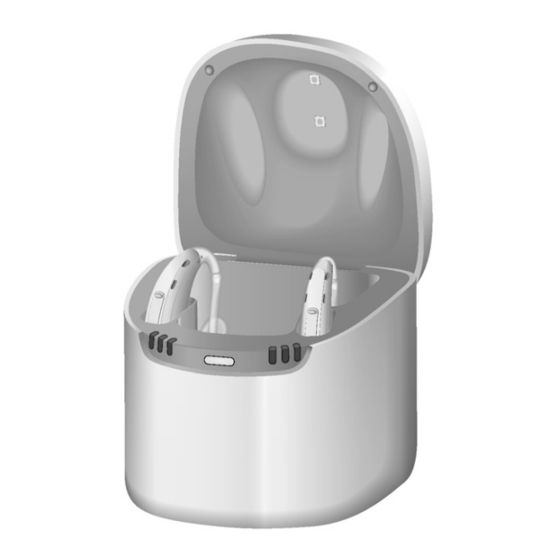
Correct Position of the Hearing Instruments
Cleaning and Drying
Cleaning Status LED
Charging Status Leds
Charging Tips
Further Information
Maintenance and Care
Troubleshooting
Important Safety Information
General Warnings
Personal Safety
Product Safety
Important Information
Explanation of Symbols
Operating, Transport, and Storage Conditions
Technical Data of the Power Supply Adapter
Disposal Information
Conformance Information
Country-Specific Information
Advertisement
Quick Links
1
Table of Contents
2
Components
3
Charging
4
Correct Position of the Hearing Instruments
5
Maintenance and Care
6
Troubleshooting
7
Operating, Transport, and Storage Conditions
Download this manual
Dry&Clean Charger
D&C Charger BTE P/SP, RIC, slimRIC
User Guide
Table of
Contents
Previous
Page
Next
Page
1
2
3
4
5
Advertisement
Table of Contents
Need help?
Do you have a question about the BTE P and is the answer not in the manual?
Ask a question
Questions and answers
Related Manuals for signia BTE P
Battery Charger signia RIC User Manual
Portable charger (52 pages)
Battery Charger signia BTE SP User Manual
Dry&clean charger (48 pages)
Battery Charger signia BTE P/SP & RIC Charger User Manual
(45 pages)
Battery Charger signia Dry&Clean Charger BTE P User Manual
(103 pages)
Battery Charger signia Pure Charge&Go 7AX User Manual
Bte p/sp & ric (88 pages)
Battery Charger signia Styletto AX User Manual
(60 pages)
Battery Charger signia Insio Charger User Manual
(45 pages)
signia Insio Manual
(article)
Battery Charger signia Insio User Manual
(92 pages)
Battery Charger signia Styletto Charger User Manual
(48 pages)
Battery Charger signia STYLETTO Quick Manual
(2 pages)
This manual is also suitable for:
Bte sp
Ric
Slimric
Table of Contents
Save PDF
Print
Rename the bookmark
Delete bookmark?
Delete from my manuals?
Login
Sign In
OR
Sign in with Facebook
Sign in with Google
Upload manual
Upload from disk
Upload from URL


Need help?
Do you have a question about the BTE P and is the answer not in the manual?
Questions and answers