Table of Contents
Advertisement
Quick Links
Operating manual
Rondostar 5000
Expert
Cutomat
SSH673*.A
SSH672*C.A
SSH673*.C
SSH672*C.C
SSH673*H.A
SSH672*HC.A
SSH673*H.A
SSH672*HC.C
* = See EC declaration for exact machine type
Translation of the original manual
Edition BE210202
03.2022
Pro
SSH673*C.A
SSH672*.A
SSH673*C.C
SSH672*.C
SSH673*HC.A
SSH672*H.A
SSH673*HC.C
SSH672*H.C
Basic
SSH670*.A
SSH670*.C
SSH670*H.A
SSH670*H.C
EN
Advertisement
Table of Contents

Subscribe to Our Youtube Channel
Related Manuals for Rondo Rondostar 5000


Summary of Contents for Rondo Rondostar 5000
- Page 1 Operating manual Rondostar 5000 Expert Cutomat Basic SSH673*.A SSH672*C.A SSH673*C.A SSH672*.A SSH670*.A SSH673*.C SSH672*C.C SSH673*C.C SSH672*.C SSH670*.C SSH673*H.A SSH672*HC.A SSH673*HC.A SSH672*H.A SSH670*H.A SSH673*H.A SSH672*HC.C SSH673*HC.C SSH672*H.C SSH670*H.C * = See EC declaration for exact machine type Translation of the original manual Edition BE210202 03.2022...
- Page 3 Tel. +39 0445 575 429 Gang Hang Center info.it@rondo-online.com No. 983 Huangpu Avenue East. Huangpu District RONDO GmbH & Co. KG Guangzhou City P.C 510700 Hoorwaldstrasse 44 Guangdong Province / China 57299 Burbach / Germany Tel. +86 20 8388 2211 Tel.
- Page 5 Address Heimiswilstrasse 42, 3400 Burgdorf, Switzerland Name (see signature) and address of the person authorised to compile the technical file: RONDO Burgdorf AG, Heimiswilstrasse 42, 3400 Burgdorf, Switzerland Herewith we declare that the dough processing machine: Dough sheeter Rondostar 5000 Basic SSH670*.A / SSH670*H.A...
- Page 6 2 / 3 Burgdorf, 11.07.2022 Christoph Albrecht Manager Machine Safety V_2.0_ROB...
- Page 7 3 / 3 Rondostar 5000 Basic SSH6703.A SSH6703H.A SSH6704.A SSH6704H.A SSH6705.A SSH6705H.A SSH6706.A SSH6706H.A SSH6707.A SSH6707H.A SSH6708.A SSH6708H.A SSH6709.A SSH6709H.A SSH6703.C SSH6703H.C SSH6704.C SSH6704H.C SSH6705.C SSH6705H.C SSH6706.C SSH6706H.C SSH6707.C SSH6707H.C SSH6708.C SSH6708H.C SSH6709.C SSH6709H.C Rondostar 5000 Pro SSH6723.A SSH6723H.A SSH6724.A SSH6724H.A...
-
Page 9: Table Of Contents
Mounting the automatic reeling device [SSH67* 7H*.*] 2.5.14 Interconnected operation with PTT150/PTT250 transfer table 2.5.15 Interconnected operation with make-up line/donut line 2.5.16 Moving the machine 2.5.17 Mounting the ship feet [option SSH670**.*, SSH672***.*] Edition BE210202 Rondostar 5000 03.2022 Operating manual... - Page 10 Authorised use of the ship feet [option SSH670**.*, SSH672**.*] Technical information 3.2.1 Noise values 3.2.2 Temperatures 3.2.3 Ambient humidity Full view of the machine 3.3.1 Rondostar 5000 Basic / Rondostar 5000 Pro 3.3.2 Rondostar 5000 Expert 3.3.3 Rondostar-Cutomat 5000 3.3.4 Type plate Machine configurations 3.4.1 Overview 3.4.2...
- Page 11 Preparing the USB stick [foreman or higher] 5.4.7 Saving a program on the USB stick [foreman or higher] 5.4.8 Load program from USB stick [foreman or higher] 5.4.9 Load product image / portrait from USB stick [foreman or higher] Edition BE210202 Rondostar 5000 03.2022 Operating manual...
- Page 12 5.11.5 Using the customer dashboard 5.11.5.1 Operating elements 5.11.5.2 Recipe history 5.11.5.3 Cleaning history 5.11.5.4 Machine data 5.11.5.5 Customer data 5.11.5.6 Chart production 5.11.5.7 Error statistics 5.11.5.8 Operating hours counter and machine state Edition BE210202 Rondostar 5000 03.2022 Operating manual...
- Page 13 Mounting the scraper 7.4.7 Conveyor belt 7.4.7.1 Checking for wear 7.4.8 Automatic reeling device: Check seal rings [SSH67*7H*.*] 7.4.9 Automatic flour duster: Adjusting the brush [variant SSH670**.*][standard SSH672***.*, SSH673***.*] 7.4.10 Cutomat: Replacing the guideway [SSH67***C.*] Edition BE210202 Rondostar 5000 03.2022 Operating manual...
- Page 14 Troubleshooting List of errors Checking the inputs and outputs Technical data Technical data 9.1.1 Technical data for Rondostar 5000 Basic / Rondostar 5000 Pro 9.1.2 Technical data for Rondostar 5000 Expert 9.1.3 Technical data for Rondostar-Cutomat 5000 Supplementary information Dismantling, dismounting and disposal Note for operating manual: The image position numbers (e.g.
-
Page 15: Safety Information
Safety information Safety information In the following sections, the term “installation” refers to RONDO instal- lations. Explanation of symbols All sections in this operating manual containing safety instructions which absolutely must be observed are marked with this symbol and with a number. -
Page 16: Explanation Of Symbols
Turn the main switch off! Danger due to general causes. Danger due to hazardous electrical supply voltage. Danger due to pinch points on bands, belts and chains. Danger due to pinch points on gearwheels. Edition BE210202 Rondostar 5000 03.2022 Operating manual... - Page 17 Danger due to contact points and pinch points. Danger due to automatic starting. Danger due to pinch points on rotating parts. Danger due to sharp parts. Danger due to heat. Wear safety shoes. Edition BE210202 Rondostar 5000 03.2022 Operating manual...
-
Page 18: Personnel
Unqualified personnel cannot identify risks and are therefore exposed to increased dangers. • Only instruct technically qualified personnel who have been trained by RONDO, to perform the tasks described in this operat- ing manual. • Ensure that the personnel adhere to locally valid rules and regula- tions for safe and hazard-aware working. -
Page 19: Conversion
Safety information 1.3.4 Conversion The machine may only be converted by trained and instructed RONDO personnel. Area of application The machine is designed solely for industrial and commercial use. The machine may only be used in a dry environment protected from sunshine. -
Page 20: Safety Elements
(dough and marzipan sheets) for the food in- dustry. The RONDO automatic flour duster is exclusively designed for contin- uously dusting dough and marzipan bands with flour. However, the machine is not suitable for the processing of other prod- ucts (e.g. - Page 21 Before beginning any repair and service work on the machine, the power supply to the machine must be interrupted (pull out the mains plug). Safety elements may not be adjusted, electrically overridden or dis- mantled. Edition BE210202 Rondostar 5000 03.2022 Operating manual...
- Page 22 Do not use compressed air for cleaning. Using a dust extraction system in the bakehouse is recommended. Check periodically to ensure that there are no loose screws in the dough processing area. Edition BE210202 Rondostar 5000 03.2022 Operating manual...
- Page 23 The machine is not designed for use in explosive atmospheres. Defective parts must be replaced with new original parts from RONDO. The entire machine must be thoroughly cleaned prior to initial opera- tion.
- Page 24 Cleaning the rollers in intermittent operation. • Cleaning the top of the conveyor belt in continuous operation If an installation is connected to a network, the operating company is responsible for the network security and network infrastructure. Edition BE210202 Rondostar 5000 03.2022 Operating manual...
- Page 25 During operation, it is not permitted to reach below closed safety guards using hands or objects. Cutting rollers may only be lowered when the safety guard is closed. Edition BE210202 Rondostar 5000 03.2022 Operating manual...
- Page 26 Cutting rollers that are outside the cutting point must be placed in the holding brackets beneath the machine table. RONDO will not accept liability if any of the above safety instruc- tions / notes have not been complied with!
-
Page 27: Transporting, Setting Up, Connecting, Dismounting And Storing The Device
For shipping purposes, the entire machine is fastened to a pallet. The machine tables must be disassembled. The safety guards must be fixed in the upper position. Accessories are packed separately and integrated in these units. Edition BE210202 Rondostar 5000 03.2022 Operating manual... -
Page 28: Unpacking The Machine
4. Remove wooden struts (3). 5. Unload pallet. See: 2.3.1 Unloading the pallet with a crane, 2.3.2 Unloading the pallet with a forklift truck, 2.3.3 Unloading the pallet with a manual pallet jack. Edition BE210202 Rondostar 5000 03.2022 Operating manual... -
Page 29: Unloading The Pallet With A Crane
Set the forks as wide apart as possible. Desirable fork position 1. Lift the machine as shown in the illustration. (Pay attention to the centre of gravity, can tip!) 2. Deposit machine on a flat, stable surface. Edition BE210202 Rondostar 5000 03.2022 Operating manual... -
Page 30: Unloading The Pallet With A Manual Pallet Jack
Transporting, setting up, connecting, dismounting and storing the device 2.3.3 Unloading the pallet with a manual pallet jack Permissible tilt angle: Maximum permissible X = 10° in longitudinal / transverse direction. • In longitudinal direction • In transverse direction Edition BE210202 Rondostar 5000 03.2022 Operating manual... - Page 31 11. At the same time, two of you should hold the machine by the guard tube (1) and push it off the pallet. (Pay attention to the centre of gravity, can tip! Take care not to trip!) Edition BE210202 Rondostar 5000 03.2022 Operating manual...
- Page 32 13. Two of you should hold the machine by the guard tube (1). Deposit the operating side of the machine on the surface. if fork height < 7.5 cm: 14. Put the manual pallet jack to one side. Edition BE210202 Rondostar 5000 03.2022 Operating manual...
- Page 33 X = 30 cm, for secure handling 18. Lower the fork (3) of the manual pallet jack. 19. Pull the manual pallet jack out somewhat. 20. Lift the machine with the fork tips (5) of the manual pallet jack. Edition BE210202 Rondostar 5000 03.2022 Operating manual...
- Page 34 Make sure that you do not put any body parts beneath the machine!) 22. Lower the fork (3) of the manual pallet jack. 23. Put the manual pallet jack to one side. Edition BE210202 Rondostar 5000 03.2022 Operating manual...
-
Page 35: Space Requirement
Transporting, setting up, connecting, dismounting and storing the device Space requirement B = Total width H = Total height L = Total length Edition BE210202 Rondostar 5000 03.2022 Operating manual... -
Page 36: Setting Up The Machine
Do not tighten screws (2A/B/C) yet! • Align the undertable. • Tighten all screws for the following connections: • Substructure - Undertables • Undertables - Table supports • Table supports - Beams (3) Edition BE210202 Rondostar 5000 03.2022 Operating manual... -
Page 37: Mounting The Machine Tables
5. Centre the driver (3) of the drive roller of the machine table in the holding device (5) of the front housing. To engage the machine table, proceed as follows: 6. Lightly pull the conveyor belt (6) until the driver engages. Edition BE210202 Rondostar 5000 03.2022 Operating manual... -
Page 38: Mounting Gas Springs: Rigid Substructure [Ssh673***.*]
Fit 200 N gas springs. Machine table without automatic reeling device: • Fit 100 N gas springs. 1. Mount gas springs with locking washers and hexagon nuts (3) on the undertable (4) and on guide plates (2). Edition BE210202 Rondostar 5000 03.2022 Operating manual... -
Page 39: Mounting The Table Supports [Ssh670**.*, Ssh672***.*]
2. Fix the table support (2) with the hexagon screws. 3. Attach the second washer on both inner sides, then screw on the locking nut (3). Please note, the conveyor belt must be positioned under the locking nut again. Edition BE210202 Rondostar 5000 03.2022 Operating manual... - Page 40 4. The feet (7) of the table support must be adjusted so that the machine table is horizontal. The machine must be locked. Only in this way is optimal functioning of the safety guards en- sured. Edition BE210202 Rondostar 5000 03.2022 Operating manual...
-
Page 41: Tensioning The Conveyor Belts: Belt Release [Variant]
Prior to carrying out each further correction, allow the machine to run for at least 30 seconds. Before starting to operate the machine, the conveyor belts must be lightly dusted with flour to prevent the dough from sticking to the con- veyor belt. Edition BE210202 Rondostar 5000 03.2022 Operating manual... -
Page 42: Tensioning The Conveyor Belts: Quick-Release Belt [Variant]
Prior to carrying out each further correction, allow the machine to run for at least 30 seconds. Before starting to operate the machine, the conveyor belts must be lightly rubbed with flour, to prevent the dough from sticking to the con- veyor belt. Edition BE210202 Rondostar 5000 03.2022 Operating manual... -
Page 43: Mounting The Dough Catch Pans
A defective locking lever (1) must be replaced immediately! Reason: Risk of injury from falling machine table! 1. Remove the cutting rollers. 2. Fold up the machine table until the locking lever (1) locks. Edition BE210202 Rondostar 5000 03.2022 Operating manual... -
Page 44: Folding Down The Machine Table: Cutomat [Ssh672**C.* / Ssh673**C.* ]
2. Push the locking lever (1) down slightly and lower the machine table at the same time. 2.5.11 Mounting the flour container [variant SSH670**.*] 1. Mount the flour container (2) onto the cover plate (1) from above. Edition BE210202 Rondostar 5000 03.2022 Operating manual... -
Page 45: Mounting The Automatic Flour Duster [Variant Ssh670**.*][Standard Ssh672***.*, Ssh673***.*]
5. Turn the delivery roller (5) until the driver (4) can be inserted into the holding device and the automatic flour duster engages with the protruding catch of the cover plate. 6. Hook the flour apron (7) and protective cover (6) in the correct position. Edition BE210202 Rondostar 5000 03.2022 Operating manual... -
Page 46: Mounting The Automatic Reeling Device [Ssh67* 7H*.*]
(1) of the Linak motor. 2. Check: Is the connecting cable (2) correctly connected to the Linak motor? 3. Fix the connecting cable (2) with the plastic tube (3) and screws (4) to the machine table (5). Edition BE210202 Rondostar 5000 03.2022 Operating manual... -
Page 47: Interconnected Operation With Ptt150/Ptt250 Transfer Table
(4). The distance between the protection bar (2) and the belts (1) must not exceed 3 mm. Make-up Rondostar line/ Interconnected operation without a correctly installed protection bar is donut line prohibited. Edition BE210202 Rondostar 5000 03.2022 Operating manual... -
Page 48: Moving The Machine
Lower the machine gently to the ground, do not let it “fall”. 2.5.17 Mounting the ship feet [option SSH670**.*, SSH672***.*] 1. Mount the ship feet (1) on the substructure (2) 2. Fasten the ship feet to the floor 3. Tighten the screws Edition BE210202 Rondostar 5000 03.2022 Operating manual... -
Page 49: Storing The Machine
Monitor the temperature and humidity conditions 1. Switch the machine off. 2. Clean the machine, see chapter 6 Cleaning. 3. Cover the machine with a plastic sheet. 4. Store the machine in a suitable place. Edition BE210202 Rondostar 5000 03.2022 Operating manual... -
Page 50: Requirements For Commissioning The Machine
IΔn ≤ 500 mA or protective isolating transformers. • Three-phase electronic equipment with plug connections > 63 A may only be operated via AC/DC-sensitive residual current devices or pro- tective isolating transformers. Edition BE210202 Rondostar 5000 03.2022 Operating manual... - Page 51 In order to sheet doughs with the machine, the following requirements must be fulfilled: • Dough piece weight max. 12 kg • Flour the dough pieces: This prevents dough from sticking to the rollers and scrapers. Edition BE210202 Rondostar 5000 03.2022 Operating manual...
-
Page 52: General Information On The Machine
General information 3.1.1 Authorised use of the basic version This RONDO machine is exclusively designed for sheeting, laminating and finish-rolling doughs (dough and marzipan sheets) for the food in- dustry. However, the machine is not suitable for the processing of other prod- ucts (e.g. -
Page 53: Authorised Use Of The Automatic Reeling Device [Ssh67* 7H*.*]
Authorised use of the automatic reeling device [SSH67* 7H*.*] The RONDO automatic reeling device is exclusively designed for auto- matic reeling of the end product processed on the machine. Any other use of this machine is not in accordance with the purpose for which it was built. -
Page 54: Authorised Use Of The Automatic Flour Duster [Variant Ssh670**.*][Standard Ssh672**.*, Ssh673**.*]
3.1.5 Authorised use of the automatic flour duster [variant SSH670**.*][standard SSH672**.*, SSH673**.*] The RONDO automatic flour duster is exclusively designed for the au- tomatic application of process flour on the conveyor belts and product processed on the machine. Any other use of this machine is not in accordance with the purpose for which it was built. -
Page 55: Technical Information
-25ºC to +55ºC, for short periods of time up to +70ºC 3.2.3 Ambient humidity The permissible humidity for the machine lies in the range of 30–95% relative humidity, non-condensing. The permissible humidity for the flour used is max. 60% relative humid- ity, non-condensing. Edition BE210202 Rondostar 5000 03.2022 Operating manual... -
Page 56: Full View Of The Machine
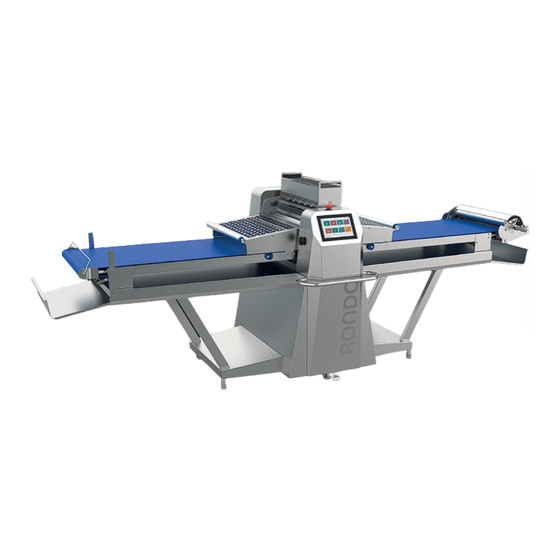
General information on the machine Full view of the machine 3.3.1 Rondostar 5000 Basic / Rondostar 5000 Pro 3 10 2 Dough catch pan Flour container / Automatic flour duster Machine body Safety guards Machine table Substructure Main switch and USB interface “Start”... -
Page 57: Rondostar 5000 Expert
General information on the machine 3.3.2 Rondostar 5000 Expert 3 10 2 Dough catch pan Automatic flour duster Machine body Safety guards Machine table Rigid substructure Main switch and USB interface “Start” mushroom button Touch screen “Stop” mushroom button Table support... -
Page 58: Rondostar-Cutomat 5000
“Start” mushroom button Touch screen “Stop” mushroom button Table support Belt release / Quick-release belt [variant] Cutomat (cutting station) Reeler holder Holder for cutting rollers Dough retention arm Flour catch pan [option] Ship feet [option] Edition BE210202 Rondostar 5000 03.2022 Operating manual... -
Page 59: Type Plate
General information on the machine 3.3.4 Type plate A Year of manufacture B Manufacturer C Product name D Model number E Machine number Edition BE210202 Rondostar 5000 03.2022 Operating manual... -
Page 60: Machine Configurations
Quick-release belt Flour container Automatic flour duster Dough reeler Automatic reeling device Ship feet Cutomat (cutting station) Interconnected operation (transferring) - = Not available x = Standard V = Variant O = Option Edition BE210202 Rondostar 5000 03.2022 Operating manual... -
Page 61: Machine Type Nomenclature
EU and rest of the world Option Automatic reeling device Cutomat Machine table length Table length 5 Table length 7 Machine name Rondostar 5000 Basic Rondostar 5000 Pro Rondostar 5000 Expert Machine table width approx. 600 mm Machine family Sheeter 4.0 Notes: •... -
Page 62: Individual Components
General information on the machine Individual components 3.5.1 Complete housing (housing covers include basic structure) 3.5.2 Scraper Edition BE210202 Rondostar 5000 03.2022 Operating manual... -
Page 63: Dough Catch Pans
General information on the machine 3.5.3 Dough catch pans 3.5.4 Conveyor belts Edition BE210202 Rondostar 5000 03.2022 Operating manual... -
Page 64: Machine Tables
General information on the machine 3.5.5 Machine tables Table length 5 [SSH67*5.* / SSH67*5C.*] Table length 7 [SSH67*7**.*] Table length 7 with Cutomat [SSH67***C.*] Edition BE210202 Rondostar 5000 03.2022 Operating manual... -
Page 65: Substructure
General information on the machine 3.5.6 Substructure [SSH6705.A / SSH6705.C / SSH6707.A / SSH6707.C / SSH6725.A / SSH6725.C / SSH6727.A / SSH6727.C] [SSH6707H.A / SSH6707H.C / SSH6727H.A / SSH6727H.C] [SSH673***.*] [SSH672*C.*] [SSH6727HC.* Edition BE210202 Rondostar 5000 03.2022 Operating manual... -
Page 66: Flour Catch Sheets [Option Ssh670**.*, Ssh672***.*]
General information on the machine 3.5.7 Flour catch sheets [option SSH670**.*, SSH672***.*] 3.5.8 Belt release [variant] 3.5.9 Quick-release belt [variant] Edition BE210202 Rondostar 5000 03.2022 Operating manual... -
Page 67: Flour Container [Variant Ssh670**.*]
General information on the machine 3.5.10 Flour container [variant SSH670**.*] 3.5.11 Automatic flour duster [variant SSH670**.*][standard SSH672***.*, SSH673***.*] Edition BE210202 Rondostar 5000 03.2022 Operating manual... -
Page 68: Dough Reeler
General information on the machine 3.5.12 Dough reeler 3.5.13 Automatic reeling device [SSH67*7H*.*] 3.5.14 Ship feet [option SSH670**.*, SSH672***.*] The ship feet (1) hold the machine in position in rough seas. Edition BE210202 Rondostar 5000 03.2022 Operating manual... - Page 69 General information on the machine 3.5.15 Transferring [option] Transferring to PTT 150 / PTT 250 Transferring to PMML* / SFT* 3.5.16 Cutomat [SSH672**C.*] Edition BE210202 Rondostar 5000 03.2022 Operating manual...
- Page 70 Turn the main switch (1) on the substructure to position (0). 3.6.1.2 Black mushroom button Start machine Press black mushroom button (1). 3.6.1.3 Red mushroom button Stop machine Press the red mushroom button (1). Edition BE210202 Rondostar 5000 03.2022 Operating manual...
-
Page 71: Cutomat: Tension Lever / Stop Lever [Ssh67***C.*]
(1) to the actually required dusting width. 3.6.1.6 Cutomat: Tension lever / stop lever [SSH67***C.*] The height of the cutting roller (1) is set with the tension lever (2). The stop lever (3) locks the tension lever (2). Edition BE210202 Rondostar 5000 03.2022 Operating manual... -
Page 72: Safety Elements
3.6.2.2 Gas spring The gas spring (1) protects the operator against the safety guard drop- ping. [SSH673***.*] The gas spring (2) protects the operator against the machine table dropping. Edition BE210202 Rondostar 5000 03.2022 Operating manual... -
Page 73: Warning Label
General information on the machine 3.6.2.3 Warning label Warning labels on the machine warn the operator of imminent danger. 3.6.2.4 Cutomat: Locking lever [SSH67***C.*] The locking lever (1) protects the operator against the machine table dropping. Edition BE210202 Rondostar 5000 03.2022 Operating manual... -
Page 74: Putting Into Operation
6. Turn the main switch (4) of the machine to position “I”. 7. Fold both safety guards (5) down. 8. On the touch screen (6): • Select and load the desired program. Edition BE210202 Rondostar 5000 03.2022 Operating manual... -
Page 75: Switching The Machine On / Off
► A new QR code is displayed on the touch screen. 3. Scan the new QR code. ► Depending on the mobile device, you must tap on “Visit web- site”. ► A 64-digit code appears on the mobile device. Edition BE210202 Rondostar 5000 03.2022 Operating manual... - Page 76 ► The 64-digit code is entered in the input field. 6. Tap Enter. ► The start process is displayed on the touch screen. ► The main screen is displayed. ► The registration process is complete. Edition BE210202 Rondostar 5000 03.2022 Operating manual...
-
Page 77: Starting / Stopping The Machine
Start machine Press black mushroom button (1). Press the black mushroom button on the side on which the dough is located on the conveyor belt. Stop machine Press the red mushroom button (2). Edition BE210202 Rondostar 5000 03.2022 Operating manual... -
Page 78: Operation
Drag the question mark symbol onto the highlighted areas to display the explanatory texts. Subsequently in this operating manual only in- formation is described, which is supplementary to the explanatory texts or is not considered intuitive. Edition BE210202 Rondostar 5000 03.2022 Operating manual... -
Page 79: User Levels
● Set parameters for dough processing ● Set basic parameters for end function Service ● Password-protected ● Set parameters for advanced dough processing ● Set parameters for end function Rondo Service ● Password-protected ● All options Edition BE210202 Rondostar 5000 03.2022 Operating manual... -
Page 80: Create New User [Foreman Or Higher]
3. Tap the icon for editing the relevant program. 4. Change the user’s full name, user name, user colour, user lan- guage, user photo and password. 5. Tap the quality mark icon. ► The user has been changed. Edition BE210202 Rondostar 5000 03.2022 Operating manual... - Page 81 8. Select the program name, program number, program colour and the program image, if desired. 9. Tap the save icon. ► The program is saved. ► The program appears in the program list. Alternatively you can use the program wizard. Edition BE210202 Rondostar 5000 03.2022 Operating manual...
- Page 82 13. Select the program name, program number, program colour and the program image, if desired. 14. Tap the save icon. ► The program is saved. ► The program appears in the program list. Edition BE210202 Rondostar 5000 03.2022 Operating manual...
- Page 83 1. Open side tab. 2. Open program list. 3. Tap the three point icon. 4. Tap the recycle bin icon. ► The delete dialogue opens. 5. Follow further instructions where applicable. ► The program is deleted. Edition BE210202 Rondostar 5000 03.2022 Operating manual...
- Page 84 Preparing the USB stick [foreman or higher] Requirements for the USB stick Storage capacity 8 GB USB type 1.0 / 2.0 / 3.0 1. Format the USB stick: FAT 32 2. Create folder: “Portraits” 3. Create folder: “Products” Edition BE210202 Rondostar 5000 03.2022 Operating manual...
- Page 85 6. Select relevant programs from the right-hand column. (Multiple selection is possible) 7. Tap the double arrow icon. 8. Follow further instructions where applicable. ► The program is saved on the machine. 9. Remove USB stick from the interface. Edition BE210202 Rondostar 5000 03.2022 Operating manual...
- Page 86 8. Select relevant image from the right-hand column. 9. Tap the double arrow icon. 10. Follow further instructions where applicable. ► The program image is saved on the machine. 11. Remove USB stick from the interface. Edition BE210202 Rondostar 5000 03.2022 Operating manual...
-
Page 87: Sheeting
6. Press the black mushroom button on the dough side. ► Machine starts. ► The sequence is processed from the re-entry point. ► The sequence is highlighted and is ready for complete process- ing. Edition BE210202 Rondostar 5000 03.2022 Operating manual... -
Page 88: Performing Daily Corrections
5. Tap the program step to be changed. ► The program step settings open. 6. Carry out settings. ► Changed settings are highlighted with a yellow triangle. 7. Tap the quality mark icon. ► The daily correction is performed. Edition BE210202 Rondostar 5000 03.2022 Operating manual... -
Page 89: Settings
Only change them if you know their function. If the explanatory texts are inadequate, contact customer service. 1. Open side tab. 2. Open the settings menu. 3. Open the parameter list. 4. Tap automatic reeling device or transfer. 5. Set parameters. Edition BE210202 Rondostar 5000 03.2022 Operating manual... -
Page 90: Process Know-How
During final sheeting the dough band is placed in the dough catch pan. During removal, the dough band may turn over at the end. When fitted and folded upwards, the dough retention arm prevents this. Edition BE210202 Rondostar 5000 03.2022 Operating manual... -
Page 91: Automatic Flour Duster [Variant Ssh670**.*][Standard Ssh672***.*, Ssh673***.*]
To ensure perfect functioning, flour type no. 550 is recommended. Setting the dusting width The dusting width is set by opening and closing the slides to the de- sired dusting width. Edition BE210202 Rondostar 5000 03.2022 Operating manual... -
Page 92: Automatic Reeling Device [Ssh67*7H*.*]
(1), this can be re- moved. • Loosen and remove the plastic screw (2). Side plate (4) • Insert the dough reeler (3) correctly into the side plates (4). Side plates Edition BE210202 Rondostar 5000 03.2022 Operating manual... -
Page 93: Cutomat With Cutting Station [Ssh67***C.*]
Safety guards The cutting equipment is covered by a safety guard (1). A defective gas spring (5) on the safety guard (1) must be replaced immediately! Reason: Risk of injury from falling safety guard! Edition BE210202 Rondostar 5000 03.2022 Operating manual... -
Page 94: Cutting Roller Types
Cutting roller types Push roller Length cutting roller Cross cutting roller Zig-zag cutting roller Form cutting roller Tandem cutting roller Standard dimensions for stainless-steel zig-zag cutting rollers for trian- gles. Number of Rows Edition BE210202 Rondostar 5000 03.2022 Operating manual... -
Page 95: Inserting The Cutting Rollers
First use zig-zag cutting, then length cutting. Cutting rollers not being used must be stored in the repository provided for this purpose. Reason: This will prevent damage to the cutting knives. Injury to the operator will also be prevented. Edition BE210202 Rondostar 5000 03.2022 Operating manual... -
Page 96: Lowering The Cutting Rollers
Lifting the cutting rollers 1. Gently push down the tension lever (1). 2. Turn the stop lever (2) clockwise to the limit stop. 3. Release the tension lever (1) and lift it to the limit stop. Edition BE210202 Rondostar 5000 03.2022 Operating manual... -
Page 97: Cutting
► “Lower cutting roller” pop-up opens. 5. Press the black mushroom button on the dough side. ► Machine starts. 6. Lower cutting roller at the right moment. (See chapter 5.10.3 Lowering the cutting rollers) ► Dough is cut. Edition BE210202 Rondostar 5000 03.2022 Operating manual... -
Page 98: Rondoconnect [Technician Or Higher]
The RONDOconnect Customer Dashboard is used to display the current machine data. • RONDOconnect Customer Care Services enables remote access to the machine so that the RONDO Service Centre can provide you with optimum support. • RONDOconnect Doug-how Services enables RONDO technicians to access the display (touch screen) remotely. -
Page 99: Establishing The Basic Requirements
WIFI with internet connection. • Mobile Android or iOS device. • cMT Viewer app installed on the terminal. Available to download from the Google Playstore or Apple app store. • Basic IT knowledge for gateway settings. Edition BE210202 Rondostar 5000 03.2022 Operating manual... -
Page 100: Connecting A Machine To The Wifi
Moldova Sao Tome and Principe Western Sahara China Guyana Monaco Saudi Arabia Yemen Hong Kong, SAR China Haiti Mongolia Senegal Zambia Macao, SAR China Heard and Mcdonald Islands Montenegro Serbia Zimbabwe Christmas Island Holy See (Vatican City State) Montserrat Seychelles Cocos (Keeling) Islands Honduras Morocco Sierra Leone Edition BE210202 Rondostar 5000 03.2022 Operating manual... -
Page 101: Registering The Machine For Rondoconnect
3. Tap Gateway. 4. Tap Register. 5. Enter the company name. 6. Enter the company email address. 7. Enter the contact person. 8. Enter the contact person’s email address. 9. Confirm terms and conditions. Edition BE210202 Rondostar 5000 03.2022 Operating manual... -
Page 102: Displaying The Customer Dashboard: Via Wifi
9. When accessing the dashboard from the mobile device at a later time: Tap on the current IP address in the history and confirm with Enter. 10. Enter the password 111111 and confirm with “OK”. 11. Wait until the customer’s dashboard is displayed. Edition BE210202 Rondostar 5000 03.2022 Operating manual... -
Page 103: Using The Customer Dashboard
5.11.5.1 Operating elements It is possible to zoom in on certain elements of the customer dash- board. To return to the initial overview, tap the three-quarter circle icon. Edition BE210202 Rondostar 5000 03.2022 Operating manual... -
Page 104: Recipe History
5.11.5.2 Recipe history Completed quantity in the sequence Sequence Recipe name Operator 5.11.5.3 Cleaning history If the cleaning duration is zero minutes, the cleaning page was opened only briefly. Cleaning duration [min] Part cleaned Operator Edition BE210202 Rondostar 5000 03.2022 Operating manual... -
Page 105: Machine Data
Operation 5.11.5.4 Machine data The configuration code, machine number, software version and sys- tem version facilitate communication with the service centre. 5.11.5.5 Customer data Overview of the stored customer data from machine registration. Edition BE210202 Rondostar 5000 03.2022 Operating manual... -
Page 106: Chart Production
Operation 5.11.5.6 Chart production Chronology of the data recorded for a machine component. Edition BE210202 Rondostar 5000 03.2022 Operating manual... -
Page 107: Error Statistics
Operation 5.11.5.7 Error statistics Errors are listed according to the frequency of their occurrence. Thus, errors that occur frequently appear at the top. Count Error number Edition BE210202 Rondostar 5000 03.2022 Operating manual... -
Page 108: Operating Hours Counter And Machine State
Operation 5.11.5.8 Operating hours counter and machine state The donut chart displays the machine state over the last four hours. Standby Production Error Cleaning Operating hours Edition BE210202 Rondostar 5000 03.2022 Operating manual... -
Page 109: Cleaning
Before beginning any cleaning work, stop the machine and interrupt the power supply to the machine (pull out the mains plug). Exceptions: • Cleaning the rollers in intermittent operation. • Cleaning the top of the conveyor belt in continuous operation Edition BE210202 Rondostar 5000 03.2022 Operating manual... - Page 110 Due to the risk of injury at the sharp edges, cutting rollers must be re- placed carefully and correctly. Wear suitable protective gloves to pre- vent injuries. Cutting rollers that are outside the cutting point must be placed in the holding brackets beneath the machine table. Edition BE210202 Rondostar 5000 03.2022 Operating manual...
- Page 111 *Legend Damp clean with a cloth and soapy water. Dry clean with a brush. Remove dough scraps with a horn scraper (plastic). Clean with window cleaner. Edition BE210202 Rondostar 5000 03.2022 Operating manual...
- Page 112 (scraper/belt), which can lead to problems with the light barrier function. 1. Remove occasional flour accumulations manually. Edition BE210202 Rondostar 5000 03.2022 Operating manual...
- Page 113 • RONDO recommends cleaning the conveyor belts while the scrapers are removed. • RONDO recommends cleaning the light barrier while the scrapers are removed. Also see 7.3.2 Replacing the scrapers 1. Open side tab. 2. Tap cleaning menu.
- Page 114 3. Free the conveyor belt underside / machine table / drive rollers / idle rollers of dough scraps with a brush and horn scraper. 4. Clean the undertable (2). [SSH673***.*] 5. Lower the machine table. [SSH673***.*] 6. Tensioning the conveyor belts. Edition BE210202 Rondostar 5000 03.2022 Operating manual...
- Page 115 All assembly and disassembly work must be carried out by three peo- ple. Disassemble the automatic flour duster as follows: 1. Slightly lift the automatic flour duster (1) at the front on the right- hand side. Edition BE210202 Rondostar 5000 03.2022 Operating manual...
- Page 116 There should be no flour between the flour container and the movable side plates. Do not use any solvents! 7. Mount the automatic flour duster again (see2.5.12 Mounting the automatic flour duster [variant SSH670**.*][standard SSH672***.*, SSH673***.*]). Edition BE210202 Rondostar 5000 03.2022 Operating manual...
- Page 117 Clean the automatic reeling device with a cloth and soapy water. Also see 2.5.13 Mounting the automatic reeling device [SSH67* 7H*.*]. 6.1.1.13 Cutting rollers [SSH67***C.*] • Dry clean the cutting rollers daily with a brush. Also see 5.10.2 Inserting the cutting rollers. Edition BE210202 Rondostar 5000 03.2022 Operating manual...
-
Page 118: Maintenance
Due to the risk of injury at the sharp edges, cutting rollers must be re- placed carefully and correctly. Wear suitable protective gloves to pre- vent injuries. Cutting rollers that are outside the cutting point must be placed in the holding brackets beneath the machine table. Edition BE210202 Rondostar 5000 03.2022 Operating manual... - Page 119 Maintenance All defects on the machine must be rectified by an authorised customer service representative. Edition BE210202 Rondostar 5000 03.2022 Operating manual...
-
Page 120: Software Updates
Maintenance Software updates RONDO provides software updates once a year. If you register, RON- DO can actively inform you about new software updates. 1. Tap the person icon (1). 2. Tap the register button (2). 3. Provide your personal details. -
Page 121: Maintenance List
Check, adjust or replace (automatic flour duster) if necessary Safety elements Check safety function Warning signs Check legibility, replace if necessary Guide Check, replace if necessary Legend Weekly Monthly 1/2 Y Biannually Annually Every 2 years Edition BE210202 Rondostar 5000 03.2022 Operating manual... -
Page 122: Replacement Kit
Maintenance Replacement kit Defective safety elements must be replaced with new original parts immediately. Defective parts must be replaced with new original parts by RONDO. Article No. Designation Dimensions 122954T01 Scraper, complete All models 122954T02 Scraper, complete (blue) All models... -
Page 123: Checking And Replacing The Sensor Wiper
In the event of unusual noises, lubricate the sensor wiper (2) with a grease approved for use in the food industry. Recommended grease: • Cassida HDS 2 grease B1000505 • Cassida 320 spray B1000506 Edition BE210202 Rondostar 5000 03.2022 Operating manual... -
Page 124: Check And Replace Gas Spring: Safety Guards
1. Position the scale. 2. Lift the safety guard. The safety guard must close at distance (a), and open at distance (c). 3. Close the safety guard. 4. Replace the gas springs if necessary. Edition BE210202 Rondostar 5000 03.2022 Operating manual... -
Page 125: Checking And Replacing The Gas Springs: Rigid Substructure [Ssh673***.*]
Fit 100 N gas springs. 1. Check gas springs. 2. Replace gas springs if necessary: Mount gas springs with locking washers and hexagon nuts (3) on the undertable (4) and on guide plates (2). Edition BE210202 Rondostar 5000 03.2022 Operating manual... -
Page 126: Checking The Safety Guards Trigger Point
3. Push down the front and rear scraper bracket (3) with your thumb. 4. Lift the scraper (4) out of the scraper mount. 5. Remove the scraper (4). 6. Clean the scraper (see 6.1.1 Care). Edition BE210202 Rondostar 5000 03.2022 Operating manual... -
Page 127: Replacing The Scraper Blade
2. Mount the new scraper blade in the reverse order. Caution Make sure that the scraper blade is mounted with the side bevels on the lower, i.e. clear anodised, scraper holder! 3. Remount the spring compressor in the reverse order. Edition BE210202 Rondostar 5000 03.2022 Operating manual... -
Page 128: Mounting The Scraper
If slight signs of wear are visible at the edges, the conveyor belt is skewed. Adjust the belt release. 7.4.8 Automatic reeling device: Check seal rings [SSH67*7H*.*] Check seal rings (1). Arrange replacement by customer service if nec- essary. Edition BE210202 Rondostar 5000 03.2022 Operating manual... - Page 129 1. Open the safety guard (1). 2. Remove the cutting roller (2). 3. Replace the guideway (3). 4. Insert the cutting roller (2). 5. Close the safety guard (1). Edition BE210202 Rondostar 5000 03.2022 Operating manual...
-
Page 130: Check Warning Labels
Defective or missing warn- ing labels must be replaced immediately. 7.4.11.1 Warning label: Complete housing: ISO [SSH67****.A] 158076 137393 158076 137393 108747 108747 B1014373 108751 137393 158076 108747 137393 158076 108747 Edition BE210202 Rondostar 5000 03.2022 Operating manual... -
Page 131: Warning Label: Automatic Flour Duster: Iso [Variant Ssh670**.A][Standard Ssh672***.A, Ssh673***.A]
Maintenance 7.4.11.2 Warning label: Automatic flour duster: ISO [variant SSH670**.A][standard SSH672***.A, SSH673***.A] Edition BE210202 Rondostar 5000 03.2022 Operating manual... -
Page 132: Warning Label: Automatic Reeling Device: Iso [Ssh67*7H*.A]
Maintenance 7.4.11.3 Warning label: Automatic reeling device: ISO [SSH67*7H*.A] Edition BE210202 Rondostar 5000 03.2022 Operating manual... -
Page 133: Warning Label: Cutomat: Iso [Ssh67***C.a]
Maintenance 7.4.11.4 Warning label: Cutomat: ISO [SSH67***C.A] 158068 158076 137393 158078 137393 158076 158068 Edition BE210202 Rondostar 5000 03.2022 Operating manual... -
Page 134: Warning Label: Complete Housing: Ansi [Ssh67****.C]
Maintenance 7.4.11.5 Warning label: Complete housing: ANSI [SSH67****.C] Edition BE210202 Rondostar 5000 03.2022 Operating manual... -
Page 135: Warning Label: Automatic Flour Duster: Ansi [Variant Ssh670**.C][Standard Ssh672***.C, Ssh673***.C]
Maintenance 7.4.11.6 Warning label: Automatic flour duster: ANSI [variant SSH670**.C][standard SSH672***.C, SSH673***.C] Edition BE210202 Rondostar 5000 03.2022 Operating manual... -
Page 136: Warning Label: Automatic Reeling Device: Ansi [Ssh67*7H*.C]
Maintenance 7.4.11.7 Warning label: Automatic reeling device: ANSI [SSH67*7H*.C] Edition BE210202 Rondostar 5000 03.2022 Operating manual... -
Page 137: Warning Label: Cutomat: Ansi [Ssh67***C.c]
Maintenance 7.4.11.8 Warning label: Cutomat: ANSI [SSH67***C.C] Edition BE210202 Rondostar 5000 03.2022 Operating manual... -
Page 138: Troubleshooting
- Remove rear cover of substructure rollers and conveyor belts and of machine body, replace ribbed are stationary. belt if necessary. This work may only be carried out by an authorised customer service representative. Edition BE210202 Rondostar 5000 03.2022 Operating manual... - Page 139 - Mount the scraper correctly or passes through between Check correct mounting. (see 6.1.1 Care). scraper and infeed belt. - Check wear of scraper blades. - Replace scraper blades if necessary. Replace scraper completely if necessary. Edition BE210202 Rondostar 5000 03.2022 Operating manual...
- Page 140 - Check light barrier (see 8.2 Checking the inputs and outputs). - Wiper is worn. - Replace wiper. 12. All other errors / failures. - Inform the nearest “RONDO” service centre providing as much information as possible. Edition BE210202 Rondostar 5000 03.2022...
-
Page 141: Checking The Inputs And Outputs
The states of the inputs and outputs are displayed in the I/O menu. 1. Open side tab. 2. Open the settings menu 3. Tap I/O menu 4. Read states of the inputs and outputs Edition BE210202 Rondostar 5000 03.2022 Operating manual... -
Page 142: Technical Data
Technical data Technical data Technical data 9.1.1 Technical data for Rondostar 5000 Basic / Rondostar 5000 Pro Technical data SSH6705.* / SSH6707.* / SSH6707H.* / SSH6725.* SSH6727.* SSH6727H.* Total length 3095 mm 3626 mm 3700 mm Total width 1255 mm... -
Page 143: Technical Data For Rondostar 5000 Expert
Technical data 9.1.2 Technical data for Rondostar 5000 Expert Technical data SSH6737.* SSH6737H.* Total length 3753 mm 3756 mm Total width 1255 mm 1255 mm Total height 1409 mm 1409 mm Substructure Rigid substructure Rigid substructure Belt release Standard Standard... -
Page 144: Technical Data For Rondostar-Cutomat 5000
Weight of automatic flour duster 18.2 kg 18.2 kg 18.2 kg Weight of automatic reeling device 13 kg Weight of flour catch pans 7.5 kg 7.5 kg 7.5 kg Technical specifications subject to change without notice. Edition BE210202 Rondostar 5000 03.2022 Operating manual... -
Page 145: Supplementary Information
Technical data Supplementary information RONDO sheeters are distinguished by the following quality features: • Conveyor belts made of plastic material: All plastic coated conveyor belts used on our machines are approved for coming into contact with food stuff and correspond with the requirements of the directives EU 10/2011 as well as the FDA (Food and Drug Administration, USA). -
Page 146: Dismantling, Dismounting And Disposal
Dismantling • End running production process. • Disconnect electricity connection. Disposal • Disassemble machine components as required. • Recycle individual parts according to material type. • Dispose of non-recyclable materials correctly. Edition BE210202 Rondostar 5000 03.2022 Operating manual...
Need help?
Do you have a question about the Rondostar 5000 and is the answer not in the manual?
Questions and answers
How to adjust the roller gap