Table of Contents
Advertisement
Quick Links
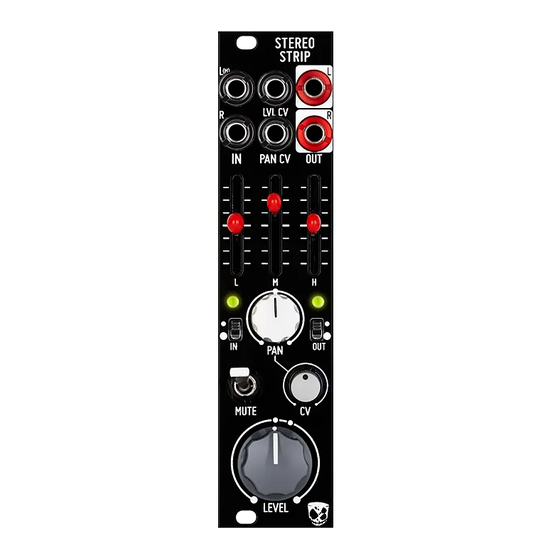
STEREO STRIP PRESOLDERED - ASSEMBLY GUIDE Rev. Jan. 23
THANKS FOR CHOOSING STEREO STRIP SEMI KIT!
What you have here is a semi kit, where all components are soldered in the boards and
you will be doing the final assembly of some mechanical components and final testing.
Also, even if this is a semi kit, TROUBLESHOOTING SKILLS ARE MANDATORY and
you should be an experienced DIYer with basic schematics reading skills.
This semi kit is suitable for beginners.
HAVE FUN!
Mechanical parts are really delicate and will need your full attention. Please read all
steps carefully: A MISTAKE FROM HERE WILL UNLEASH A DESOLDERING MAYHEM
ON YOU. YOU ARE WARNED.
Front Panel COMPONENTS MOUNTING TIPS:
Now we will proceed to mount potentiometer, switches and LEDs. This part of the assembly is CRITICAL.
Please take your time and read the following instructions carefully.
These components must NOT be soldered until they are placed on the PCB and fully attached to the front
panel.
There are two reasons for this:
The height of the panel components are not all the same. Because of this, if not attached properly
before soldering, they will not stay properly seated against the panel. This might cause mechanical
stress reducing their life expectancy and in the worst case cause them to break.
The second reason is that it is very difficult to align the components to the holes if the panel is not
positioned prior to soldering. In the case of the LEDs, they are almost impossible to set to the
correct height without reference to the front panel.
1
Advertisement
Table of Contents

Related Manuals for Befaco STEREO STRIP


Summary of Contents for Befaco STEREO STRIP
- Page 1 STEREO STRIP PRESOLDERED - ASSEMBLY GUIDE Rev. Jan. 23 THANKS FOR CHOOSING STEREO STRIP SEMI KIT! What you have here is a semi kit, where all components are soldered in the boards and you will be doing the final assembly of some mechanical components and final testing.
- Page 2 STEREO STRIP PRESOLDERED - ASSEMBLY GUIDE Rev. Jan. 23 SWITCHES Place the switches in their right places. don't solder them yet! Type Name on PCB Mini. Two circuits two position S1, S2, (ON)-OFF-On SPDT Mute 1 POTENTIOMETERS Now place the potentiometer on the PCB but... don't solder them yet!
- Page 3 STEREO STRIP PRESOLDERED - ASSEMBLY GUIDE Rev. Jan. 23...
Need help?
Do you have a question about the STEREO STRIP and is the answer not in the manual?
Questions and answers