Table of Contents
Advertisement
Quick Links
Advertisement
Table of Contents

Related Manuals for Leica Microsystems M320

Summary of Contents for Leica Microsystems M320
- Page 1 From Eye to Insight M320 User Manual 10734261 - Version 03...
- Page 2 The information provided by this manual is directly related to the operation of the equipment. Medical decision remains the responsibility of the clinician. Leica Microsystems has made every effort to provide a complete and clear user manual highlighting the key areas of product use. Should additional information regarding the use of the product be required, please contact your local Leica representative.
-
Page 3: Table Of Contents
7.14 Balancing the swing arm 13.13 Working range 7.15 Adjusting the interpupillary distance 13.14 Dimensions F12 (in mm) 7.16 Checking the illumination 7.17 Changing the accessories of the surgical microscope and balancing the swing arm M320 Ref. 10734261 / Version 03... -
Page 4: Introduction
The symbols used in this user manual have the following meaning: About this user manual Symbol Warning Meaning In this user manual the surgical microscope M320 is described. The word present user manual applies to the M320 with the following Warning Indicates a potentially hazardous situation stand variants: F12, C12, W12, FP12, TC12, LW12 and TP12. -
Page 5: Product Identification
The model and serial numbers of your product are located on the identification label at the bottom of the horizontal arm. Enter this data in your user manual and always refer to it when you contact us or the service workshop regarding any questions you may have. Type Serial no. M320 Ref. 10734261 / Version 03... -
Page 6: Safety Notes
Other accessories, provided that these have been expressly • The Leica M320 surgical microscope may only be used in closed approved by Leica as being technically safe in the context. rooms and must be placed on a solid floor or mounted to the Use original accessories or approved Leica accessories only. -
Page 7: User Qualifications
Follow the instructions given by your employer regarding the no closer than 30 cm (12 inches) to any part of the Leica M320, organization of work and safety at work. including cables specified by the manufacturer. Otherwise, Do not modify the surgical microscope. -
Page 8: Dangers Of Use
• Abrupt braking of the surgical microscope at a threshold that cannot be crossed. For transportation, always move the Leica M320 surgical microscope into the transport position. Never move the stand while the unit is extended. Never roll the stand or OP equipment over the cables lying on the floor. -
Page 9: Signs And Labels
Signs and labels Signs and labels 1, 8 2, 4, 5, 7, 11, 14, 6 9,10 14, 6 M320 Ref. 10734261 / Version 03... - Page 10 Max. load for optics carrier Type label Leica Microsystems (Schweiz) AG Max Schmidheiny-Strasse 201 CH-9435 Heerbrugg MODEL LEICA M320 LW12/ TP12/ TC12/ F12 100 V - 240 V 50 - 60 Hz 100 VA 2x T6.3 AH 250 V Leica Microsystems (Schweiz) AG...
- Page 11 Prefix number Leica system article no. Serial number Incremental number starting at 1 for each batch J = year (2 digits) MM = month (2 digits) TT = day (2 digits) Production starting date M320 Ref. 10734261 / Version 03...
-
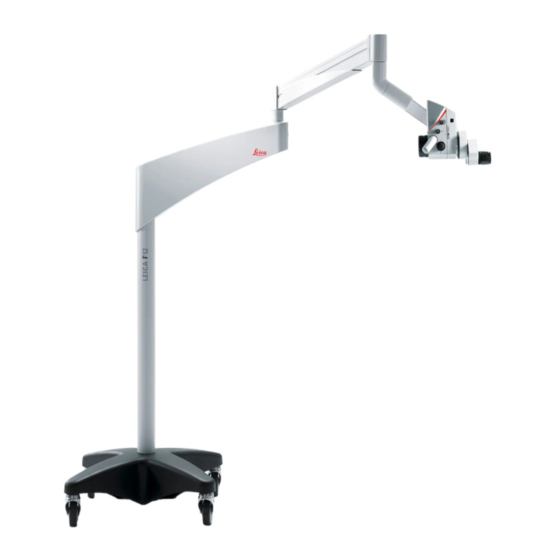
Page 12: Design
Reference model in current user manual Table stand with plate (TP12) Rolling floor stand, short swing Unit Mount* Wall stand (W12) * Japan Only (UN12-D 4K) Ceiling mount (C12) Floor stand/baseplate (FP12) M320 Ref. 10734261 / Version 03... -
Page 13: Swing Arm And Horizontal Arm
The integrated tilt switch is not available for models TC12, TP12 and LW12. Filter and diaphragm controls for white light, orange filter and spot illumination. Counterweight for balancing when many accessories are used. M320 Ref. 10734261 / Version 03... -
Page 14: Microscope Carrier
Articulation brake Two different versions are available. Inclined Lever for locking the vertical position. Upright Joint for balancing Upright installation is not possible for models TC12, TP12 and LW12 Articulation brake Articulation brake Tilt brake M320 Ref. 10734261 / Version 03... -
Page 15: Connections
Design Connections Rotary brake (inclined version) Brake knob for setting the articulation brakes Articulation brake (LW12, TP12, TC12) Main switch Power socket Port for HDMI/USB cable M320 Ref. 10734261 / Version 03... -
Page 16: Functions
Functions Functions Balancing system With a balanced surgical microscope Leica M320 F12 you can move Illumination the optics in any position without it tilting or falling. The illumination of the surgical microscope M320 consists of 2 LEDs. Remove the screw. -
Page 17: Footbrakes
The wheel is engaged and released with the footbrake engage/release lever (1). Press the footbrake engage/ release lever down (3): The footbrake is engaged. Lift the footbrake engage/ release lever (2): The footbrake is released. M320 Ref. 10734261 / Version 03... -
Page 18: Preperation Before Surgery
Turn the optics/microscope carrier towards the outside. Unplug the power cable. NOTE Possible damage of the cable! Always pull the plug, never the cable. Tighten the articulation brake. Release the footbrakes. Open the articulation brake. M320 Ref. 10734261 / Version 03... - Page 19 CAUTION Risk of injury to feet! Always push the instrument to move it; never pull it. Tighten the footbrakes. CAUTION Danger of microscope rolling away on its own! Tighten the footbrakes. M320 Ref. 10734261 / Version 03...
-
Page 20: Installing The Accessories
Insert until the handle Push the accessory into the sleeve clicks into place. dovetail interface. Push the knob and release Tighten the clamping screw. the handle sleeve. Documentation output C-mount port for commercially available video camera M320 Ref. 10734261 / Version 03... -
Page 21: Ergonoptic Dent
Handle tilt is individually ErgoWedge. adjustable. Refit the handle sleeve holder. Ideal in combination with 45° inclined binocular tube. For installation, see 7.2, "Installing the accessories" Insert until the handle sleeve clicks into place. M320 Ref. 10734261 / Version 03... -
Page 22: Objectives
The protective glass is used to protect the objective. The glass is steam- or gas-sterilizable. Tighten the rotary ring. Fine focusing objective: The nose points forward. Fixed objective: The nose points 90° towards the left or right. M320 Ref. 10734261 / Version 03... -
Page 23: Positioning At The Operating Table
Tighten the footbrakes. Insert until the handle sleeve clicks into place. Attach the caps. Attach protective glass on objective. The noise points forwards (fine focus objectives) or 90° to the left/right (fixed objectives). M320 Ref. 10734261 / Version 03... -
Page 24: Installing The Drape
For the general preparation see chapter 6.1, "Illumination". Also check the brightness and filters before positioning the microscope above the patient. M320 Ref. 10734261 / Version 03... -
Page 25: Changing The Accessories Of The Surgical Microscope And Balancing The Swing Arm
Without looking into the eyepieces, set the minimum magnification (6.4×). The image on the monitor must remain sharp! Turn the dioptric correction on the eyepieces to "+5". M320 Ref. 10734261 / Version 03... -
Page 26: Adjusting The Parfocality Without Camera And Monitor
The writing should now remain sharp when you change the magnification. If it does not, repeat the procedure. Set maximum magnification (40×). Bring the writing on the sheet of paper into focus. M320 Ref. 10734261 / Version 03... -
Page 27: Check The Remote Control And Camera
A signal tone sounds. Set maximum magnification (40×). Turn out the eyecups to the desired distance. The writing should now remain sharp when you change the magnification. If it does not, repeat the procedure. M320 Ref. 10734261 / Version 03... -
Page 28: Checklist Before Surgery
• Footbrakes tightened • Proper fixation of all parts and accessories • Proper positioning at the operating table • Sterile components and drape installed • Illumination working properly • Remote control and camera working properly M320 Ref. 10734261 / Version 03... -
Page 29: Operation
White LED illumination on Plug the HDMI cable and the optics carrier lights up. USB cable (optional) into the horizontal arm and fasten it using cable ties. M320 Ref. 10734261 / Version 03... -
Page 30: Adjusting The Design Led Illuminator
Using a ball-point pen or Brakes could be overcome with muscle power. similar object, press the switch until the desired dimming level is reached. Screw in the cover of the horizontal arm and tighten M320 Ref. 10734261 / Version 03... -
Page 31: Adjusting The Illumination
In case of an illumination cooling fan failure an acoustic alarm appears (short beep every 5 seconds, lasting for Bring the surgical microscope 5 minutes). into transport position (see 7.1, "Transportation"). Switch off the surgical microscope at the main switch. M320 Ref. 10734261 / Version 03... -
Page 32: Binocular Tubes
For installation, refer to the separate Assembly Instructions provided. Double Iris Diaphragm Binocular tube, variable 30° - 150° For enhancing depth of field Inclined binocular tube 45° For installation, see 7.2, "Installing the accessories". M320 Ref. 10734261 / Version 03... -
Page 33: Video Camera
The live image and captured image do not show the same section one sees when looking through eyepieces. To simplify image centering, install 10× eyepiece with crosshair graticule. 10× eyepiece 12.5× eyepiece 4:3 aspect ratio 16:9 aspect ratio 4:3 section 16:9 section M320 Ref. 10734261 / Version 03... -
Page 34: Sd Memory Card
Replace the battery. Insert the SD memory card (Button battery type CR2032) into the video camera. Push in the SD memory card and remove it. Do not remove SD memory card while video recording is on. M320 Ref. 10734261 / Version 03... -
Page 35: On Screen Menu
Show / hide information menu Press to confirm. Arrow keys for navigation / Quick Menu OK / confirm Arrow key for navigation / orange filter mode Arrow key for navigation / camera capture mode M320 Ref. 10734261 / Version 03... - Page 36 9.4.2 Exposure Manual exposure Select "MANUAL" for manual exposure. Correct the values for "EXPOSURE", "GAIN", and "GAMMA". Automatic exposure Select "AUTO" for automatic exposure. Correct the values for "BRIGHTNESS" and "GAMMA". M320 Ref. 10734261 / Version 03...
- Page 37 The exposure is automatically adjusted based on the medium sized circle (“M CIRCLE”), as indicated on the screen. L Circle The exposure is automatically adjusted based on the large sized circle (“L CIRCLE”), as indicated on the screen. M320 Ref. 10734261 / Version 03...
- Page 38 3840x2160 and 2704x2028 resolution is applicable to 4K video camera only Live Select the resolution for live view. Captured Select resolution for still image. Select quality for still image. Movie Select resolution for video file. Select quality of video file. M320 Ref. 10734261 / Version 03...
- Page 39 • Show: Date/Time can be shown during playback of still image or recorded video. Show filename Select the option for Show Filename: • Show: File name can be shown during playback of still image or recorded video. M320 Ref. 10734261 / Version 03...
- Page 40 • Flip Horizontal: Image is mirrored horizontally • Flip Vertical: Image is mirrored vertically • Flip Both: Image is rotated 180⁰ Audio/beep Select “ON” to have audio signal when capturing still images or initiating video recordings. M320 Ref. 10734261 / Version 03...
- Page 41 The following icon status will NOT be hidden: Wi-Fi enabled indicator No SD Card indicator Low disk space indicator Reset Camera Press to restore all settings of the video camera to the factory settings. M320 Ref. 10734261 / Version 03...
- Page 42 • “OFF” • “1 SEC” • “3SEC” Show menu Select the display duration of the Camera Menu on the screen: • “15 SEC” • “30 SEC” • “INFINITE” Language Select the language. M320 Ref. 10734261 / Version 03...
- Page 43 Folder name = 100m320_ Service For service use only Eject SD Card Select ‘EJECT SD CARD’ before removing SD card from the camera Always eject the SD card before removal to prevent corruption of the SD card. M320 Ref. 10734261 / Version 03...
- Page 44 SD card and pasted to the local PC. Applicable to USB port at horizontal arm only. Set filename Select “SET FILENAME” to enter “SET FILENAME” menu. Refer to "Set filename" section on page M320 Ref. 10734261 / Version 03...
- Page 45 ALC mode: “NO MASK”, “GRID”, “S CIRCLE”, “M CIRCLE” and “L CIRCLE” Camera mode Press to select the camera capture mode: • “NORMAL” : Capture 1 image. • “BURST”: Capture 3 images. M320 Ref. 10734261 / Version 03...
- Page 46 “Removable Disk” MODE” and the SD card will on the computer. appear as “Removable Disk” on the computer. The camera cannot do still capture or recording to SD card while Wifi streaming is enabled. M320 Ref. 10734261 / Version 03...
- Page 47 Navigate by using the Navigate by using the arrow keys. arrow keys. Press to select the Press to play the video. image. Image selected will be displayed in full screen. M320 Ref. 10734261 / Version 03...
- Page 48 If a “timeout” is displayed after 4 seconds, press the Select “OK” to permanently delete the file from SD card. “Pair” button again to start the process. Select “CANCEL” to cancel the file deletion process. M320 Ref. 10734261 / Version 03...
- Page 49 Video Camera 9.4.9 Switching live resolution Press and hold while pressing once on will switch the resolution between 3840x2160, 2704x2028, 1920x1080 and 1920x1440. Press & Hold Press and release M320 Ref. 10734261 / Version 03...
-
Page 50: Care And Maintenance
Care and maintenance 10 Care and maintenance We recommend concluding a service contract with Leica Microsystems Service. 10.1 Care instructions Put a dust cover over the instrument during breaks in work. Keep accessories in a dust-free place when not in use. -
Page 51: Maintenance
Do not use alcohol. Do not use ethanol or spirits. 10.2.1 Tropical environment/fungus Leica Microsystems employs certain safety precautions in its manufacturing techniques and materials. Other preventive measures include: Keep optical parts clean. Use and store them in a clean environment only. -
Page 52: Notes On Reprocessing Of Resterilizable Products
Clip-on handle 10428328 Rotary knob, binocular tube T 10384656 Rotary knob, transparent 10443792 Lever extension 1) 10446058 Protective glass, multifocal lens 1) 10446469 Protective objective glass, Leica M680/FL400 M320 Ref. 10734261 / Version 03... - Page 53 Maintenance The Leica M320 surgical microscope is maintenance-free. To ensure operational safety and reliability, Leica Microsystems (Schweiz) AG recommends taking the precaution of contacting the responsible service organization. There, periodic inspections can be agreed or a maintenance contract can be concluded.
-
Page 54: Changing Fuses
The fuse is in a fuse holder (arrow) in the device power socket. Remove cover of the horizontal arm. Push out fuse holder with screwdriver. Remove fuse from the fuse holder (arrow) and replace. Screw in the cover of the horizontal arm and tighten it. M320 Ref. 10734261 / Version 03... -
Page 55: What To Do If
Beep every 5 seconds, light Contact service technician, have fan replaced. switches off automatically after five minutes. Double beep every 5 seconds, Allow the LED to cool off, switch off the instrument. light switches off automatically after 5 minutes. M320 Ref. 10734261 / Version 03... -
Page 56: Video Camera
Colors not accurate. Carry out white balance. See 9.4.1, "Color (white balance)" File Transfer not possible. Check USB cable connection. If your instrument has a malfunction that is not described here, contact your Leica representative. M320 Ref. 10734261 / Version 03... -
Page 57: Specifications
Average service life of 60,000 h for an end-of-life criterion of 70 % of the initial brightness; UV filter UV and IR-free LED illumination Orange filter OG530 Light intensity adjustment Using a drive knob on the optics carrier M320 Ref. 10734261 / Version 03... -
Page 58: Stands
External UV light filter up to 530 nm for illumination and observation ErgoWedge 5°- to 25°-angle for binocular tubes with fixed angle ErgonOptic Dent With 52° swivel angle, for binocular tubes variable from 0° to 180° M320 Ref. 10734261 / Version 03... -
Page 59: Video Accessories
Weight for balancing the optics carrier Eyepieces 8.33×, 10×, 10× with crosshair graticule, 12.5× 13.7 Video accessories M320 4K/FULL HD Video & Photo Camera Integrated (optional) video camera 3840×2160/1902x1080 px video resolution and 12Mpx photo resolution Functions Playback function for video and photo and thumbnail view... -
Page 60: Electromagnetic Compatibility (Emc)
±1 kV differential mode; ±2 kV common mode Conducted disturbances, induced by RF fields 10 V rms Rated power-frequency magnetic field 30 A/m Voltage dips and interruption according to IEC 60601-1-2:2014 Rated power-frequency magnetic field Not applicable M320 Ref. 10734261 / Version 03... -
Page 61: Standards Fulfilled
ISO/13485 for quality management and quality assurance. 13.12 Limitations on use • The Leica M320 surgical microscope may be used in enclosed rooms and on flat surfaces with max. 0.3° unevenness and on stable walls or ceilings that fulfill our specifications (see Installation Manual). -
Page 62: Working Range
±155° extension arm ±150° movement ±60° movement ±60° Lateral microscope carrier Lateral microscope carrier Lateral microscope carrier movement ±60° movement ±60° movement ±60° 46 kg 41 kg 38 kg 30 kg 48 kg M320 Ref. 10734261 / Version 03... -
Page 63: Dimensions F12 (In Mm)
Specifications 13.14 Dimensions F12 (in mm) Max. 1775 M320 Ref. 10734261 / Version 03... - Page 64 Notes M320 Ref. 10734261 / Version 03...
- Page 65 Notes M320 Ref. 10734261 / Version 03...
- Page 66 10734261en/03 • Copyright © by Leica Microsystems (Schweiz) AG, Medical Division, CH-9435 Heerbrugg, 2022 • Printed – 06.2022 – Subject to modifications. • LEICA and the Leica Logo are registered trademarks of Leica Microsystems IR GmbH. Leica Microsystems (Schweiz) AG · Max Schmidheiny Strasse 201 · CH-9435 Heerbrugg T +41 71 726 3333 ·...
Need help?
Do you have a question about the M320 and is the answer not in the manual?
Questions and answers