Advertisement
Quick Links
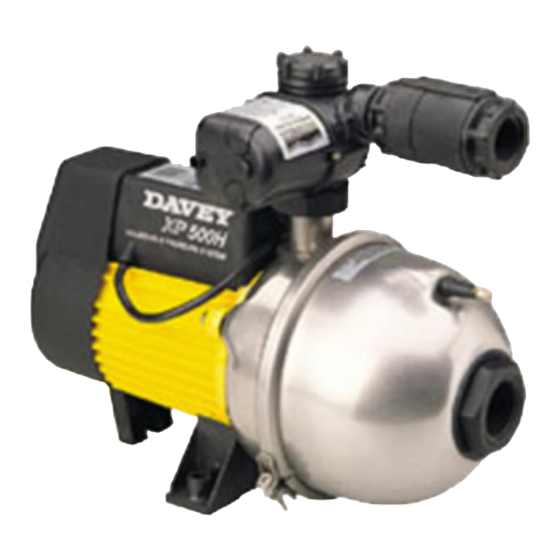
Maintenance
The only regular attention your new pressure system requires is to check the pressure
tank's air charge every 6 months. This is 'factory set' at 130kPa (19psi) and can be
checked at the air valve with a tyre gauge. Do not charge tank to a higher pressure
than 130kPa.
To check air pressure in tank:
1. Switch off pump.
2. Open outlet nearest to pump to release water pressure.
3. Charge tank to 130kPa (19psi) using air pump and check
with tyre gauge.
4. Switch on.
5. Close outlet.
Water Quality
Where the water being pumped contains high levels of dissolved solids
(hard water) or biological organisms, a scale build up on the Hydrascan
CL sensor plate may occur over time. This will cause the pump to cycle
at higher than normal flow rates (eg while using the shower). To fix the
problem, clean the sensor plate, using a blunt object, such as a timber
icy pole stick or toothbrush - as illustrated.
Trouble Shooting Check List
a) MOTOR RUNS FOR SHORT PERIOD ONLY WHEN SWITCHED ON BUT DOES
NOT PUMP - LOW PRESSURE INDICATOR LIGHT REMAINS ILLUMINATED
1. Suction line and pump body not filled with water.
2. Air leaks in suction lines or suction pipe not under water.
3. Air trapped in suction lines (also possible with flooded suction due to uneven
rise in piping; eliminate humps and hollows).
4. No water at source or water level too low.
5. Valve on suction lines closed.
b) PUMP SWITCHES ON AND OFF FREQUENTLY (CYCLING)
1. Check that tank air charge is 130kPa (19psi).
2. Cycling may occasionally be caused by float valves filling tanks. This can be
overcome by fitting a Davey Supercell 8C or 18C tank in place of the priming
plug.
3. Leaking taps, float valves etc. check plumbing.
4. Leaking check valve/foot valve.
5. Scale on sensor - see Water Quality.
c) MOTOR DOESN'T START WHEN SWITCHED ON - LOW PRESSURE
INDICATOR LIGHT NOT ILLUMINATED
1. Power not connected or no power available from supply outlet.
2. Supply voltage too low.
3. System already primed and pressurised.
d) MOTOR DOESN'T START WHEN SWITCHED ON - LOW PRESSURE
INDICATOR LIGHT IS ILLUMINATED
1. Supply voltage too low.
2. "Over temperature" cut-out tripped - switch off, wait 10 minutes and switch on
again.
3. Motor not free to turn - e.g. a jammed impeller.
4. Internal motor fault.
e) PUMP WILL NOT STOP
1. Flow Cone not fitted in Hydrascan
.
®
2. Air lock in Hydrascan
®
.
3. Water leaks on discharge side of pump.
f) PUMP WILL OPERATE NORMALLY INITIALLY BUT WILL NOT RESTART ON
WATER DEMAND - LOW PRESSURE INDICATOR LIGHT NOT ILLUMINATED
1. Power supply problem - see c) 1 or c) 2 above.
2. Static discharge head too high - measure vertical height to top outlet.
i.
If height over 10 metres, consult your Davey dealer for advice.
ii. If height less than 10 metres, adjust the cut-in screw setting.
3. Suction depth too great.
4. Suction air leak.
5. Hot water in suction pipe (75°C+).
g) PUMP WILL OPERATE NORMALLY INITIALLY BUT WILL NOT RESTART ON
WATER DEMAND - LOW PRESSURE INDICATOR LIGHT IS ILLUMINATED
1. Suction depth too great.
2. Suction air leak - pump has lost prime.
3. Blocked impellers or suction.
4. Cut-in pressure set too high - must be at least 50kPa below maximum pump
pressure.
*NOTE:
a) For protection, the Davey
®
pump motor is fitted with an automatic "over
temperature" cut-out. Constant tripping of this overload device indicates a
problem e.g. low voltage at pump, excessive temperature (above 45°C) in
pump enclosure.
b) The 'Hydrascan
' control device may have to be reset after rectifying any of
®
the above operating troubles. This is done by pushing in the yellow button
and releasing it after 2 seconds.
WARNING: When servicing or attending pump, always ensure power is switched
off and lead unplugged. Electrical connections should be serviced only by
qualified persons. If the electrical supply lead of this pressure system is
damaged, it must only be replaced by authorised Davey service personnel as
special tools are required.
Care should also be taken when servicing or disassembling pump to avoid
possible injury from hot pressurised water. Unplug pump, relieve pressure by
opening a tap on the discharge side of the pump and allow any hot water in the
pump to cool before attempting to dismantle.
Adjustable cut-in screw setting
How do I set or adjust?
Always check air precharge in tank - see maintenance section.
Accurate Method
Quick Set Method
Equipment required:
Equipment required:
Hydrascan
test kit
Flat blade screwdriver
®
Flat blade screwdriver
Tea cup
Fit Hydrascan
®
test kit to top of
Tyre pressure gauge
Hydrascan
to allow test to be conducted
®
at the pump.
Step 1 Fill the pump with water.
Step 1 Fill the pump with water.
Step 2 Start pump and open tap to purge
air out of pipework.
Step 2 Start pump and open tap to purge
air out of pipework.
Step 3 Close tap and pump will turn off.
Step 3 Close tap and pump will turn off.
Step 4 Remove cut-in screw cover
and gently turn the adjusting screw
Step 4 Remove cut-in
anticlockwise until it comes to a stop.
screw cover and gently
NB If the pump starts during step 4,
turn the adjusting screw
simply wait a few seconds until the pump
anticlockwise until it
stops then repeat step 4.
comes to a stop.
NB If the pump starts
Step 5 Slowly draw off
during step 4, simply wait
water and close the tap.
a few seconds until the
NB If you have a 8 litre or 18 litre tank
pump stops then repeat
draw off
/
3
step 4.
close the tap.
Step 5 Slowly open
Step 6 Slowly turn the adjusting screw
the tap and allow the
clockwise until the pump starts. The pump
pressure gauge to drop
will start for a few seconds and then stop.
to the desired cut-in pressure. Close the
tap to hold the system at this pressure.
Step 7 Replace the cut-in screw cover.
Congratulations: Your pump is ready to
Step 6 Slowly turn the adjusting screw
use.
clockwise until the pump starts. The pump
will start for a few seconds and then stop.
The low pressure indicator light will be
illuminated momentarily when the pump
first starts. If the pump stops and the light
does not go out adjust to a lower cut-in
pressure or consult the trouble shooting
guide.
Step 7 Replace the cut-in screw cover.
Congratulations: Your pump is ready to
use.
During servicing, use only approved, non-petrochemical based oring and gasket
lubrication. If unsure, consult your Davey Dealer for advice.
WARNING: Do not use hydrocarbon based or hydrocarbon propelled sprays
around the electrical components of this pump.
After Sales Service
For professional after sales service or repair contact your Davey Dealer. For
assistance in locating your nearest dealer contact the Davey Customer Service Centre
on 1300 367 866.
/
- 1 tea cup of
1
2
and 1
/
litres respectively,
1
4
2
Advertisement

Related Manuals for Davey XP500H


Summary of Contents for Davey XP500H
- Page 1 2. Cycling may occasionally be caused by float valves filling tanks. This can be and gently turn the adjusting screw overcome by fitting a Davey Supercell 8C or 18C tank in place of the priming Step 4 Remove cut-in anticlockwise until it comes to a stop.
- Page 2 The pumping of abrasive materials will cause damage to the pressure system mounted on a firm base allowing for drainage, to avoid your Davey dealer or the appropriate Davey office as listed on the back of this document. which will then not be covered by the guarantee.