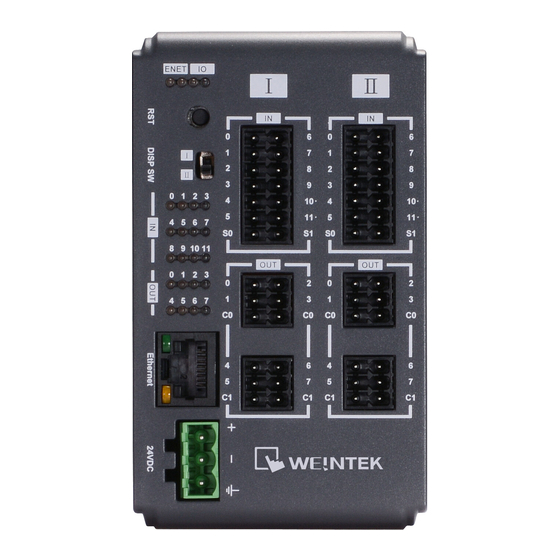
Summary of Contents for weintek iR-ETN
- Page 1 User Manual iR-ETN/iR-ETN40R - EtherNet/IP Connection Guide This guide walks through the steps to connect iR-ETN/iR-ETN40R with PLC. UM020006E_20221109...
-
Page 2: Table Of Contents
Overview ................................1 How to Generate EDS File using EasyRemoteIO ................1 CODESYS ............................3 Rockwell CompactLogix/ControlLogix ................... 9 3.1. Adding a Single iR-ETN ........................9 3.2. Adding Multiple iR-ETN ........................15 Panasonic FP7 ..........................18 KEYENCE KV Series ........................22... -
Page 3: Overview
For more information on updating iR-ETN firmware, please see UM019005E_iR_Series_Firmware_Update_UserManual_eng.pdf This user manual explains how to generate iR-ETN’s/iR-ETN40R’s EtherNet/IP EDS File, and how to connect PLC to iR-ETN/iR-ETN40R via EtherNet/IP. How to Generate EDS File using EasyRemoteIO For more information on EasyRemoteIO, please see UM018004E_EasyRemoteIO_UserManual_eng.pdf... - Page 4 EtherNetIP Connection Guide Step 3. Select the iR-ETN and click OK. EDS file is successfully exported.
-
Page 5: Codesys
EtherNetIP Connection Guide CODESYS This chapter explains how to connect two iR-ETN and iR Remote I/O in CODESYS. Step 1. In EasyRemoteIO scan and export EtherNet/IP EDS. Step 2. Open a new project in CODESYS and select a device. - Page 6 EtherNetIP Connection Guide Step 5. Select [EDS and DCF files (*.eds, *.dcf)] and then select the first *.eds file. Step 6. After importing the file, the iR-ETN is added under EtherNetIP Remote Adapter.
- Page 7 EtherNetIP Connection Guide Step 7. Add an Ethernet device. Step 8. Assign an interface (Ethernet).
- Page 8 EtherNetIP Connection Guide Step 9. Add an EtherNet/IP Scanner. *Please note that [Auto-reestablish Connections] must be selected. Step 10. Add the first iR-ETN.
- Page 9 EtherNetIP Connection Guide Start from step 3 again to add the second iR-ETN’s *.eds file. This will overwrite the *.eds file of the first iR-ETN. Add the second iR-ETN. Step 11. The default iR module setting is shown. Add new parameters in User-Defined Parameters tab.
- Page 10 EtherNetIP Connection Guide Step 12. In EtherNet/IP I/O Mapping tab find the IO address and start editing the program.
-
Page 11: Rockwell Compactlogix/Controllogix
EtherNetIP Connection Guide Rockwell CompactLogix/ControlLogix 3.1. Adding a Single iR-ETN Rockwell CompactLogix and ControlLogix can be edited using RSLogix 5000. Step 1. Open [Tools] » [EDS Wizard] and import iR-ETN’s EDS file. Import EDS file following the on-screen instructions. - Page 12 EtherNetIP Connection Guide...
- Page 13 EtherNetIP Connection Guide...
- Page 14 EtherNetIP Connection Guide Step 2. Right-click on [Ethernet] and select [Add Module…].
- Page 15 EtherNetIP Connection Guide...
- Page 16 EtherNetIP Connection Guide Enter iR-ETN’s IP address and device name. The device name will be used in the tags. Step 3. iR-ETN’s Input/Output Data can be found in the tag.
-
Page 17: Adding Multiple Ir-Etn
EtherNetIP Connection Guide Select the corresponding bit when programming. 3.2. Adding Multiple iR-ETN In Allen Bradley software, each device requires a unique EDS file. To add multiple iR-ETN (each with different number of I/O), please follow instructions below. Step 1. - Page 18 EtherNetIP Connection Guide Step 2. Configure connection parameters for iR-ETN’s EDS file. *When Assembly Instance only has Input, “Comm Format” must be set to “Input Data – SINT”. Step 3. Enter iR-ETN’s IP address, name, and description.
- Page 19 EtherNetIP Connection Guide Step 4. Enter RPI. Use the default setting, which is 10 ms (min. RPI support for iR-ETN is 5 ms). Step 5. When you have finished setting the parameters, you can see iR-ETN’s I/O status in Controller Tags page.
-
Page 20: Panasonic Fp7
Panasonic FP7 CPS41E CPU supports EtherNet/IP, please use Control FPWIN Pro 7 software to edit the program. Step 1. Use static IP for PLC. Step 2. Open EtherNet/IP Setting » [EDS File] » [Register...] and import iR-ETN’s EDS file. Step 3. Right-click on iR-ETN and select [Add to Scan List]. - Page 21 EtherNetIP Connection Guide Step 4. [Setting] » [EtherNet/IP Basic Configuration...] Set [Auto Allocation] to “No”.
- Page 22 EtherNetIP Connection Guide Step 5. Device Allocation is currently empty. Right-click on iR-ETN and select [Reallocate Device].
- Page 23 EtherNetIP Connection Guide Settings can be saved for other projects to read by clicking [Save Setting]. Click [OK] to finish settings. Step 6. Configure I/O mapping in [Global variables] tab for use in the program...
-
Page 24: Keyence Kv Series
EtherNetIP Connection Guide KEYENCE KV Series KEYENCE KV-NC32 can connect to iR-ETN using KV-NC1EP. Use KV STUDIO software to edit the program. Step 1. Open a new project, double-click on KV-NC32, and then add KV-NC1EP in Unit Editor. Step 2. - Page 25 Step 4. Import iR-ETN’s EDS file generated by EasyRemoteIO. Step 5. Double-click on iR-ETN to add it into the settings and then set iR-ETN’s IP address. iR-ETN configuration is completed, the input address is W00 and output address is W02.
- Page 26 CODESYS® is a trademark of 3S-Smart Software Solutions GmbH. Other company names, product names, or trademarks in this document are the trademarks or registered trademarks of their respective companies. This document is subject to change without prior notice. Copyright© 2020 Weintek Lab., Inc. All rights reserved.


Need help?
Do you have a question about the iR-ETN and is the answer not in the manual?
Questions and answers