Table of Contents
Advertisement
Quick Links
ASSEMBLY INSTRUCTIONS
INSTRUCCIONES DE ENSAMBLAJE
INSTRUCTIONS D'ASSEMBLAGE
MONTAGEANLEITUNGEN
®
RiverRidge
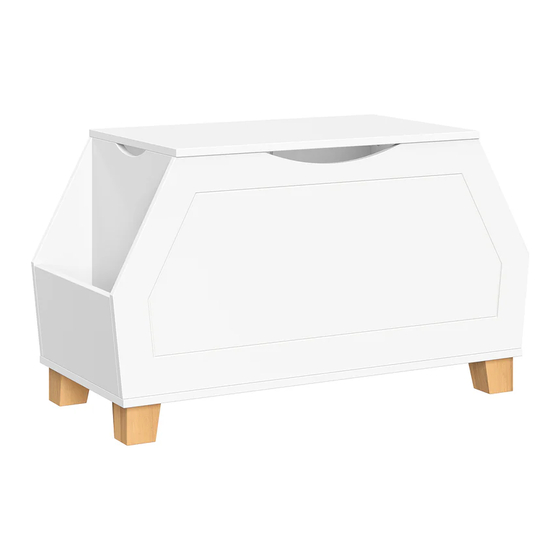
Kids Catch-All Toy Storage Box
®
RiverRidge
Caja de almacenamiento de juguetes para niños Catch-All
®
RiverRidge
Boîte fourre-tout pour jouets d'enfants
®
RiverRidge
Aufbewahrungskiste für Kinderspielzeug
02-376 - White, Blanco, Blanc, Weiß
RiverRidge
®
is a registered trademark of Sourcing Solutions, Inc., Hudson, WI 54016, USA
RiverRidge
®
es una marca comercial registrada de Sourcing Solutions, Inc., Hudson, WI 54016, USA
RiverRidge
®
est une marque déposée de Sourcing Solutions, Inc., Hudson, WI 54016, USA
®
RiverRidge
ist ein eingetragenes Warenzeichen der Sourcing Solutions, Inc. mit Sitz in Hudson, WI 54016, USA
Advertisement
Table of Contents

Related Manuals for RiverRidge 02-376


Summary of Contents for RiverRidge 02-376
- Page 1 ® RiverRidge Boîte fourre-tout pour jouets d’enfants ® RiverRidge Aufbewahrungskiste für Kinderspielzeug 02-376 - White, Blanco, Blanc, Weiß RiverRidge ® is a registered trademark of Sourcing Solutions, Inc., Hudson, WI 54016, USA RiverRidge ® es una marca comercial registrada de Sourcing Solutions, Inc., Hudson, WI 54016, USA RiverRidge ®...
-
Page 2: Weight Capacity
IMPORTANT SERIOUS OR FATAL INJURIES CAN OCCUR FROM IMPROPER ASSEMBLY AND/OR MISUSE. Please read and fully understand all warnings and assembly instructions before assembling item. Maintain these instructions for future reference. When correctly assembled and maintained, this product is suitable for use by children 3 years and older. WARNING: USE ONLY AS INTENDED •... - Page 3 IMPORTANTE SE PUEDEN PRODUCIR LESIONES GRAVES O MORTALES POR UN ENSAMBLADO INCORRECTO Y/O UN USO INDEBIDO. Lea y comprenda todas las advertencias e instrucciones de ensamblado antes de ensamblar el producto. Guarde estas instrucciones para futuras referencias. Si se ensambla y mantiene correctamente, este producto es adecuado para que lo utilicen niños a partir de 3 años.
- Page 4 IMPORTANT DES BLESSURES SÉRIEUSES OU FATALES PEUVENT SURVENIR LORS D'UN ASSEMBLAGE INCORRECT ET/OU D'UNE MAUVAISE UTILISATION. Veuillez lire et comprendre entièrement tous les avertissements et instructions de montage avant d'assembler l'article. Conservez ces instructions d’assemblage pour toute référence ultérieure. Lorsqu'il est correctement assemblé et entretenu, ce produit peut être utilisé par des enfants de 3 ans et plus.
- Page 5 WICHTIG BEI UNSACHGEMÄSSER MONTAGE UND/ODER UNSACHGEMÄSSEM GEBRAUCH KANN ES ZU SCHWEREN ODER TÖDLICHEN VERLETZUNGEN KOMMEN. Bitte lesen und verstehen Sie alle Warnhinweise und die Montageanleitung, bevor Sie den Artikel zusammenbauen. Bewahren Sie diese Anleitung zum späteren Nachschlagen auf. Bei korrekter Montage und Wartung ist dieses Produkt für Kinder ab 3 Jahren geeignet. WARNUNG: NUR BESTIMMUNGSGEMÄSSE VERWENDUNG •...
-
Page 6: Parts List
PARTS LIST DESCRIPTION Top Board Front Panel Back Panel 2PCS Divider Board 2PCS Side Panel Bottom Board 4PCS Wooden Leg 2PCS Wood Block... -
Page 7: Replacement Parts
If you purchased your item in the United States, you can order replacement parts at no cost to you on www.riverridgehome.com. If purchased outside of the United States, please contact retailer where purchased. CONTACT US For any questions regarding your RiverRidge® product, please feel free to contact us at www.riverridgehome.com/pages/contact-us. - Page 8 STEP 1 Screw 4 cam bolts (A) into cam bolt holes on front panel (2). Screw 4 cam bolts (A) into cam bolt holes on back panel (3). Attach wood block (8) to back panel (3) by inserting 2 screws (I) through holes on wood block (8), then tighten to back panel (3).
- Page 9 STEP 3 Insert 4 wood dowels (C) into wood dowel holes on side panels (5). Attach front panel (2) to 2 divider boards (4) and 2 side panels (5) by inserting cam bolt (A) into cam lock holes on divider boards (4) and inserting wood dowels (C) into wood dowel holes on front panel (2).
- Page 10 STEP 5 Insert 4 wood dowels (C) into wood dowel holes on bottom board (6). Attach bottom board (6) to front panel (2) and back panel (3) by inserting wood dowels (C) into wood dowel holes on front panel (2) and back panel (3). Insert 6 screws (E) through holes on bottom board (6), then tighten to front panel (2) and back panel (3).
- Page 11 STEP 7 Attach wood block (8) to top board (1) by inserting 2 screws (I) through holes on wood block (8), then tighten to top board (1). STEP 8 Attach 2 hinges (H) to top board (1) by inserting 4 screws (D) through holes on hinges (H), then tighten to top board (1).
-
Page 12: Maintenance
CARE Wipe clean with a water dampened cloth. Wipe dry with clean cloth. IMPORTANT: Keep assembly instructions for future reference. LET’S GET SOCIAL! Follow us and tag @riverridgehome in your photos and videos of your RiverRidge products! ®... -
Page 13: Lista De Piezas
Si lo compró fuera de los Estados Unidos, comuníquese con el distribuidor donde lo adquirió. COMUNÍQUESE CON NOSOTROS Si tiene preguntas con relación a este producto RiverRidge®, no dude en comunicarse con nosotros a través de www.riverridgehome.com/pages/contact-us. - Page 14 PASO 1 1. Atornille los 4 pernos de anclaje (A) en los agujeros correspondientes del panel delantero (2). 2. Atornille los 4 pernos de anclaje (A) en los agujeros correspondientes del panel trasero (3). 3. Fije el bloque de madera (8) al panel trasero (3) insertando 2 tornillos (I) a través de los agujeros del bloque de madera (8) y, a luego, ajústelos al panel trasero (3).
-
Page 15: Mantenimiento
CUIDADO Limpiar con un paño humedecido en agua. Secar con un paño limpio. IMPORTANTE: Guarde las instrucciones de ensamblaje para futuras referencias. ¡SOCIALICEMOS! ® ¡Síganos y etiquete a @riverridgehome en las fotos y videos de sus productos RiverRidge... -
Page 16: Liste Des Pièces
Si vous avez acheté votre article aux États-Unis, vous pouvez commander des pièces de rechange sans frais pour vous sur www.riverridgehome.com. Si l’achat est effectué en dehors des États-Unis, veuillez contacter le détaillant où vous avez acheté. CONTACTEZ-NOUS Pour toute question concernant votre contrat RiverRidge® n’hésitez pas à nous contacter à l’adresse www.riverridgehome.com/pages/contact-us. - Page 17 ÉTAPE 1 1. Vissez 4 boulons à came (A) dans les trous de boulon à came sur le panneau avant (2). 2. Vissez 4 boulons à came (A) dans les trous de boulon à came sur le panneau arrière (3). 3.
-
Page 18: Entretien
éloigner les pièces endommagées des enfants. ENTRETIEN Nettoyez avec un chiffon humide. Séchez avec un chiffon propre. IMPORTANT : Conservez les instructions d’assemblage pour toute référence ultérieure SOCIALISONS-NOUS! ® Suivez-nous et marquez @riverridgehome dans vos photos et vidéos de vos produits RiverRidge... - Page 19 Wenn Sie Ihren Artikel in den Vereinigten Staaten gekauft haben, können Sie Ersatzteile versandkostenfrei auf www.riverridgehome.com bestellen. Bei Kauf außerhalb der Vereinigten Staaten, wenden Sie sich bitte an den Händler, bei dem Sie das Produkt erstanden haben. KONTAKT Für alle Fragen zu Ihrem RiverRidge® Produkt kontaktieren Sie uns bitte unter www.riverridgehome.com/pages/contact-us.
- Page 20 SCHRITT 1 1. Schrauben Sie 4 Verbindungsbolzen (A) in die Verbindungsbolzenbohrungen des oberen Bretts (2). 2. Schrauben Sie 4 Korpusverbinder-Bolzen (A) in die Korpusverbinder-Bolzenbohrungen der Rückwand (3). 3. Befestigen Sie den Holzblock (8) an der Rückwand (3), indem Sie 2 Schrauben (I) durch die Öffnungen des Blocks (8) stecken und an der Rückwand (3) festschrauben.
-
Page 21: Wartung
PFLEGE Mit einem mit Wasser angefeuchteten Tuch abwischen. Mit einem sauberen Tuch trockenwischen. WICHTIG: Bewahren Sie die Montageanleitung zum späteren Nachschlagen auf. Lasst uns sozial werden! Folgen Sie uns und markieren Sie @riverridgehome in den Fotos und Videos Ihrer RiverRidge®-Produkte!
Need help?
Do you have a question about the 02-376 and is the answer not in the manual?
Questions and answers