Nederman L-PAK Series Original Instruction Manual
Hide thumbs
Also See for L-PAK Series:
- Manual (17 pages) ,
- Instruction manual (19 pages) ,
- User manual (178 pages)

Related Manuals for Nederman L-PAK Series


Summary of Contents for Nederman L-PAK Series
- Page 1 PLC Manual L-PAK Series L-PAK 150/250 Advanced 50Hz, 60Hz Original PLC manual PLC MANUAL 2016-12-09 2130144(00)
- Page 3 L-PAK 150/250 Advanced Figures .................................. English ...................................
- Page 4 L-PAK 150/250 Advanced Figures Nederman FlexPAK Off TimeToService 2000Hour Pilot Signal O Pilot Signal On FlexPAK Off Standby TimeToService 2000Hour Running kPa -20 DIRTm 10:00s OTTmr 00:00s DIR_Time DIR_Time T > 10:00s T < 10:00s Ta = 00:00 Ta = 00:00...
-
Page 5: Table Of Contents
L-PAK 150/250 Advanced English PLC Manual Table of contents 1 Preface ....................................2 Safety ....................................3 Description ..................................4 Unit operation ................................Software with extended functionality ....................Unit operation modes ..........................5 PLC messages .................................. Status messages ............................. 5.1.1 L-PAK Off (Off mode) ........................5.1.2 L-PAK Standby (Standby mode) ....................5.1.3 Running (Running mode) ......................5.1.4 Idling (Idling mode) .......................... -
Page 6: Preface
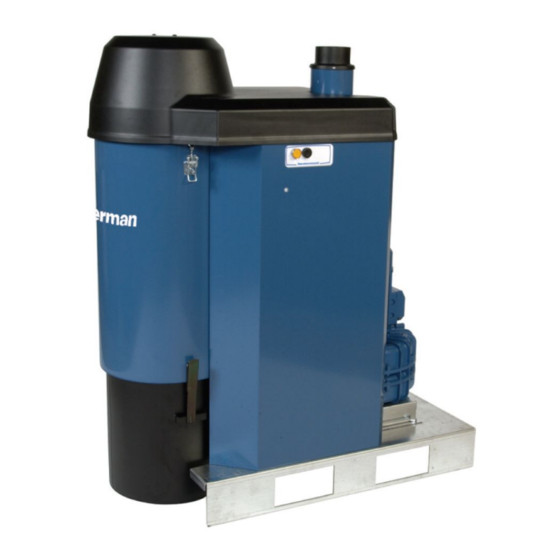
L-PAK 150/250 Advanced Preface Read this manual carefully before installation, use and service of this product. Replace the manual immediately if lost. Nederman reserves the right, without previous notice, to modify and improve its products including documentation. This product is designed to meet the requirements of relevant EC directives. To maintain this status, all installation, maintenance and repair is to be done by qualified personnel using only Nederman original spare parts and accessories. Contact the nearest authorized distributor or Nederman for advice on technical service and obtaining spare parts. If there are any damaged or missing parts when the product is delivered, notify the carrier and the local Nederman representative immediately. Safety This document contains important information that is presented as either a warning, caution or note. See the following examples: WARNING! Risk of personal injury. Warnings indicate a potential hazard to the health and safety of personnel, and how that hazard may be avoided. CAUTION! Risk of equipment damage. Cautions indicate a potential hazard to the product but not to personnel, and how that hazard may be avoided. NOTE! Notes contain other information that is important for personnel. Description WARNING! Risk of personal injury. See the User manual... -
Page 7: Unit Operation Modes
L-PAK 150/250 Advanced Unit operation modes L-PAK 150/250 Advanced has the following four operation modes: Off mode Standby mode Running mode Idling mode See Section 5.1. Status messages for more information about each mode. How the unit moves from one operation mode to another is explained below. See also Figure 1 for a flow chart showing how the unit goes through its four different operation modes. When the unit is in Off mode, the unit can be put into Standby mode (the unit is ready) with its motor off and the Filter Cleaning Valve (FCV) closed by pressing the Standby/Running button. While the unit is in Standby mode, the unit can be put back into Off mode again by pressing the Standby/Running button. NOTE! If power is lost to the unit, for example if there is a power outage, and Zero voltage detection is set to OFF see page 16, the unit goes immediately back into Standby mode once power is resumed without having to push the Standby/Running button. The unit goes from Standby mode into Running mode when it receives a pilot signal by a valve being opened at one or more work stations (in other words, someone starts to work). The unit’s motor is now on and the FCV is closed. The DIR_Time and SSR_Time timers are not started, see Sections 6.2.4. DIR_Time and 6.2.5. SSR_Time. The unit stays in Running mode as long as there is an active pilot signal. However, the unit can still be put into Off mode by pressing the Standby/ Running button. Note that if only one workstation is connected to the unit, or if only one work station is in use and work stops at that one station, the pilot signal stops. If there is more than one work station connected to the unit, and more than one work station is in use, the pilot signal only stops if work stops at all workstations (in other words, all valves close). -
Page 8: Plc Messages
L-PAK 150/250 Advanced PLC messages The following sections show the different status, warning and alarm messages that can be seen in the PLC display. Status messages The following status messages give information about what mode the unit is in or what routine service is being performed. 5.1.1 L-PAK Off (Off mode) The unit is in Off mode, which is also the unit’s start menu. The unit can also go into Off mode if something is wrong, such as if an alarm is activated. The pump motor is off, there is no vacuum, the FCV is closed, and the unit cannot be activated by a pilot signal. TimeToService: The amount of time until next L-PAK scheduled service. The default setting is 2000 hours. See Section 6.2.3. H-Meter 1. TimeToService 2000Hour 5.1.2 L-PAK Standby (Standby mode) The unit is in Standby mode and is ready. The pump motor is off, there is no vacuum, the FCV is closed, and the unit is waiting for a pilot signal to go into Running mode. Standby Waiting for pilot signal 2012-07-02 5.1.3 Running (Running mode) The unit in Running mode. The pump motor is on and the unit generates a... -
Page 9: Filter Cleaning
L-PAK 150/250 Advanced Time to Standby: The amount of time until the FlexPAK unit goes into Standby mode. The default setting Idling is 12 minutes. See Section 6.2.5. SSR_Time. TimeToStandby 12:00m 5.1.5 Filter Cleaning The unit is cleaning its filter. Clean: How long the filter cleaning valve is open. Filter Cleaning Charge: Vacuum charge time. Clean 00:00 Wait 00:00 Warning messages If a warning is activated, there is a problem that needs to be corrected, but the unit continues to work. 5.2.1 Time for service The time interval set in the ‘Service Interval Setting’ menu has expired. If this alarm is activated, the light in the Standby/Running button is lit one second and then again in 7 seconds. This 1/7 on/off sequence continues until the warning is reset. Reset the alarm by first putting the unit into Off mode. Restart the unit. In Standby mode, press the manual filter cleaning button for 10 seconds. Time for Service Time when fault occured Reset OK ==>... -
Page 10: Motor Protector Activated
L-PAK 150/250 Advanced temperature has not gone below 90°C. The unit goes into Off mode. Correct the problem and press ‘OK’ to reset the alarm. NOTE! When Alarm Fan Hi Temp is activated, Alarm output is also activated until the temperature has gone below 90°C, see section 6.7. Alarm output.. Alarm Fan Hi Temp Unit Off Time when fault occured Reset OK ==> 5.3.2 Motor Protector Activated The motor is overheated. Correct the problem, and press ‘OK’ to reset the warning. Motor Protector Activated Time when fault occured Reset OK ==> 5.3.3 Low Pressure CAS The compressed air level is low. When the accurate pressure is established, press ‘OK’ to reset the warning. -
Page 11: Parameter Settings
L-PAK 150/250 Advanced NOTE! There are several other input menus on the same level as the date and time screen. If pressing takes the PLC to one of those menus, use to get to the date and time screen. Press to get to the main menu. Stop > Set Param Prg Name Press to go to >Set Param. Press to confirm. Use or to find the parameter. Press to confirm. Use and to select a value. NOTE! The blinking cursor shows the current value that can be changed. Use or to set the value. Press to confirm. Press to go to the main menu. Press to go to the date and time screen. Press to exit. -
Page 12: Weekly Timer
L-PAK 150/250 Advanced Press to go to >Set. Stop Set Param > Prg Name Press to confirm. > Clock Contrast Start Screen Press to confirm. > SetClock S/W Time Sync Press to confirm. Set Clock Su 00:00 YYYY-MM-DD 2011-12-01 The cursor shows the day of the week, which flashes since it is the first value that is selected. Change the weekday with or Move the cursor to the next position with or . Make any other necessary setting as shown in items 2 and 3 above. - Page 13 L-PAK 150/250 Advanced WeekTim 1 and WeekTim 2 have the following default settings: • WeekTim 1: The unit switches to standby on Monday, Tuesday, Wednesday, Thursday and Friday at 07:00 and switches off at 12:00. • WeekTim 2: The unit switches to standby Monday, Tuesday, Wednesday, Thursday and Friday at 13:00 and switches off at 16:00. WeekTim 3 and WeekTim 4 have the following default settings: • WeekTim 3 is suitable when you need to start/stop on Saturdays and Sundays. • WeekTim 4 is always off. The settings can be changed to accommodate a suitable time schedule. NOTE! When the timer stops the unit and a valve at a workstation is in its open position, the unit will start immediately once the timer puts the unit in standby mode. It is not necessary to use the timer function. The function can be switched off by setting the display to show only dashes. However, it is recommended that the timer function is used, as this ensures that the unit is switched off even when a valve remains open, for example, over night. NOTE! If the weekly timer has been activated, the amount of time the unit can be used during the day before it automatically goes into Off mode can be extended if the optional external standby button accessory is used, see Section Section 6.3.1. OTTmr. Below is how to make adjustments to the default settings for the weekly timer. WeekTim 1, Monday–Friday mornings WeekTim 1 D=--------- On=07:00 Off=12:00 Press to go to the unit’s date and time screen.
-
Page 14: H-Meter 1
L-PAK 150/250 Advanced Press to confirm. Press to go to the main menu. Press to go to the date and time screen. Press to exit. Setting WeekTim 2, Monday–Friday afternoons WeekTim 2 D=MTWTF-- On=13:00 Off=16:00 Make the settings according to the previous section. Setting WeekTim 3, Saturday–Sunday afternoons WeekTim 3 D=-----SS On=--:-- Off=--:-- Make the settings according to the previous section. Setting WeekTim 4 WeekTim 4 is to be set to off at all times. -
Page 15: Fltclean
L-PAK 150/250 Advanced T=12:00m: Time before SSR_Time is activated. SSR_Time The default setting is 12 minutes. The minimum setting is 5 minutes. T = 12:00m Ta=00:00: The elapsed time since the pilot signal Ta = 00:00 disappeared. 6.2.6 FltClean Menu for setting time between automatic filter cleanings. If TH = 0, no filter cleaning is performed. TH may not be set to 0 if PSIFC is set to ‘On’. TH=01:00s: Do not change the default setting of FltClean 1 second. TH = 01:00s TL=60:00m: Time between automatic filter TL = 60:00m cleanings. The default setting is 60 minutes. Ta = 00:00 Ta=00:00: The elapsed time since the last automatic cleaning was activated. 6.2.7 ClenCyl Menu for setting the opening and closing times for the FCV cleaning cycle. The FCV cleaning cycle is repeated 3 times when filter cleaning is activated for both manual and automatic filter cleaning. If TH is set to 0, no filter cleaning is performed. -
Page 16: Standard Cleaning Process
L-PAK 150/250 Advanced hours after the closing time set in the weekly timer, see Section 6.2.2. Weekly timer. To reset OTTmr so that the time is not extended, press the external standby button longer than 2 seconds and then release. T=02:00h: Extra time before the unit goes into OTTmr Off mode. The default setting is 2 hours. Ta=00:00: The elapsed time since the overtime T = 02:00h timer started. Ta = 00:00 Standard Cleaning process The filter cleaning process is always activated after the pilot signal (PS) or (PSIFC) has disappeared and DIR Time has elapsed. The filter cleaning valve opens and the filter cleaning process generates three cleaning pulses. The unit then goes into Idle mode. Standard Pilot Signal (PS) input Input 2, terminals 13 and 14 is for the standard pilot signal input were the filter cleaning process can be activated by the filter cleaning sequence timer and the manual cleaning button . PSIFC (Pilot Signal Interlock Filter Cleaning) Input 8, terminals 13 and 17 is a pilot signal input for the PSIFC filter cleaning process. When this input is used, filter cleaning is not activated until this input is deactivated. If this input is activated during a filter cleaning sequence, the... -
Page 17: Standby (Ready) Indicator
L-PAK 150/250 Advanced But, if ZV-Detect is OFF or activated,the unit does not need to be restarted by pressing the Standby/Running button. This feature is useful if L-PAK Advanced is located at some distance from the workplace; there is no need to go all the way to L-PAK Advanced to restart it. Standby (Ready) indicator The H1 lamp/Output DO1 acts as a Standby (unit ready) indicator. When the unit is in Standby mode or the fan is running, the H1 Lamp/DO1 is activated. The H1 lamp/Output DO1 is available on terminal 13. 6.10 FCTmr If this soft key is deactivated (FltClean), the interval timer will not activate any filter cleaning sequence. Default is Switch=On. - Page 18 www.nederman.com...
Need help?
Do you have a question about the L-PAK Series and is the answer not in the manual?
Questions and answers