Cafe CMB903P2NS1 Owner's Manual
30" built-in electric steam oven
Hide thumbs
Also See for CMB903P2NS1:
- Installation instructions manual (29 pages) ,
- Owner's manual (84 pages)
Table of Contents
Advertisement
Quick Links
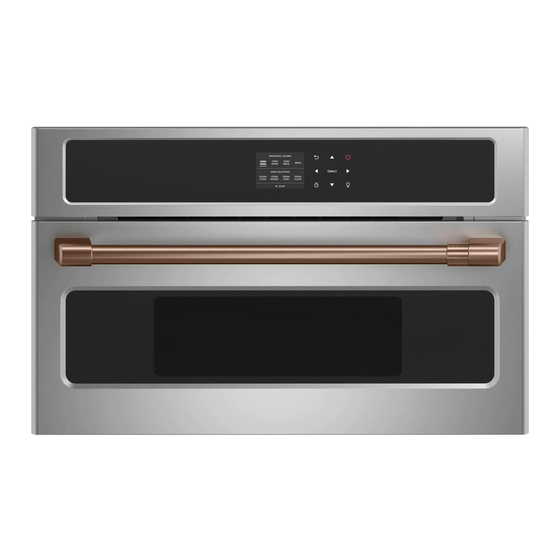
30" Built-In Electric Steam Oven
Models: CMB903P2NS1
Contents
Safety Information . . . . . . . . . . . . . . . . . . . . . . . . . . . . . . .3
Using The Oven
Before You Start . . . . . . . . . . . . . . . . . . . . . . . . . . . . . . .5
Oven Keypad . . . . . . . . . . . . . . . . . . . . . . . . . . . . . . . . . .6
Oven Controls . . . . . . . . . . . . . . . . . . . . . . . . . . . . . . . . .7
Traditional Cooking Modes . . . . . . . . . . . . . . . . . . . . . .10
Steam Cooking Modes . . . . . . . . . . . . . . . . . . . . . . . . . .11
Timed Cooking . . . . . . . . . . . . . . . . . . . . . . . . . . . . . . . .13
Probe . . . . . . . . . . . . . . . . . . . . . . . . . . . . . . . . . . . . . . .14
Recipe Function . . . . . . . . . . . . . . . . . . . . . . . . . . . . . . .16
Para consultar una version en español de este manual de instrucciones,
Owner's Manual
Write the model and serial numbers here:
Model # _______________________________
Serial # _______________________________
You can find them on a label on the front of the
oven behind the oven door.
Français
Pour obtenir une version française de ce manuel d'instructions,
visitez notre site cafeappliances.com.
Español
visite nuestro sitio de internet cafeappliances.com.
Oven Exterior . . . . . . . . . . . . . . . . . . . . . . . . . . . . . . . . .19
Oven Interior . . . . . . . . . . . . . . . . . . . . . . . . . . . . . . . . .19
Water Discharge . . . . . . . . . . . . . . . . . . . . . . . . . . . . . .20
Probe . . . . . . . . . . . . . . . . . . . . . . . . . . . . . . . . . . . . . . .20
Cookware & Reservoir . . . . . . . . . . . . . . . . . . . . . . . . . .20
Oven Racks . . . . . . . . . . . . . . . . . . . . . . . . . . . . . . . . . .20
Oven Doors . . . . . . . . . . . . . . . . . . . . . . . . . . . . . . . . . .21
Oven Light Replacement . . . . . . . . . . . . . . . . . . . . . . . .21
Troubleshooting Tips . . . . . . . . . . . . . . . . . . . . . . . . . . .22
Limited Warranty . . . . . . . . . . . . . . . . . . . . . . . . . . . . . . .25
Accessories . . . . . . . . . . . . . . . . . . . . . . . . . . . . . . . . . . .26
Consumer Support . . . . . . . . . . . . . . . . . . . . . . . . . . . . .28
49-2000695 Rev. 2 12-21 GEA
Advertisement
Table of Contents

Related Manuals for Cafe CMB903P2NS1


Summary of Contents for Cafe CMB903P2NS1
-
Page 1: Table Of Contents
Owner's Manual 30" Built-In Electric Steam Oven Models: CMB903P2NS1 Contents Safety Information .......3 Care And Cleaning Oven Exterior . - Page 2 THANK YOU FOR MAKING CAFÉ A PART OF YOUR HOME. We take pride in the craftsmanship, innovation and design that goes into every Café product, and we think you will too. Among other things, registration of your appliance ensures that we can deliver important product information and warranty details when you need them.
-
Page 3: Safety Information
IMPORTANT SAFETY INFORMATION READ ALL INSTRUCTIONS BEFORE USING THE APPLIANCE WARNING Read all safety instructions before using the product. Failure to follow these instructions may result in fire, electrical shock, serious injury or death. WARNING GENERAL SAFETY INSTRUCTIONS described in this Owner’s Manual. surface of the oven. - Page 4 IMPORTANT SAFETY INFORMATION READ ALL INSTRUCTIONS BEFORE USING THE APPLIANCE IN THE EVENT OF A FIRE, TAKE THE FOLLOWING WARNING STEPS TO PREVENT INJURY AND FIRE SPREADING flaming pan. the fire by closing the oven door and turning the oven off or by using a multi-purpose dry chemical or foam-type fire extinguisher.
-
Page 5: Before You Start
Before You Start How to Remove Protective Shipping Film Conditioning the Oven and Packaging Tape Carefully grasp a corner of the protective shipping film with your fingers and slowly peel it from the appliance water and carefully rinsed. surface. Do not use any sharp items to remove the film. Remove all of the film before using the appliance for the it for cooking and baking. -
Page 6: Oven Keypad
Oven Keypad Movement arrows ON/OFF Cancel and return to Switches the oven previous display page. on and off. Select Switches the inner For adding functions of oven light on and cook time, delay start, off. or 5 minutes of steam during cooking. -
Page 7: Oven Controls
Oven Controls Movement arrows ON/OFF Cancel and return to Switches the oven previous display page. on and off. Select Switches the inner For adding functions of oven light on and cook time, delay start, off. or 5 minutes of steam during cooking. - Page 8 Oven Controls (Cont.) TRADITIONAL COOKING CONV CONV CONV BROIL ROAST BROIL BAKE STEAM SELECTIONS STEAM STEAM STEAM STEAM COOK REHEAT CONV CLEAN 3. Steam Cooking Modes: 7. Delay Start: Steam cooking modes use steam along with the turn on. Press the and set a cook time.
- Page 9 Oven Controls (Cont.) Turning the Oven On and Off Selecting the Cooking Mode Press to switch the oven on and off. When off, the From the Cooking Screen, use the arrow keys to oven returns to standby mode. A longer keypress may navigate to the desired mode.
-
Page 10: Traditional Cooking Modes
Traditional Cooking Modes Your new oven has a variety of cooking modes to help Convection Broil you get the best results. These modes are described The Convection Broil mode uses the broil mode along with below. Remember, your new oven may perform air movement for improved searing and browning. -
Page 11: Steam Cooking Modes
Steam Cooking Modes Steam cooking has numerous benefits which include NOTES: retaining the nutritional value of food, along with retaining Do NOT place cookware directly on the oven bottom. taste, structure, and color. Cookware included with the oven is designed for use in IMPORTANT: Before using any steam functions the Steam Cook and Steam Reheat modes. - Page 12 Steam Cooking Modes Steam Reheat COOKWARE GUIDELINES FOR STEAM MODES This mode allows you to modify the temperature while steam cooking. This type of function is particularly Cookware included with the oven is designed for use in suitable for heating pre-cooked food and for preparing Steam Cook and Steam Reheat modes.
-
Page 13: Timed Cooking
Timed Cooking TIMED COOKING To use timed cooking modes, make sure the clock is displaying the correct time. press SELECT. NOTE: The time functions cannot be used if the 3. Based on the times provided for total cook time and temperature probe is on. -
Page 14: Probe
Probe WARNING Consuming undercooked food can result in foodborne illness. Use probe according to the following instructions to ensure all portions of the food reach minimum safe cooking temperatures. Recommendations for minimum safe food temperatures can be found at foodsafety.gov or IsItDoneYet.gov. Internal food temperature is frequently used as an indicator of doneness, especially for roasts and poultry. - Page 15 Probe Proper Probe Placement After preparing the food and placing it on the cooking 5. Cooking will start and all probe cooking details appear pan follow these instructions for proper probe placement. on the screen. probe will rest in the center of the thickest part of the food.
-
Page 16: Recipe Function
Recipe Function The Recipe function on your oven enables you to cook without having to set the oven manually every time. By selecting a recipe, the cooking mode, temperature and time are automatically set according to the recipe selected from the menu. PRESET RECIPES Rack Cooking... - Page 17 Recipe Function Rack Cooking Set Temp Cooking Category Item Cookware Quantity Preheat Additional Information Position Mode (°F) Time (min) Chicken, One Baking 1 (6-8 oz) Steam 6-8 oz Breast, Sheet or breast Convect Boneless Cook until internal Chicken, Two Baking 2 (6-8 oz) Steam temperature...
- Page 18 Recipe Function Select a preset recipe To remove a personalized recipe 1. Navigate to RECIPES and then SELECT. 1. Select a saved recipe you want to remove and PRESET FAVORITES’ and then press SELECT. 3. Choose the type of food to be cooked by pressing SELECT.
-
Page 19: Care And Cleaning
Care and Cleaning Be sure electrical power is off and all surfaces are cool before cleaning any part of the oven OVEN EXTERIOR OVEN INTERIOR The interior of your new oven can be cleaned manually Control Panel or by using the Steam Clean mode. It’s a good idea to wipe the control panel after each use. -
Page 20: Water Discharge
Care and Cleaning WATER DISCHARGE This cycle is called for anytime steam has been used reservoir for disposal. Pump noises during this cycle are and the oven is turned off. The following message will normal. appear on the display: NEED TO DISCHARGE/OPEN At the end of the discharge cycle, the message THE DOOR. -
Page 21: Oven Doors
Care and Cleaning OVEN DOORS Lift-Off Oven Door The door is very heavy. Be careful when removing and To replace the door: lifting the door. 1. Firmly grasp both sides of the door at the top. Do not lift the door by the handle. 2. -
Page 22: Troubleshooting Tips
Troubleshooting Tips Save time and money! Review the charts on the following pages first and you may not need to call for service. Problem Possible Cause What To Do My new oven doesn't Your new oven has a different cooking system For the first few uses, follow your recipe times cook like my old one. - Page 23 Troubleshooting Tips Problem Possible Cause What To Do “F— and a number or letter” You have a function error code. Press the Cancel/Off pad. Allow the oven to cool for flash in the display one hour. Put the oven back into operation. If the function code repeats.
- Page 24 Notes 49-2000695 Rev. 2...
-
Page 25: Limited Warranty
Limited Warranty cafeappliances.com All warranty service is provided by our Factory Service Centers, or an authorized service technician. To schedule service online, visit us at cafeappliances.com/service. Please have your serial number and your model number available when scheduling service. For the period of Café... -
Page 26: Accessories
Accesssories Looking For Something More? Café offers a variety of accessories to improve your cooking and maintenance experiences! Refer to the Consumer Support page for website information. The following products and more are available: Accessories Deep Pans and Lids (6) Perforated Pan and Lid Solid Pan Oven Rack...
Need help?
Do you have a question about the CMB903P2NS1 and is the answer not in the manual?
Questions and answers