Cisco ASA 5506-X Hardware Installation Manual
Hide thumbs
Also See for ASA 5506-X:
- User manual ,
- Configuration manual (422 pages) ,
- Installation manual (46 pages)
Table of Contents
Advertisement
Quick Links
Advertisement
Table of Contents

Related Manuals for Cisco ASA 5506-X


Summary of Contents for Cisco ASA 5506-X
- Page 1 Cisco ASA 5506-X Hardware Installation Guide First Published: 0, Last Modified: 0, Americas Headquarters Cisco Systems, Inc. 170 West Tasman Drive San Jose, CA 95134-1706 http://www.cisco.com Tel: 408 526-4000 800 553-NETS (6387) Fax: 408 527-0883 Text Part Number: Online Only...
- Page 2 Cisco and the Cisco logo are trademarks or registered trademarks of Cisco and/or its affiliates in the U.S. and other countries. To view a list of Cisco trademarks, go to this URL: www.cisco.com/go/trademarks . Third-party trademarks mentioned are the property of their respective owners. The use of the word partner does not imply a partnership relationship between Cisco and any other company.
-
Page 3: Table Of Contents
Power Supply Considerations Equipment Rack Configuration Mount and Connect the ASA C H A P T E R 3 Mount the ASA Desktop Mount the ASA Wall Mount the ASA Rack Mount the ASA Cisco ASA 5506-X Hardware Installation Guide Online Only... - Page 4 Connect Cables, Turn on Power, and Verify Connectivity Connect to a Console Terminal or PC Connect to the Console Port with Microsoft Windows Connect to the Console Port with Mac OS X Connect to the Console Port with Linux Cisco ASA 5506-X Hardware Installation Guide Online Only...
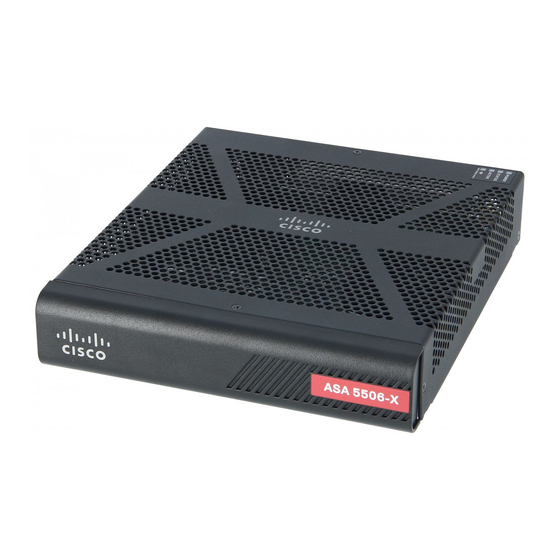
- Page 5 C H A P T E R About the ASA 5506-X The Cisco ASA 5506-X adaptive security appliance is part of the ASA 5500-X of next-generation mid-range ASAs and is built on the same security platform as the rest of the ASA family.
-
Page 6: About The Asa 5506-X
Brick power supply Front Panel The following figure shows the front panel. Note that there are no connectors or LEDs on the front panel. Rear Panel The following figure shows the rear panel. Cisco ASA 5506-X Hardware Installation Guide Online Only... - Page 7 You can use the service sw-reset-button to disable the reset button. Note The default is enabled. Lock slot The slot accepts a standard Kensington T-bar locking mechanism for securing the ASA. Cisco ASA 5506-X Hardware Installation Guide Online Only...
-
Page 8: Status Lights
• Green – Normal system function. • Amber – Critical alarm indicating one or more of the following: • Major failure of a hardware or software component. • Over-temperature condition. • Power voltage outside the tolerance range. Cisco ASA 5506-X Hardware Installation Guide Online Only... -
Page 9: Network Ports
• Three rapid blinks – 1000 Mbps. Network Ports There are eight 10/100/1000 baseT Ethernet network ports on the ASA 5506-X. Each RJ-45 (8P8C) copper port supports auto MDI/X as well as auto-negotiation for interface speed, duplex, and other negotiated parameters, and are MDI/MDIX compliant. -
Page 10: Internal And External Flash Storage
The RJ-45 (8P8C) port supports RS-232 signaling to an internal UART controller. The RJ-45 console port does not support a remote dial-in modem. You can use a standard management cable (Cisco part number 72-3383-01) to convert the RJ45-to-DB9 connection if necessary. -
Page 11: Solid State Drive
Solid State Drive The ASA 5506-X ships with an SSD installed that provides storage support. The SSD has 50 GB of useable space and is not field-replaceable. You must return the entire ASA to Cisco for drive replacement. The SSD is used by the software;... - Page 12 About the ASA 5506-X Hardware Specifications Maximum altitude Operating: 3048 m (10,000 ft) Nonoperating: 4572 m (15,000 ft) 1 Derate the maximum operating temperature 1.5 degrees C per 1000 ft above sea level. Cisco ASA 5506-X Hardware Installation Guide Online Only...
-
Page 13: Prepare For Installation
(Statement 94) Work During Lightning Warning Do not work on the system, or connect or disconnect cables during periods of lightning. (Statement 1001) Short-Circuit Protection Warning Cisco ASA 5506-X Hardware Installation Guide Online Only... -
Page 14: Position The Asa
The appliance has “feet” on the bottom so it does not sit flush where placed, thus allowing proper air circulation through and around it. Make sure that the appliance is not tightly enclosed or crowded by other objects that might impede proper circulation. Cisco ASA 5506-X Hardware Installation Guide Online Only... -
Page 15: Safety Recommendations
◦ Determine whether the person needs rescue breathing or external cardiac compressions; then take appropriate action. • Use the ASA within its marked electrical ratings and product usage instructions. Cisco ASA 5506-X Hardware Installation Guide Online Only... -
Page 16: Prevent Electrostatic Discharge Damage
Prevent Electrostatic Discharge Damage • Install the ASA in compliance with local and national electrical codes as listed in the Regulatory Compliance and Safety Information document (see http://www.cisco.com/go/asa5506x-compliance). Prevent Electrostatic Discharge Damage Electrostatic discharge (ESD) occurs when electronic components are improperly handled, and it can damage equipment and impair electrical circuitry, resulting in intermittent or complete failure. -
Page 17: Power Supply Considerations
• Baffles can help to isolate exhaust air from intake air, which also helps to draw cooling air through the chassis. The best placement of the baffles depends on the airflow patterns in the rack. Experiment with different arrangements to position the baffles effectively. Cisco ASA 5506-X Hardware Installation Guide Online Only... - Page 18 Prepare for Installation Equipment Rack Configuration Cisco ASA 5506-X Hardware Installation Guide Online Only...
-
Page 19: Mount And Connect The Asa
Wall Mount the ASA Follow these steps to mount your ASA on a wall. Step 1 Choose a location on the desired wall for the ASA. Step 2 Use the two Cisco-provided screws and anchors. Cisco ASA 5506-X Hardware Installation Guide Online Only... - Page 20 ASA down until it rests on the screws. You can only mount the chassis with the front panel oriented toward either the ceiling or the floor. Wall mounting in other orientation is not supported. Cisco ASA 5506-X Hardware Installation Guide Online Only...
-
Page 21: Rack Mount The Asa
Attach the rack-mount tray to the rack using the supplied screws. What to Do Next You can now install the cables and power cord, as described in Connect Cables, Turn on Power, and Verify Connectivity, on page Cisco ASA 5506-X Hardware Installation Guide Online Only... -
Page 22: Connect Cables, Turn On Power, And Verify Connectivity
Only one console port can be active at a time. When a cable is plugged into the USB console port, the RJ-45 port becomes inactive. Conversely, when the USB cable is removed from the Mini USB Type B port, the RJ-45 port Cisco ASA 5506-X Hardware Installation Guide Online Only... -
Page 23: Connect To A Console Terminal Or Pc
Step 2 Connect the power cord to the ASA, and plug the other end to your power source. The ASA 5506-X does not have an on/off switch; the device powers on when you plug it into a power source. Note Step 3 Check the Status LED on the ASA chassis. - Page 24 To communicate with the ASA, start a terminal emulator application. This software should be configured with the following parameters: • 9600 baud • 8 data bits • no parity • 1 stop bit Cisco ASA 5506-X Hardware Installation Guide Online Only...
-
Page 25: Connect To The Console Port With Mac Os X
/dev# ls -ltr *ACM* crw-r--r-- 1 root root 188, 0 Jan 14 18:02 ttyACM0 root@usb-suse /dev# Step 4 Connect to the USB port with the following command followed by the ASA USB port speed Cisco ASA 5506-X Hardware Installation Guide Online Only... - Page 26 Connect to the Console Port with Linux Example: root@usb-suse /dev# screen /dev/ttyACM0 9600 Step 5 To disconnect the Linux USB console from the Terminal window, enter Ctrl-a followed by : then quit. Cisco ASA 5506-X Hardware Installation Guide Online Only...
Need help?
Do you have a question about the ASA 5506-X and is the answer not in the manual?
Questions and answers