Table of Contents
Advertisement
Home
User Guide
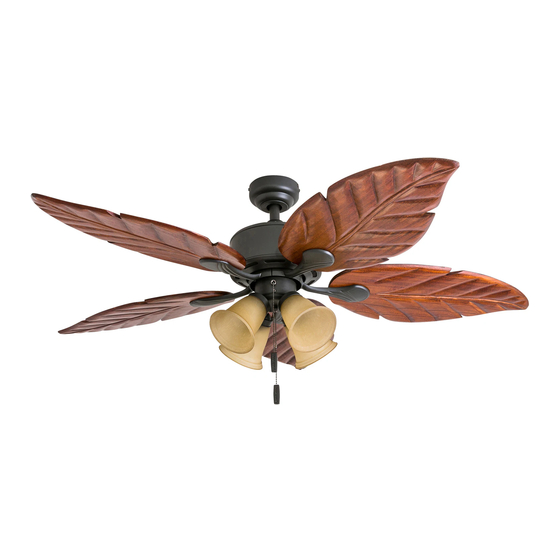
Royal Palm Ceiling Fan
Model #50503, 50504
INDEX
Package Contents . . . . . . . . . . . . . . . . . . . . . . . . . . . . . . . . . . . . . . . . . . . . . . . . . . . . . . . . . . . . . . . . . . . . . . . . . . . . . . . . . . . . . . . . . . . . . . . . . . . . . . . . . . . . .2
Hardware Contents . . . . . . . . . . . . . . . . . . . . . . . . . . . . . . . . . . . . . . . . . . . . . . . . . . . . . . . . . . . . . . . . . . . . . . . . . . . . . . . . . . . . . . . . . . . . . . . . . . . . . . . . . . . .2
Safety Information . . . . . . . . . . . . . . . . . . . . . . . . . . . . . . . . . . . . . . . . . . . . . . . . . . . . . . . . . . . . . . . . . . . . . . . . . . . . . . . . . . . . . . . . . . . . . . . . . . . . . . . . . . . . .3
Care and Maintenance . . . . . . . . . . . . . . . . . . . . . . . . . . . . . . . . . . . . . . . . . . . . . . . . . . . . . . . . . . . . . . . . . . . . . . . . . . . . . . . . . . . . . . . . . . . . . . . . . . . . . . . .3
Preparation . . . . . . . . . . . . . . . . . . . . . . . . . . . . . . . . . . . . . . . . . . . . . . . . . . . . . . . . . . . . . . . . . . . . . . . . . . . . . . . . . . . . . . . . . . . . . . . . . . . . . . . . . . . . . . . . . . . .4
Initial Installation . . . . . . . . . . . . . . . . . . . . . . . . . . . . . . . . . . . . . . . . . . . . . . . . . . . . . . . . . . . . . . . . . . . . . . . . . . . . . . . . . . . . . . . . . . . . . . . . . . . . . . . . . . . . . .4
Standard or Angle Mounting Instructions . . . . . . . . . . . . . . . . . . . . . . . . . . . . . . . . . . . . . . . . . . . . . . . . . . . . . . . . . . . . . . . . . . . . . . . . . . . . . . . . . . . . . .5
Closemount Instructions . . . . . . . . . . . . . . . . . . . . . . . . . . . . . . . . . . . . . . . . . . . . . . . . . . . . . . . . . . . . . . . . . . . . . . . . . . . . . . . . . . . . . . . . . . . . . . . . . . . . . .6
Final Installation . . . . . . . . . . . . . . . . . . . . . . . . . . . . . . . . . . . . . . . . . . . . . . . . . . . . . . . . . . . . . . . . . . . . . . . . . . . . . . . . . . . . . . . . . . . . . . . . . . . . . . . . . . . . . .6
Installation Without Light Kit . . . . . . . . . . . . . . . . . . . . . . . . . . . . . . . . . . . . . . . . . . . . . . . . . . . . . . . . . . . . . . . . . . . . . . . . . . . . . . . . . . . . . . . . . . . . . . . . . .8
Operating Instructions . . . . . . . . . . . . . . . . . . . . . . . . . . . . . . . . . . . . . . . . . . . . . . . . . . . . . . . . . . . . . . . . . . . . . . . . . . . . . . . . . . . . . . . . . . . . . . . . . . . . . . . .9
Troubleshooting . . . . . . . . . . . . . . . . . . . . . . . . . . . . . . . . . . . . . . . . . . . . . . . . . . . . . . . . . . . . . . . . . . . . . . . . . . . . . . . . . . . . . . . . . . . . . . . . . . . . . . . . . . . . . . .9
Warranty . . . . . . . . . . . . . . . . . . . . . . . . . . . . . . . . . . . . . . . . . . . . . . . . . . . . . . . . . . . . . . . . . . . . . . . . . . . . . . . . . . . . . . . . . . . . . . . . . . . . . . . . . . . . . . . . . . . . 10
Replacement Parts List . . . . . . . . . . . . . . . . . . . . . . . . . . . . . . . . . . . . . . . . . . . . . . . . . . . . . . . . . . . . . . . . . . . . . . . . . . . . . . . . . . . . . . . . . . . . . . . . . . . . . . 10
1
Advertisement
Table of Contents

Subscribe to Our Youtube Channel
Related Manuals for Honeywell Home Royal Palm


Summary of Contents for Honeywell Home Royal Palm
-
Page 1: Table Of Contents
Home User Guide Royal Palm Ceiling Fan Model #50503, 50504 INDEX Package Contents . . . . . . . . . . . . . . . . . . . . . . . . . . . . . . . . . . . . . . . . . . . . . . . . . . . . . . . . . . . . . . . . . . . . . . . . . . . . . . . . . . . . . . . . . . . . . . . . . . . . . . . . . . . . .2 Hardware Contents . -
Page 2: Package Contents
PACKAGE CONTENTS Mounting Bracket Screw (x 4) Mounting Bracket Canopy Canopy Cover Downrod Downrod Clip Downrod Pin Yoke Cover Closemount Screw (x 3) Yoke Motor Assembly Switch Housing Blade (x 5) Blade Arm (x 5) Switch Housing Screw (x 3) Socket Ring (x 4) Light Kit Switch Housing Cap... -
Page 3: Safety Information
SAFETY INFORMATION Please read and understand this entire manual before attempting to assemble, operate or install the product . • Before you begin installing the fan, disconnect the power by removing fuses or turning off the circuit breakers. • Make sure all electrical connections comply with local codes, ordinances, the National Electrical Code and ANSI/NFPA 70- 199. -
Page 4: Preparation
PREPARATION Before beginning the assembly of this product, ensure all parts are present . Compare all parts with the package contents list and hardware contents list . If any part is missing or damaged, do not attempt to assemble the product . Estimated assembly time: 2 hours Tools required (not included): Electrical tape, Phillips Screwdriver, Safety Glasses, Step Ladder, and Wire Strippers . -
Page 5: Standard Or Angle Mounting Instructions
STANDARD OR ANGLE MOUNT INSTRUCTIONS 1 . Feed the fan wires through the yoke cover, canopy and downrod (Figure 3 .1) . 2 . Slide the downrod into the yoke of the motor assembly . Align holes and reinstall the downrod pin and downrod clip and secure with the two set screws (Figure 3 .2) . -
Page 6: Closemount Instructions
CLOSEMOUNT INSTRUCTIONS (optional) 1 . Remove the canopy cover from the bottom of the canopy (Figura 4 .1) . 2. Remove the three Phillips-head closemount screws from the top of the motor assembly. Then align the canopy with the holes in the top of the motor assembly . - Page 7 FINAL INSTALLATION 4 . Partially insert the blade screws along with lock washer and blade washer through blade and into the blade arm . Tighten each blade screw starting with the one in the middle (Figure 5 . 4 ) . Repeat this step for the remaining blades and blade arms . 5 .
-
Page 8: Installation Without Light Kit
FINAL INSTALLATION 10 . Attach the pull chain extensions to the pull chains (Figure 5 .10) . 11 . Turn on power to fan at breaker box and the wall switch (Figure 5 .11) . Assembly is complete . Fan Pull Chain Light Pull Chain Figure 5.10 Figure 5.11... -
Page 9: Operating Instructions
OPERATING INSTRUCTIONS 1 . The fan pull chain has four positions to control fan speed . One pull is high, two is medium, three is low and four turns the fan off. The light pull chain has two positions to control the light, on and off (Figure 7.1). 2 . -
Page 10: Warranty
LIMITED LIFETIME WARRANTY Set forth below, the manufacturer, Hong Kong China Electric Appliance Company (HKC) warrants the fan motor for this ceiling fan to be free from defects in workmanship and material for the life of the product . Also, subject to the limitations below, HKC warrants all ceiling fan parts (“ceiling fan parts”...
Need help?
Do you have a question about the Royal Palm and is the answer not in the manual?
Questions and answers