Table of Contents
Advertisement
Quick Links
Advertisement
Table of Contents

Related Manuals for TurboChef VSOT730


Summary of Contents for TurboChef VSOT730
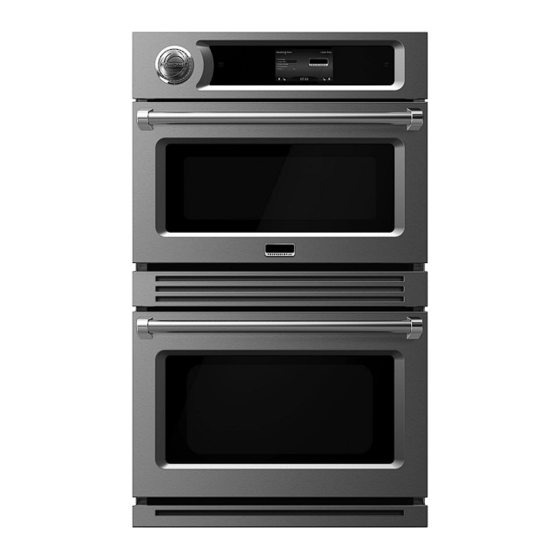
- Page 1 Use & Care MANUAL 7 SERIES Professional TurboChef Speedcook Oven VSOT730 VDOT730...
- Page 2 We hope you will enjoy and appreciate the care and attention we have put into every detail of your new, state-of-the-art Professional TurboChef Speedcook Oven. Your Speedcook oven is designed to off er years of reliable service. This Use and Care Manual will provide you with the information you need to become familiar with your oven’s care and operation.
-
Page 3: Table Of Contents
Table of Contents Getting Started Warnings and Important Information ____________________________________________4 Your Professional TurboChef Oven _______________________________________________8 Before Using the Ovens ______________________________________________________10 Product Controls Navigating the Control Panel __________________________________________________12 Operation The Speedcook Oven ________________________________________________________15 Pre-programmed Cook Settings _______________________________________________ 36 The Lower Oven _____________________________________________________________38... -
Page 4: Warnings And Important Information
IMPORTANT – Please Read and Follow! Warning and Important Safety Instructions To ensure proper and safe operation: appearing in this manual are not meant to Appliance must be properly installed and cover all possible conditions and situations grounded by a qualifi ed technician. DO NOT that may occur. - Page 5 IMPORTANT – Please Read and Follow! Read and follow all instructions before using recommended in this manual. All other this appliance to prevent the potential risk of servicing should be referred to a qualifi ed fi re, electric shock, personal injury or damage technician.
- Page 6 IMPORTANT – Please Read and Follow! WARNING CAUTION The use of cabinets for storage above the The Speedcook oven uses a high- oven may result in potential fi re or burn speed convection fan and a cooling fan hazard. for optimum cooking performance. Air movement from the fans can be heard while cooking and during a cool down WARNING...
- Page 7 IMPORTANT – Please Read and Follow! Grounding Instructions RF Interference Considerations • The appliance has been tested and Service was determined to be in compliance • Should this appliance require service, please with applicable portions of FCC part 18 call Viking Range, LLC at 1-888-(845-4641). A requirements and with the protection qualifi ed service representative will assist you requirements of Council Directive 89/336/...
-
Page 8: Your Professional Turbochef Oven
Your Professional TurboChef Oven Settings Your new TurboChef Speedcook Double Wall Oven off ers you the versatility to cook all your Every cook knows that getting the time and favorite foods in a fraction of the time they temperature right for a particular dish can be a usually require. - Page 9 Your Professional TurboChef Oven Flexibility of Adapting and Saving To summarize, with your Professional TurboChef Your Own Favorite Recipes Oven you will enjoy: The Speedcook Oven will store up to 9,999 of your • The Speedcook Oven’s Patented Airspeed favorite recipe settings. You can also adapt your Technology™, which cooks food 15 times...
-
Page 10: Before Using The Ovens
Before Using the Ovens Initial Cleaning Setting the Clock and Personal Preferences on the Utilities Screen Before the fi rst use of each oven, wipe the interior with soapy water and dry thoroughly. You can access the Utilities screen from any screen. - Page 11 Before Using the Ovens Setting the Clock If standard time is chosen, AM/PM, will At the Utilities screen, tap Settings. The appear. Select the correct time. The "del" key following screen displays: will clear the last number entered. Back key At the Settings screen, tap Clock.
-
Page 12: Navigating The Control Panel
Power Off Power Off Speedcook Speedcook Control Lower Lower Clock Speedcook Oven* Oven Light Oven Lock Panel Oven Oven Lower Oven Lock Light *Note: Holding “Upper/Off” for more than 5 seconds will reset the oven software. VSOT730 Single Oven Control Panel... - Page 13 Navigating the Control Panel Oven Light and Lock To start either oven, tap the oven name. An arrow appears under the name of the oven At the bottom of the screen, on the left for the selected. The fi rst menu of options for that oven Speedcook Oven and on the right for the Lower also displays.
- Page 14 Navigating the Control Panel Moving through Menu Levels To toggle from the Lower Oven to a In the Speedcook Oven, you navigate from the Speedcook screen, you have two options: Main Menu to reach the settings for the food a. Tap the Back key. item you want to cook.
-
Page 15: The Speedcook Oven
The Speedcook Oven Cooking Example: Choosing the To use the Speedcook Oven, simply select from Settings one of the menu items listed on the touch screen. If you tap Cook mode on the main menu, a screen opens showing the eight cooking modes available in Speedcook (scroll down to see Defrost): From this menu, choose Roast to see a list... - Page 16 The Speedcook Oven Cooking Example: Preheating and Tapping Lamb opens a screen listing Cooking various cuts of lamb that can be roasted. In our example we have gone from Cook Mode to Roast to Meat to Lamb to Rack of Lamb. Tapping Rack of Lamb opens the screen for preheating and cooking.
- Page 17 The Speedcook Oven Note: The pre-programmed Speedcook settings, Once preheating is complete, place the food which have been developed through extensive in the oven. testing by our staff of professional chefs, may diff er in time and temperature from what your original recipe indicates.
- Page 18 The Speedcook Oven cook cycle pauses. At this point you can At the end of the cook cycle, a chime check the food and adjust the settings. sounds, notifying you that your item is There is a 1 minute window for response. done.
- Page 19 The Speedcook Oven The touch screen will then display these Starting from Cook Mode options: "Save to favorites, " "Repeat Cook, " or Your Speedcook Oven off ers eight cook modes "Main menu. " You can choose one of these that enable you to choose the best cooking options.
- Page 20 The Speedcook Oven Tap any cook mode to open a screen listing the Air Crisp various types of foods you can cook using this mode. As we saw in the example, tapping Roast opens a menu of food types that do well when roasted.
- Page 21 The Speedcook Oven Toast Bake bake toast Toasting browns and crisps foods. Using high Traditionally, to bake is to cook with dry heat. Hot heat and high-speed air, the Toast mode can air from the top and bottom of the oven envelops enhance fl avor and melt cheese.
- Page 22 The Speedcook Oven Broil Dehydrate broil dehydrate The Broil mode on your Speedcook Oven will Considered the original form of preservation, yield the same or superior results as broiling in dehydrating removes a food’s natural moisture a traditional oven. The only diff erence is that by slowly drying it with a low heat.
- Page 23 The Speedcook Oven Convection Bake Roast roast convection bake In Roast mode (see the screen in the When set to Convection Bake, the Speedcook introduction to Cook mode), the Speedcook Oven operates as a standard convection oven Oven uses a combination of low and high speed with the fans running at a low speed.
- Page 24 The Speedcook Oven Defrost Tap Temperature to open a scaled bar for setting the oven temperature. The temperature can be changed in 5° F increments. defrost The Defrost function can be used to aid in thawing foods, especially frozen meats and Tap Preheat.
- Page 25 The Speedcook Oven Starting from Food Item For example, to bake focaccia, tap Breads to Cooks traditionally set an oven to a specifi c open this menu: mode according to the kind of food they are cooking. Because the Speedcook Oven has programmed times and temperatures for more than 700 food items, you can also go to the correct preheat and cook screen by choosing a...
- Page 26 The Speedcook Oven Reheating Leftovers Starting from Favorites The Food Item menu includes "Leftovers, As you use your Speedcook Oven, you will begin Reheat." This is a generic setting for any item you adapting your own favorite recipes to the oven, are reheating and does not have any options for adjusting the time and temperature, or using changing time and temperature.
- Page 27 The Speedcook Oven Type in the name of the favorite. Use the Cooking a Dish Already Saved in Favorites Sym 123 key to add numbers to the name of To cook a dish already saved in Favorites, follow your favorite. the directions below.
- Page 28 The Speedcook Oven Making Adjustments On the touch screen, select the desired Making Adjustments during a Cook Cycle adjustment. When a cook cycle is 80% complete, the oven chimes and cooking is paused for 1 minute. This gives you the chance, if desired, to make mid- course adjustments to account for diff erences in food products and individual tastes.
- Page 29 The Speedcook Oven If the cook cycle is started from a pre- Making Adjustments at the End of a Cook programmed cook setting or from a cook setting Cycle in Favorites, changes made at the 80% complete point will not alter the original pre-programmed or saved setting.
- Page 30 The Speedcook Oven Adjusting the Cook Time Selecting "Cook more," "Brown more," or "Cook & brown more" adds 15 seconds to The pre-programmed cook time for each item the time. has been calculated through extensive testing a. If "Finished" is selected, the oven advances by a staff of professional chefs to yield optimal to the "Save to Favorites"/"Repeat results.
- Page 31 The Speedcook Oven Adjusting the Oven Temperature Like the cook times, pre-programmed Tap Save to confi rm the new temperature. temperatures have been calculated by a staff Tap OK. The cook screen displays showing of professional chefs to yield optimal results. Be the new temperature.
- Page 32 The Speedcook Oven Tap Cancel on the left side of the bar. The Using the Advanced Setting word "Cancel" changes to "Events." In Advanced Setting you can adjust not only the cook time and oven temperature but also the air fl ow and microwave power levels of a pre- programmed setting.
- Page 33 The Speedcook Oven Each programmed setting is divided into Microwave: Controls the amount of microwave four time intervals, and each interval has four power being used. You can adjust the microwave associated settings; Time, Upper Air, Lower Air, power in 10% increments from 0 to 100%. and Microwave: To change the settings, at the Advanced Setting screen tap the number in the table...
- Page 34 The Speedcook Oven At the Advanced Setting screen tap Save Tap OK to return to the preheat and cook to confi rm the changes you have made, or screen and start the preheat. Cancel to return to the original settings. a.
- Page 35 The Speedcook Oven Speedcook Oven Tips The Speedcook Oven comes equipped with a variety of helpful hints that cover a range of topics. After choosing your pre-programmed cook setting, you may also see the information key logo . Tap this logo to see helpful tips about cooking your food.
-
Page 36: Pre-Programmed Cook Settings
Pre-programmed Cook Settings AirCrisp Bake (cont.) Bake (cont.) Corn Dogs Chicken & Fowl Custards Crab Cakes • Chicken • Bread Pudding o Bone-In Portions • Crème Brûlée Egg Rolls o Boneless •Flan Fishsticks o Whole • Vanilla Fries • Cornish Game Hen Fruit Cobbler Hash Brown Patties •... - Page 37 Pre-programmed Cook Settings Bake (cont.) Broil (cont.) Roast (cont.) • Pasta with Red Sauce • Pork • Cornish Game Hen • Pasta with White Sauce o Bone-In Chops • Duck, Whole • Stuff ed Shell o Brats • Turkey Vegetables & Grains o Breakfast Links o Boneless Breasts •...
-
Page 38: The Lower Oven
The Lower Oven The Lower Oven in the Double Oven model is In addition to these six modes, Warm and Proof both a conventional and convection oven that Modes further expand the overall capabilities of provides uniform cooking throughout in fi ve the bottom oven. - Page 39 The Lower Oven Convection Bake Broil Hi and Broil Lo broil convection bake Convection Bake uses the same heating elements Broiling directly exposes food to radiant heat as Bake, with the addition of a convection fan (as over a fi re or on top of a grill). The heat is and heater in the back of the cook cavity.
- Page 40 The Lower Oven Using the Lower Oven Convection Roast CAUTION Due to the concealed heating element in the bottom oven, DO NOT cover or line the bottom of the oven with foil. From the Lower Oven main menu: Use the touch screen to select the desired oven mode: Convection Bake, Convection convection roast Roast, Broil, Roast, Bake, Warm, or Proof.
- Page 41 The Lower Oven To select the oven temperature, tap the Note: When the timer is set, the remaining cook preset temperature (450° on the screen time is displayed as the primary information. If the show below) on the "Oven" section of the meat probe is in use, the probe temperature (see bar.
- Page 42 The Lower Oven Proof Temperature Probe Function This function allows you to raise ("proof") bread The temperature probe takes the guesswork out or other yeast doughs. When the lower oven of roasting by cooking foods to the ideal internal is used for proofi ng, the temperature can be temperature.
-
Page 43: Using The Timer
Using the Timer The egg timer is a traditional timer that operates independently of any of the oven timers. It is displayed on the right side of the utility drawer handle (visible when you tap to pull up the tab centered in the bottom of the screen). -
Page 44: Using Utilities
Using Utilities Adjusting Speedcook Sounds The Utilities screen, which is visible when you tap the tab centered in the bottom of the screen Oven Sounds: On or Off permits you to use a variety of features in your There are several events within a cook cycle oven;... - Page 45 Using Utilities Select the individual sound you wish to turn Oven Sounds: Volume on or off : The volume of the oven chimes can be adjusted to suit your personal preference. Volume changes apply to all oven sounds. To change the volume: From the Settings screen select Sound.
-
Page 46: About Utilities
Updates are applied to the oven via USB fl ash drive (not included with the oven) and can be downloaded directly from: www.vikingrange.com/turbochef in the US or www.brigade.ca/turbochef in Canada Follow instructions on the website to save the update fi le to a USB fl ash drive. - Page 47 Headline Using Utilities Note: To cancel, tap the back button or simply Note: DO NOT remove USB fl ash drive or turn off remove the fl ash drive. power while fi rmware is installing. If the USB fl ash drive is not connected properly, 10.
- Page 48 Using Utilities Accessing Version Information and You can display serial number by going to Installer Setup "Utilities", "Settings" and tapping Update Should you need to call technical support, you Software. may be asked to provide information concerning the oven’s software version. Knowing this information can help Customer and/or Technical Service Departments serve you more effi ciently.
-
Page 49: Self-Cleaning
Self-Cleaning Tap Start. CAUTION Do not touch the exterior portions of the oven after self-cleaning cycle has begun, since some parts become extremely hot to the touch! During the fi rst few times the self-cleaning feature is used, there may be some odor and smoking from the curing of the binder in the high-density insulation used in the oven. -
Page 50: Frequently Asked Questions
No. The lower oven is a conventional/convection a fan in the back of the oven, the TurboChef oven. Additionally, the lower oven can be used as Speedcook oven, forces the air through “jet a warming drawer or proofi ng oven. -
Page 51: Troubleshooting
Troubleshooting Before calling for service, please consider the following troubleshooting guidelines. Problem Solution Displays and indicator lights are not working. Verify the oven is receiving power. The touch screen display is too dark or light. Adjust the display brightness. See page 46. Sounds are not working. -
Page 52: Service Information
Service Information If service is required, call your authorized service agency. Have the following information readily available. • Model number • Serial number • Date purchased • Name of dealer from whom purchased Clearly describe the problem that you are having. If you are unable to obtain the name of an authorized service agency, or if you continue to have service problems, contact Viking Range, LLC at 1-888-(845- 4641), or write to: VIKING RANGE, LLC... -
Page 53: Warranty
Warranty TURBOCHEF SPEEDCOOK OVEN WARRANTY TWO YEAR FULL WARRANTY Electric wall ovens and all of their component parts, except as detailed below*, are warranted to be free from defective materials or work- manship in residential housed hold use for a period of two (2) years from the date of original retail purchase. Viking Range, warrantor, agrees to repair or replace at its option, any part which fails or is found to be defective during the warranty period. - Page 54 Notes _________________________________________________________ _________________________________________________________ _________________________________________________________ _________________________________________________________ _________________________________________________________ _________________________________________________________ _________________________________________________________ _________________________________________________________ _________________________________________________________ _________________________________________________________ _________________________________________________________ _________________________________________________________ _________________________________________________________ _________________________________________________________ _________________________________________________________ _________________________________________________________ _________________________________________________________ _________________________________________________________ _________________________________________________________ _________________________________________________________ _________________________________________________________ _________________________________________________________ _________________________________________________________ _________________________________________________________ _________________________________________________________ _________________________________________________________ _________________________________________________________ _________________________________________________________ _________________________________________________________ _________________________________________________________ _________________________________________________________...
- Page 55 Headline Notes _________________________________________________________ _________________________________________________________ _________________________________________________________ _________________________________________________________ _________________________________________________________ _________________________________________________________ _________________________________________________________ _________________________________________________________ _________________________________________________________ _________________________________________________________ _________________________________________________________ _________________________________________________________ _________________________________________________________ _________________________________________________________ _________________________________________________________ _________________________________________________________ _________________________________________________________ _________________________________________________________ _________________________________________________________ _________________________________________________________ _________________________________________________________ _________________________________________________________ _________________________________________________________ _________________________________________________________ _________________________________________________________ _________________________________________________________ _________________________________________________________ _________________________________________________________ _________________________________________________________ _________________________________________________________ _________________________________________________________...
- Page 56 Headline Viking Range, LLC 111 Front Street Greenwood, Mississippi 38930 USA (662) 455-1200 For product information, call 1-888-(845-4641) or visit our web site at vikingrange.com F21299F EN (021520)
Need help?
Do you have a question about the VSOT730 and is the answer not in the manual?
Questions and answers