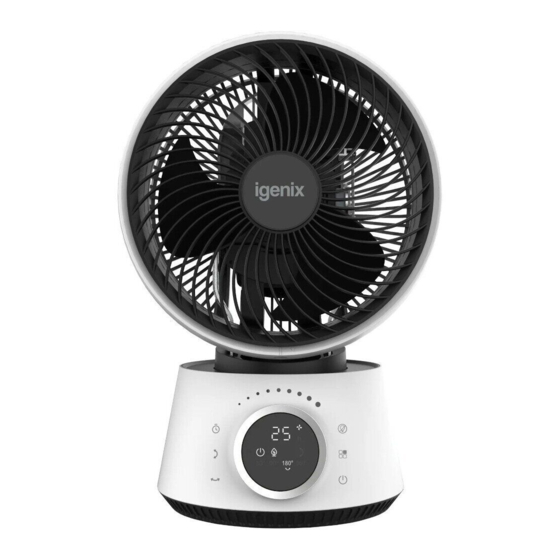
Summary of Contents for iGenix IGFD4009W
- Page 1 USER MANUAL 9 Inch Air Circulating Turbo Fan IGFD4009W PO Number: Please read these instructions carefully before use and retain for future reference Before switching on your appliance, always check for any damage which may have been caused in transit...
-
Page 2: Table Of Contents
CONTENTS Important Safety Instructions ..........3-4 Product Overview ..............5-6 Operating Instructions ............7-11 Cleaning and Maintenance ............. 11 Trouble Shooting Guide ............12 Fuse Replacement ..............13 Disposal Information ............... 13 Igenix Warranty Terms and Conditions ......14-15... -
Page 3: Important Safety Instructions
IMPORTANT SAFETY INSTRUCTIONS Please read this user manual carefully to ensure proper use, maintenance and installation. 1. Make sure the voltage in your home corresponds to the one shown on the rating label of the appliance. 2. This appliance is not intended for use by persons (including children) with reduced physical, sensory or mental capabilities, or lack of experience and knowledge, unless they have been given supervision or instruction concerning use of the appliance by a... - Page 4 11. The fan should stand upright during operation and never be laid on its side. 12. Whilst using keep a distance of no less than 20cm from walls and other objects to ensure that the air inlets and outlets are not blocked or covered and oscillation of the fan is not restricted or blocked.
-
Page 5: Product Overview
PRODUCT OVERVIEW 1. Front Grille 6. Side Panel 2. Back Grille 7. Rotation Bracket 3. Base 8. Scent Diffuser Pad 4. Control Panel Display 9. Diffuser Cover 5. Wind Speed Control Dial... - Page 6 Display Horizontal Oscillation (Left/Right) Power (On/Off) 7. Wind Speed Control Dial Wind Mode 8. Control Panel Display Control Panel Display (On/Off) Timer Function Vertical Oscillation (Up/Down) Remote Control Horizontal Oscillation Power Button (On/Off) Vertical Oscillation Control Panel Display Timer Function Decrease Speed/Time Wind Modes Increase Speed/Time...
-
Page 7: Operating Instructions
OPERATING INSTRUCTIONS Power Button (On/Off ) 1. After the fan has been plugged in and switched on at the wall socket, the device beeps twice and enters the standby state, all functions and displays are turned off. 2. In the standby state, press the Power (On/Off) button once to turn on the device. - Page 8 Timer Off Function 1. The fan can be set to turn off after a certain length of time. To do this, turn the fan on using the Power (On/Off) button , either on the control panel or remote. Then press the Timer button .
- Page 9 3. If using the remote control, when the fan is in standby mode use the buttons to increase/decrease the hour displayed. To set the delayed start time leave the hour to flash 5 times on the control panel. This will then set and begin.
- Page 10 High Medium Medium The diagrams below demonstrate how each selected level cycles through low, medium and high wind speeds to simulate various types of natural breeze: Stop T=90S High High Medium Medium High Stop Stop T=90S T=90S High Medium Medium Stop T=90S High...
- Page 11 Horizontal Oscillation Function 1. When the fan is on, press the button to enter the horizontal oscillation function. The default oscillation angle is 30° which will appear on the control panel display. Press the button again to change the angle to 90°, again for 180°...
-
Page 12: Cleaning And Maintenance
Screen Brightness: Once the fan has been working in one mode for 1 minute continuously, the brightness of the control panel display, will be reduced to a third of its normal brightness so as to avoid glare of the display at night. The brightness will restore when a function is changed. -
Page 13: Trouble Shooting Guide
TROUBLE SHOOTING GUIDE If you experience difficulties with the appliance, please check the suggestions below before contacting customer services on 01473 271272: Problem Possible Cause Possible Solution The appliance does not The appliance is not Plug the appliance in work. properly plugged into firmly. -
Page 14: Fuse Replacement
MAINS PLUG FUSE REPLACEMENT Fuse Cover Fuse Replacement (Class II) Remove the fuse cover with a small flat head screw driver. Take out the fuse and replace with a new fuse of the same Amp. Replace the fuse cover and push back into place. -
Page 18: Igenix Warranty Terms And Conditions
Igenix Warranty Terms & Conditions This product is guaranteed for a period of 12 months as standard from the date of purchase against mechanical and electrical defects. You can extend your warranty for a further 12 months by registering your product. - Page 19 To qualify for the 2 year warranty you must register your product within 30 days of purchase. The full Terms & Conditions of our warranty policy are shown on the opposite page. They are also available on our website. www.igenix.co.uk...
- Page 20 EU: Castle Electrical Factors Ltd., Dundalk, A91 KA9R, IR Tel. 01473 271 272 Disclaimer: Igenix operate a policy of continual improvement and development. We therefore reserve the right to change/alter the specification and appearance of our appliances without prior notice.


Need help?
Do you have a question about the IGFD4009W and is the answer not in the manual?
Questions and answers
My igenix digital circular fan doesn't ossolate at all, it just blinks 30° but doesn't turn at all. It turns vertically but not horizontally.
The iGenix IGFD4009W fan may only be blinking at 30° and not oscillating because it is in horizontal oscillation mode with the default angle selected but not fully activated. To start oscillation, press the horizontal oscillation button again to confirm or change the angle. If the fan was turned on from standby, it resumes the previous angle setting, which may require reactivation.
This answer is automatically generated