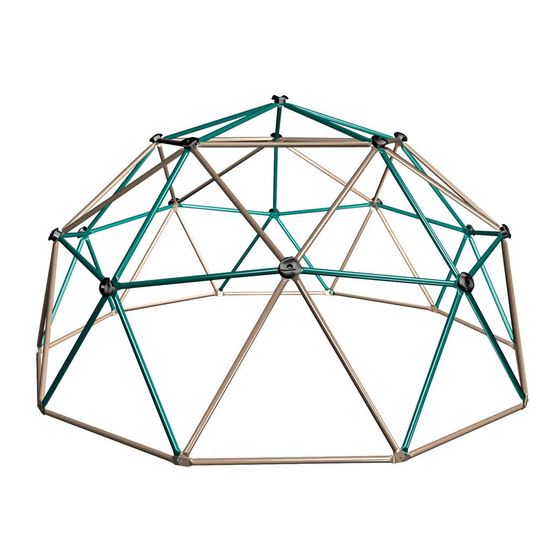
Summary of Contents for Lifetime 90136
- Page 1 MODEL N° 90136 COMPLETE BASKETBALL SYSTEM OWNER’S MANUAL OWNER’S MANUAL Keep this Product ID Number and use when contacting Customer Service:...
- Page 2 Maintaining your privacy is our long-standing policy at Lifetime. And you can rest as- sured that Lifetime will not sell or provide your personal data to other third parties, or allow them to use your personal data for their own purposes.
-
Page 3: Safety Instructions
SAFETY INSTRUCTIONS DAMAGE AND WILL VOID WARRANTY. To ensure safety, do not attempt to assemble this product without reading and materials for parts and/or additional instruction material. Before beginning assembly, identify and inventory all parts and hardware using the parts and hardware lists and identifiers in this document. - Page 4 TOOLS AND PARTS REQUIRED FOR THIS ASSEMBLY 3/16” Allen Wrench 1/2” Wrench (1, included) *Two adults required to complete assembly* Only adults should set up the product. Do not allow children in the setup area until assembly is complete.
- Page 5 ASSEMBLY GUIDES Refer to the following areas throughout the instructions to assist in the assembly process: This area is located at the top, TOOLS AND HARDWARE REQUIRED FOR THIS PAGE left-hand corner of the page and indicates which tools and hardware are needed to complete the assembly steps on a page.
- Page 6 INSTALLATION & GROUND PREPARATION INSTRUCTIONS PLAYGROUND AND SURFACE MATERIALS INSTRUCTIONS Playground and Surface Materials Instructions:...
-
Page 7: Maintenance Instructions
OPERATING INSTRUCTIONS MAINTENANCE INSTRUCTIONS Disposal Instructions:... - Page 8 **The maximum fall height for this product is 60 in (152 cm). We recommend using 6 in (15 cm) of Double Shredded Bark Mulch.** 5 ft 6 ft 7 ft 9 ft 10 ft 11 ft 12 ft 6 in 9 in 12 in 6 in...
-
Page 9: Parts List
PARTS LIST Item Description Handhold HARDWARE LIST Item Description Geodome Assembly Hardware Bag 5/16” Nut... -
Page 10: Parts Identifier
PARTS IDENTIFIER Parts shown at 5% of Actual Size Handhold HARDWARE IDENTIFIER GEODOME ASSEMBLY HARDWARE (CPA) Head Bolt 5/16” Standard Nut... - Page 11 TOOLS AND HARDWARE REQUIRED FOR THIS PAGE 3/16” Slide a Washer (ARL) over a 5/16” x t (ASI), then slide the Bolt through the two and four Light Brown Tubes (CPD) in the order indicated by the numbers. Slide another Washer over the Bolt and secure with a 5/16”...
- Page 12 TOOLS AND HARDWARE REQUIRED FOR THIS PAGE 3/16” 1/2” Attach a Light Brown Tube (CPD) to the bottom of the assembly completed in the previous step (Joint A). Slide a through a Washer (ARL) and the two Light Brown Tubes. Place a Washer over the Bolt and finger tighten a Nylock Nut (ASE) for removal later.
- Page 13 TOOLS AND HARDWARE REQUIRED FOR THIS PAGE 3/16” 1/2” Bring the assembles completed in steps 1.1 and 1.2 together as shown. Place a Green Tube (CPC) over the Light Brown Tubes (CPD) and shown below by placing a 5/16” x Bolt (ASI) through Washer (ARL) the Bolt and finger tighten the 5/16”...
- Page 14 TOOLS AND HARDWARE REQUIRED FOR THIS PAGE 3/16” 1/2” Add two additional Green Tubes (CPC) in the order indicated. Place the 5/16” x Bolt (ASI) through the Washer (ARL) then through the five 5/16” Standard Nut (ATL). Tighten completely.
- Page 15 TOOLS AND HARDWARE REQUIRED FOR THIS PAGE 3/16” NO NEW HARDWARE REQUIRED 1/2” Remove 5/16” Nylock Nut (ASE) from the bottom two Light Brown Tubes (CPD). Place a new Light Brown Tube at the bottom of the green pentagon assemblies. Secure the Light Brown Tube and Green Tubes (CPC) Washer (ARL) and the Note: Make sure all Bolts on the bottom go in the direction shown,...
- Page 16 TOOLS AND HARDWARE REQUIRED FOR THIS PAGE 3/16” 1/2” Add one of the assemblies completed in step 1.2, to the assembly 1.5 to attach the assemblies. Continue adding the assemblies from step 1.2 to complete the circle.
- Page 17 TOOLS AND HARDWARE REQUIRED FOR THIS PAGE 3/16” NO NEW HARDWARE REQUIRED 1/2” Remove the 5/16” Standard Nut (ATL), the Washers (ARL) and the Bolt (ASI) at Joint C and add an additional Light Brown Tube with Sticker (CPE). Replace the Washer, Nut, and Bolt, however do not completely tighten to Joint D, repeat the same process for Joint E.
- Page 18 TOOLS AND HARDWARE REQUIRED FOR THIS PAGE 3/16” 1/2” Connect the five Green Tubes (CPC) at the top by sliding a 5/16” x Bolt (ASI) through a Washer (ARL) the order shown. Secure with a Washer and 5/16” Standard Nut (ATL). Tighten completely.
- Page 19 TOOLS AND HARDWARE REQUIRED FOR THIS PAGE 3/16” 1/2” Attach Handholds (CPB) Attach the handholds by sliding a Washer (ARL) over the (ASI) and placing the Handhold over the Bolt. It is critical that the Washer is added. Line up the notch on the bottom of the Handhold Washer and 5/16”...
- Page 20 NOTES...
- Page 21 NOTES...
- Page 22 ® ENHANCE YOUR LIFETIME PURCHASE BY ADDING ACCESSORIES OR OTHER GREAT PRODUCTS: To purchase accessories or other Lifetime Products, visit us at: www.lifetime.com Or call: 1-800-424-3865...
- Page 23 L’observation des déclarations et des enunciados y avisos de advertencia and warnings reduces the likelihood avertissements suivants réduit les risques se reduce la probabilidad de pro- of serious or fatal injury. de blessures graves ou fatales. ducirse lesiones serias o mortales. Lifetime Products, Inc.
-
Page 24: Warranty Information
WARRANTY INFORMATION UNAVAILABLE OR OBSOLETE. 1. Lifetime Playground systems are warranted to the original purchaser to be free from defects in material or as imperfections that impair the use of the product. Defects resulting from misuse, abuse or negligence will void this warranty.


Need help?
Do you have a question about the 90136 and is the answer not in the manual?
Questions and answers