Advertisement
Quick Links
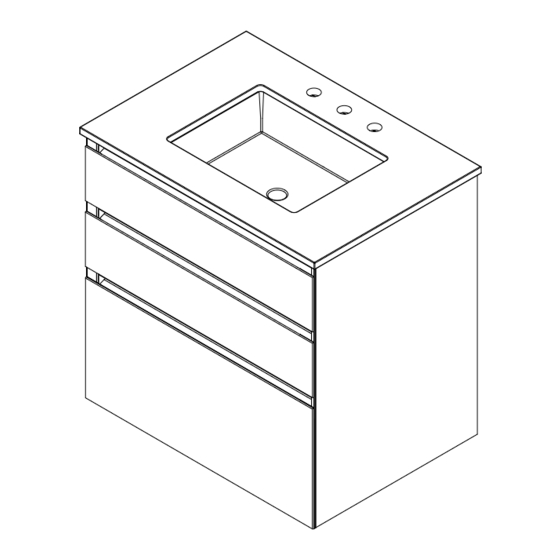
CURATED CARTESIAN
VANITY
™
H4-3 DRAWER
CONTENT
Tools Needed - 2
Parts - 2
Prep the wall - 3
Sink assembly - 8
Insert the drawer - 10
Use and Maintenance - 13
Warranty - 14
GENERAL INFORMATION
This instruction manual contains information on how to install the 30" high Cartesian Vanity. This series comes in several sizes and
variations. Electrical option(s) may be provided with your vanity(s).
This vanity series needs special site preparation. Do not install vanities until all framing, plumbing and electrical option rough-ins have
been completed and wall surface has been finished. We recommend using the services of a professional installer. Observe all local
building codes.
Save these instructions for future use and reference. An improper installation voids the warranty. Installed vanities cannot be returned.
If you experience any problems with your vanities, contact your dealer or Robern directly.
© 2016 Robern, Inc. 701 N. Wilson Ave. Bristol, PA 19007 U.S.A.
800.877.2376
www.robern.com
Part no. 209-1276 rev. 04/19/23
1
Installation instructions
Curated Cartesian H4 - 3 Drawer
Advertisement
Chapters

Related Manuals for Robern CURATED CARTESIAN H4-3


Summary of Contents for Robern CURATED CARTESIAN H4-3
-
Page 1: Table Of Contents
Save these instructions for future use and reference. An improper installation voids the warranty. Installed vanities cannot be returned. If you experience any problems with your vanities, contact your dealer or Robern directly. © 2016 Robern, Inc. 701 N. Wilson Ave. Bristol, PA 19007 U.S.A. -
Page 2: Tools Needed
(4) Divider Clip (4) Divider Clip Shoe (2) Medium Glass Bin (2) Large Glass Bin Divider Glass © 2016 Robern, Inc. 701 N. Wilson Ave. Bristol, PA 19007 U.S.A. 800.877.2376 www.robern.com Part no. 209-1276 rev. 04/19/23 Installation instructions Curated Cartesian H4 - 3 Drawer... -
Page 3: Prep The Wall
36-1/2" 2 x 4 (927 mm) 2 x 4 Side view showing blocking location in wall. © 2016 Robern, Inc. 701 N. Wilson Ave. Bristol, PA 19007 U.S.A. 800.877.2376 www.robern.com Part no. 209-1276 rev. 04/19/23 Installation instructions Curated Cartesian H4 - 3 Drawer... - Page 4 (284 mm) (295 mm) 22" (559 mm) 6-1/8" (156 mm) Plumbing drawer clearance © 2016 Robern, Inc. 701 N. Wilson Ave. Bristol, PA 19007 U.S.A. 800.877.2376 www.robern.com Part no. 209-1276 rev. 04/19/23 Installation instructions Curated Cartesian H4 - 3 Drawer...
-
Page 5: Frame Installation
36" = 16" (406 mm) 2-1/2" (64 mm) [SS674] (2) #10 x 2" Screw © 2016 Robern, Inc. 701 N. Wilson Ave. Bristol, PA 19007 U.S.A. 800.877.2376 www.robern.com Part no. 209-1276 rev. 04/19/23 Installation instructions Curated Cartesian H4 - 3 Drawer... - Page 6 Structural Bolt 4-Structural Bolt 4-Boulon 4-Perno estructural [SS674] (4) #10 x 2" Screw © 2016 Robern, Inc. 701 N. Wilson Ave. Bristol, PA 19007 U.S.A. 800.877.2376 www.robern.com Part no. 209-1276 rev. 04/19/23 Installation instructions Curated Cartesian H4 - 3 Drawer...
-
Page 7: Attaching The Side Kits
STEP 4 - INSTALLING OPTIONAL ACCESSORIES If you have the optional night light plug the unit in and test. See separate instructions for VAELECTRIC accessory. © 2016 Robern, Inc. 701 N. Wilson Ave. Bristol, PA 19007 U.S.A. 800.877.2376 www.robern.com Part no. 209-1276 rev. 04/19/23... -
Page 8: Sink Assembly
4. Carefully place the stone top on the vanity and sink. Note: The back edge of the stone top must be flush against the wall and equal left and right overhang on each side of the vanity. © 2016 Robern, Inc. 701 N. Wilson Ave. Bristol, PA 19007 U.S.A. 800.877.2376 www.robern.com... - Page 9 7. Install the faucet(s) to the stone top and drain(s) to the sink(s). Refer to the faucet and drain manufacturer's instructions. 8. Complete the faucet connections. Run water and check for leaks. 5-5/8" (143 mm) © 2016 Robern, Inc. 701 N. Wilson Ave. Bristol, PA 19007 U.S.A. 800.877.2376 www.robern.com Part no. 209-1276 rev. 04/19/23...
-
Page 10: Insert The Drawer
2. Place the drawer into the slide rails. 3. To secure the drawer, close the drawer until a series of clicks are heard. 4. Repeat steps 1 thru 3 for middle drawer. © 2016 Robern, Inc. 701 N. Wilson Ave. Bristol, PA 19007 U.S.A. 800.877.2376 www.robern.com Part no. -
Page 11: Attaching Glass Drawer Front
3. Install the remaining screws WITH washers into the two remaining threads in the drawer front bracket. Tighten all screws after the drawer front is level and even with the side kits. 4. Snap the screw covers over the screws by squeezing gently at “Robern”. © 2016 Robern, Inc. 701 N. Wilson Ave. Bristol, PA 19007 U.S.A. - Page 12 8. Tilt the top tipout drawer down. 9. Thread the screw and washer through the holes inside the drawer to the glass front. 10. Install the screw caps as shown. © 2016 Robern, Inc. 701 N. Wilson Ave. Bristol, PA 19007 U.S.A. 800.877.2376 www.robern.com Part no.
-
Page 13: Use And Maintenance
When cleaning, spray the cloth, not the vanity, mirror, or surround surfaces. Do not use abrasive cleansers on any part of the vanity. No Ammonia Sans Ammoniac Sin Amoniaco No Vinegar Sans Vinaigre Sin Vinagre © 2016 Robern, Inc. 701 N. Wilson Ave. Bristol, PA 19007 U.S.A. 800.877.2376 www.robern.com Part no. 209-1276 rev. 04/19/23 Installation instructions Curated Cartesian H4 - 3 Drawer... - Page 14 Robern in writing within one (1) year from the date of delivery. Robern is not responsible for installation costs. The warranty is void in the event the product is damaged in transit, or if damage or failure is caused by abuse, misuse, abnormal usage, faulty installation, damage in an accident, improper maintenance, or any repairs other than those authorized by Robern.
- Page 15 Si tiene algún problema con sus tocadores, comuníquese con su le concessionnaire ou directement avec Robern. concesionario o directamente con Robern. © 2016 Robern, Inc. 701 N. Wilson Ave. Bristol, PA 19007 U.S.A. 800.877.2376 www.robern.com No. de pièce / Pieza n.° 209-1276 rev. 04/19/23 Instructions d'installation / Instrucciones de instalación...
-
Page 16: Outils Nécessaires
Bandeja grande de vidrio de clips de divisores Vidrio divisor Clip para divisor © 2016 Robern, Inc. 701 N. Wilson Ave. Bristol, PA 19007 U.S.A. 800.877.2376 www.robern.com No. de pièce / Pieza n.° 209-1276 rev. 04/19/23 Instructions d'installation / Instrucciones de instalación... - Page 17 Vue latérale indiquant l'emplacement de blocage dans le mur. La vista lateral muestra el lugar para los maderos de refuerzo en la pared. © 2016 Robern, Inc. 701 N. Wilson Ave. Bristol, PA 19007 U.S.A. 800.877.2376 www.robern.com No. de pièce / Pieza n.° 209-1276 rev. 04/19/23 Instructions d'installation / Instrucciones de instalación...
- Page 18 6-1/8" (156 mm) Dégagement du tiroir de plomberie / Espacio libre del cajón con recorte para plomería © 2016 Robern, Inc. 701 N. Wilson Ave. Bristol, PA 19007 U.S.A. 800.877.2376 www.robern.com No. de pièce / Pieza n.° 209-1276 rev. 04/19/23 Instructions d'installation / Instrucciones de instalación...
-
Page 19: Installation Du Cadre
2-1/2" (64 mm) [SS674] (2) #10 x 2" Vis / Tornillo © 2016 Robern, Inc. 701 N. Wilson Ave. Bristol, PA 19007 U.S.A. 800.877.2376 www.robern.com No. de pièce / Pieza n.° 209-1276 rev. 04/19/23 Instructions d'installation / Instrucciones de instalación... - Page 20 Perno estructural 4-Perno estructural [SS674] (4) #10 x 2" Vis / Tornillo © 2016 Robern, Inc. 701 N. Wilson Ave. Bristol, PA 19007 U.S.A. 800.877.2376 www.robern.com No. de pièce / Pieza n.° 209-1276 rev. 04/19/23 Instructions d'installation / Instrucciones de instalación...
-
Page 21: Attacher Les Kits Latéraux
Consulte las instrucciones por separado para el accesorio Voir les instructions séparées pour l'accessoire VAELECTRIC. VAELECTRIC. © 2016 Robern, Inc. 701 N. Wilson Ave. Bristol, PA 19007 U.S.A. 800.877.2376 www.robern.com No. de pièce / Pieza n.° 209-1276 rev. 04/19/23 Instructions d'installation / Instrucciones de instalación... -
Page 22: Assemblage De Lavabo
égale sur chaque côté du meuble de toilette. derecha del tocador. © 2016 Robern, Inc. 701 N. Wilson Ave. Bristol, PA 19007 U.S.A. 800.877.2376 www.robern.com No. - Page 23 MAX / MÁX 5-5/8" (143 mm) © 2016 Robern, Inc. 701 N. Wilson Ave. Bristol, PA 19007 U.S.A. 800.877.2376 www.robern.com No. de pièce / Pieza n.° 209-1276 rev. 04/19/23 Instructions d'installation / Instrucciones de instalación...
-
Page 24: Insérer Le Tiroir
4. Répéter les étapes 1 à 3 pour le tiroir du milieu. 4. Repita los pasos del 1 al 3 en el cajón intermedio. © 2016 Robern, Inc. 701 N. Wilson Ave. Bristol, PA 19007 U.S.A. 800.877.2376 www.robern.com No. de pièce / Pieza n.° 209-1276 rev. 04/19/23 Instructions d'installation / Instrucciones de instalación... -
Page 25: Instalación De Frente De Vidrio Del Cajón
“Robern”. 4. Meta a presión los cubretornillos sobre los tornillos, apretando con cuidado donde dice “Robern”. © 2016 Robern, Inc. 701 N. Wilson Ave. Bristol, PA 19007 U.S.A. 800.877.2376 www.robern.com No. de pièce / Pieza n.° 209-1276 rev. 04/19/23 Instructions d'installation / Instrucciones de instalación... - Page 26 10. Installer les capuchons de vis comme illustré. 10. Instale los tapapernos como se muestra. © 2016 Robern, Inc. 701 N. Wilson Ave. Bristol, PA 19007 U.S.A. 800.877.2376 www.robern.com No. de pièce / Pieza n.° 209-1276 rev. 04/19/23 Instructions d'installation / Instrucciones de instalación...
-
Page 27: Uso Y Mantenimiento
Sans Ammoniac Sin Amoniaco No Vinegar Sans Vinaigre Sin Vinagre © 2016 Robern, Inc. 701 N. Wilson Ave. Bristol, PA 19007 U.S.A. 800.877.2376 www.robern.com No. de pièce / Pieza n.° 209-1276 rev. 04/19/23 Instructions d'installation / Instrucciones de instalación Curated Cartesian H4 - 3 Drawer... -
Page 28: Garantía
Robern por escrito par écrit dans un délai d'un (1) an suivant la date de livraison. Robern en menos de un (1) año a partir de la fecha de entrega. Robern no n'est pas responsable des frais d'installation. La garantie est annulée se hace responsable de los costos de instalación.
Need help?
Do you have a question about the CURATED CARTESIAN H4-3 and is the answer not in the manual?
Questions and answers