Axis Q1786-LE User Manual
Hide thumbs
Also See for Q1786-LE:
- User manual (66 pages) ,
- Installation manual (35 pages) ,
- Repainting instructions (10 pages)

Subscribe to Our Youtube Channel
Related Manuals for Axis Q1786-LE


Summary of Contents for Axis Q1786-LE
- Page 1 AXIS Q17 Series AXIS Q1785-LE Network Camera AXIS Q1786-LE Network Camera User Manual...
-
Page 2: Table Of Contents
AXIS Q17 Series Table of Contents About this manual ......... . -
Page 3: About This Manual
AXIS Q17 Series About this manual About this manual This User Manual provides information on the product regarding: • Access • Main use cases • Troubleshooting • Specifications Note The User Manual may include more than one product. Part of the content, e.g. some use cases or specifications, may only apply to some of them. -
Page 4: Solution Overview
AXIS Q17 Series Solution overview Solution overview... -
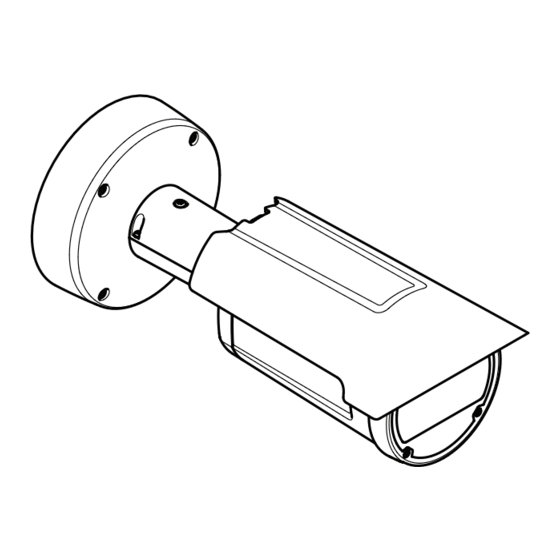
Page 5: Product Overview
AXIS Q17 Series Product overview Product overview Network connector Part nu mber (P/N) & Serial number (S/N) Safety wire Power connector I/O connector Audio connector Function button microSD card slot Control button 10 Status LED indicator IDC network connector Foot... -
Page 6: How To Access The Product
HTTPS connection and then change the password. The device password is the primary protection for the data and services. Axis devices do not impose a password policy as they may be used in various types of installations. To protect your data we recommend that you: •... - Page 7 AXIS Q17 Series How to access the product 3. Click Create login. The password has now been configured.
-
Page 8: Setup
AXIS Q17 Series Setup Setup Product webpage overview Live view control bar Live view Product name Controls Video control bar Settings toggle... -
Page 9: About Long-Distance Connections
AXIS Q17 Series Setup Settings tabs About the product's built-in help You can access the built-in help from the product’s webpage. The help provides more detailed information on the product’s features and their settings. About long-distance connections This product supports fiber-optic cable installations through a media converter. Fiber-optic cable installations offer a number of benefits such as: •... -
Page 10: Image Quality
Installation Guide for this product. Image quality About capture modes Capture mode defines the maximum frame rate available in the Axis product. Depending on which capture mode you select, you may not be able to use WDR. How to select capture mode Which capture mode to choose depends on the requirements of frame rate and resolution for the specific surveillance setup. - Page 11 AXIS Q17 Series Setup How to focus This product has three focus modes: • Auto: The camera automatically adjusts focus based on the entire image. • Area: The camera automatically adjusts focus based on a selected area of the image.
- Page 12 Note WDR may cause artifacts in the image. Find out more about WDR and how to use it at axis.com/web-articles/wdr How to stabilize a shaky image with Electronic Image Stabilization (EIS) EIS can be used in environments where the product is mounted in an exposed location and subject to vibrations, for example, wind or passing traffic.
- Page 13 Use corridor format to better utilize the full field of view in a long and narrow area, for example a staircase, hallway, road, or tunnel. 1. Depending on your product, turn the camera or the 3-axis lens in the camera 90° or 270°.
-
Page 14: Privacy Masks
Zoom How to optimize the image for traffic surveillance To get the best possible image for traffic surveillance, use the AXIS Traffic Wizard in combination with the Traffic overview scene profile. 1. Go to Settings > Apps > AXIS Traffic Wizard. -
Page 15: Overlays
8. To position the text overlay, choose Custom or one of the presets. Create an action rule: 9. Go to System > Events > Action rules. 10. Create an action rule with AXIS Video Motion Detection as trigger. 11. From the list of actions, select Overlay text. 12. Type “Motion detected”. -
Page 16: Ptz (Pan Tilt Zoom)
AXIS Q17 Series Setup PTZ (Pan Tilt Zoom) How to limit pan, tilt, and zoom movements In this example, the camera is surveilling a parking lot with nearby apartment buildings. Set pan, tilt and zoom limits to ensure privacy for residents. - Page 17 H.264 or MPEG-4 Part 10/AVC Note H.264 is a licensed technology. The Axis product includes one H.264 viewing client license. Installing additional unlicensed copies of the client is prohibited. To purchase additional licenses, contact your Axis reseller. H.264 can, without compromising image quality, reduce the size of a digital video file by more than 80% compared to the Motion JPEG format and by as much as 50% compared to the MPEG-4 standard.
-
Page 18: Events
AXIS Q17 Series Setup 2. Select the stream profile and click Modify. 3. In the Audio tab, select the Audio stream checkbox and select On from the drop-down list. 4. Click Ok. How do Image, Stream, and Stream profile settings relate to each other? The Image tab contains camera settings that affect all video streams from the product. - Page 19 13. Click Ok. How to record video when a PIR detector senses motion This example explains how to connect an Axis PIR detector to the camera, and set up the camera to start recording when the detector senses motion. Required hardware •...
- Page 20 3. Create the zoomed-in preset position so that it covers the area in the image where you assume that the license plate will appear. Create a motion detection profile: 4. Go to Settings > Apps and open AXIS Video Motion Detection. 5. Create a profile that covers the entrance of the gate and then save the profile. Create an action rule: 6.
-
Page 21: Applications
Applications About applications AXIS Camera Application Platform (ACAP) is an open platform that enables third parties to develop analytics and other applications for Axis products. To find out more about available applications, downloads, trials and licenses, go to axis.com/applications To find the user manuals for Axis applications, go to axis.com Note •... -
Page 22: Troubleshooting
AXIS Q17 Series Troubleshooting Troubleshooting If you can’t find what you’re looking for here, try the troubleshooting section at axis.com/support How to reset to factory default settings Important Reset to factory default should be used with caution. A reset to factory default resets all settings, including the IP address, to the factory default values. -
Page 23: Technical Issues, Clues And Solutions
Axis product. Check all cabling and reinstall the product. Possible IP address conflict The static IP address in the Axis product is used before the DHCP server sets a dynamic address. with another device on the... -
Page 24: Performance Considerations
Heavy network utilization due to poor infrastructure affects the bandwidth. • Viewing on poorly performing client computers lowers perceived performance and affects frame rate. • Running multiple AXIS Camera Application Platform (ACAP) applications simultaneously may affect the frame rate and the general performance. -
Page 25: Specifications
AXIS Q17 Series Specifications Specifications To find the latest version of the product’s datasheet, go to the product page at axis.com and locate Support & Documentation. LED Indicators Note • The Status LED can be configured to be unlit during normal operation. To configure, go to Settings > System > Plain config. -
Page 26: Connectors
AXIS Q17 Series Specifications Function button The function button is used for: • Leveling assistant – This function helps to ensure the camera is level. Press the button for about 3 seconds to start the leveling assistant and press again to stop the leveling assistant. The buzzer signal assists leveling of the camera, see Buzzer signal for leveling assistant on page 25. - Page 27 Brown Brown Audio connector The Axis product has the following audio connectors: • Audio in (pink) – 3.5 mm input for a mono microphone, or a line-in mono signal. For audio in, the left channel is used from a stereo signal.
- Page 28 AXIS Q17 Series Specifications DC output 12 V, max 50mA I/O configured as input I/O configured as output Power connector 2-pin terminal block for DC power input. Use a Safety Extra Low Voltage (SELV) compliant limited power source (LPS) with either...
- Page 29 User Manual Ver. M3.11 AXIS Q17 Series Date: November 2018 © Axis Communications AB, 2017 - 2018 Part No. T10118679...
Need help?
Do you have a question about the Q1786-LE and is the answer not in the manual?
Questions and answers