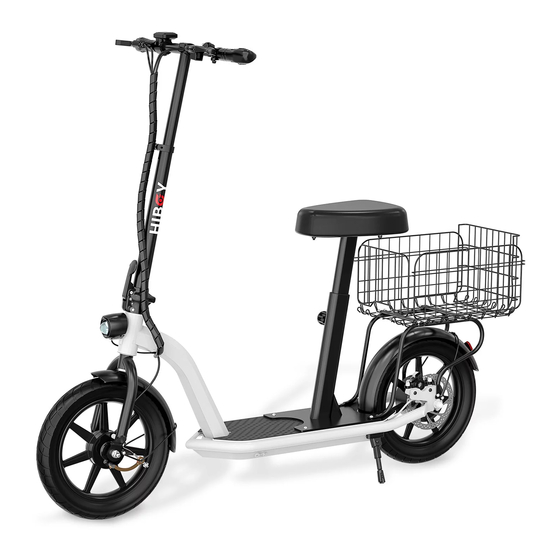
Summary of Contents for Hiboy ECOM 14
- Page 1 ECOM 14 Electric Scooter www.hiboy.com The manufacturer reserves the right to make changes to the product USER MANUAL and update this manual at any time.
-
Page 2: Table Of Contents
Read and understand this entire manual before Riding Basics Safety Instructions using this product! For assistance contact Hiboy. Dangerous Actions (No Attempting!) PLEASE DO NOT RETURN BEFORE YOUR CONTACTING HIBOY Safety Reminder Daily Care and Maintenance Specifications Instructions of Seat&Basket Assembly(Option) Limited Warranty Statement 14 Q&A and Trouble shooting... -
Page 3: Package Contents
Please check package contents carefully, if anything is missing or damaged, please correct PSI. Failure to do so may damage contact Hiboy customer service for support: support@hiboy.com your electric scooter and void your warranty. - Page 4 Screen Display Setting Screen Speed display Upsfift Upsfift Battery display Upsfift Power button Gear display Downshift Mile Power button Power button Throttle Downshift Item name Downshift Item display Hold down the up or down key to enter the setting screen G ear Mode 1.
-
Page 5: Assembly And Set Up
Need Help? Please search “Hiboy us” on Youtube website to find our Channel. You can watch the Installation video Need Help? Please search “Hiboy us” on Youtube website to find our Channel. You can watch the Installation video of ECOM 14. -
Page 6: Charging
Insert the charger plug in Fill and fix the rubber solve the abnormal sound problem, please contact Hiboy after-sales team immediately. Our email is support@hiboy.com. plug after the charging Safety Gear Always wear proper protective equipment, such as an approved safety helmet (with chin strap securely buckled), elbow Your scooter will be fully charged when the LED light on the charger changes from red (charging) to green (fully charged). -
Page 7: Safety Instructions
7. Safety Instructions Do not ride in the rain. Always steer clear of obstacles. Keep your speed between 3.1-6.2 mph when you ride Do not press the throttle when through speed bumps, elevator door sills, bumpy roads or you're walking alongside the scooter. other uneven surfaces. -
Page 8: Dangerous Actions(No Attempting!)
8. Dangerous Actions(No Attempting!) Do not try riding up or down stairs, and Do not ride in traffic lanes or residential areas Do not turn the handlebar violently during Do not keep your feet on the rear jumping over obstacles. where vehicles and pedestrians are both allowed. -
Page 9: Safety Reminder
● Closely follow the safety instructions in the manual especially in the countries that lack relevant laws and regulations regarding electric scooters. Hiboy shall not be liable for any financial losses, physical injuries, accidents, legal disputes and other interest conflicts resulted from sunlight, overheating and overcooling accelerate tire aging and compromise the scooter and the battery pack's lifespan. - Page 10 ISED Canada Statement: WARNING! This device contains licence-exempt transmitter(s)/receiver(s) that comply with Innovation, Science and Economic Development Battery maintenance Canada 's licence exempt RSS(s). Operation is subject to the following two conditions: 1. Use original battery packs, use of other models or brands may bring about safety issues; (1) this device may not cause interference and 2.
-
Page 11: Specifications
11. Specifications FCC Warning Statement Changes or modificaons not expressly approved by the party responsible for compliance could void the user’ s ECOM14 Item Electric Scooter authority to operate the equipment. This equipment has been tested and found to comply with the limits for a Class Dimensions Tire 14 inch... -
Page 12: Instructions Of Seat&Basket Assembly(Option)
Required Tools:4mm Allen Wrench(Included) 1.Unscrew the screws with the required tools. Need Help? Please search “Hiboy us” on Youtube website to find our Channel. You can watch the Installation video 4.Tighten the knob to right 3.You can adjust the height of ECOM 14. -
Page 13: Limited Warranty Statement
REMEDIES If a hardware defect is found and a valid claim is received by Hiboy within the Warranty Period, Hiboy will, at its option and to the extent permitted by law, either (1) repair the product at no charge, using new or refurbished replacement parts or, (2) replace the product with a new or refurbished product. In the event of a defect, to the extent permitted 30 DAY SATISFACTION GUARANTEED RETURN POLICY by law, these are your sole and exclusive remedies. - Page 14 5. How to attach the seat? A: Please refer to the assembly steps in this manual, and you can also search for “how to assemble Hiboy seat” on Google, and then you can find some Youtube tutorial videos. 6. Is that possible to replace some components for example the rear fender? A: Yes, please take a photo and send to Hiboy Support Team’s email: support@hiboy.com, Hiboy Support Team will reply you soon.
-
Page 15: Contact Us
Solution Error code Contact us if you experience issues relating to riding, maintenance and safety, or errors/faults with your Hiboy ECOM14 Need to check if the motor hall cables are connecting well first, if any cable is not connecting well, re-connect it and see if the E1 error E-mail Service: support@hiboy.com...


Need help?
Do you have a question about the ECOM 14 and is the answer not in the manual?
Questions and answers
Need to change the rear back tire tube due to a flat