Advertisement
Quick Links
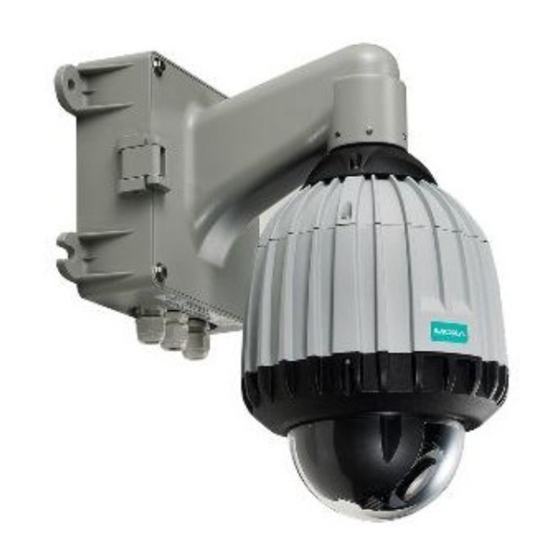
VPort 66-2MP Series
Quick Installation Guide
Moxa Americas:
Toll-free: 1-888-669-2872
Tel:
1-714-528-6777
Fax:
1-714-528-6778
Moxa Europe:
Tel:
+49-89-3 70 03 99-0
Fax:
+49-89-3 70 03 99-99
Moxa India:
Tel:
+91-80-4172-9088
Fax:
+91-80-4132-1045
Edition 1.0, September 2015
Technical Support Contact Information
www.moxa.com/support
2015 Moxa Inc. All rights reserved.
Moxa China (Shanghai office):
Toll-free: 800-820-5036
Tel:
+86-21-5258-9955
Fax:
+86-21-5258-5505
Moxa Asia-Pacific:
Tel:
+886-2-8919-1230
Fax:
+886-2-8919-1231
P/N: 1802000661010
*1802000661010*
Advertisement

Related Manuals for Moxa Technologies VPort 66-2MP Series


Summary of Contents for Moxa Technologies VPort 66-2MP Series
- Page 1 VPort 66-2MP Series Quick Installation Guide Edition 1.0, September 2015 Technical Support Contact Information www.moxa.com/support Moxa Americas: Moxa China (Shanghai office): Toll-free: 1-888-669-2872 Toll-free: 800-820-5036 Tel: 1-714-528-6777 Tel: +86-21-5258-9955 Fax: 1-714-528-6778 Fax: +86-21-5258-5505 Moxa Europe: Moxa Asia-Pacific: Tel: +49-89-3 70 03 99-0...
-
Page 2: Package Checklist
Overview The VPort 66-2MP is a vandal-proof, IP66-rated, PTZ speed dome IP camera for use in harsh, outdoor environments. With a 360° endless PAN, -6 to 96° TILT, 22X/30X optical/20X digital zoom, H.264/MJPEG triple video streams, day-and-night camera lens, and -40 to 65°C operating temperature, the VPort 66-2MP is especially well-suited for outdoor video surveillance applications. - Page 3 NOTE This product must be installed in compliance with your local laws and regulations. Features • Maximum 60 FPS @ full HD (1080P, 1920x1080) resolution (only in single stream mode) • 22X/30X optical and 20X digital zoom (22X: 4.3 to 94.6 mm, 30X: 4.3 to 129 mm) •...
- Page 4 VPort 66-2MP Product Description Appearance • Top cover screws: Four screws used to secure the top cover. Top cover: The top cover can be removed to take out the camera • body for installing or re-installing the SD card. • Zoom Lens: The VPort 66-2MP-M12 supports 2 lenses with different optical zoom specs: 22X: f = 4.3 mm (wide) to 94.6 mm (tele), F1.6 to F4.5...
- Page 5 SD card socket (SDXC): The VPort 66-2MP supports the SDXC • interface, which can use SD cards with more than 64 GB of memory for local storage of video recordings (by event or continuous recording). NOTE Since video recording requires a high frequency of read and write actions, we recommend using high performance, high reliability SD cards, such as Scandisk or Transcend high-end SD cards.
- Page 6 NOTE • The heater and fan will be enabled when the internal temperature is under -10°C, and disabled when above 0°C. The fan will be enabled when the internal temperature is above 50°C, and disabled when under 35°C. • When using the 3.5 mm power jack to 2-pin terminal block connector for a direct power line connection, be sure to pay attention to the “+”...
-
Page 7: Hardware Installation
Safety Rope: For easier installation, use the safety rope to hook the • camera to the mounting kit buckle. Hardware Installation A mounting kit is required to install the VPort 66-2MP. Below we use the VP-520LB to illustrate; the installation method of other accessories is similar. - Page 8 2. Pull the camera module a little and turn it clockwise to remove the camera module from the camera module connector. 3. Insert the SD card, and then install the camera module by rotating the camera module connector counterclockwise. Screw in the 2 anti-drop Phillips screws.
- Page 9 2. Remove the black mount kit and put the VP-SH1 on the housing. Use the 3 small Phillips screws in the VP-SH1’s package to fix the VP-SH1 to the housing. 3. Replace the black mount kit tighten the 4 security screws. Step 4: Fasten the dry bag inside the housing Use the hook-and-loop fastener to attach the dry bag to the camera housing.
- Page 10 Step 5: Close the top cover and screw in the 4 top cover screws immediately (5.5 kgf-cm torque is recommended) NOTE The dry bag will absorb moisture inside the camera to prevent moisture from condensing on the inside of the transparent dome when the camera is used in low temperature environments.
- Page 11 3. Insert the VPort 66-2MP’s external cables and connectors through the tube. 4. Connect the connectors. 5. Arrange the cables and connectors inside the box and then fix the ground screw and hook the safety rope with the buckle. Close the front cover, put the stud bolt back on the hinge to fix it in place, and then tighten the 4 front cover Phillips screws.
-
Page 12: Software Installation
Step 7: Power on the VPort 66-2MP NOTE When the VPort 66-2MP’s internal temperature is under -30°C, it will need at least 30 to 40 minutes to power up. Software Installation Step 1: Configure the VPort’s IP address. When the VPort 66-2MP is first powered on, the POST (Power On Self Test) will run for a few moments (about 90 to 120 seconds). - Page 13 Step 2: Accessing the VPort’s web-based manager. Type the IP address in the web browser’s address input box and then press enter. Step 3: Install the ActiveX Control Plug-in. A security warning message will appear the first time you access the VPort’s web-based manager.
-
Page 14: Wiring Requirements
Step 5: Access the VPort’s system configuration. Click on System Configuration to access the system configuration overview to change the configuration. Model Name, Server Name, IP Address, MAC Address, and Firmware Version appear in the green bar near the top of the page. Use this information to check the system information and installation. - Page 15 Grounding the VPort 66-2MP Grounding and wire routing help limit the effects of noise due to electromagnetic interference (EMI). Run the ground connection from the ground screw to the grounding surface prior to connecting devices. Dimensions (mm/inch) Side View Bottom View - 15 -...
Need help?
Do you have a question about the VPort 66-2MP Series and is the answer not in the manual?
Questions and answers